- Home
- Forums
- NAXJA Unibody Jeep Technical Forums
- Jeep Cherokee XJ (1984 - 2001)
- Modified Tech Discussion
You are using an out of date browser. It may not display this or other websites correctly.
You should upgrade or use an alternative browser.
You should upgrade or use an alternative browser.
My 44/9" full width cherokee build
- Thread starter Gravesdiggerxj
- Start date
ranger125 said:good question tnt i am also wondering that
I narrowed and rotated the C's on the last one I built. I'm staying full width this time. I have a '77 f150 HPD44 and a '79 ford 9" sitting in the garage. I couldn't pass them up for $200.00 for both of them.
Gravesdiggerxj
NAXJA Forum User
- Location
- Salt Lake City, Utah
I am not turning the C's. I measured 15* difference between the knuckles and pinion. So I can run +5* caster and still point my pinion 10* up at my t-case.TNT said:Did you turn your inner C's or are you running them the way they were stock on the F150?
I only measured 10* difference between the knuckles and pinion on my D30. I was running +5* caster on that and 5* up on the pinion.
So I believe my D44 is a little better for both caster and pinion angles.
I saw your write up too: looks good!
ranger125: I know some of the SLC4x4.com guys; I spend more time on Utah4x4club.com.
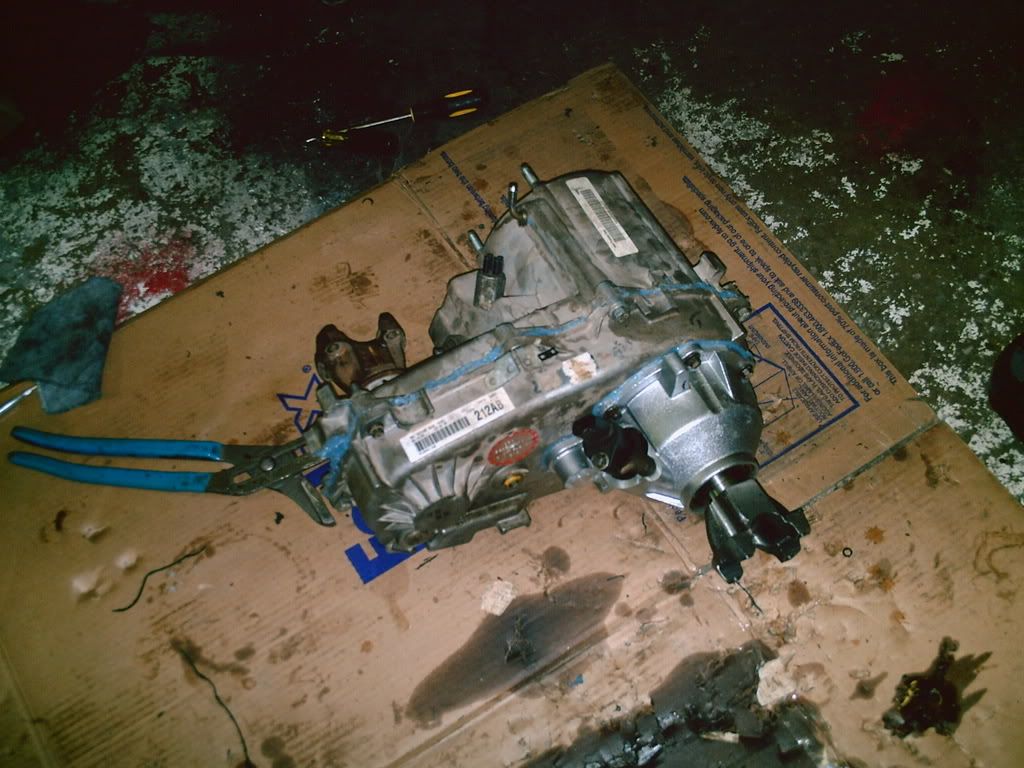
I put together my SYE last night on a 231 I pulled from a 2000, so I'll have that write-up here soon.
Gravesdiggerxj
NAXJA Forum User
- Location
- Salt Lake City, Utah
PORC SYE install Write-up
So here's the quick and dirty writeup with a lot of pics for installing a PORC or Advance Adapters SYE (they're basically identical) into your later model 231. mine is from a 2000.
A couple of quick things: I'm not a pro mechanic; please forgive any errors in diction, terminology, or spelling.
The t-case is made up of three main pieces:
a.) The front case: containes the planetaries (gear reduction part), shift fork, range selector hub, mainshaft sprocket, magnet, and front output shaft with sproket.
b.) The middle case: covers the front and has the oil pump and pickup tube on it.
c.) The rear case or tailcone has the rear output bearing, seal, and dust shield/boot.
1.) Drain and Pull your t-case and unbolt shifter linkages, front and rear driveshafts and the front output shaft flange (you'll need a big pipe wrench or slip lock pliers).
2.) Remove the rear output dust boot, dust cover, and rear output shaft seal. (you will probably destroy the dust cover, and rear seal getting them off)
3.) Remove the retainer clip before the tailcone bearings.
4.) Unbolt the and remove the tailcone and use only the pry-points on each case or you could ruin the mating surfaces
5.) Remove the retainer clip before the oil pump on the main (center case).
(Oil pump removed from the center case)
6.) Unbolt and remove the main case. The oil pump pickup tube should come with it.
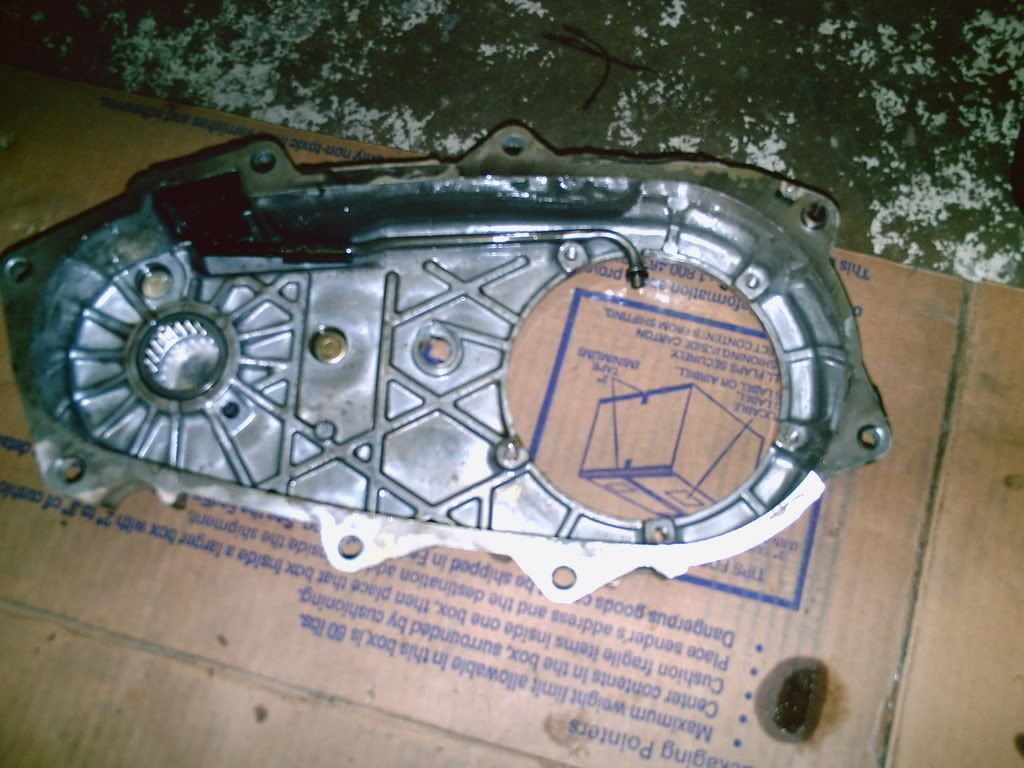
6a.) Remove and place the oil pump pickup tube somewhere safe. Inspect the O-ring on the tube and replace if needed.
6b.) At this point clean off all the old gunk from the mating surfaces on all sides of both cases.
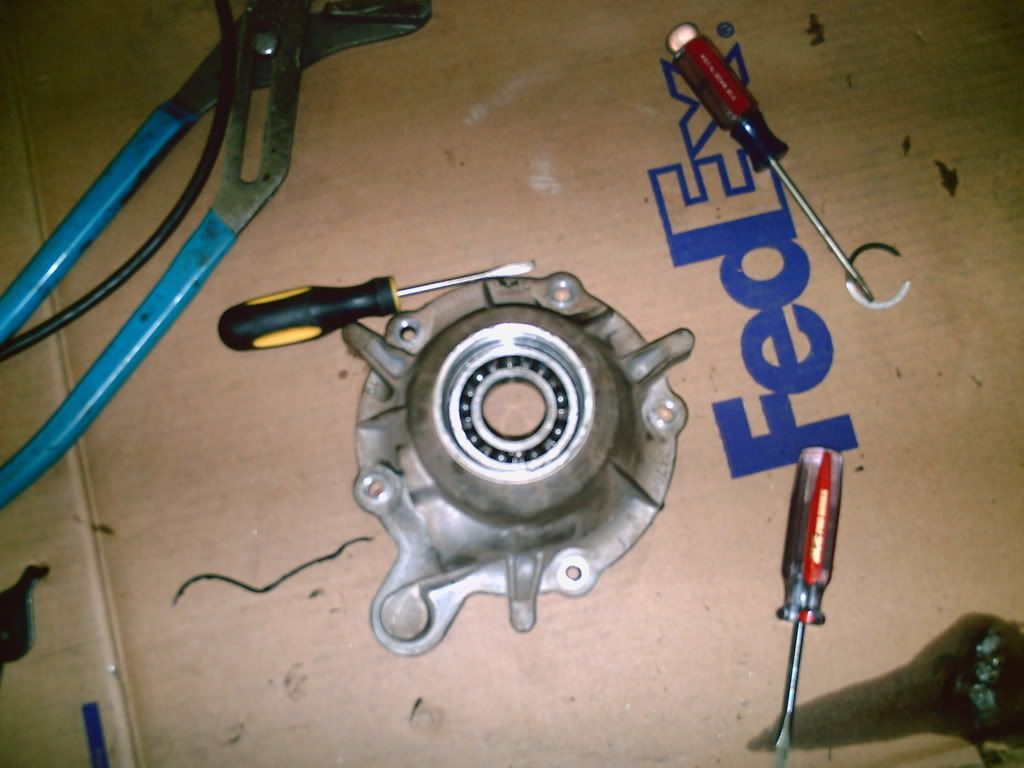
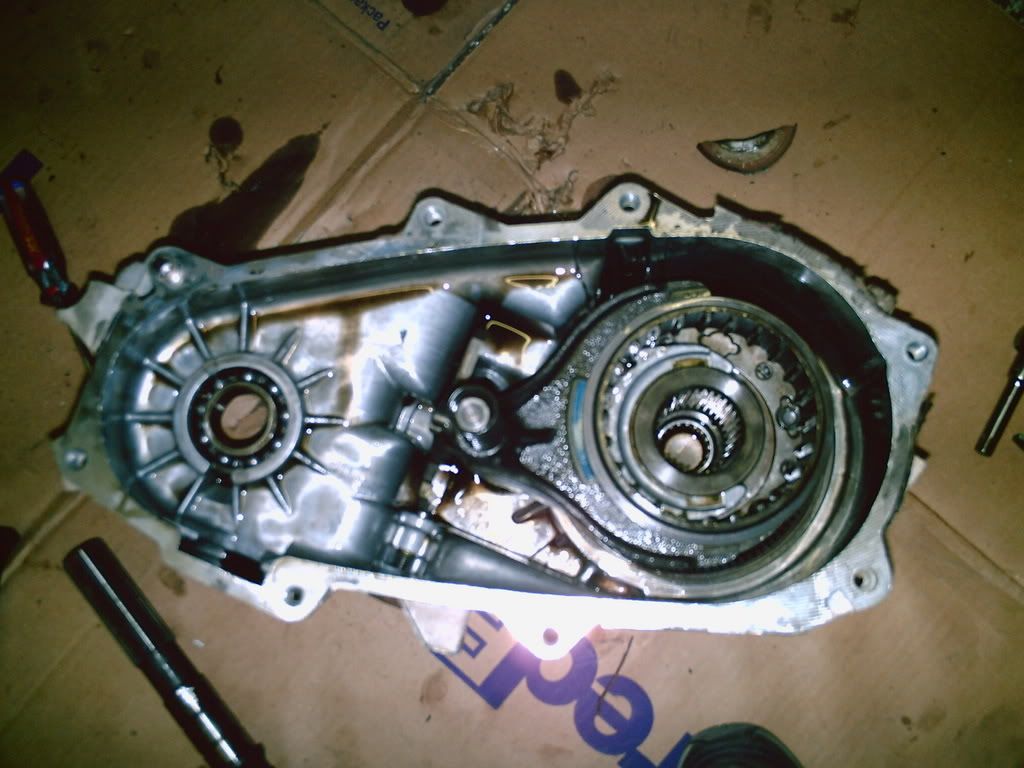
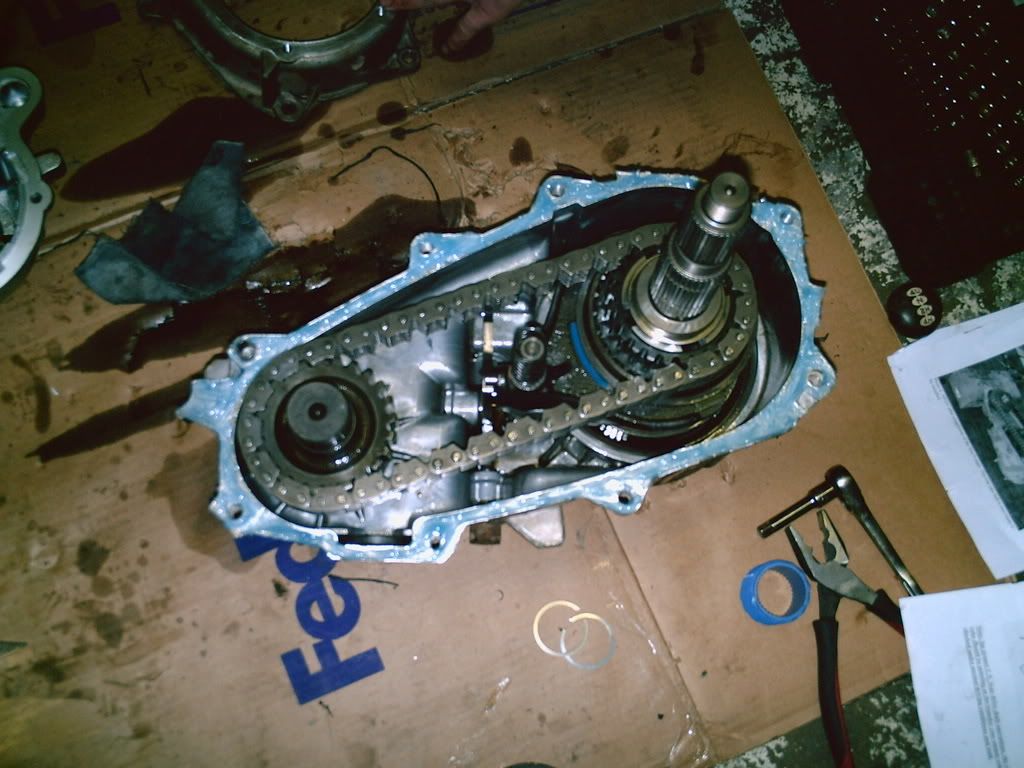
7.) Remove the mainshaft, output shaft and sprocket with chain on them from the front case half.
It should now look like this
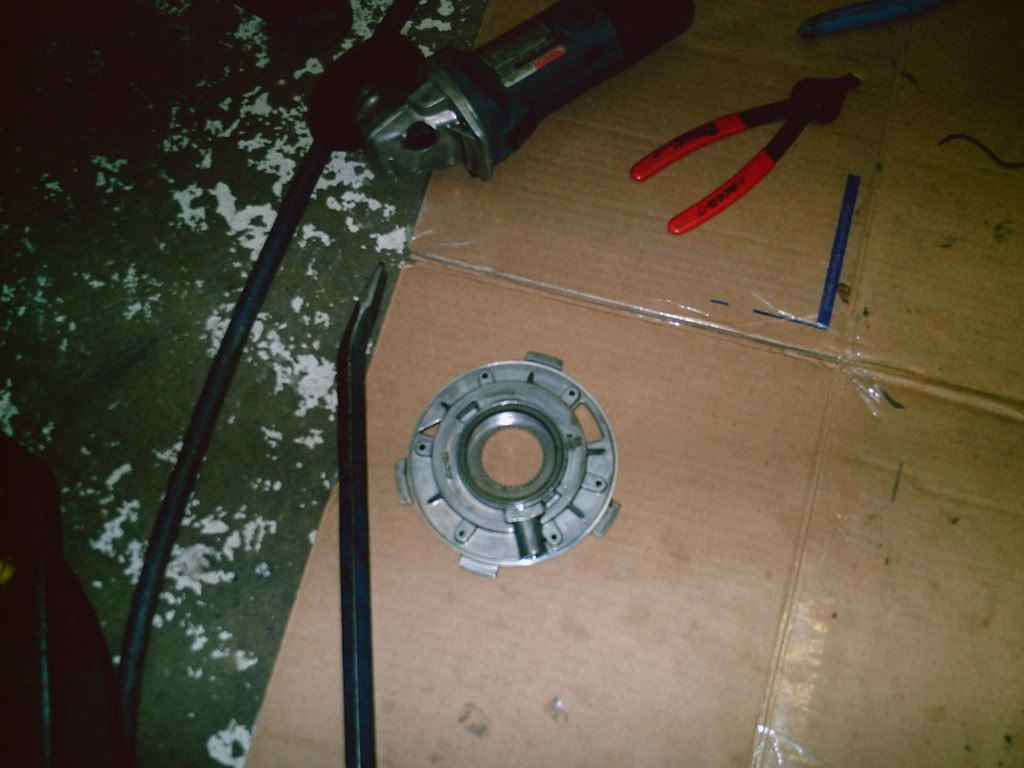
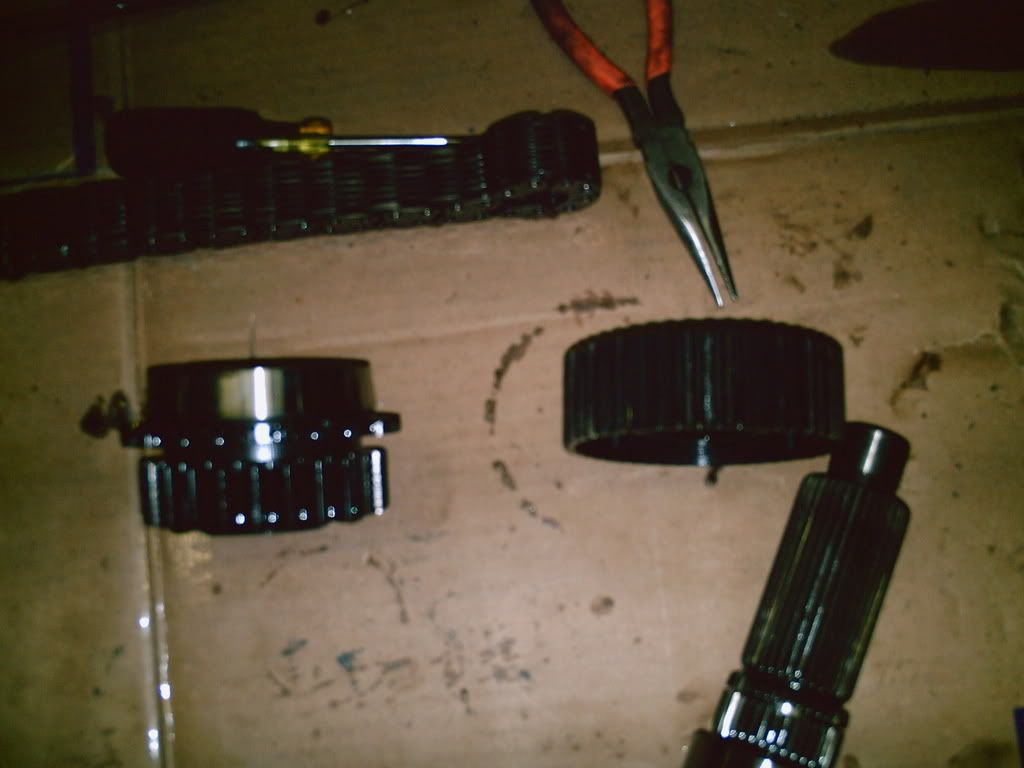
8.) Remove the chain and set aside, then remove retainer clip from the mainshaft that holds on the range selector hub and sprocket.

9.) Slide the range selector hub and sprocket off the mainshaft, and note their positions.
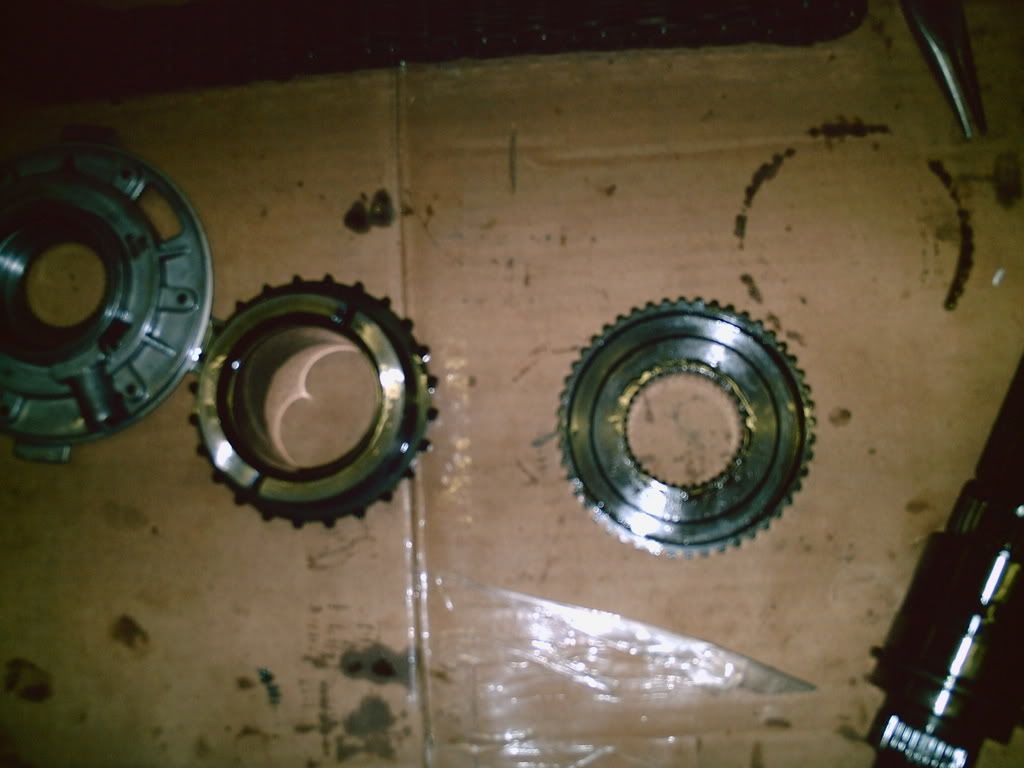
(top view)
(side view)
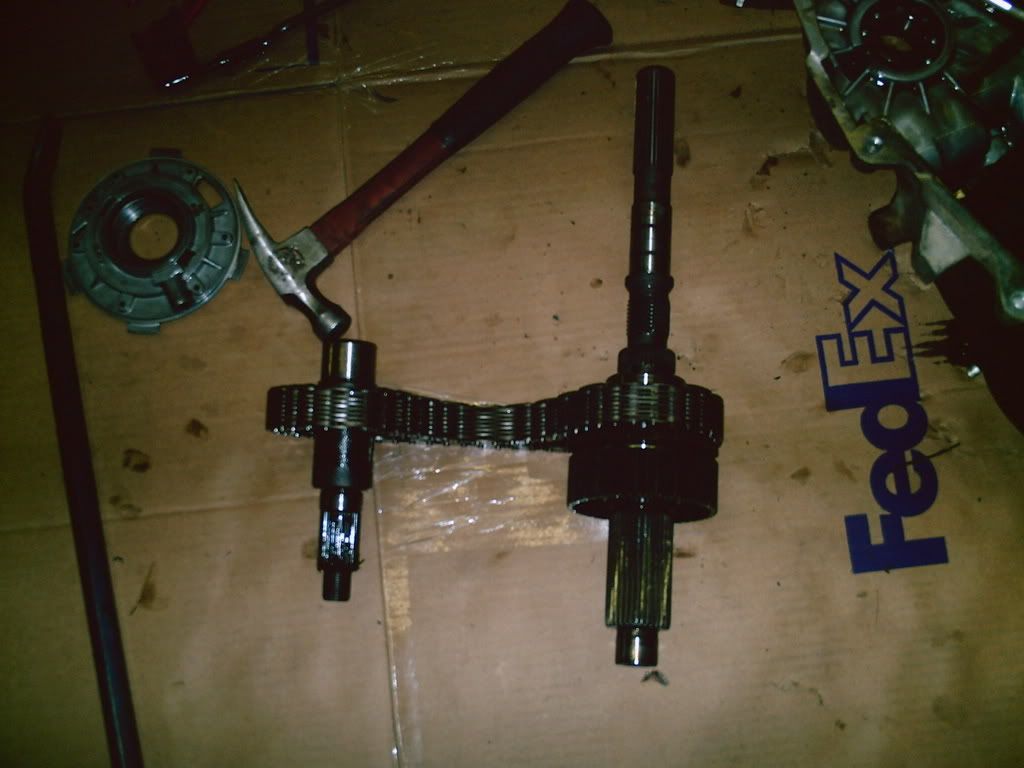
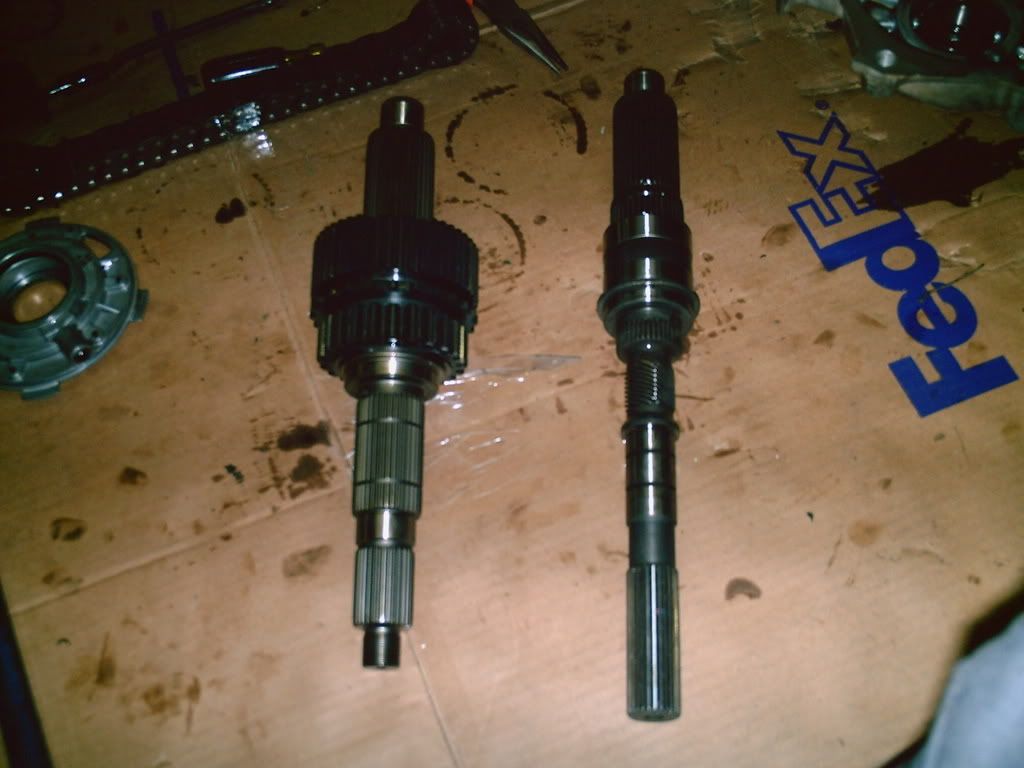
Here are the two main shafts side by side. Note the new one on the left [shorter and much larger on the output portion (bottom) because of the spline count 32 versus 23] also note the speedometer worm gear that is machined into the original mainshaft.
So here's the quick and dirty writeup with a lot of pics for installing a PORC or Advance Adapters SYE (they're basically identical) into your later model 231. mine is from a 2000.
A couple of quick things: I'm not a pro mechanic; please forgive any errors in diction, terminology, or spelling.
The t-case is made up of three main pieces:
a.) The front case: containes the planetaries (gear reduction part), shift fork, range selector hub, mainshaft sprocket, magnet, and front output shaft with sproket.
b.) The middle case: covers the front and has the oil pump and pickup tube on it.
c.) The rear case or tailcone has the rear output bearing, seal, and dust shield/boot.
1.) Drain and Pull your t-case and unbolt shifter linkages, front and rear driveshafts and the front output shaft flange (you'll need a big pipe wrench or slip lock pliers).
2.) Remove the rear output dust boot, dust cover, and rear output shaft seal. (you will probably destroy the dust cover, and rear seal getting them off)
3.) Remove the retainer clip before the tailcone bearings.
4.) Unbolt the and remove the tailcone and use only the pry-points on each case or you could ruin the mating surfaces
5.) Remove the retainer clip before the oil pump on the main (center case).
(Oil pump removed from the center case)
6.) Unbolt and remove the main case. The oil pump pickup tube should come with it.
6a.) Remove and place the oil pump pickup tube somewhere safe. Inspect the O-ring on the tube and replace if needed.
6b.) At this point clean off all the old gunk from the mating surfaces on all sides of both cases.
7.) Remove the mainshaft, output shaft and sprocket with chain on them from the front case half.
It should now look like this
8.) Remove the chain and set aside, then remove retainer clip from the mainshaft that holds on the range selector hub and sprocket.
9.) Slide the range selector hub and sprocket off the mainshaft, and note their positions.
(top view)
(side view)
Here are the two main shafts side by side. Note the new one on the left [shorter and much larger on the output portion (bottom) because of the spline count 32 versus 23] also note the speedometer worm gear that is machined into the original mainshaft.
Gravesdiggerxj
NAXJA Forum User
- Location
- Salt Lake City, Utah
10.) Slide the range selector hub and sprocket onto the new mainshaft and install the new retainer clip.
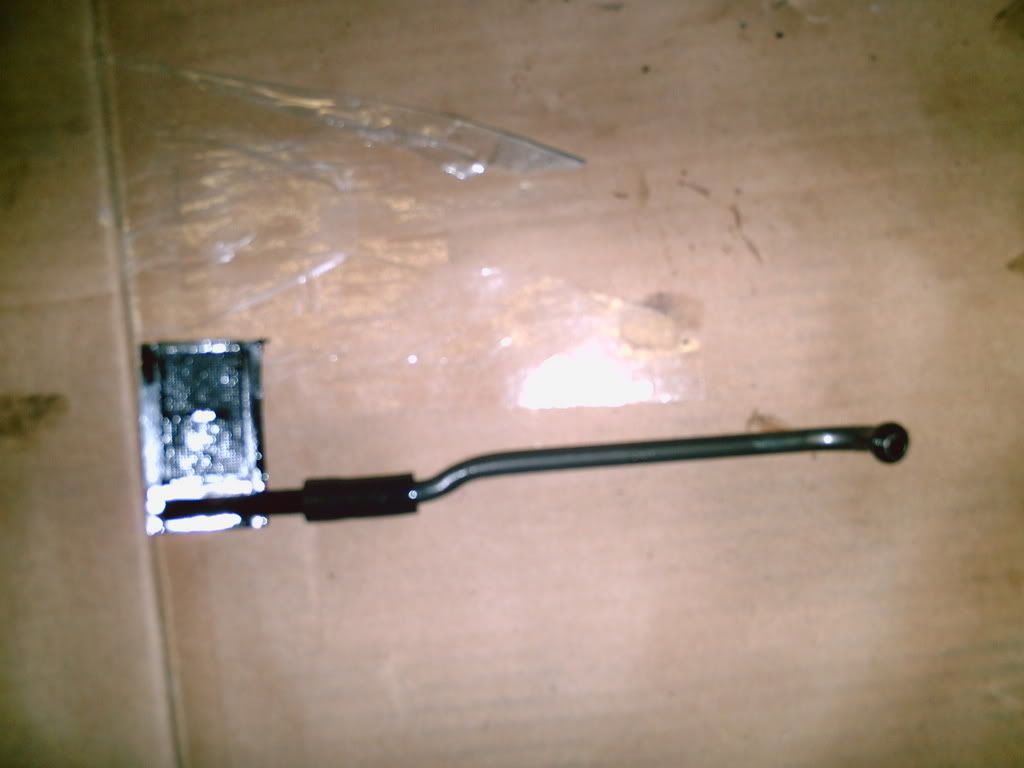
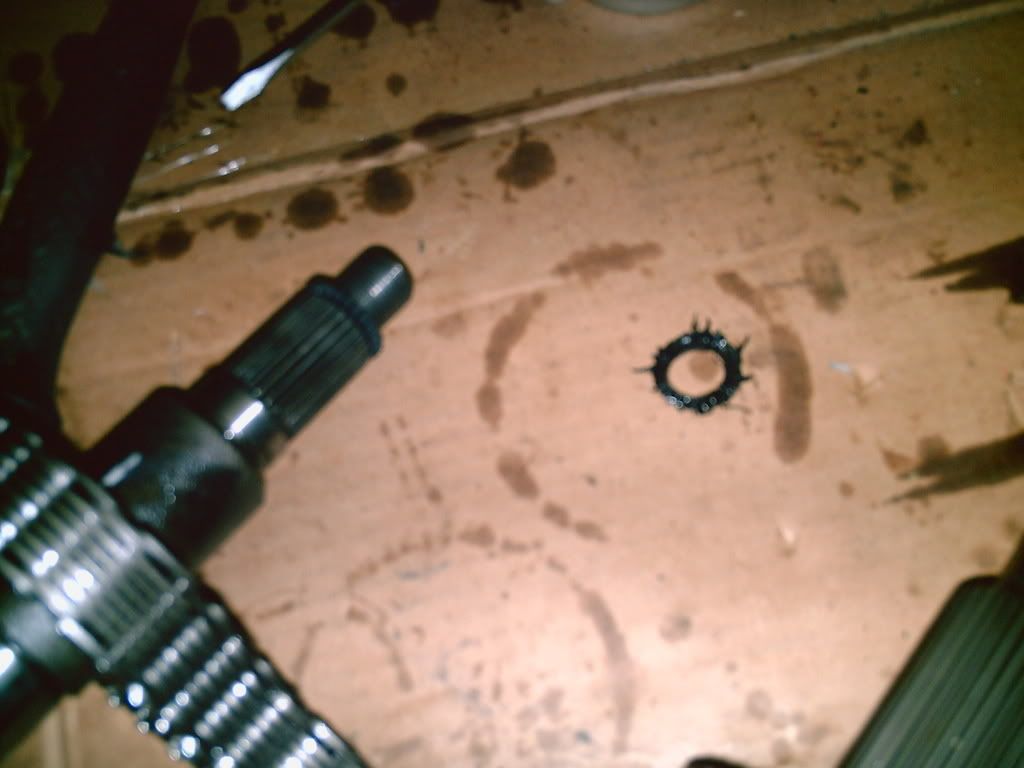
11.) Install the new rubber yoke seals (that black thing in the pic) on the ends of the mainshaft and front output shaft. (pic is of and old one)
12.) Place the chain back on the front output shaft sprocket and mainshaft sprocket. Then slide the two back into their previous positions is the front case. (may take some coaxing).
12a.) replace magnet
13.) Apply RTV generously to the front case half. Then reassemble the oil pump and pickup tube in the middle case before sliding the main case onto the front case and bolting them together using 10-15 lb/ft of torque. (Make sure the pickup tube doesn't pull out of the pump when wiggling the case on)
14.) Install the retainer clip after the middle case and install the blue worm drive speedo gear. Then install the second retainer clip after the blue worm gear (this is the mainshaft out of the case to aid visually).
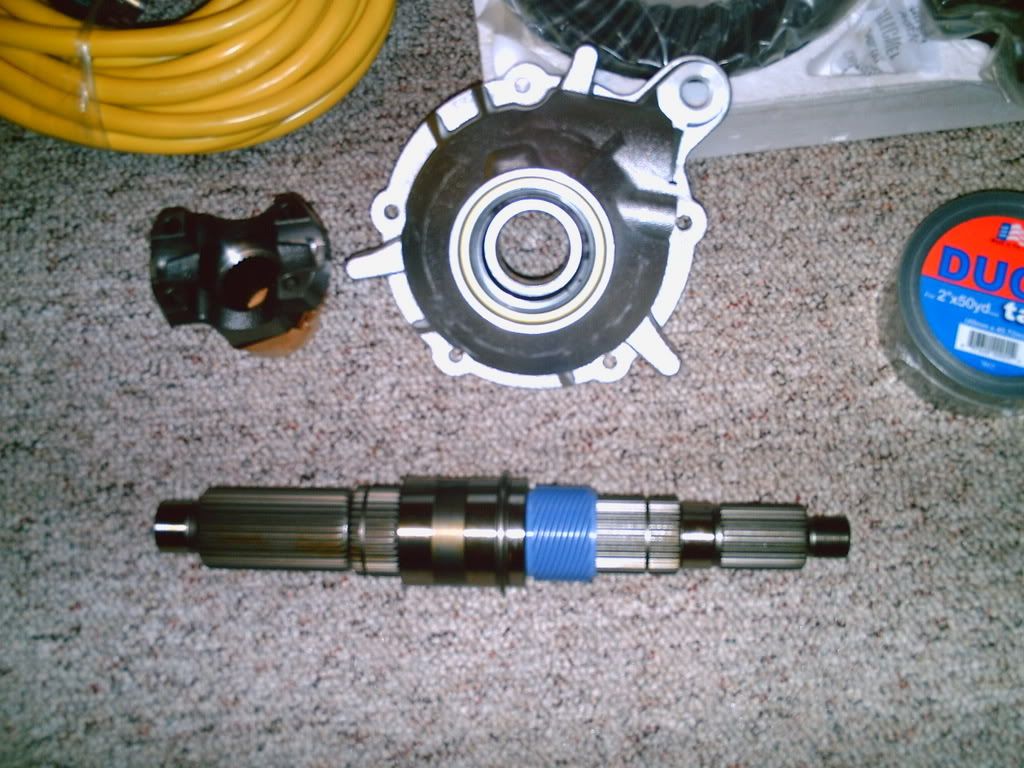
15.) Apply RTV to the new Tailcone (rear case) slide over the main shaft and bolt it up using 10-15 lb/ft of torque
16.) Slide the rear yoke and front yoke back on and torque to 140- 150 ft/lbs. I used some red RTV.
17.) Re-Install the speedo gear back into the tailcone (changing speedo gears if needed).
18.) Reinstall everything else and fill and bolt up!
DONE
Let me know if you'd like me to post this writeup seperately in General Jeep Tech.
11.) Install the new rubber yoke seals (that black thing in the pic) on the ends of the mainshaft and front output shaft. (pic is of and old one)
12.) Place the chain back on the front output shaft sprocket and mainshaft sprocket. Then slide the two back into their previous positions is the front case. (may take some coaxing).
12a.) replace magnet
13.) Apply RTV generously to the front case half. Then reassemble the oil pump and pickup tube in the middle case before sliding the main case onto the front case and bolting them together using 10-15 lb/ft of torque. (Make sure the pickup tube doesn't pull out of the pump when wiggling the case on)
14.) Install the retainer clip after the middle case and install the blue worm drive speedo gear. Then install the second retainer clip after the blue worm gear (this is the mainshaft out of the case to aid visually).
15.) Apply RTV to the new Tailcone (rear case) slide over the main shaft and bolt it up using 10-15 lb/ft of torque
16.) Slide the rear yoke and front yoke back on and torque to 140- 150 ft/lbs. I used some red RTV.
17.) Re-Install the speedo gear back into the tailcone (changing speedo gears if needed).
18.) Reinstall everything else and fill and bolt up!
DONE
Let me know if you'd like me to post this writeup seperately in General Jeep Tech.
Last edited:
aparke4
NAXJA Forum User
- Location
- Atlanta, Ga
cool write up - i have the same tcase and SYE in my 99 and thats a good writeup - by doing this yourself you probally saved about 4-500 dollars in labor - also this is a great time if you want to upgrade to the HD chain kit as well - i have been running the PORC sye kit for 3 years now and no problems what so ever - best deal for a sye kit anywhere - nice lookin 44 too!
pecsxj
NAXJA Forum User
- Location
- Layton, Utah
I didn't think it was that easy, I thought you had to have some special tools but from the looks of it you were using only common tools, is that right? how long did it take? Nice write up!!
Gravesdiggerxj
NAXJA Forum User
- Location
- Salt Lake City, Utah
No special tools it took about 4 hours with a bud
pecsxj
NAXJA Forum User
- Location
- Layton, Utah
was that your first? could the average Joe with basic mechanical skills do it easy enough?
Gravesdiggerxj
NAXJA Forum User
- Location
- Salt Lake City, Utah
ya it's pretty simple. I would recommend picking up a set of snap ring and retainer clip pliers though just to make it easier.
Gravesdiggerxj
NAXJA Forum User
- Location
- Salt Lake City, Utah
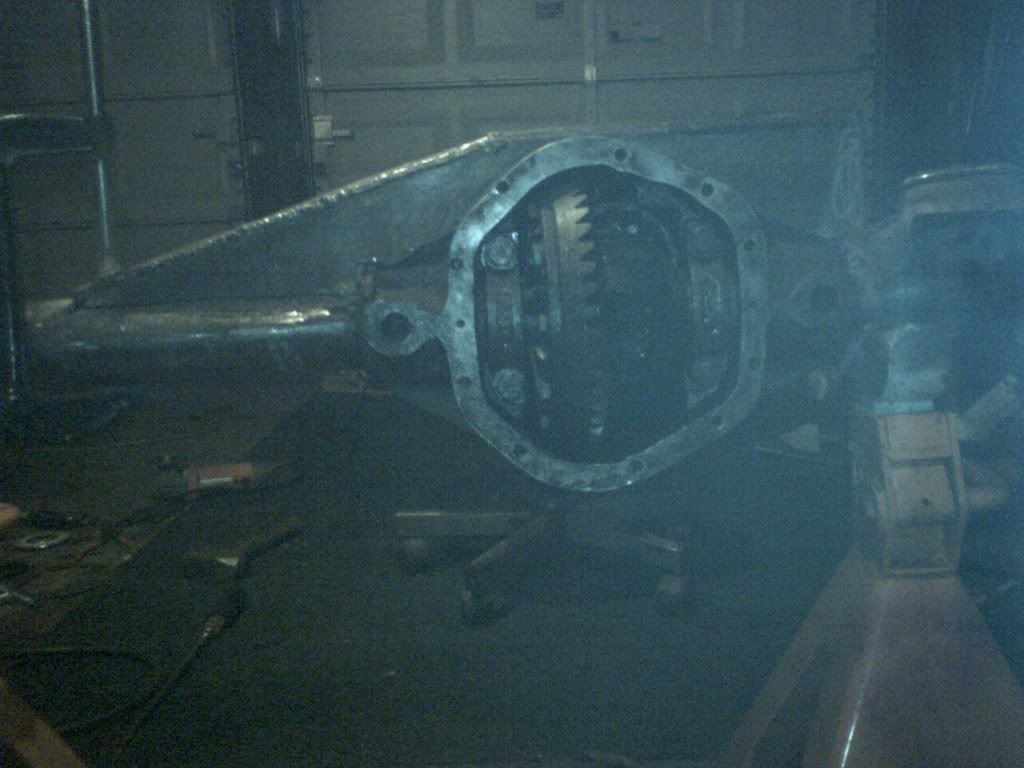
Dry fit on the axle truss :clap:
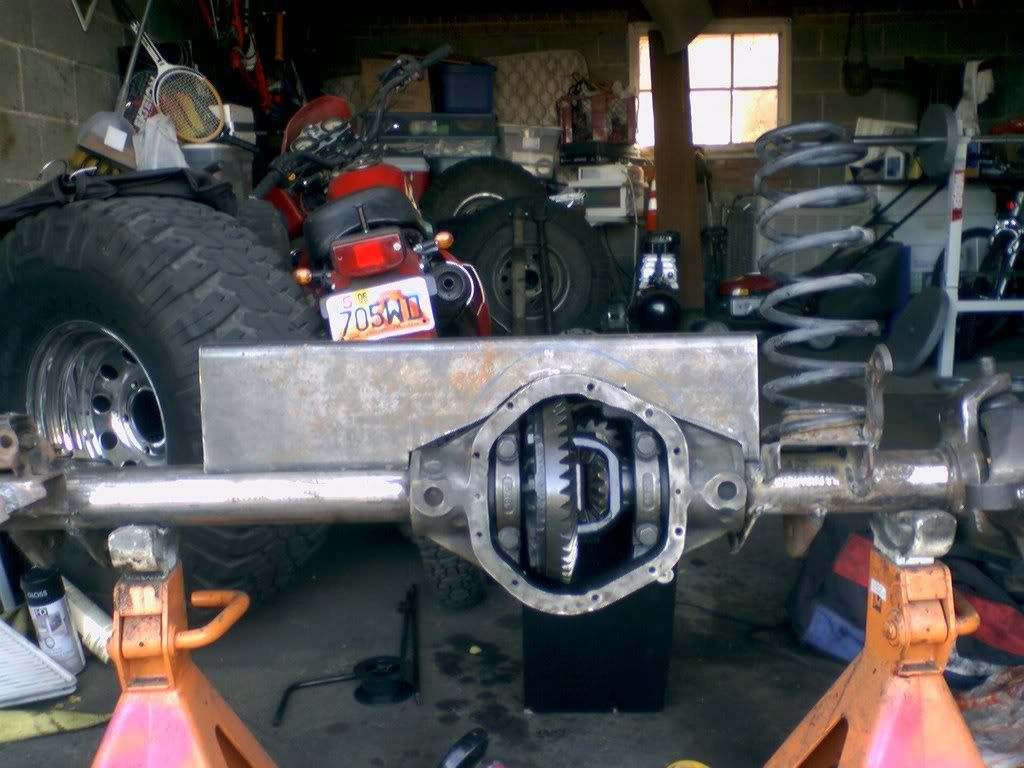
dropped it 1/4" for a better fit. Still going to have a couple inches more vertical seperation than stock.
that's all for today... it's 23* out...brrr
dropped it 1/4" for a better fit. Still going to have a couple inches more vertical seperation than stock.
that's all for today... it's 23* out...brrr
If I was doing this (which I am) I would use 1/4" steel for the lower control arm mounts. I would also move them up about 2" to keep the geometry closer with the raised UCA mounts, gain ground clearance and better lower control arm angle.
Also make sure you box and brace the UCA mounts for added strength.
Also make sure you box and brace the UCA mounts for added strength.
tjmwr7
NAXJA Forum User
- Location
- Under your bed, UT
Wow great work man. Maybe tomorrow it will warm up a bit
Gravesdiggerxj
NAXJA Forum User
- Location
- Salt Lake City, Utah
AW4 with np231 tcase swap
So here is my little writeup on how to swap a np231 transfercase out of a cherokee with an AW4 tranny.
so remember the good old safety rules here since you're unbolting drivelines: chock your tires. wear safety glasses and gloves. don't be an idiot... etc....etc...
1) put the t-case in 4-low (you don't have to it just makes it easier later). Remove your huge transfercase skid.
2) Support the t-case/ trans with a jack or something similar. Then remove the t-case crossmember bolts. Use plenty of PB Blaster. (There are nuts welded inside the unibody that will break loose if you haven't done this... and you will curse they day you were born... there is no easy fix for that!:gonnablow) Also if you've never messed with your crossmember before there will be a nut and a stud on each side. Use the old "double nut" trick to remove the stud.
3) Remove the Speedo gear and sensor using a 1/2" wrench.
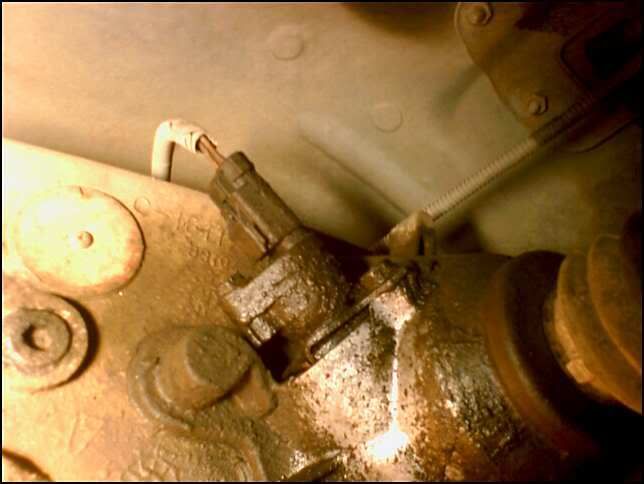
4) unbolt the shifter linkages with a 14mm socket, unclip the t-case gear position sensor (your may have to unbolt your old sensor and swap it to the new t-case as some years have 2 holes where they clip to the sensor (like 99') and some have 4 (like 2000). Pull off the vent hose.
5) Unbolt the front driveshaft at the t-case side. If you are swapping rear driveshafts; unbolt the driveshaft at the t-case and pinion. some of these are 5/16 bolts so use a good 6 point socket of the right size... rounding them off would be bad. :confused1

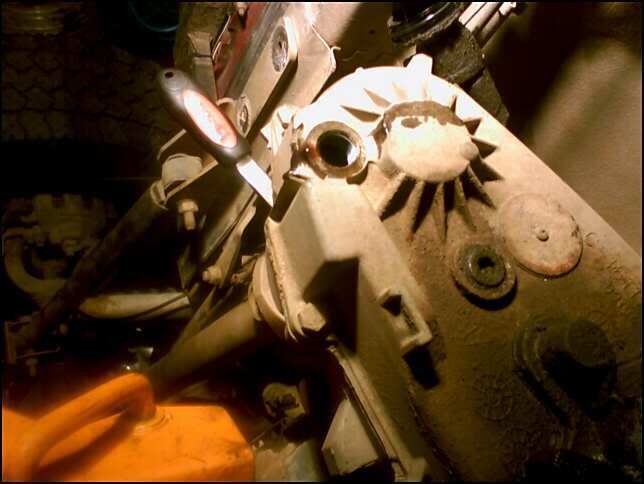
6) Drain the t-case using the lower drain plug [it's hex but I used a big ol torx bit (they're only in with 14ft/lbs)]. If the fluid is purple or brown and glittery mmmm... that's bad. If it's nice and red like cough syrup in mine... that's good.
7) Unbolt the rubber t-case/tranny mount.
8) Here's the tricky part: unbolt all six of the tcase to tranny mount bolts. (A stubby 14mm speed wrench will help you here) you may want to lower the jack supporting the tranny/ t-case to reach the upper bolts.
9) Once unbolted slid the t-case off the tranny mount studs and have a friend watch you drop the t-case on your chest and knock the wind out of you.
10) Slide the new t-case on and bolt it up then reverse steps 9 through 1. party1:
So here is my little writeup on how to swap a np231 transfercase out of a cherokee with an AW4 tranny.
so remember the good old safety rules here since you're unbolting drivelines: chock your tires. wear safety glasses and gloves. don't be an idiot... etc....etc...
1) put the t-case in 4-low (you don't have to it just makes it easier later). Remove your huge transfercase skid.
2) Support the t-case/ trans with a jack or something similar. Then remove the t-case crossmember bolts. Use plenty of PB Blaster. (There are nuts welded inside the unibody that will break loose if you haven't done this... and you will curse they day you were born... there is no easy fix for that!:gonnablow) Also if you've never messed with your crossmember before there will be a nut and a stud on each side. Use the old "double nut" trick to remove the stud.
3) Remove the Speedo gear and sensor using a 1/2" wrench.
4) unbolt the shifter linkages with a 14mm socket, unclip the t-case gear position sensor (your may have to unbolt your old sensor and swap it to the new t-case as some years have 2 holes where they clip to the sensor (like 99') and some have 4 (like 2000). Pull off the vent hose.
5) Unbolt the front driveshaft at the t-case side. If you are swapping rear driveshafts; unbolt the driveshaft at the t-case and pinion. some of these are 5/16 bolts so use a good 6 point socket of the right size... rounding them off would be bad. :confused1
6) Drain the t-case using the lower drain plug [it's hex but I used a big ol torx bit (they're only in with 14ft/lbs)]. If the fluid is purple or brown and glittery mmmm... that's bad. If it's nice and red like cough syrup in mine... that's good.
7) Unbolt the rubber t-case/tranny mount.
8) Here's the tricky part: unbolt all six of the tcase to tranny mount bolts. (A stubby 14mm speed wrench will help you here) you may want to lower the jack supporting the tranny/ t-case to reach the upper bolts.
9) Once unbolted slid the t-case off the tranny mount studs and have a friend watch you drop the t-case on your chest and knock the wind out of you.
10) Slide the new t-case on and bolt it up then reverse steps 9 through 1. party1:
- Location
- Port Orchard, WA
Gravesdiggerxj said:Dry fit on the axle truss :clap:
dropped it 1/4" for a better fit. Still going to have a couple inches more vertical seperation than stock.
that's all for today... it's 23* out...brrr
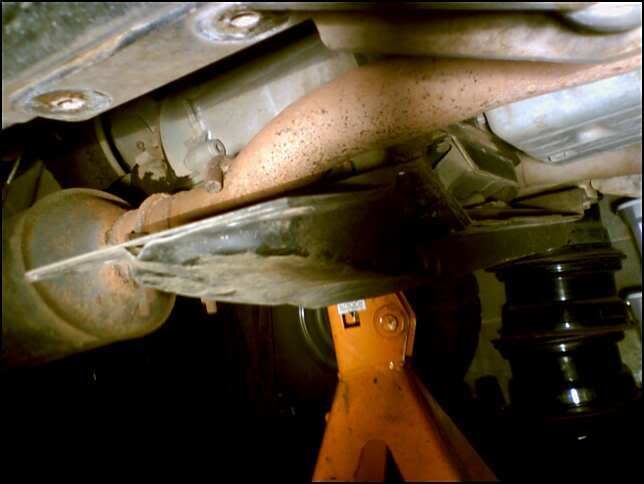
just a thought from someone who has punched a hole in their oil pan with their front axle truss...
you might want to check oil pan clearance at full stuff before burning that home...
Gravesdiggerxj
NAXJA Forum User
- Location
- Salt Lake City, Utah
XJ_Ranger: Thanks, I was planning on chopping it down at an angle toward the passenger side, but I definitely will now. It will hit ")
With Christmas and snowboarding I haven't made too much progress other than swapping that tcase and building a hybrid rear driveshaft out of a 85 Bronco rear (lots of slip) and ZJ front.
With Christmas and snowboarding I haven't made too much progress other than swapping that tcase and building a hybrid rear driveshaft out of a 85 Bronco rear (lots of slip) and ZJ front.
Gravesdiggerxj
NAXJA Forum User
- Location
- Salt Lake City, Utah
Nothing to report as of late except that I went snowboarding 4 times last week and I work 40+ hours per week.
I have a bud coming over and I'm hoping to get the wheel bearings and brakes back together tonight though.
I have a bud coming over and I'm hoping to get the wheel bearings and brakes back together tonight though.
Gravesdiggerxj
NAXJA Forum User
- Location
- Salt Lake City, Utah
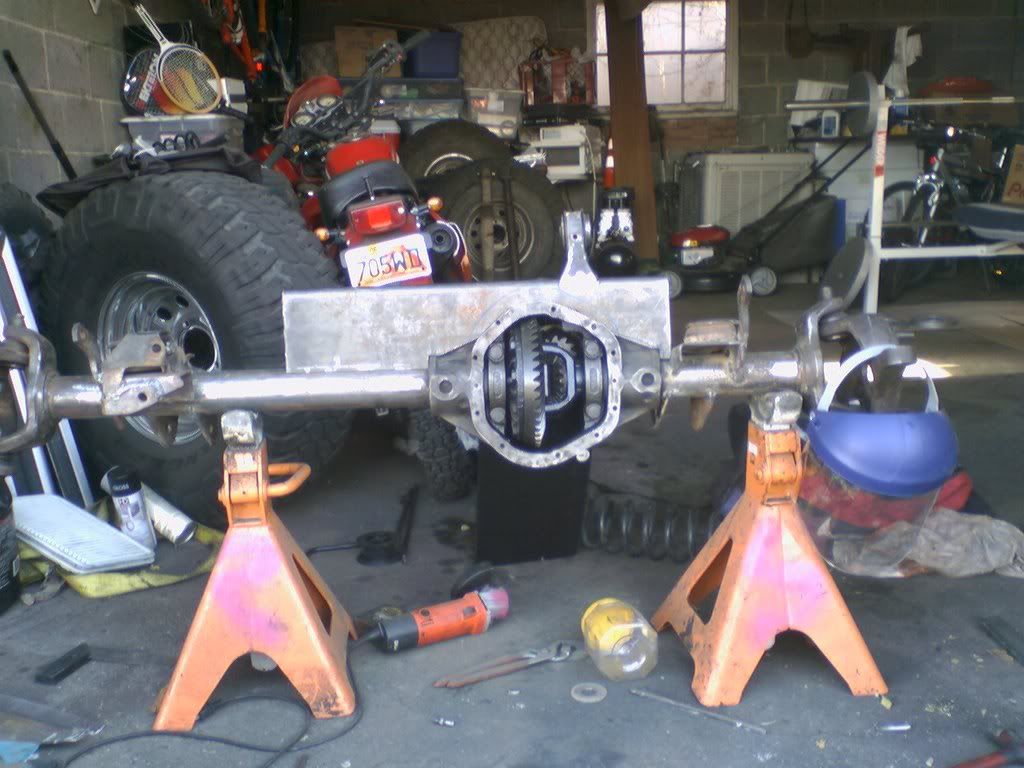
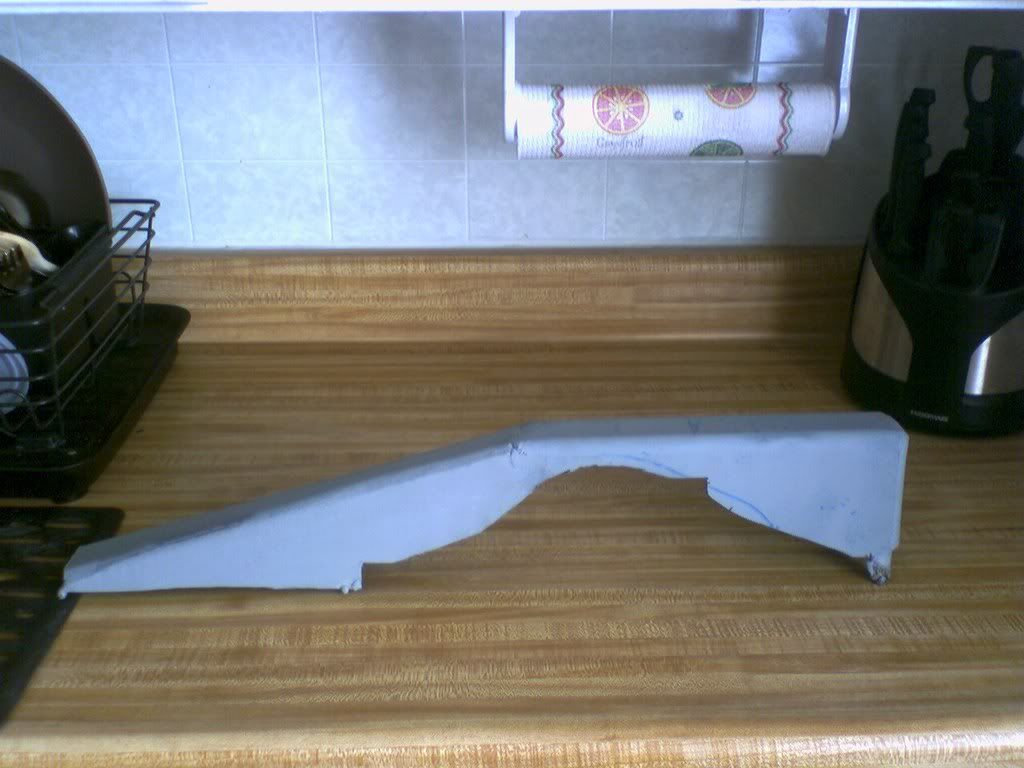
I've been flat-lined for a while made some progress
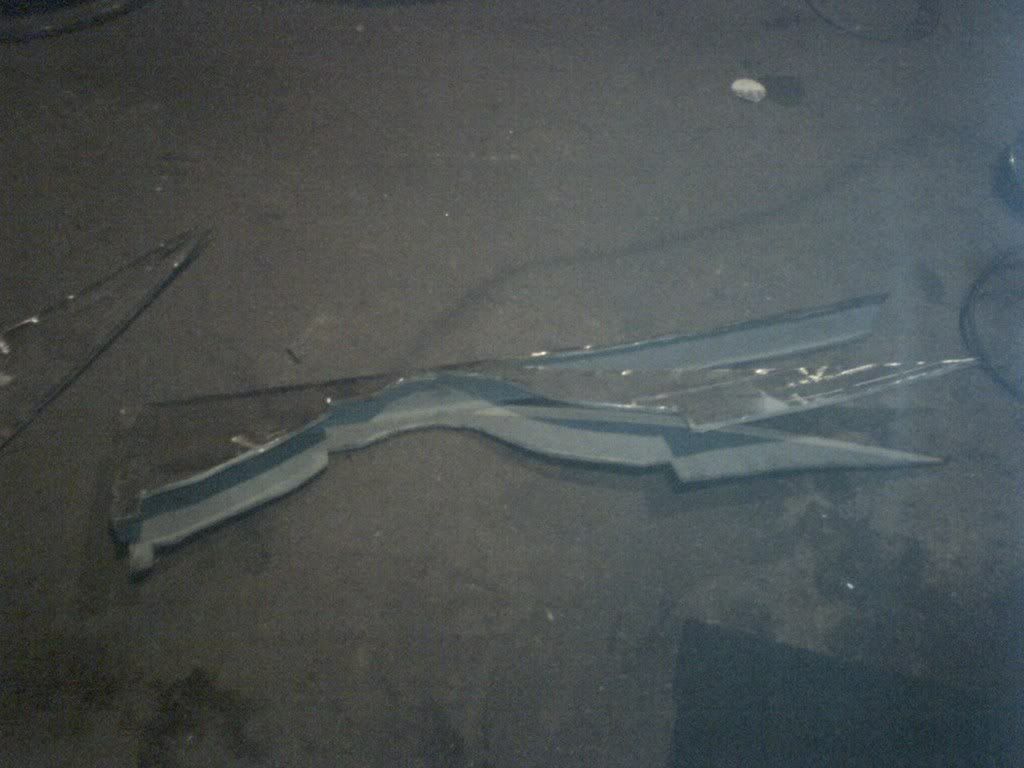
chopped it down somemore. And welded inside and out
sorry for the camera phone pics, they make the corners look strange
chopped it down somemore. And welded inside and out
sorry for the camera phone pics, they make the corners look strange
Similar threads
- Replies
- 63
- Views
- 8K
- Replies
- 1
- Views
- 209
- Replies
- 6
- Views
- 2K