• Welcome to the new NAXJA Forum! If your password does not work, please use "Forgot your password?" link on the log-in page. Please feel free to reach out to [email protected] if we can provide any assistance.

Project AllOut: a moderate 2door build (pics warning)

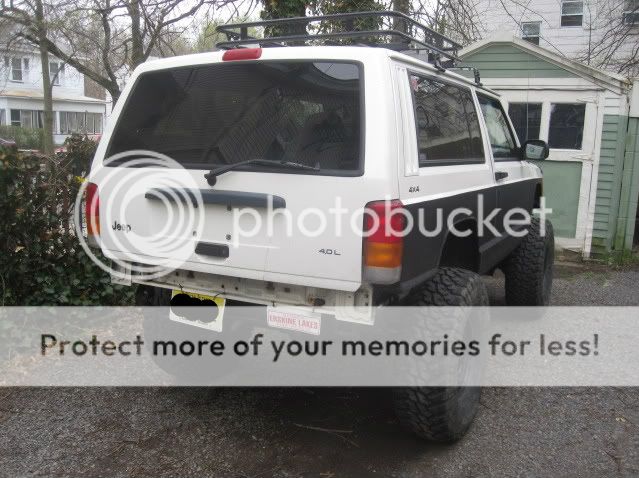
Little update just to keep this alive. What should have been done months ago is still dragging on. (i.e the rig is still on jackstands in my garage).
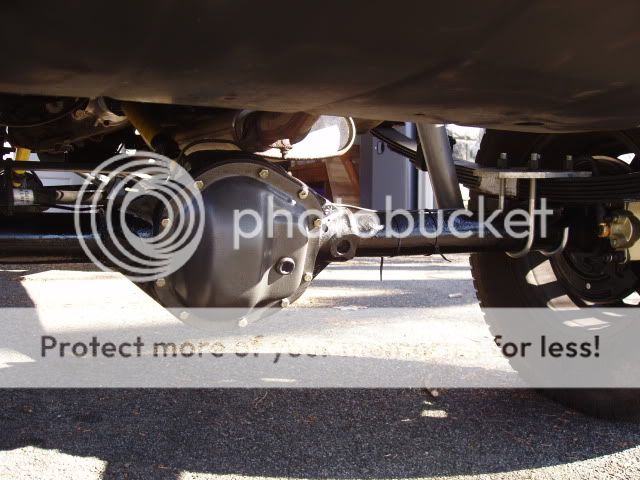
I've since acquired another front driveshaft to run in the rear and have rebuilt both, the D44 is all welded up and the disc swap just needs to be finished, and all the front suspension/steering components need to be installed. Otherwise the AA SYE went smoothly with some help from a buddy.

Quick notes/problems I ran into: some of these may seem juvenile to some of you, but hey.

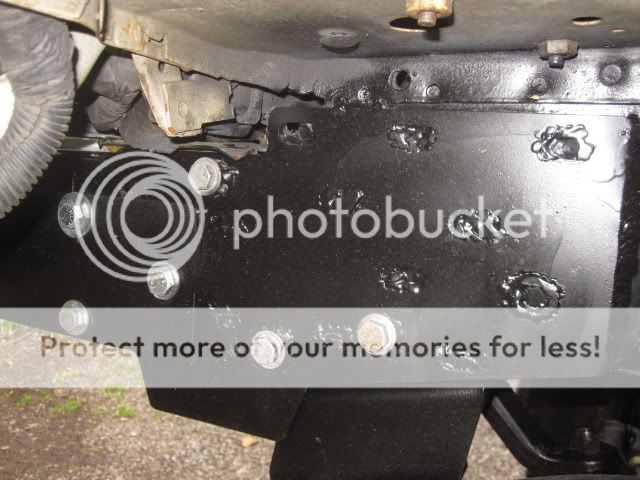
-only 2000-2001 (LP) D30 studs are actually longer and can be used for rear disc swaps

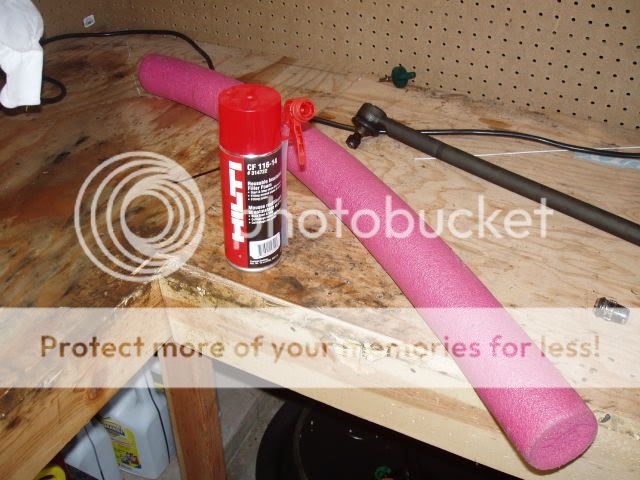
-packing too much grease into the ujoint caps (contrary to advice given in some website buildups), will cause the seals to crack when reinstalling the caps/joints

-buying front driveshaft centering ball replacement kits are useless (~$50) because the old balls are hard as fark to get out anyway and new centering yoke w/ new ball already installed can be acquired online for ~$30 dispite the fact that all my local autostores said that yoke is no longer available anywhere
 
Finally driveable and out of the garage. Had to deal with a frozen alternator bearing. Two-toned it with spray-on bedliner while I was waiting for parts to come in.

I need some 35s
P3110197.jpg


P3110196.jpg


Trackbar- draglink angle isn't that bad (bad pic angle). It drives and tracks great. I currently am not even running a steering stabilizer.
P3110198.jpg


Currie tierod vs stock
P3110199.jpg


Did up the D44 cover hammered silver
P3110205.jpg


Materials to seal the fender gap :D
P3110204.jpg


To do list:
-shorter rear shocks (because of BPEs and the raised perches)
-frame stiffeners and front bumper
-regear the D30
-delete abs / add pre96 washer bottle
-go wheeling!
 
just want to let you know that if you dont run a steering stabilizer there is a high chance the world will end :shhh:


What are you gonna do with the fender gap stuff? I dont have anything in mine. Jeep is looking really sharp, and it looks like the build is alot of fun. Funny how its a 2 door SE with ABS.... guessing fleet vehicle.

Haha I've already got an OME stabilizer I got on the cheap that I plan to throw on once I get the 35s. I'm basically going to cut the noodle shorter and in half then stuff it in the fender between the wheelwell and the door hinges, then see if the foam is necessary. A number of people on here have gone that route, so since I can't fab up some sheetmetal as easily I'm going with the noodle method.

Ya it was probably a fleet vehicle at some point, since I can't imagine someone custom ordering from the factory the full skids package but sticking with the SE trim level.
 
Wait what is the noodle supposed to prevent? I had some mud come through the hole where all the door electrical passes through.... does the noodle seal that up?

Oh and what steering brace setup are you rocking? Looks pretty beefy.

Thanks.
 
Wait what is the noodle supposed to prevent? I had some mud come through the hole where all the door electrical passes through.... does the noodle seal that up?

Oh and what steering brace setup are you rocking? Looks pretty beefy.

Thanks.

Yeah its suppose to seal between the wheel well and the door. Once you cut the fenders and pull the inner wheel well splashguard, this area is exposed in ~97.5+ models (pre96 have a molded guard in there). The noodle and sealant is to essentially close this up so crap doesn't collect in there nor come through when the doors are off. It's not that big of a deal, but it's so simple and cheap to do

That is the RE cross brace which runs from the trackbar HD drop bracket to the other frame rail. Came with the 5.5" LA kit
 
It's been awhile but finally made some progess and have the XJ roadworthy.

Right now it's sitting on old style 35x12.50x15 MTRs that I acquired with about 80% tread. Also added KC 130w Daylighters and the roofrack from my old while XJ

IMG_0178.jpg


IMG_0179.jpg


IMG_0181.jpg


IMG_0185.jpg


JKS frame stiffeners to solve that crunked frame problem.
IMG_0180.jpg


JKS Crossover shockmounting that I got for really cheap
IMG_0182.jpg


turndown after the muffler with 2 universal hangers coupled together to reach the rubber thingy
IMG_0184.jpg


next on the agenda is to add some LED blue strobes
IMG_0186.jpg


Stuff that still needs to be done asap:
-balance the MTRs: I plan on adding ~9oz of .25g airsoft bbs to each tire
-install OME stabilizer
-regear to D30 to match the rear 4.88s
-wire in some cheap rock lights
-organize the auxiliary wiring and put dashboard back together
-get some sort of tire carrier bumper
 
(I hated the RE shocks but... ) How do you like the JKS shock relocator bracket?

Ive been wanting one. saving my funds up.

I got the RE shocks for free with the RE 5.5 kit (a discount from Jeepin-Outfitters). I can't really give an opinion on the JKS bracket cause I haven't had time to flex it out and see what kind of droop I can get. Steet ride is a little stiff, but that could just be the RE shocks and new leaf packs.


Great Build! Jeep Looks good!

What is this kit? I want one! and was it hard to install?

Thanks, it's not actually a kit, it's just the hinges that I removed from the doors, cut the "ear" off the bottom part of the hinge, rounded the ends of the pins, and painted black. The bolts are M8x1.25x30 hex head which I replaced the torx with.
 
Thanks, it's not actually a kit, it's just the hinges that I removed from the doors, cut the "ear" off the bottom part of the hinge, rounded the ends of the pins, and painted black. The bolts are M8x1.25x30 hex head which I replaced the torx with.


That's it?! SWEET! I know what my next project is going to be!


Did you have power anything to your doors? Or were they manual everything?
 
Did you have power anything to your doors? Or were they manual everything?

Power everything, they just disconnect at the kick panels. i'm planning on adding some mate-lock connectors closer to where the wires enter the door for ease of connection/disconnection. Ehall did a great writeup on using mil-spec connectors so you may want to look into that
 
Back
Top