• Welcome to the new NAXJA Forum! If your password does not work, please use "Forgot your password?" link on the log-in page. Please feel free to reach out to [email protected] if we can provide any assistance.

The Nail Salon

Lots of folks make fun of my 'short' links, but I really like them.
Opie, I dont think they were talking about your control arms.....:gag:


Looking at the 44 there are a lot of angles going on. I chose to mount the upper based off the coil spring mounts. Set the mounts to 0 degrees using one of my new favorite tools. Just out of curiosity I found the caster to be set to ~5 degrees with a ~7degree pinion angle.
000ABC06-9BA8-4B76-AAAB-ABF3F29E8214.jpg
When I built my front 44, I originally mounted my coil buckets around the same area, and ran into clearance issues with my high steer.

Might be too late, but cycle your steering side to side before you commit to that placement, I was only able to get ~1/2 my steering before the tierod hit the coils. I think I ended up mounting the coils right at axle center line if memory serves. I was/am running RE ZJ coils, not sure if that made any difference or not.

(Disregard if you already mentioned something about steering or clearance).
 
Very nice, Andy. :D
When I built my front 44, I originally mounted my coil buckets around the same area, and ran into clearance issues with my high steer.

Might be too late, but cycle your steering side to side before you commit to that placement, I was only able to get ~1/2 my steering before the tierod hit the coils. I think I ended up mounting the coils right at axle center line if memory serves. I was/am running RE ZJ coils, not sure if that made any difference or not.

Appreciate the concern, Matt. I don't think it'll be an issue for my setup. The tie-rod mounts over the knuckle but in the factory position. Only the drag link is ran to the high steer. Clearance is going to be tight for the track bar though, I can already tell. Cycle, cycle, cycle is one thing I've learned when setting up new suspension/steering.


In other news, I think I have the rear 60 pretty much ready to go. Spent some time mounting new brake lines, and routing new hardline on the axle.

The Tera60 uses Explorer 8.8 disc brakes, so I opted to go with two new passenger side Explorer rear brake hoses to connect each caliper to the hardline. Part #380528. They're roughly 8" long and feature a mounting tab on one end. For the axle to frame line, I went with a 21.5" line with built in 3/8" union on the axle side. Part #38576. Pretty much the exact setup I'm running on my current 8.8.

Started by using some old coat hangers to use as a template for the hard line routing.
B2D19C1E-CAAA-4C6E-988B-8033F20F0768.jpg


I picked up this Harbor Freight brake line forming tool to help with the bends. It does a decent job, and bends to a pretty tight radius.
40B6242A-463E-479C-8451-57B39D075AE2.jpg


Mark where you want center of the bend, subtract about 3/4" for the radius, and that's where you'll want to start your bend.
442B77CE-2B57-4E9B-92B3-812D71E1B86B.jpg


After you have your line bent up, trim to length, and flare the end (Don't forget the nut!).
A220E3E8-68D6-4E6C-AF2A-EDEC910ACFD8.jpg


I've learned it's important to prep the tube good before. Bevel the inside and outside, and make sure the cut is square. Clamp it evenly in the flare tool. I also used a little WD40 to help the tool flare the line. When you're done, you should have a good quality flare.
6F9EC1C7-2C3B-43F6-B30E-259A487175F1.jpg


With the hardline all bent up, I needed a way to secure it to the axle. I made these mounting tabs out of some .750" round stock. Cut some pieces to length, drilled out the centers to 13/64, and then tapped the holes out to 1/4-20.
7101FD3E-1DDC-4017-8DE7-4E697AC62239.jpg


There she be.
2FA422C7-3C07-4762-874D-8DF67D7B0085.jpg


Don't knock my wooden leaf springs mock up blocks. The center soft line mounts to the axle via a tapped piece of .250" plate. To mount the Explorer soft lines, I welded some brackets onto the leaf spring perches. Each side is a mirror image of the other. All in all, I'm happy with the turnout. I tried to keep the routing as simple as possible, and out of harms way.
AEDA8F4B-506A-4BC0-930B-CF6E61514A3C.jpg
 
I'm also really proud to say Team #6 aka Team NAXJA 
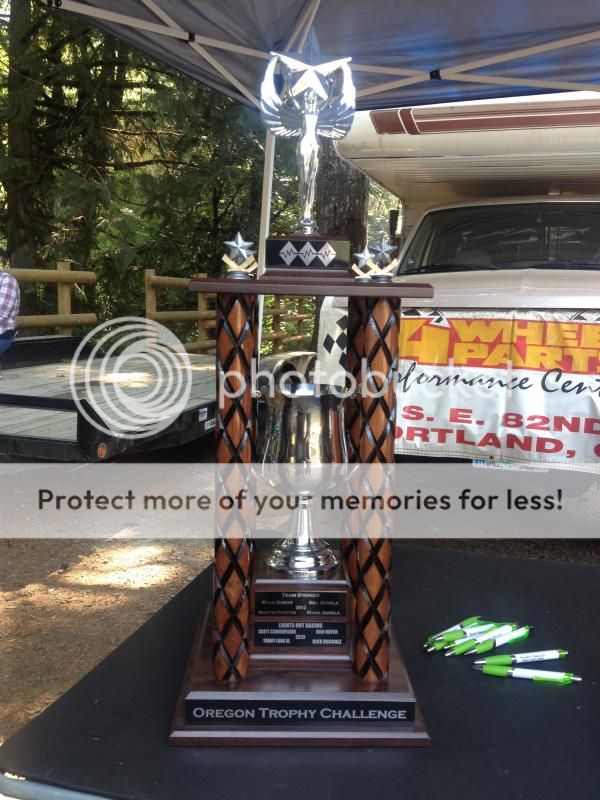
took first place at this year's Oregon Trophy Challenge. Brought home gold. :cool:
E61E0469-E2AC-4240-AD5F-B360A8D67532.jpg


Nail Salon did well all weekend.
04AD4EEA-BE86-4ADE-A686-1564C2F3D270.jpg


TORXreport: Oregon Trophy Challenge 2014

Some maintenance items I noticed from that run...

Had a brief CPS scare early Saturday morning. I shut the rig down a little warm, and it didn't want to start after. I tried the tap trick on the CPS, and she fired right up. Defintely some early warning signs of a spotty CPS. I need to price out a replacement from Jeep since I've heard mixed reviews of aftermarket replacements. Current one will become a trail spare.

I also need to look into refreshing the cooling system in the near future. I noticed the Jeep would start to run warm when climbing hills, and getting pushed hard (granted it was 90 degrees outside, and we were doing a fair bit of climbing on gravel). Thinking a new radiator is in the works since it's all the stock cooling system, and the last few years haven't been easy miles. Any recommendations for a good replacement?
 
Last edited:
I think blondjon has a aftermarket 2 rom with 1" rows. Are you running aftermarket trans cooler? If not, definitely consider it. Your trans and cooling system will thank you.
Also, I have had success with the "Blue box" premium sensors from Carquest, made by wells. They have lifetime warranty.
 
I have had terrible luck with all "Plastic end-tank radiators"

I also have had terrible luck with Non-mopar sensors such as the CKPS.

I also have had terrible luck with luck.
 
Find a good triple core, mine consistently runs 15 degrees cooler than the stock setup did.
I think when the time comes, I'll go this route. Probably something along the lines of an all aluminum three core.

Are you running aftermarket trans cooler?
One of the first mods I did to the Jeep. Added a large auxiliary B&M unit.


One of the last little projects I've been procrastinating on was building some front frame stiffeners. I figure while the rig is down, I might as well take the time to plate the front end, and try to prevent any further cracking. I also plan to plate the bottom of the front unibody as well. This will also give me a solid foundation for a track bar mount.

Picked up a piece of 10 gauge (.134") to make them out of. I borrowed a template from a fellow NWC'r, which saved me a ton of time.
27326FA4-1B05-422D-A136-DF71C66F7FB8.jpg


Two cutoff wheels, and some portaband action later I had both sides cut out.
DF6E841E-4480-4ED1-8B83-CEB28FADC60E.jpg


Tacked both sides together for drilling. I then drilled out the holes for the factory steering box holes and bumper mounts. Then it was onto adding some speed holes for additional plug welds.
AA833A75-C128-4462-B0B1-85F144BA8681.jpg


Front TORXplates, done.
5077F441-8B4E-4F25-AAF4-D96D92ED0B0D.jpg


I'm also really impressed by Milwaukee's hole saw quality. Well over two dozen holes later, and it's still cutting like new.
D72BF297-B62F-4940-BFB8-DE37090AC52D.jpg


I have a couple other miscellaneous things to do in preparation for the axle swap, but I'm thinking later this week I'll start tearing out the old suspension and axles.
 
Is any of this in CAD? IF not it should be. Would make it easier for anyone that has access to a cnc/plasma. Just sayin'
 
If someone were to get me those templates, I could draft up dimensional prints, and even make cad files and solid models...
Or if someone were to already HAVE dimensional prints sketched out, I could make drawings, cad files, and models of virtually any format.
 
Along with those templates I have a pile of other various templates for axle brackets.

If Josh wants he can convert whatever I have to cad, they are all copies of other companies products so I wouldn't want to try to produce them for sale but I do have them available for people in the chapter to use.

What kind of axle brackets?
 
Phase2 has officially begun. I've been working on it a little bit over the past few days. Started by yarding out the old trust 8.8 and suspension.
E29A55A5-5572-487B-A5B8-6B67BCC4E0D6.jpg


Did some cleaning, and prep work for the new hardware. I always like to thoroughly wash the underside when starting a project like this. Clean workspace is where it's at.
431414F8-8EB5-4BD4-97F9-38E9000B2D33.jpg


Started mocking up the new BDS 5" leaf packs with my existing JKS shackles, and TORXfab shackle brackets. I built my shackle hangers originally with some adjustability, and with the new packs I'm so glad I did. In the same orientation with the old BDS 3" packs my shackle was pretty much flat with the new leafs, hole #2 yielded a 38 degree angle, and hole #3 yielded a 55 degree (perfect).
8C6F5300-A277-4F8D-B38B-5CB5E3AF930E.jpg


At this point I needed to dial in the pinion angle, and tack the perches on. First I had to center the housing under the leafs. I wanted to center the perches at 43.5 inches center of spring to center of spring (~OEM). This meant 4-3/16" from outside flange to outside perch.
0C5F6BD6-DC22-49B2-A42F-2E58D6AF18B8.jpg


I've heard a lot of different ways on setting pinion angle. I found the easiest way is to bolt up the driveline (it just so happens the one from my 8.8 bolted up once I took the 8.8 flange off), and measure the angle.
CFE439E2-AF4D-4313-84EE-AF02736BC200.jpg


To measure the pinion angle I found the machined flat top of my Tera60 was matched perfectly to my pinion. You can also measure off the flats of the pinion yoke. I set my 8.8 ~2 degrees below the driveline angle to account for axle wrap on acceleration, and was happy with the results. So with a 17 degree driveline angle, I set the 60's pinion to 15 degrees.
51A63C6C-11F5-4448-B90A-6139CD3BA047.jpg


Yarded it out, and burned it all in.
676C0703-BE94-4070-8FB8-AD425ACAC30B.jpg


As the axle was cooling, I shot it with some paint. Then it was onto final assembly with the shafts and brakes.
4995BA26-7196-47C1-8C42-1D9F2D616C19.jpg


38626E23-E0A7-4BD4-97A6-FDA51CF084AC.jpg


Bolted it all up.
A237D118-6E07-4CA5-934E-50CFD241E81B.jpg


962BE6B3-F592-406D-8495-7F26FA216599.jpg


Still need to plumb the ARB, and build the upper shock mounts, but the rear end is pretty much ready to go. I'll toss the 35's on it tomorrow, flip the Jeep around, and then it's onto Project_Front_End_2.0 (stiffeners, three link, and 44 install). Rear 60 install was just a warm up. :rolleyes:
 
Looks very nice! Are you sticking with the 35's?
 
Drool
 
Back
Top