- Home
- Forums
- NAXJA Unibody Jeep Technical Forums
- Jeep Cherokee XJ (1984 - 2001)
- Modified Tech Discussion
You are using an out of date browser. It may not display this or other websites correctly.
You should upgrade or use an alternative browser.
You should upgrade or use an alternative browser.
Rear Bumper Thread...
- Thread starter DanMan2k06
- Start date


Oatmeal
NAXJA Forum User
- Location
- Cedar City, UT
That'll work ok but, you should weld a tube (sleeve) into the bumper to keep from "crushing" the rectangular tubeDanMan2k06 said:^ Learn to read... There will be a bracket that captures the carrier. Almost like a sandwhich. And the bolt goes all the way through the bumper... whereas most are just butt-welded on top of the bumper. Hence "flagpole"... a flagpole just sits on top of the ground.
") -----Hans
-----HansJeeps in Head
NAXJA Forum User
- Location
- Iowa
Damn nice bumper jdbwrx.
DanMan2k06
NAXJA Forum User
- Location
- Damascus, MD
Wow that looks really good. The idea behind the bolt is so that in the future if something does go wrong, I can repair it a lot easier than if everything was welded together.
I'm thinking about putting a sleeve inside the tube, but it would have to be a perfect 1" and slip over bolt. Otherwise it wouldn't serve any purpose. We'll see how things turn out in the next couple of days.
What I really need your guys' help on is the tire carrier. I want the tire to be angled over the rear window, much like the c-rok. But like most people, don't have a tube bender. Anyone have any previous designs/drawings?
DanMan2k06
NAXJA Forum User
- Location
- Damascus, MD
Well I made a little more progress today. Got the tire carrier almost completed. Just have to finish up a few more welds and put on the pattern plate. I tried to make the carrier as low profile as possible, I'm not a fan of the tire being a foot away from the glass. wasn't too tough, and my spindle feels pretty stiff, even without the bracing on yet.
I also talked to a friend of mine, who said I could use his sandblasting room when everything is finished") Pics...
Pics...


I also talked to a friend of mine, who said I could use his sandblasting room when everything is finished
Pics...
chris420
NAXJA Forum User
- Location
- California
Below are some shots of the mounting points as well as the quater panel protection. I used 3/16" steel for the quater panels and they hold the weight of the XJ. All the steel that was used for the bumper is 3/16" except the 4x4 tube that was used for the main bumper peice.
http://i210.photobucket.com/albums/bb283/chris420_012/XJRearBumper001.jpg
http://i210.photobucket.com/albums/bb283/chris420_012/XJRearBumper002.jpg
http://i210.photobucket.com/albums/bb283/chris420_012/XJRearBumper006.jpg
http://i210.photobucket.com/albums/bb283/chris420_012/XJRearBumper005.jpg
http://i210.photobucket.com/albums/bb283/chris420_012/XJRearBumper004.jpg
http://i210.photobucket.com/albums/bb283/chris420_012/XJRearBumper007.jpg
http://i210.photobucket.com/albums/bb283/chris420_012/XJRearBumper003.jpg
http://i210.photobucket.com/albums/bb283/chris420_012/SwingOutGatewithTire.jpg
Last edited:
DanMan2k06
NAXJA Forum User
- Location
- Damascus, MD
Ah I see... That clears up a lot of things. Mine will be seperate from the bumper for now, as I want to cut and fold the rear qaurters later.
Where do you guys get your toggle pull latches? Anywhere locally? I checked Home Depot, Lowes, Ace, Tru Value, Tractor Supply, Southern States, Napa, Pep Boys, Wal-Mart, all with absolutely NOTHING!!
Where do you guys get your toggle pull latches? Anywhere locally? I checked Home Depot, Lowes, Ace, Tru Value, Tractor Supply, Southern States, Napa, Pep Boys, Wal-Mart, all with absolutely NOTHING!!
Oatmeal
NAXJA Forum User
- Location
- Cedar City, UT
Those are made by: www.destacoclamp.com You can get them from: www.mcmaster.com (look under toggle clamps) they can usually have them delivered to you by the next day----------HansDanMan2k06 said:........Where do you guys get your toggle pull latches? Anywhere locally? I checked Home Depot, Lowes, Ace, Tru Value, Tractor Supply, Southern States, Napa, Pep Boys, Wal-Mart, all with absolutely NOTHING!!
Jeeps in Head said:Damn nice bumper jdbwrx.
Thanks!
I got my clasp from mcmaster. Go heavier than you would think (higher weight rating) just to be on the safe side.
On the side opposite of the spindle, I can't figure out if you built it so it would have a pad or support. If you look at mine, I did that. I figured, when the tire swing is closed, all the weight is not resting on the spindle. I got a piece of UHMV so the swing will slide easily over the top, and made it so I have to give it a little tug up so there is a bit of downward pressure on that support too.
Just a thought.
Another note I had, in case anyone else is thinking about doing there own bumper, was is in regards to the angle the tire is mounted on. I really like when the tire follows the angle of the tailgate, but the only downside I have found is you have to open the swing out past 90 to get the rear hatch open. This might not be a problem if the tire is centered on the swing, but since mine was offset to the side so I have some rearward visibility, it comes up from time to time. Not an issue outdoors or on the trail, but can be a pain in the one car garage. Also on a plus, the angle like that helps the departure angle.
Last edited:
DanMan2k06
NAXJA Forum User
- Location
- Damascus, MD
Yea I figured I would just have to order one from mcmastercarr. On the opposite side of the carrier there will be a pad that the arm rest on. I picked up some big blocks of Teflon that the arm will pull up onto, and be sandwhiched against. I just need some sort of latch to hold everything together.
krelja
NAXJA Forum User
- Location
- New Jersey
If there is a fastenal near you you can order it through themand get it delivered to your house or pic it up at the store. I got mine at the store in 2 days www.fastenal.com search for latch and they will come up de-sta-co and others as well. I used a hockey puck that I had left over from bumpstops and I used a 2 1/4 inch hole saw trimmed it down and bolted it to the bumper works great is durable and very cheap
Last edited:
Like I said, www.mcmaster.com
Pg 2514 in the catalog (website catalog)
They ship everything overnight.
There are three different options there. U-bolt arm, u-bolt arm locking, U-bolt arm 90 degrees
Holding weight ranging from 360 lbs to 7500lbs.
I think I got the 2000lb one, but I can double check later. I did get the one with the locking latch. It's just an extra spring loaded clip that helps hold it closed. Better safe than sorry I figured.
Here:
DanMan2k06
NAXJA Forum User
- Location
- Damascus, MD
Yea I just ordered one from mcmastercarr, and WOW I was suprised to see how fast they shipped it. I ordered at maybe 3 or 4pm, woke up, ran a few errands, and by noon the part was sitting on my doorstep. Talk about quick. Tomorrow I am going balls to the walls and spending all day finishing everything.
DanMan2k06
NAXJA Forum User
- Location
- Damascus, MD
Well it's been about a month, so that means time for an update.
Update: I worked on my rear carrier for the first time in a month....
Heres a few new pics. I focused today on the side "panels" that blend the bumper into the rest of the body.
good thing I passed geometry.


Both side panels, are actually going to be more like boxes. So they wrap completely around and back to the bumper again. That way no mud/water can get wedged in between the body and bumper, and makes things easier to wash out.
Update: I worked on my rear carrier for the first time in a month....
Heres a few new pics. I focused today on the side "panels" that blend the bumper into the rest of the body.
good thing I passed geometry.
Both side panels, are actually going to be more like boxes. So they wrap completely around and back to the bumper again. That way no mud/water can get wedged in between the body and bumper, and makes things easier to wash out.
Last edited:
dgrigorenko
NAXJA Forum User
- Location
- Big Rapids MI
DanMan2k06 said:Well I made some progress tonight, I pretty much have the bracket design figured out. I'm using 2.0x4.0x1/8 tubing, which will push all the way into the frame, and bolt in underneath, as well as the stock locations. I also cut a slot down the tubing so that the shackle bolt slides in nicely. I don't think it should have any effect on overall integrity. Heres some pics.
Heres the 4 holes.

Heres what I had to cut out to get the tube to fit

Like a glove

Heres the slot

A few holes drilled

And of course a look down the tube to see how it all lines up.

The nuts will be welded inside the tube, and then bolts will be used to secure everything to the frame. I should have more pics on the stock flange/plate in a few.
does anyone know what size tube this is? i think i am going to build a bumper and use this mounting system.
DanMan2k06
NAXJA Forum User
- Location
- Damascus, MD
2x4x.125". Some may say it's a little weak, but It saved a ton of weight and I gusseted EVERYTHING.
SOUTHTEXASXJ
NAXJA Forum User
- Location
- Odem Texas
anyone have any close-ups of this tire rack?Whats it made of? A close-up of the pivot point and latch point?Also a pic of the tire mounting area itself!

Last edited:
SOUTHTEXASXJ said:Whats it made of?
Oh, I don't know, steel maybe?!?!
600dollarxj
NAXJA Forum User
- Location
- Dayton Oh/Purdue
dgrigorenko said:does anyone know what size tube this is? i think i am going to build a bumper and use this mounting system.
it could be 2x4x1/8... thats what you have quoted anyway
NighthawkXJ
NAXJA Forum User
- Location
- Salina, KS
here is the bumper i made a few months ago for myself. I like how yours is going too though.

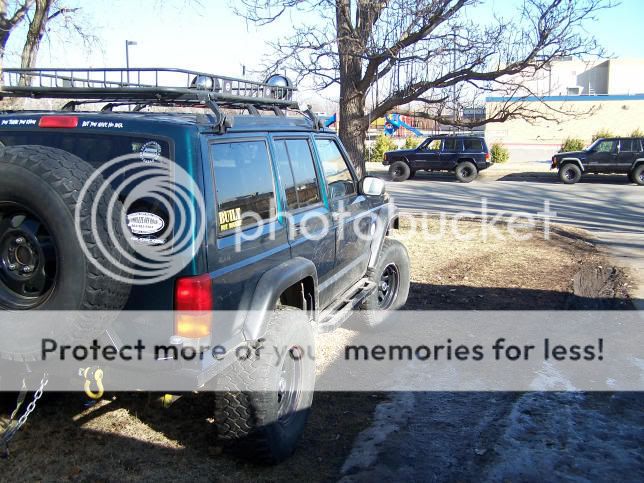

Sorry the pics where not really of the bumper when i took them, but of the flares so i did not get all the right angles on the pics to do the bumper justice
Sorry the pics where not really of the bumper when i took them, but of the flares so i did not get all the right angles on the pics to do the bumper justice
Similar threads
- Replies
- 3
- Views
- 521
- Replies
- 3
- Views
- 355
- Replies
- 8
- Views
- 654
- Locked
- Replies
- 50
- Views
- 2K