• Welcome to the new NAXJA Forum! If your password does not work, please use "Forgot your password?" link on the log-in page. Please feel free to reach out to [email protected] if we can provide any assistance.

The Nail Salon

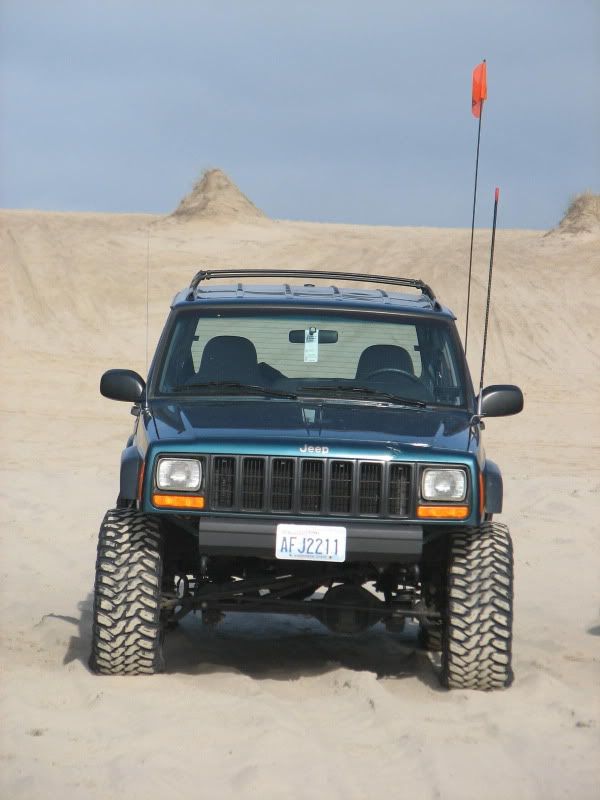
Do you feel a little better now that you have some armor on it?
Looks good BTW....
 
Prepped the Jeep for Sandlake tomorrow. Did a fluid check, re-torqued all the suspension bolts, greased the joints, and checked the bead lock bolts.

Also, when I bought the Jeep the fan shroud was missing. I could always tell it needed one. At low speed the temp would hover just a hair above 210. I snagged Dellstopjeep's old one during his part out, and finally got around to installing it.
P1070410.jpg


Sandlake requires you have a flag on your vehicle while on the sand. I needed a place to mount mine, so I stared at the Jeep for awhile and came up with an idea. Cranked this mount out of some scrap aluminum. Ties into the tail light boxes on the JCR's, and is removable when I don't need it.
P1070411.jpg


Should get the job done. Plus the hatch is still accessible.
P1070413.jpg
 
Time for a little update.

Took it to Sandlake for the Sandflea Rally. It was a blast to bomb around the dunes, and cruise through the trees.
IMG_0095.jpg


This was before I perfected tire pressure. :D


Suspension worked good, but I really wished I would have got bump stops installed prior. A few whoop sections had me cringing. Overall though the Jeep did great for it's first official shake down run.
 
Today I set aside for a little maintenance, and upgrades. I've gotten a check engine light a few times over the past few weeks. After getting it scanned, I was told I had a random misfire on some of the cylinders. Most likely from a bad plug wire. I decided it was time to do a tune up.

Oil change, air filter, plugs, plug wires, cap, and rotor.
P1070497.jpg


Before removing the pugs I like to take some compressed air and blow out the dirt and dust from the spark plug holes.
P1070498.jpg


One by one I replaced the plugs. Old vs news. Surprisingly the plugs weren't that bad. Autolite brand so they must have been changed at some point.
P1070499.jpg


I always use high temp never seez on the plugs. I've heard arguments for both sides, but I've never had an issue using it.
P1070500.jpg


Using some feeler gauges to double check the plug gap is correct, .035".
P1070502.jpg


Plugs are torqued to 27 ft/lbs, but I usually go by feel. Snug them up, and go another 1/4 turn. After the plugs were replaced, I installed the new plug wires, and then the cap and rotor. Everything is pretty straight forward, just don't mix up the wire locations on the cap.

Hopefully the tune up will solve the random miss.
 
One thing I knew I'd have to deal with at some point was fluid coolers. When running low tire pressures at slow speeds the power steering really heats up. I ran a small cooler on Jeepforceone, and it really helped reduce the whine associated with a hard working pump. I went ahead and ordered a Derale Power Steering cooler for the Nail Salon to get that issue out of the way.

Also, being new to auto's I've been paranoid about tranny temps. While snow wheeling I could tell the tranny was hot while crawling along breaking trail. Then at Sandlake running through the sand (an auto's worst nightmare) I could smell the transmission a few times through out the day. After that, I ordered up a Hayden 11x9.5 external cooler.

P1070505.jpg


Started installing the tranny cooler by removing the transmission hard lines from the radiator. I decided to bypass the radiator portion all together. It's basically a heat exchanger that warms the fluid. The volume of fluid it holds is pretty pathetic.
P1070507.jpg


Then I spliced into the OEM soft lines.
P1070508.jpg


Splice complete. It's a peace of mind having solid connections, and not the goofy factory quick connects.
P1070509.jpg


Return line routed.
P1070512.jpg


Got the lines routed, and made sure they were out of harms way.
P1070513.jpg


Done.
P1070514.jpg


I was curious how much air the electric fan pulled. I think it will keep the tranny nice and cool.
P1070520.jpg


After getting the cooler plumbed in, I drained the transmission pan. Rather than getting the tranny flushed at a shop, I decided to do the drain-refill-repeat process.

I wasn't too thrilled when a coffee like substance came out of the pan. She got a bit warm, plus it might be the original fluid.
P1070517.jpg


After the pan finished draining, pour in the new fluid. Check the fluid level with the engine running, and at operating temp.
P1070519.jpg


I'll give it a few hundred miles, and drain the pan again. However, I can tell a difference in shifting after the fluid change. Seems to shift much smoother.
 
Power steering cooler install is pretty straight forward. I got some 3/8" line, and ran the cooler off the low pressure return line for the pump. One side will come off the box, and one off the pump.
P1070532.jpg


P1070533.jpg


Starting to get crowded.
P1070535.jpg


Topped off the reservoir before firing it up. The system needed to be bled so I raised the front end, and turned the wheel lock to lock about 20 times.

Fluid coolers can now be crossed off the list. ;)
 
While routing the cooler lines, I noticed a block off plate right in front of the air box. Not really sure the reasoning behind it, but I know on early models this doesn't exist.
P1070515.jpg


To get some cooler air directed to the air box I did the block off plate delete mod. Should be good for about 7hp I figure.
P1070516.jpg


Also, I needed to address my front bump stop situation, or lack there of. I stumbled across a large 1/2" thick sheet of plastic awhile back.
P1070521.jpg


Chucked up a 3" hole saw.
P1070522.jpg


Went to town.
P1070524.jpg


After a few quick measurements I figure I'll need ~3.5" per side. I tapped the coil mounts when I had the axle out, so I'll get them cleaned up and bolted down.

Lastly, after standing around for 20 minutes waiting for my Costco compressor to air up my tires at Sandlake I decided that was the end of that. I'm not willing to give up my AC, so CO2 it was. Picked up a 20lb aluminum bottle at Airgas. Ordered the bracket online. The cylinder doesn't quite fit the bracket, so may modify it or find a new bracket.
P1070539.jpg


Tracked down a 150PSI preset regulator. Western Enterprises #RP320150.
P1070537.jpg


Pretty simple setup. Tank, regulator, hose. Just need to figure out a good mounting system, and I'll be in business.
 
Dustin, I run the same mount, all I did is went to a hardware store and picked up a threaded coupler and bolt to lengthen the arm to fit around the tank, works great and only cost a couple bucks
 
Can I ask where from, and for how much you spent on your fluid coolers project?
 
I love this build, Half of it I've already done, the other half is great idea's and info!
 
Dustin, I run the same mount, all I did is went to a hardware store and picked up a threaded coupler and bolt to lengthen the arm to fit around the tank, works great and only cost a couple bucks
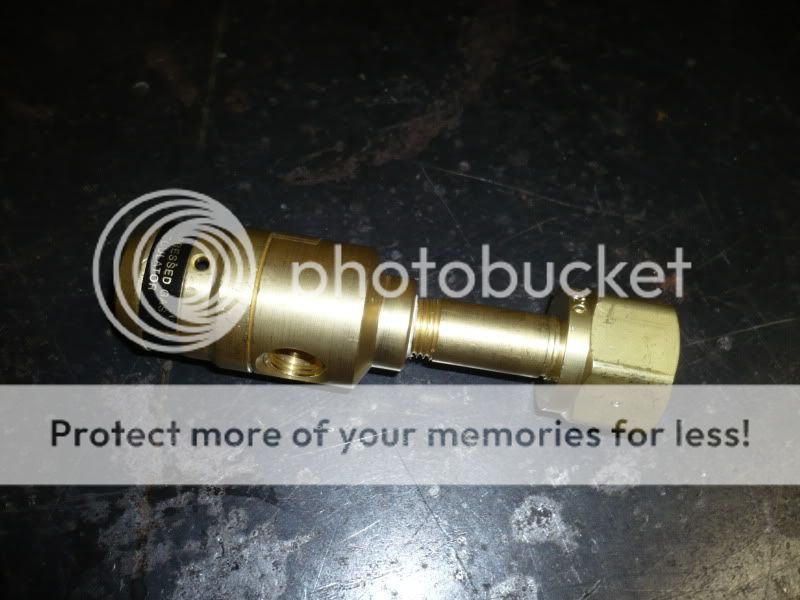
That thought did cross my mind. The problem with the mount is that it has an inside dimension of 7.75", and the cylinder has a diameter of 8". So the cylinder doesn't exactly fit flush in the mount.

I'll make it work this weekend. It's only metal, you can take it and add it as you need. ;)

Can I ask where from, and for how much you spent on your fluid coolers project?
Summit Racing, $85.

DER-13200
HDA-678

On Jeepforceone, I actually picked up a small transmission cooler off a ZJ to use as a power steering cooler. I'm sure you could cruise the Pick-N-Pull and find what you need, while saving a few bucks.
I love this build, Half of it I've already done, the other half is great idea's and info!
I actually started this to let others know what not to do. I just haven't had any big f*ck ups yet. :D
 
Modifying the CO2 bracket was pretty easy. Sliced the welds on the bottom, bent the bracket sides out a little, and welded it back up. Also took Tim's advice and used a coupler nut to lengthen the throw on the latch.

With the bracket reworked to my liking, I moved onto how I was going to mount it in the Jeep. Decided to make use of the OEM spare tire mount. Added some 2" flat bar to support the bracket.
P1070565.jpg


The bracket then bolts to the mount.
P1070567.jpg


With the cylinder latched down. I added the ratchet strap just for some extra support. I didn't realize how big a 20lb bottle is until I got it in there.
P1070569.jpg


Overall it will get the job done, and not leave me with a 20lb gas cylinder rolling around the back. It is temporary though. I plan on building a cargo shelf here soon, and it will then get tied into that.

Next project was getting the front end bump stopped. Got my 1/2" pucks cleaned up. I put a little bead of RTV on them before setting them in place.
P1070570.jpg


One side installed. I countersunk the top puck for the center 5/16 bolt to sit flush(ish).
P1070571.jpg


Lastly, during the initial build I used a factory 97' front drive line on the rear. While it has worked fine for the past month, the slip joint on it was basically maxed out. I really didn't trust it for trail use where the rear suspension would be cycling.

My solution... a Ken Nevill's custom drive line. :cool:
P1070572.jpg


I had a gift certificate to use up at Six States, so I ended up getting a smoking good deal on it. I'm very happy with the end result. Bigger tube size, and all brand new hardware. Sexy.
 
NIIIIIIIICE!!! And now you have the old to keep as a spare (just in case).... Those guys over at Six States do great work, so I'm sure that'll last.
 
When you're done with that mount.. I'd love to buy it off you! (if that's what you were insinuating)
 
Spill Kits: Everyone should have one of these in there vehicle! I consider a spill kit just as important as a fire extinguisher. It's just one of those things you should have just in case. Also, many trails are now requiring you to carry one.

I put together a new one for the Nail Salon. 5 absorbent pads, 2 pairs nitrile gloves, and 2 large garbage bags.
P1070580.jpg


It all condenses nicely into a gallon sized zip-lock. Add your favorite vendor sticker for style points.
P1070583.jpg


I think a simple kit like this should be able to handle most "trail spills". Anything from a gear oil spill, to a leaking power steering line. Turning your head to spills is what gets trails shut down. Be responsible, and do your part. :thumbup:

 
Back
Top