Probably should do this

well on another thread I had learned that the 97' did have a few recalls so i took it over to a dealer to get the vin checked and it did have the recall for the airbag modeler which was known to corrode and cause the air bag to spontaneously go off :gee: but who ever owned this rig before had it already taken it in and had that fixed so yay no recalls :yelclap:
also was able to pry some info out of the guy as to what packages my jeep originally came with and to my not so surprise thought, it did in fact have ''up country'' lift. now he said lift not package though so i'm kinda confused, could you get just the lift back then or not. might explain why there was no front skid or gas tank skid

If you want a build sheet you can go to jeep website and email them the vin and ask for a build sheet, they will email it to u within a couple days.
 
Well it got ugly lol finally got the rust on my passenger floor board off and covered after putting it off for so long lol
Now the pics you are about to see involve ghetto fab at its finest!
So I had forgotten to grab my safety glasses as I headed to my moms house to work on my jeep... Have no fear ghetto fab is here! Basically its fencing wire and a motorcycle helmet shield lol
7y9u8ezy.jpg

are4yjez.jpg

Hey it's me!
duduqeje.jpg

This was what the floor was looking like as I had all the carpet up
duzy3e8e.jpg

3a7y6yga.jpg

Second pic isn't to bad, its more rust stain that actual rust. But with my semi trusty face mask and shirt over my mouth I went about stripping the rust off. After about 15 minutes or so I had this
ujy8y6ev.jpg

tega9a5u.jpg

Now I only did some touch up areas afterwards to get the actual rust, a lot of the back side was more stain than actual rust so I didn't bother with that..
Finally I vacuumed the dust, rust, and other crap, then gave it a good wipe down with some degreaser to get rid of any more dirt. After that I laid down a coat of rust oleum primer.
Now I didn't get any pics at this point because my itouch decided to die on me lol
But after that dried I added a second coat and waited, and once it was fully dry I laid the carpet back down, installed the floor console, added the seats back and viola! I had all my seats again lol

Once everything was install back my itouch had enough to take a few pics and I didn't know what this wire went to??
e4ubu5a4.jpg

It's literally just hanging there, not sure where its suppose to connect to?
uhyjeba3.jpg

Looks to be only five of the slots are actually used.
3yne5ehe.jpg

Anyone have a clue?
 
Went to the jy today, couldn't find any steering column(sorry redjeep2.0)
But on the plus side I got a infinity or ixfinity amp from a gc paid $10 haven't a clue if it works or how to put it in lol
Question for all you, what type of grand Cherokee front seats are you getting??? I see there are multiple types and I don't know if I'm just over judging them thinking the right ones are holy and awesome and none that I'm seeing stack up or they really aren't the ones everyone's getting. Anyone got pics of the right ones per say I guess? Lol
 
lary was brimming with questions about the xj. i gave him a feiw sugestions.

lets see what i can dig up real fast for ya biglary!

Torx via "The Nail Salon"

With the front end basically done, I moved onto the transfer case. Goal was to yard it out from the Jeep, and install the AA SYE and Teraflex 2Low. The install can be done with it under the vehicle. I've done them both ways, and prefer to pull them. It's only six extra bolts, and gives you plenty of work space.

I started by draining the fluid. It was was definitely due for a change, and smelled horrible.
P1060967.jpg


Pulled the rear drive line. Late models use these goofy boots on the slip yoke, which need to be removed to pull the shaft.
P1060969.jpg


Disconnect the linkage at the transfer case, 9/16 nut.
P1060970.jpg


Working around my old manual trans was a breeze compared to the automatic and all the junk that goes along with it. After the sensors, linkage, and vent hose are disconnected from the transfer case, remove the tranny to t-case nuts. There's six toal, and they're a 9/16. The very bottom one was completely blocked by the tranny mount, so off came the cross member and mount.
P1060974.jpg


Gotta get creative.
P1060976.jpg


Eventually the case was out from the vehicle.
P1060978.jpg


I started to tear into the case, but broke my cheap set of snap ring pliers on the first snap ring (they lasted through a few t-case tear downs so I can't complain too bad). I tracked down a loaner set for the next day, and put the t-case project on hold.

Tracked down my loaner set of snap ring pliers. These are pretty trick, and make snap ring removal/install a breeze.
P1070025.jpg


I began disassembling the case. For the most part the 97+ cases are like the earlier models. The biggest difference is in the tail housing. Early models are a breeze to remove, late models have about a dozen parts holding it on.

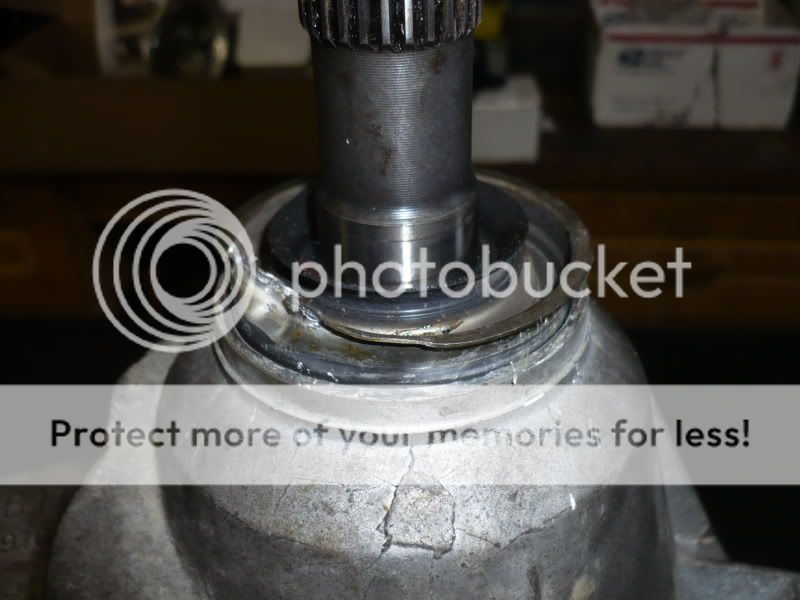
First thing that had to go was a pressed on "slinger" on the tail shaft. AA recommends using a long two jaw puller. I chose the die-grinder method. Since I wouldn't be reusing these parts, I took a cut off wheel and slowly cut away the pressed on sleeve part to relieve the stress. Then I took a chisel and "peeled" away the sleeve. At this point I could remove it by hand.
P1060986.jpg


Beneath the slinger I found another pressed on retainer. I'm sure there's another tool for this, but I used a pry bar to walk it off.
P1060989.jpg


Beneath that I found an external snap ring.
P1060990.jpg


With the snap ring removed the tail housing still wouldn't budge. So I continued to dig deeper. Out came the seal (I wouldn't be reusing this).
P1070026.jpg


Not surprising, I found another snap ring under the seal (you'll want to remove the external one on the shaft).
P1070027.jpg
 
Finally I got to a point where I could remove the tail housing. It's held on with six 10mm bolts. Be careful when prying it off since the case is cast aluminum. Also, remove the speedometer gear prior to removal. The retainer is a 13mm hex, and then you can pull the speedo gear assembly out.
P1070028.jpg


Next step was removing the front output yoke. Use a 1-1/8 socket (preferably an impact socket), and an impact wrench. If you don't have an impact you'll have to get creative.
P1070029.jpg


At this point you're ready to split the case. Remove the case bolts, and use the designated pry points on the corners to split it. Also, note the oil pump is positioned on the outside of the back half of the case.
P1070030.jpg


Case split in half. Mine must have gotten some water inside, there's some strawberry milk looking sludge around the case.
P1070033.jpg


Push the front output shaft up, and remove the chain. Then remove the mode spring, shift fork, and main shaft. Keep everything oriented to how it's been removed. Organization is key.
P1070036.jpg


Remove the 7/8 bolt off the bottom of the case. This holds in the shift detent pin (careful it's spring loaded), and lets you install the new 2Low shifter.
P1070037.jpg


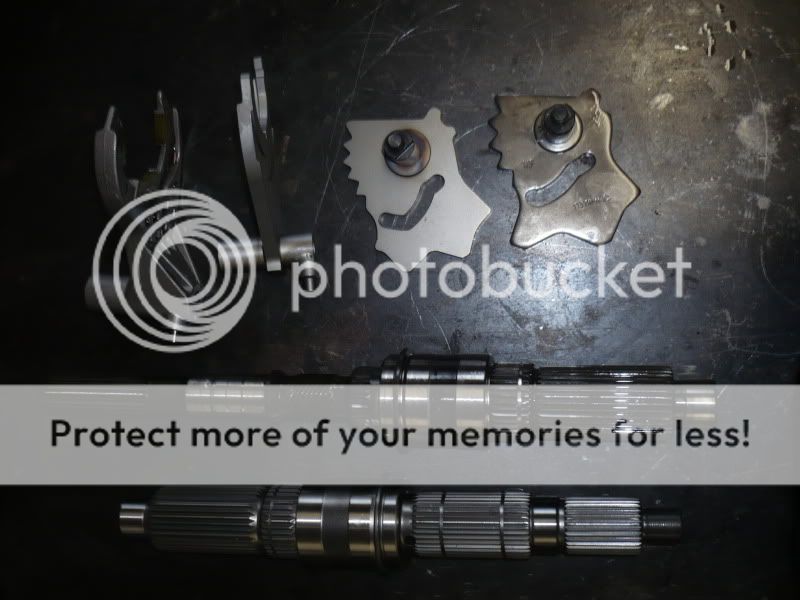
On the main shaft you'll need to transfer the main drive sprocket to the new SYE shaft (again pay attention to it's orientation). It's held on with a large snap ring. Some of the earlier models will require you to press off some needle bearings. Find an appropriate size object and tap them out.
P1070042.jpg
 
Comparison between old and new. I took this time to flush out the case halves, and remove the strawberry sludge.
P1070041.jpg


First install the new 2Low hardware. I like to pre-lube everything with ATF during install, seems to make everything go together a bit easier.
P1070043.jpg


Make sure the shift fork is aligned with the shifter rail hole.
P1070044.jpg


Install the new main shaft, shift rail, and remember the mode spring.
P1070046.jpg


Install the chain and front output yoke.
P1070047.jpg


Take the oil pump, and clean off the filter screen. Don't blow from the outside in, I like to use compressed air from the pickup tube out.
P1070048.jpg


At this point I've learned my lesson to assemble the rear case half with out sealer first, just to make sure you didn't miss a step. I put the back half of the case on, and made sure the oil pump was located on the outside, and the pickup tube was seated correctly. Then with the case locked in four wheel drive (both outputs should be locked), check how far the shift rail protrudes from the case. If it's over an inch, it will need to be cut. 97+ took care of this for you.
P1070050.jpg


Also, while you're at it, grab a 3/8 and bench test the case. Make sure you can get into each gear.
P1070052.jpg


With everything working like it's suppose to I took the case apart, and prepped the surfaces for RTV. Don't go overboard.
P1070053.jpg


Once the cases are bolted together, you can install the speedo drive gear on the main shaft. It's held on with two snap rings. Apply RTV for the tail housing.
P1070056.jpg


Install the new SYE tail housing. With some of the brands you need to pay attention to the clearance around the shift rail. I've had housings bind up on the shift rail before preventing the case form going back into 2wd. This AA housing seemed to fit pretty tight.
P1070058.jpg


Install the speedo assembly. You'll see numbers on the outside, these correspond to the tooth count of the speedo gear. Position accordingly.
P1070059.jpg


Install new supplied yoke seals, and yokes. Make sure to pre-lube the output seals with some ATF before sliding the yokes on.
P1070063.jpg


Install the yokes, and admire your new transfer case.
P1070065.jpg
 
and because it was a good tale!

http://s387.photobucket.com/user/Bronzewyrm/media/08-10-12/S7300101.mp4.html

S7300097.jpg


S7300067.jpg

S7300109.jpg


this is where i was when it broke.
0811121322.jpg


You said it lary. its all about the memories. NAXJA has given me a ton of them. hopfully that helped a little. we got to get you back on the trail.

as i see it. t-case and tires, you should be good man. 31's would be nice. but with summer comming up its not really necessary.

operation parts run, sucsess!. thankyou alex, jessie, and lary. until next time men
Bronze.
 
Why did you take the doors off?

It's a jeep thing???? Lol jk I took the driver door off because I do news paper delivery and it started getting annoying open/closing my door and such. Just seemed easier especially since summer is slowly creeping up. Plus this allows me to make future half/soft doors
 
Well lucky for me, my jeep was made early in 97(march) so I got the left over stock of early model style hinges, so I didn't need to do anything with the pins, I just cut off the lower half of the hinge and pin and it slides on and off really easy. Cool part is that since my door is a basic door with only wires connecting the speaker and side mirrors, its quite light and I can take it in and off by myself.
 
Back
Top