NOT a budget buggy build

Jeff 98XJ WI said:
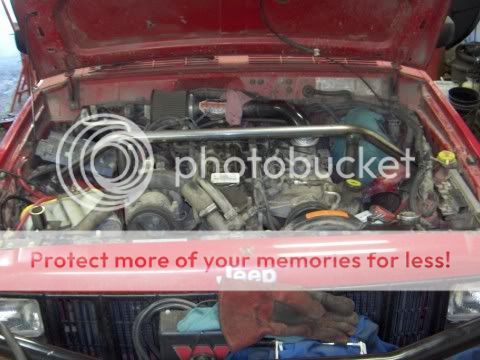
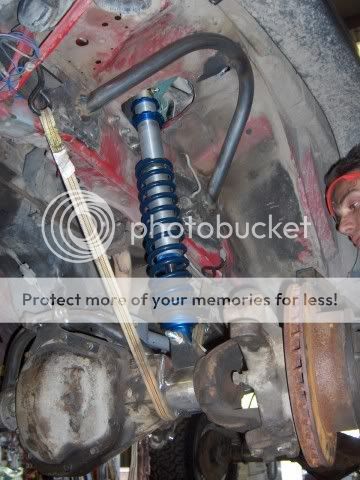
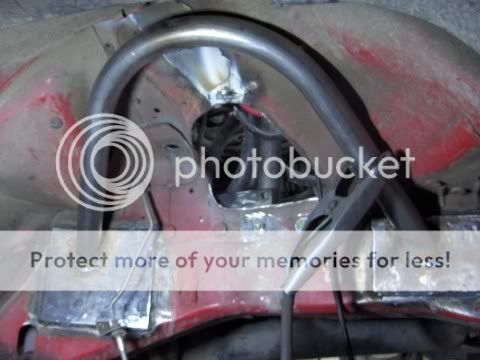
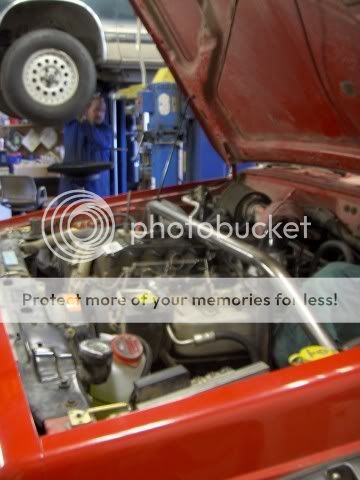
You could do like Rick did, but that would be wide again. Kind of a cool setup though in my opinion. He ran a tube from the front end, along the edge of the hood, and then wrapped it around the A pillar to the A pillar cage tube. You'll have to search for the pics yourself! :) Jeff

Edit: I did find this: http://www.fototime.com/5100DDB14C9E5F6/standard.jpg
standard.jpg

Actually, I had thought of that, and I will probably do it like that.
But, I may need to have more structure and wanted some ideas on running throughthe firewall.
 
p1010153ge9.jpg


I think we a little sweet talk to Goatman, you can get that bar from him. Matt made him up one....


that is how I would do it, then move from there.
 
Maybe something like this.

arcticxj1.jpg

arcticxj2.jpg

arcticxj3.jpg

arcticxj4.jpg

arcticxj5.jpg

You could make this your coil mounts on the top not to coilovers. Then you could tie this to the rest of the structure you build. Just throwing this out there

Matt
 
Alright, Terry, start your own thread :twak:

Nice looking project, BTW. :cheers:
 
It's a roller!!!! :woohoo: :)

There is a whole bunch left to do, and nothing is fully welded yet, but I at least got to throw the tires and shocks on and flex it up to check for clearance. Everything looks good clearance wise, and I'll be able to move the lower shock mounts out an inch. The spring rate looks like it's too stiff, so I'll order some 125 lb coils to replace the 150 lb primary/upper coil and see how that works. The upper shock mounts need to be raised a little, and I'll move them in slightly since I have plenty of spring rate.

I still need to add bracing and cut some holes in the UCA mount and panhard mount on the axle, and add a couple of B pillar bars and rocker bars, then start working on the front.

standard.jpg

standard.jpg
 
The panhard bar is old tube I had laying around, it'll work for now......it was my old tie rod.

standard.jpg

standard.jpg
 
i hate you!! it looks good!! keep on pluging buddy, almost ready.
 
sure seems like you will get alot of leverage against those mounts being that tall, the trackbar will be easy to gusset properly since the force will be side to side but the control arm will be seing front to rear force, gussetting for that will be tricky
 
Like I said, it will be well gusseted. However, the forces involved aren't quite what some might think. That mount won't need to take more than the amount of traction the tires will provide, or the torque of a 1.5" axle shaft. Plus, while it looks like force is increased as the mount gets taller, it also decreases with the increase in leverage. Basically, it comes down to weld quality, since the 3x3x3/16 boxed tubing isn't going to bend or fail, and there's 12" of weld on the bottom, plus the gusseting that I have planned will add another 6", giving 18" of weld to the tube, plus it will be tied to the panhard bar mount. Figuring a weld bead width of 1/4", and 18" of weld with a tensile strength of 60,000 psi, that's 315,000 lbs..........I think that's more than the strength of the axle shaft or what traction the tires can provide.

I guess we'll see........ :)
 
Last edited:
OT said:
It's hard to tell from the pictures, will you be able to run a straight Panhard?

Yeah, there's plenty of room. The panhard is behind the axle a couple of inches and a couple inches higher than the UCA and so clears the UCA mount easily, especially since the two mounts are stationary relative to each other.

standard.jpg
 
As for gusseting, here's an idea:

is.php


There would also be another gusset on the other side (obviously).

Sorry, just had to throw it out there.
 
My idea... 3/16" plate or something from pumpkin up to the panhard mount. solid along the tube. incorporating the upper link mount into it.

gussetvm8.png
 
GSequoia said:
Now Richard, is that the proper use of an engine hoist? :twak:

:cheers:

I already changed my engine.........now this is what it's for. :D

Also works good instead of a floor jack when putting an axle on stands to work on it............. :repair:
 
Back
Top