• Welcome to the new NAXJA Forum! If your password does not work, please use "Forgot your password?" link on the log-in page. Please feel free to reach out to [email protected] if we can provide any assistance.

The Frog Blog

Sounds good. I don't post much here anymore since the migration to the southland but I am planning a few upgrades myself. ACOS up front is the next upgrade followed by a LA lift in early 2013. Hopefully the world wont end before I get that on.

Got some SoCal trips planned as well. Panamint and Calico in the next month. Yeehaw.

I'm gearing up for the epic roadtrip to Moab next year! Hoping to get the cage done before then but who knows if that will happen.
 
Greetings from the high desert!

I was supposed to wheel at Calico this weekend, but the campsite location changed so I decided to stay home and work on the Jeep. I figured I might as well update the FB while I'm at it. Although I'm temporarily SoCal, the parts I installed came from Sierra Chapter territory (thanks, Tim), so that technically qualifies as a SC update for the blog. Here's what I did...

The ACOS kit I bought from Tim have been sitting in the garage for a month, so I took advantage of the cool weather and extra time I had to get them installed on the heep. I have been running an extra OME spacer (yellow) to top of my new isolators for that bit of extra space, along with a 3" bump stop and an additional hockey puck, but I still have a tendency to rub my fenders and knock my flares loose. The ACOS are guaranteed to fix that.

IMG_3378.jpg


I started off by using my new HiLift (gave my old one to the kid) and floor jack to lift the front of the Jeep. I also pried off the OE neoprene bump and removed the coil.

IMG_3379.jpg


Here's a good look at the OME isolator. A while back, I replaced my stock isolator after noting my coils were misaligned with the bump post. When worn, the coils will eat into the isolators and cause them to sit at ungainly angles. These isolators will likely to to the kid (100K XJ) in an effort to give him an extra 1/2" of clearance up front.

IMG_3380.jpg


The ACOS directions say to locate the inner washer and mark the bump tube for cutting. I used blue tape to transfer the exact location of the washer. You don't want to cut into the washer.

IMG_3384.jpg


This is as high as you want to cut. This upgrade gives you a couple of free souvenirs, also.

IMG_3385.jpg


A grinder is useful to make the cut as smooth as a baby's butt. The backside of the cut is hard to get to so I used pliers to work the cut piece free from the bump tube.

IMG_3387.jpg


I figured it was time for a (bad) beer after the first 20 minutes of hard labor. Make sure you have a few cold ones on hand prior to starting this project.

IMG_3388.jpg


The ACOS kit comes with a 10 x 1.5 mm bolt, so you'll need to tap the washer. This is where the ACOS bump stop bolts into to hold the unit in place.

IMG_3389.jpg


A little paint will prevent corrosion and make the tube purty.

IMG_3390.jpg


Now the fun part begins. The ACOS threaded tube fits directly onto the OE bump tube. It starts looking good at this point.

IMG_3391.jpg


Now you can screw the ACOS bump into the threaded hole with the supplied bolt.

IMG_3392.jpg


You'll want to set the lower collar as high as you can prior to re-installing the coil. I run a 5.5" coil, so even with the coil compressed, sway bar end link disco'd, and axle dropped completely, the passenger side can be a pain to install. The driver's side is much easier, as clearance is not obstructed by steering dampner, upper control arm, and tie rod/drag link connectors.

IMG_3393.jpg


Final adjustments to the ACOS system is made with load taken OFF the coils. Since the system comes with about an inch and a half of built-in lift, I decided to raise the collar as high as I could. With both isolators removed, I ended up with 3/4" of additional lift and I am completely happy with the results.

IMG_3394.jpg


I'm heading back out today to level the ACOS system to level out the driver's and passenger sides. Initial measurements showed the driver's side to be 1/4" lower, but that might be due to the brand new tire on the passenger side. The ACOS makes that adjustment very simple. Oh, I might even install my fender flares since i now know I will be less likely to knock them off when on the trail.
 
Last edited:
looking good kelly! hopefully socal is treating you well!
 
looking good kelly! hopefully socal is treating you well!

Ahhh SoCal is ok. Did some local wheeling and will do some trails at Parker Az in Nov but otherwise i spend all of my time on landscaping at the new house. I plan to return to norcal fairly soon. That's where my heart is.

Thanks for the comments.
 
Man your rig looks good!
Glad to hear that SoCal is treating you well.
 
You must miss us up hear since you are still posting writeups in Sierra Chapter.. Nice right up by the way as usual!!:cheers:

NorCal is hard to beat. I'll be back up there pretty soon and will be back on my favorite trails again so i am trying to keep the FB updated a bit. Hopefully I'll get my LA lift installed before SF.
 
4 more years of suck. You get what you vote for.

don't blame me, i sure as hell didn't vote for him.
guess i need to keep working to support the 47% of people who do not pay any income taxes...i mean obama supporters.
 
I need to change the subject because the whole O thing has depressed me.

On the bright side of life, the business unit (wife) just approved my 2013 parts budget for $2000 and is helping me plan for Easter Jeep Safari and Sierra Fest. Awesome. I'm thinking long arms and a rear bumper with tire swing....
 
Heading to Parker Az for the week. Planning to run some trails nearby and drink turkey beer. Ran into a nice family at a Mojave gas station an hour ago also towing a red XJ. We Cherokee drivers gotta stay together.

Happy T-giving everybody!
 
As far as ACOS go, in theory, since the older models have a completely removable bumpstop apparatus. Shouldn't have to cut anything?
 
As far as ACOS go, in theory, since the older models have a completely removable bumpstop apparatus. Shouldn't have to cut anything?

If you have a lip or flanged end i would think that would need to be cut off to allow the stock bump tube to fit completely inside the ACOS tube. Also, cutting the tube down an inch enabled the bump stop to thread into the tapped hole with the supplied bolt. i dont know much about the older style tubes, so post a pic and let's take a look.
 
The older bump stop flange is screwed on and the later models are welded. They need to be cut off then tapped.
 
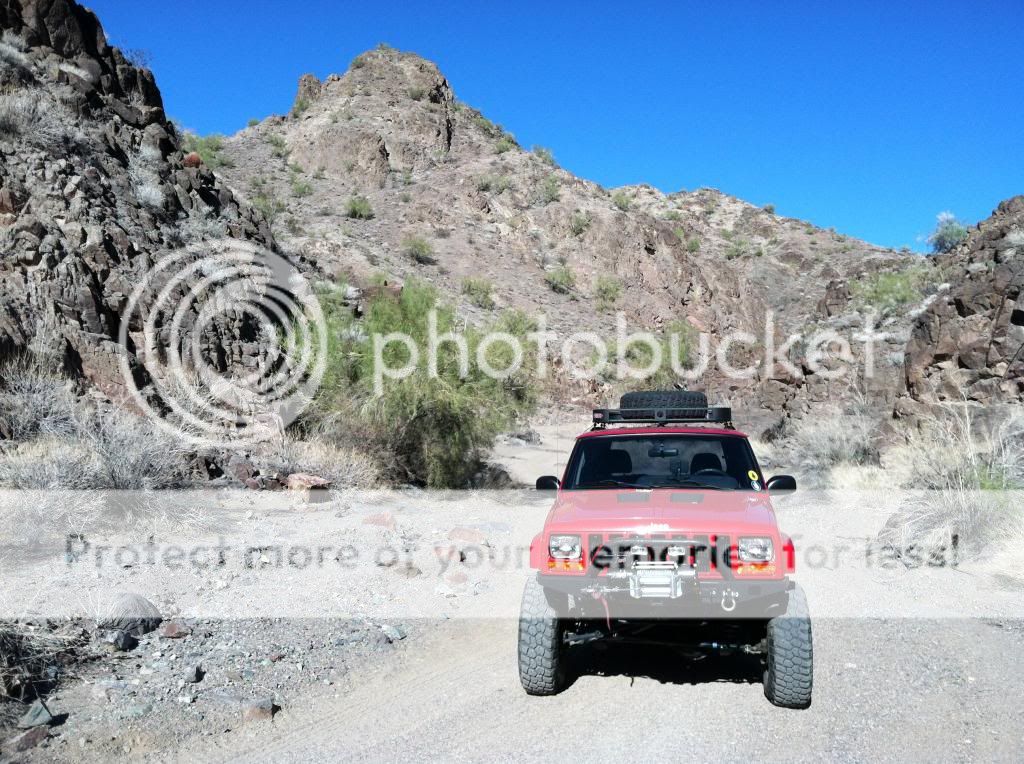
A few (poser) pics from the T-Giving weekend near Parker, Az. I intended to run President's Choice Trail, but I sliced a sidewall on my KM2 and had to cut my wheeling short. Still had a blast on some local trails.

IMG_3444.jpg


IMG_3446.jpg


IMG_3456.jpg


IMG_3461.jpg


IMG_3463.jpg


IMG_3471.jpg


IMG_3472.jpg


I'm starting to wonder about the sidewalls on these KM2's. This sucker sliced open like a ripe orange. Unfortunately, I had no luck finding a replacement for my 33X10.50 so my weekend was essentially done. I did manage to take some family to The Desert Bar the next day, but I was careful not to wheel the hard stuff.

IMG_3476.jpg


IMG_3490.jpg


IMG_3492.jpg


IMG_3493.jpg


IMG_3494.jpg


IMG_3495.jpg


IMG_3496.jpg
 
Last edited:
i read somewhere that the KM2s have about half or 2/3 of the threads per inch compared to wrangler MTRS, pro comp xtreme terrains, etc. Ive seen a lot of KM2s slice open on the trail, but never another tire.
 
i read somewhere that the KM2s have about half or 2/3 of the threads per inch compared to wrangler MTRS, pro comp xtreme terrains, etc. Ive seen a lot of KM2s slice open on the trail, but never another tire.

Agreed. I've seen a few KM2 sidewall failures, but it's still a great tire. Gatekeeper at Deer Valley chewed up a couple of them.

Three 33x12.50 choices on my short list...

images.ashx


images.ashx


images.ashx
 
Back
Top