- Location
- Southern Maryland
This is the electric fan setup I've been using on my beater project for a while. I've recently been able to test it in 90-plus degree weather, and it seems to work pretty reliably, so I feel comfortable writing about it now. The basic idea is to use the stock XJ fan "layout" on the radiator, but using an electric fan in lieu of the mechanical fan. This means putting a single electric fan inside the mechanical fan's shroud, with an independent temperature switch turning the fan on and off as needed. The stock condenser fan is also still present, but it is still under the control of the ECM and isn't involved in the normal cooling. It's possible to go beyond this setup with a manual override switch or a fan controller or whatever, but I haven't done any of that for now.
The first step is to eliminate the mechanical fan assembly and make room for an electric fan motor. Some people chop the nub off the accessory bracket with a sawzall, but I replaced my accessory bracket with one from a YJ, which got rid of the fan nub and also moved the alternator five inches higher (see here).
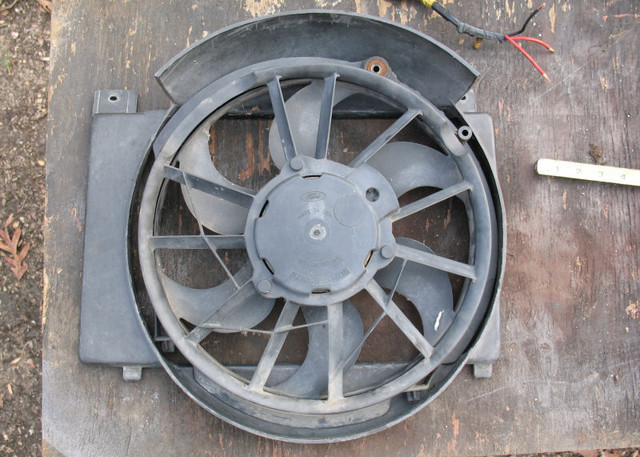
Next is the fan itself. I spent a lot of time looking at options and eventually settled on the left-side fan from a 3rd or 4th generation Ford Taurus. Most of the Taurus fan swaps are for the single big fan from a 3.8L engine, but the 3rd and 4th gen engines use two fans next to each other, and this mod uses the left-hand fan from those setups since it is a little larger. Specifically the left-side fan is approximately 14.5" outside diameter, while the opening in the stock mechanical fan shroud is approximately 15.5" inside diameter. This lets the fan drop into the stock shroud with only some minor modifications. Here is a pic showing the fan sitting in the shroud before any modifications
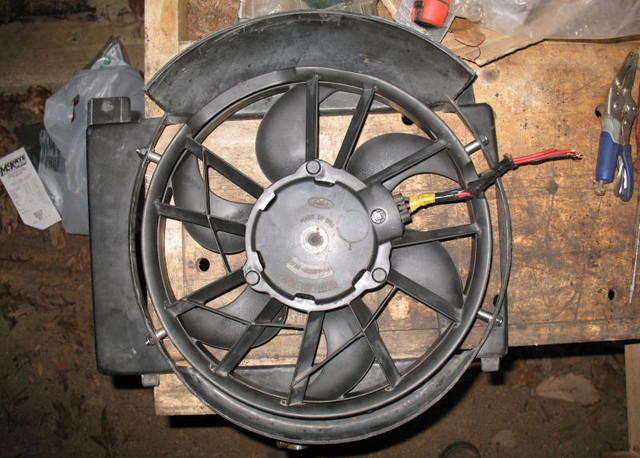
In order to make the fan fit into the shroud, I chopped off the excess plastic parts and trimmed the outside edge so that it would fit cleanly. Then I used 1/4" stainless steel carriage bolts, spacers, and nylon lock nuts to secure the fan into the center of the shroud.
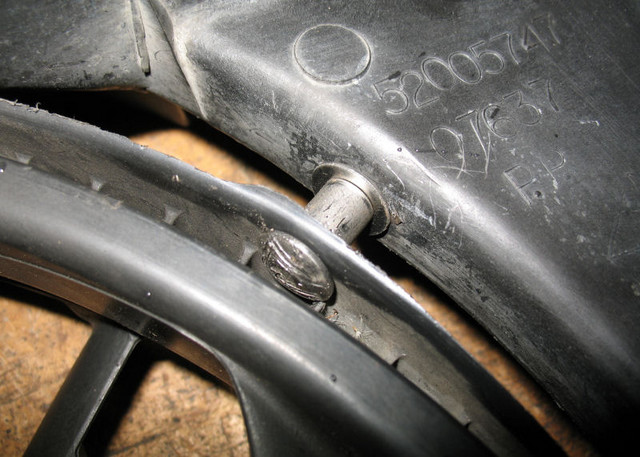
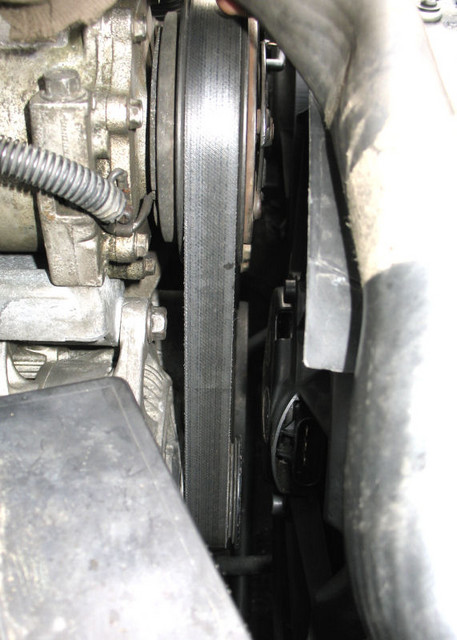
Test for fitment and make sure nothing interferes. You can see from the pic below why the mechanical fan nub has to be removed first
Now for the electronics. These fans have two positive wires and one ground, but there is only one winding on the motor. The way these are wired up in the 3rd gen Taurus is that one of the power wires goes through an inline resistor that kicks the voltage down, which provides a "low speed" operation, while the other wire goes straight through and provides a "high speed" operation (which is really the "normal" speed). You can do this too if you want, however for the purpose of this write-up I am just doing a single unmolested input that will turn the fan on and off according to temperature.
I tried a bunch of switches (over $100 in rejects) and the most consistent and reliable thing I've found so far is a two-pin switch from late-80s/early-90s BMW models (Four Seasons part number is 36511, the one I bought from NAPA was ATM part number 1435033). According to the specs, it is supposed to come on at 95c (203f) and go off again at 90c (194f) which means it should only come on after thermostat is fully open and go off again when the thermostat is starting to close.
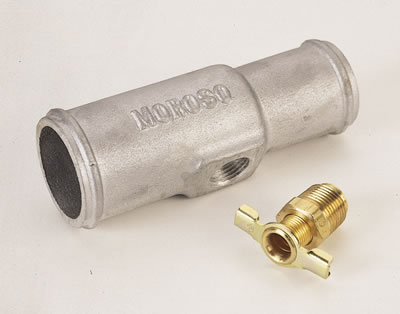
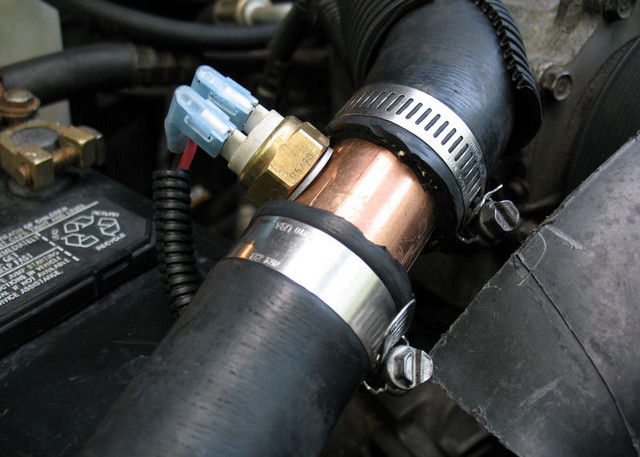
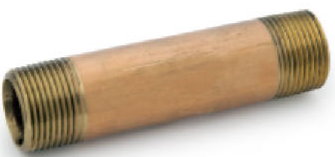
Unfortunately the switch uses an M14x1.5 thread, so it will not fit into any of the stock openings. You might be able to drill and tap a hole in the front of the thermostat housing for this, but I already have a gauge sender there so I had to use something else. I also tried drilling and threading a 3/8 NPT to 1/4 NPT adapter bung but the sidewall of the bung ended up being too thin and would crack after a few heat cycles. The thing that finally worked for me was a 4" long 1.25" OD brass pipe nipple installed in the upper radiator hose. I drilled a 1/2" hole and then used a M14x1.5 fine-pitch stainless steel bolt to make a thread in the pipe (a tap would work better but I couldn't justify the $40 for a single use tap). Brass was soft enough for this, and was thinner than the galvanized or plastic pipe. If you go this route make sure the pipe is long enough to chop the threads off the end, since pressurized coolant will travel up the threads and try to leak out. Here's a pic of the switch installed.
From there it's just a simple relay to turn the fan on and off. Since everything is by the battery this is pretty simple to setup. In my case I chose to run constant battery power to the switch and fan, then run the ground leg for the switch to the relay, since this is similar to how the stock fan operates, and should be easy to wire up an override switch (short to ground basically). Here's a pic from the rear, using an earlier test switch. You can see the relay on the fender wall.

One artifact of using constant battery power is that the fan will run after the engine cuts off if the switch is closed. This happens almost everytime I drive the jeep, but the temperature of the coolant at the switch is knocked down pretty quick so the fan does not run very long. Actually it will cycle a few times as the hose heats up from the coolant that's still in the engine, then it cools off, heats up again, etc. I've never had any problems with battery draining or anything, but if you want to feel more comfortable you can tie the switch into ignition power from the PDC if you prefer.
Another option worth looking into is a three-pin switch for the same generation of BMW vehicles, which provides two independent switches at 194f and 207f respectively. In conjunction with the 3rd gen Taurus inline resistor, this could be used to drive the "low-speed" and "full-speed" pins on the fan motor as well.
Anyway in the past few months of testing I've been very pleased with the fan, and the setup has performed pretty much the same as the old mechanical setup did. Driving down the highway the gauge is below the 210 hash mark, but when I stop at a red light or a drive-through window the gauge starts to creep into the 210 hash mark, and then the fan kicks on. Once I start moving again (or if the outside temp is cool enough for the fan to do the work alone) the temp will drop to below 200 and the fan will go off. There has only been one time where the secondary fan kicked on due to ECM command, and as expected the temperature dropped very quickly with both fans spinning.
Overall very glad I made this modification as it gives me more control, and eliminating the mech fan also eliminated a noticeable amount of drag on the serp belt.
Here is the final parts list for my installation
stock mechanical fan shroud
left-side 3rd or 4th generation Taurus fan (3.0L)
four 1/4" carriage bolts, lock nuts, and misc spacers
two-pin BMW fan switch (Four Seasons 36511, or NAPA ATM-1435033)
one relay
The first step is to eliminate the mechanical fan assembly and make room for an electric fan motor. Some people chop the nub off the accessory bracket with a sawzall, but I replaced my accessory bracket with one from a YJ, which got rid of the fan nub and also moved the alternator five inches higher (see here).
Next is the fan itself. I spent a lot of time looking at options and eventually settled on the left-side fan from a 3rd or 4th generation Ford Taurus. Most of the Taurus fan swaps are for the single big fan from a 3.8L engine, but the 3rd and 4th gen engines use two fans next to each other, and this mod uses the left-hand fan from those setups since it is a little larger. Specifically the left-side fan is approximately 14.5" outside diameter, while the opening in the stock mechanical fan shroud is approximately 15.5" inside diameter. This lets the fan drop into the stock shroud with only some minor modifications. Here is a pic showing the fan sitting in the shroud before any modifications
In order to make the fan fit into the shroud, I chopped off the excess plastic parts and trimmed the outside edge so that it would fit cleanly. Then I used 1/4" stainless steel carriage bolts, spacers, and nylon lock nuts to secure the fan into the center of the shroud.
Test for fitment and make sure nothing interferes. You can see from the pic below why the mechanical fan nub has to be removed first
Now for the electronics. These fans have two positive wires and one ground, but there is only one winding on the motor. The way these are wired up in the 3rd gen Taurus is that one of the power wires goes through an inline resistor that kicks the voltage down, which provides a "low speed" operation, while the other wire goes straight through and provides a "high speed" operation (which is really the "normal" speed). You can do this too if you want, however for the purpose of this write-up I am just doing a single unmolested input that will turn the fan on and off according to temperature.
I tried a bunch of switches (over $100 in rejects) and the most consistent and reliable thing I've found so far is a two-pin switch from late-80s/early-90s BMW models (Four Seasons part number is 36511, the one I bought from NAPA was ATM part number 1435033). According to the specs, it is supposed to come on at 95c (203f) and go off again at 90c (194f) which means it should only come on after thermostat is fully open and go off again when the thermostat is starting to close.
Unfortunately the switch uses an M14x1.5 thread, so it will not fit into any of the stock openings. You might be able to drill and tap a hole in the front of the thermostat housing for this, but I already have a gauge sender there so I had to use something else. I also tried drilling and threading a 3/8 NPT to 1/4 NPT adapter bung but the sidewall of the bung ended up being too thin and would crack after a few heat cycles. The thing that finally worked for me was a 4" long 1.25" OD brass pipe nipple installed in the upper radiator hose. I drilled a 1/2" hole and then used a M14x1.5 fine-pitch stainless steel bolt to make a thread in the pipe (a tap would work better but I couldn't justify the $40 for a single use tap). Brass was soft enough for this, and was thinner than the galvanized or plastic pipe. If you go this route make sure the pipe is long enough to chop the threads off the end, since pressurized coolant will travel up the threads and try to leak out. Here's a pic of the switch installed.
From there it's just a simple relay to turn the fan on and off. Since everything is by the battery this is pretty simple to setup. In my case I chose to run constant battery power to the switch and fan, then run the ground leg for the switch to the relay, since this is similar to how the stock fan operates, and should be easy to wire up an override switch (short to ground basically). Here's a pic from the rear, using an earlier test switch. You can see the relay on the fender wall.
One artifact of using constant battery power is that the fan will run after the engine cuts off if the switch is closed. This happens almost everytime I drive the jeep, but the temperature of the coolant at the switch is knocked down pretty quick so the fan does not run very long. Actually it will cycle a few times as the hose heats up from the coolant that's still in the engine, then it cools off, heats up again, etc. I've never had any problems with battery draining or anything, but if you want to feel more comfortable you can tie the switch into ignition power from the PDC if you prefer.
Another option worth looking into is a three-pin switch for the same generation of BMW vehicles, which provides two independent switches at 194f and 207f respectively. In conjunction with the 3rd gen Taurus inline resistor, this could be used to drive the "low-speed" and "full-speed" pins on the fan motor as well.
Anyway in the past few months of testing I've been very pleased with the fan, and the setup has performed pretty much the same as the old mechanical setup did. Driving down the highway the gauge is below the 210 hash mark, but when I stop at a red light or a drive-through window the gauge starts to creep into the 210 hash mark, and then the fan kicks on. Once I start moving again (or if the outside temp is cool enough for the fan to do the work alone) the temp will drop to below 200 and the fan will go off. There has only been one time where the secondary fan kicked on due to ECM command, and as expected the temperature dropped very quickly with both fans spinning.
Overall very glad I made this modification as it gives me more control, and eliminating the mech fan also eliminated a noticeable amount of drag on the serp belt.
Here is the final parts list for my installation
stock mechanical fan shroud
left-side 3rd or 4th generation Taurus fan (3.0L)
four 1/4" carriage bolts, lock nuts, and misc spacers
two-pin BMW fan switch (Four Seasons 36511, or NAPA ATM-1435033)
one relay
Last edited:

") had an electrical after run coolant pump which would circulate coolant through the engine, turbo and rad, with the fan running after the engine was shut down. It would do this until it reached a preset temp. Unfortunately the pumps on those Audi's are freakin expensive and used ones are generally very brittle due to their age and heat cycling.
had an electrical after run coolant pump which would circulate coolant through the engine, turbo and rad, with the fan running after the engine was shut down. It would do this until it reached a preset temp. Unfortunately the pumps on those Audi's are freakin expensive and used ones are generally very brittle due to their age and heat cycling.