I finished my install...
Running an OEM Toyota Corolla relay box through a BMW coolant switch so it's fully autonomous. I got the idea from a Toyota site, using a factory 4-Runner aux cooling fan relay box (uses slip brackets on the factory fuse box) I went with the Corolla because there were many more in the yard, and it housed 3 relays and a fuse assembly, not the 2 + fuse in the 4-Runner box... and the Corolla uses bolts to mount it.
The Corolla box has provision for 1x SPDT or DPST (5-pin Bosch style) and 2x SPST relays (just like a standard SPDT relay but without the center 87a blade). Toyota uses propitiatory SPST relays that have a large square plastic center "pin" to mate to the box. Other than that pin, the blades are in the same pattern as a standard Bosch unit. I chose to use the Toyota units because a handful tossed in the tool box at the JY cost me nothing. IF you would like to convert this box to use Bosch style in those positions, simply find yourself two more Corolla's, pull the 5-pin relay out, reach in with your needle-nosed pliers and pull out the yellow plastic spacer. Use these spacers in place of the propitiatory ones in your box. The two SPST slots are missing a provision for the center blade, so you would have to run the SPDT Bosch relay in a SPST format.... but they will fit, and will function.
I fabricated a small aluminum bracket which mounts the box to the two-hole tab between the XJ fuse/relay box and coolant overflow.
In the box below I have, from left to right... Bosch DPST actuating my HID Hella 500's, OEM Toyota SPST actuating my Taurus fan, spare OEM Toyota SPST (can be wired when I have something to wire to it), 30a fuse assembly which isolates both fan and light circuits. 12v power has been run directly to the (+) post on the front of the XJ fuse/relay box, with individual grounds run through ring terminals to factory grounding points.


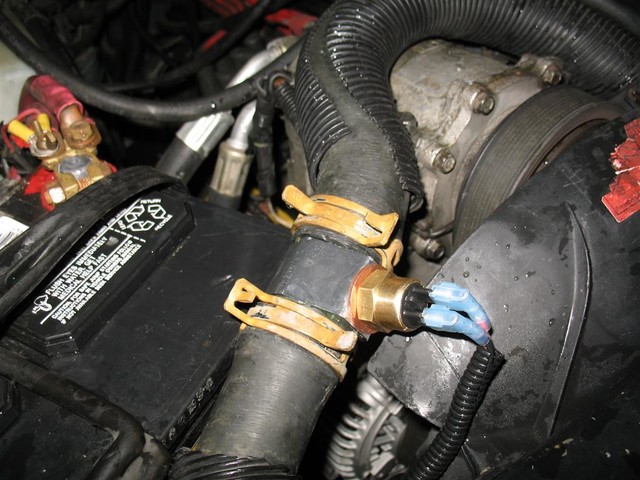
I took a 1/4FPT to 3/8MPT adapter, gigged it into my drill press, and ran a 1/2" bit through, just knocking the female threads out of it. I then ran my trusty 14x1.5 tap through the smoothed opening, and mounted my BMW switch there. Only the slightest amount of material was removed during the process, but I will keep an eye for cracks. There is 100% thread engagement on the temp switch, and I used a brass washer, not the aluminum that came with the sensor. I then used 3/8npt fittings from the hardware store to plumb it all into the coolant track. All junctions were sealed with T-tape, but I may adjust locations if this doesn't work well.

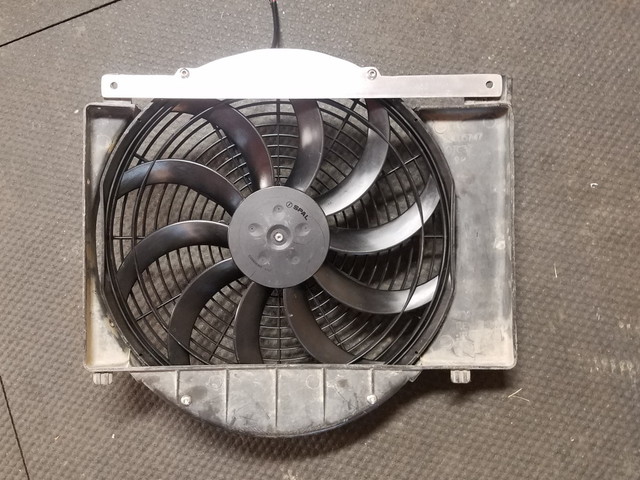
I found that by running a charge through both (+) leads on the fan allowed it to spin just a bit faster, so I ran 10ga wire to the fan, where it split to 2x14ga at the pigtail I took out of the donor car.
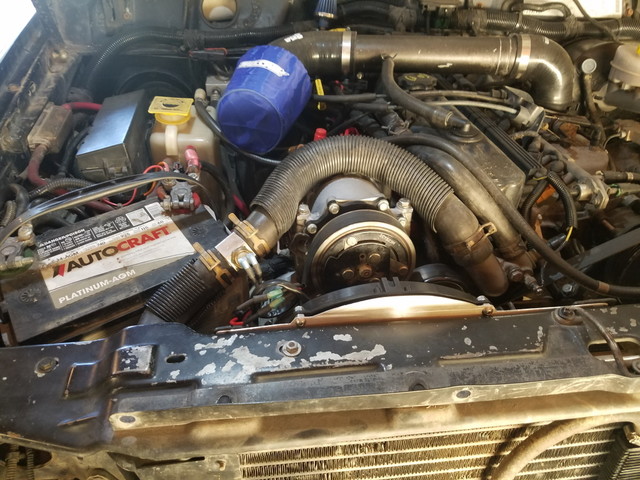
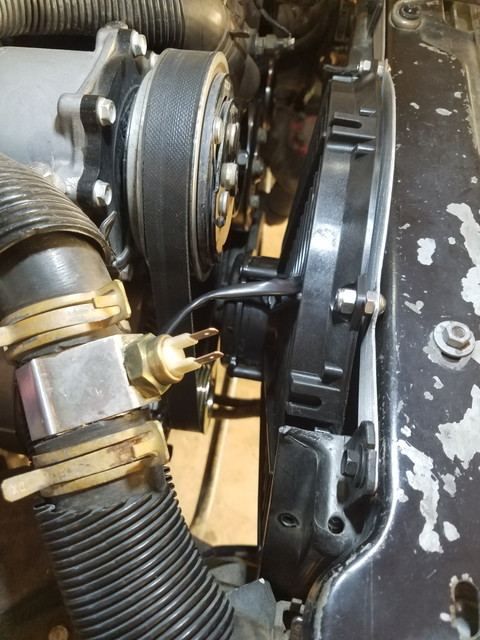
Here is the clearance with the YJ bracket. Since there is no longer the XJ cooling fan pully there, I have plenty of room with this install.
One word of advice...
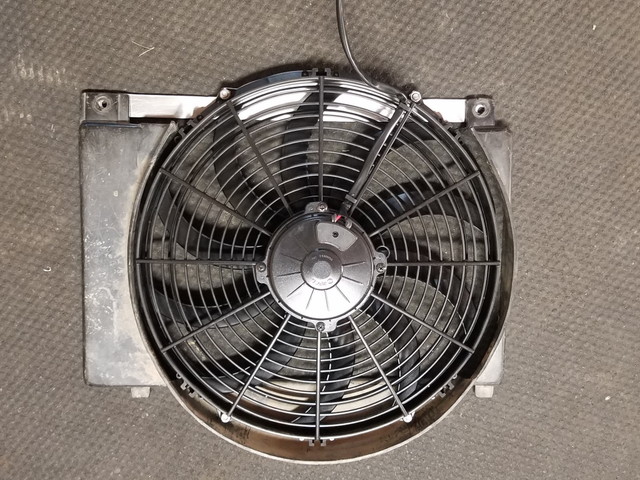
When locating your hole locations for the SS spacers, remember to leave excess room between the shroud and the fan itself. My first attempt caused rubbing, and I had to start from scratch.
Thanks again to the OP for the GREAT idea, I will be doing another set-up in the next few weeks on a friend's XJ.