• Welcome to the new NAXJA Forum! If your password does not work, please use "Forgot your password?" link on the log-in page. Please feel free to reach out to [email protected] if we can provide any assistance.

Pre-Production Sneak Peak at Boostwerks Comp Mount

Anak

Stranger
NAXJA Member
Note that this is not yet a production item. There will probably be some minor revisions to what you see here, but this probably very closely resembles the final design.

When I first bought my XJ I found this site and in reading through interesting threads I found LazyXJ’s hidden winch. That immediately went on my list of mods to eventually accomplish. Then I found Boostwerks’ Ultimate XJ Steering Brace and started trying to figure out how to blend the two ideas. Then in December 2014 the Comp Mount showed up on the Boostwerks website. I have been pestering Bryson ever since. Graciously, rather than getting a restraining order against me, he let me be one of the first guinea pigs to help him work out the final details. I have had this for several weeks now, and while I have not yet finalized my installation I have managed to prove that the Comp Mount fits as it should. There are still some details to be checked (most notably the sway bar) and the weather is interfering with progress, but that same weather is affording me the time to present a bit of a preview. For those who have been waiting, here is what is coming:

Bryson gave me a heads up in the fall that he was getting close to having the pre-production parts ready for me. That gave me time to do some hunting for a deal on a Warn M8000 winch. That is what the design is for. I have a Warn 9000XD, but when I had inquired early on in the process Bryson told me that was an unlikely fit on account of the larger size. Lamentably, no one had any Black Friday deals on an M8000, nor could I find anything leading up to Christmas.


Then Bryson contacted me to say the mount was pretty much ready to ship, and did I want it powder coated or bare? I opted for bare fully expecting I would need to grind and maybe re-weld something. Powder coating isn’t a particularly forgiving finish when it comes to modifications. Bryson also suggested I should go ahead and try the 9000XD as he had made some alterations from the original design and there was a chance the larger winch would fit. Cool.


A couple of days after Christmas the mount arrived. The Varmints were ecstatic to get a large box to play in. Again I ask, why do I spend money on them at Christmas? It could be saved to spend on the Jeep instead. And get more toys like these:
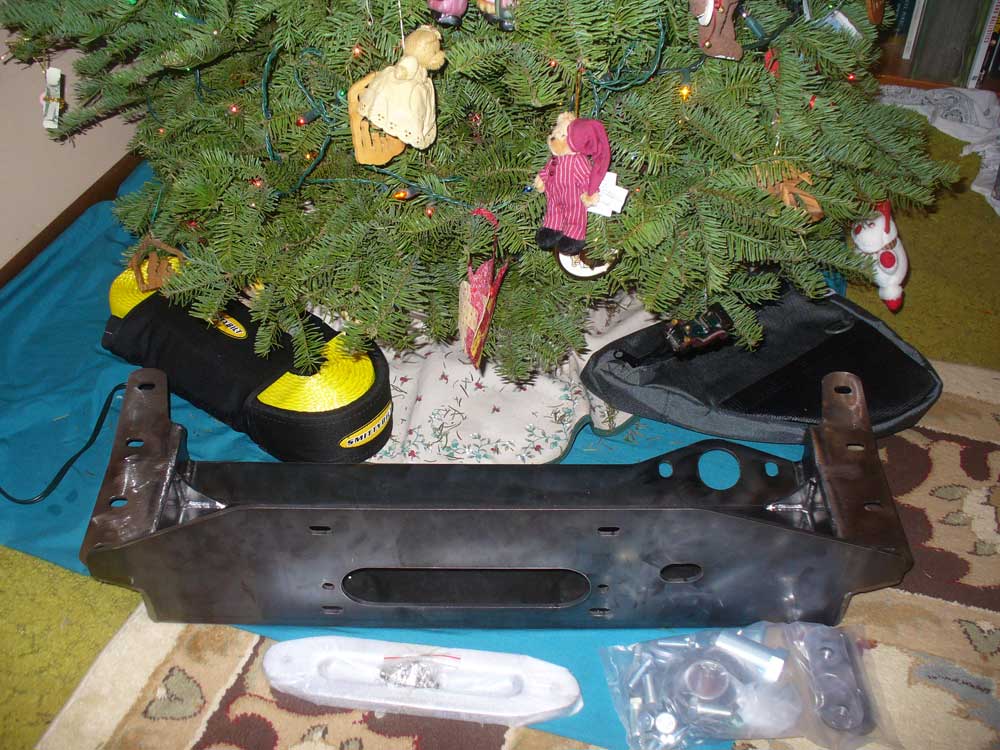


CMWU1OPT.jpg


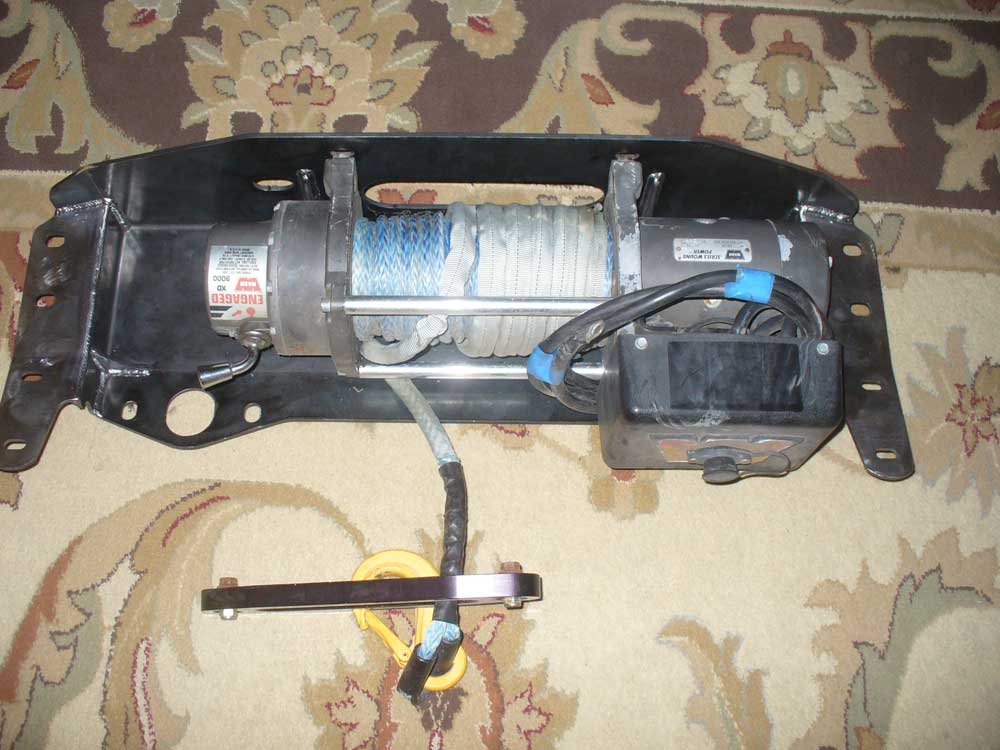
And I pulled out my winch to get a sense of how it would fit in the Comp Mount itself:

CMWU2OPT.jpg

It has to be shifted all the way to the right, but it looks like it could fit. Next is to see what kind of interference is offered by the vehicle.
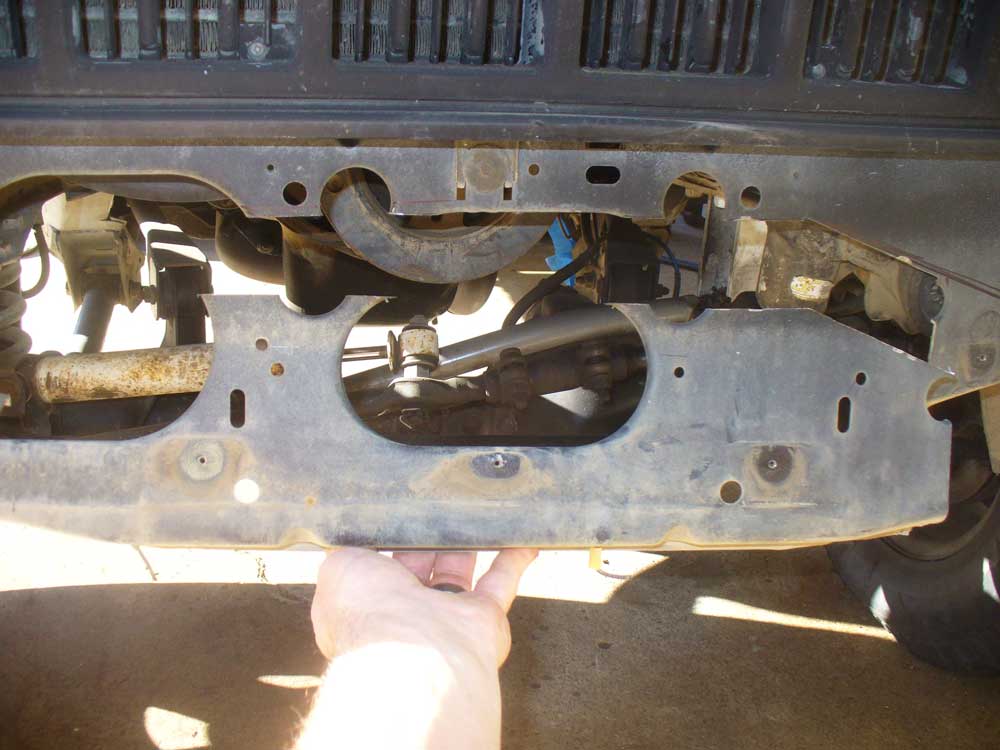
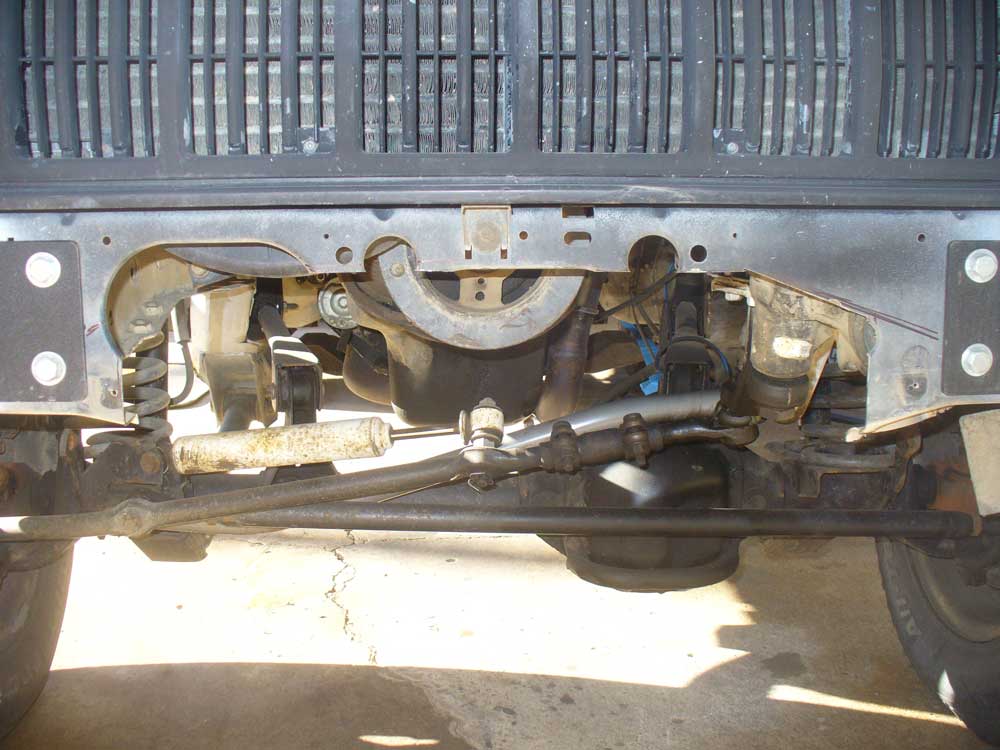
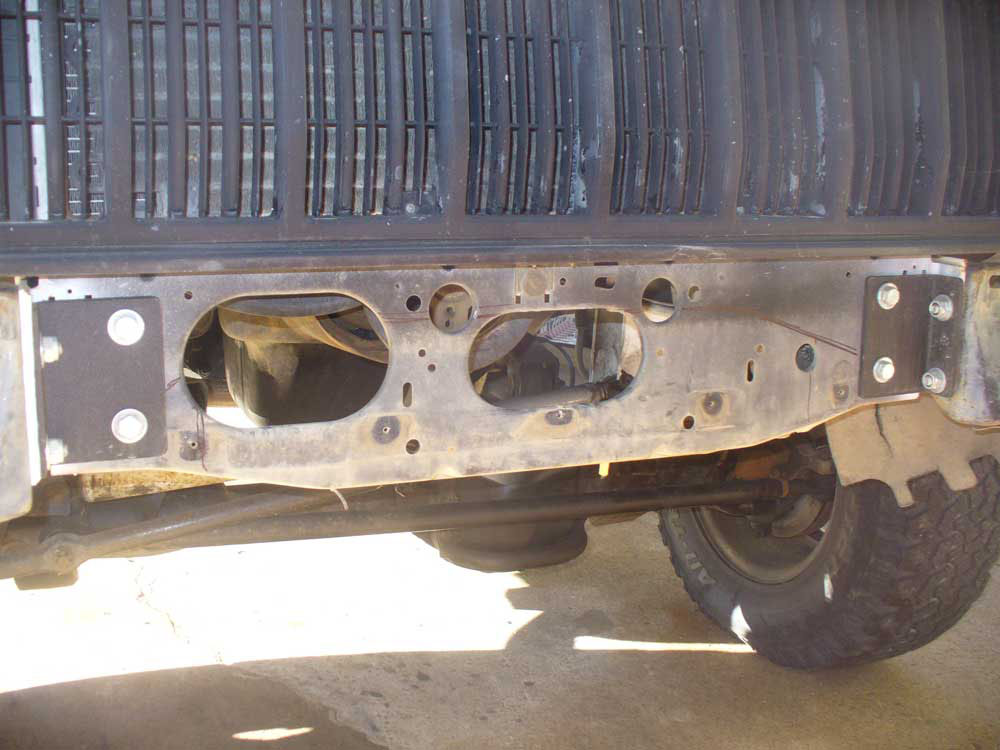
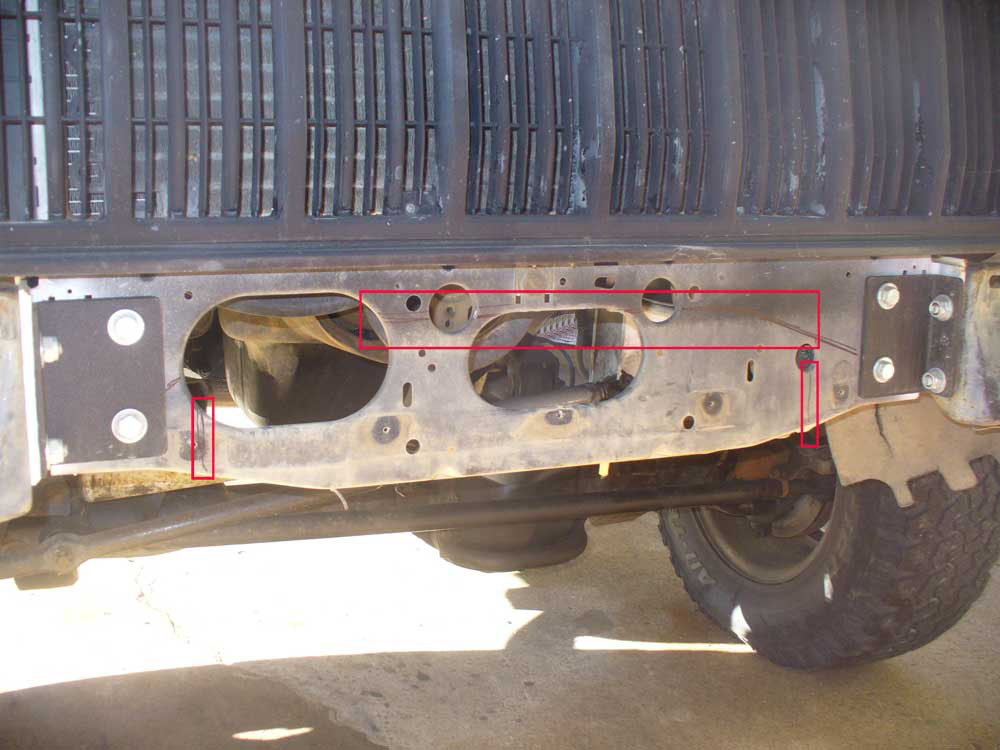
I pulled off the bumper and held the mount up against the radiator support to mark its perimeter with a Sharpie, then took a look at what I thought should be cut out. Because inside corners have a tendency to be stress risers I tried to incorporate as many of the factory holes as I could for the corners of the cuts.


Picture of the marks I made:
CMWU3OPT.jpg

Same picture, but with the intended cuts indicated:
CMWU4OPT.jpg

The cuts made:

CMWU5OPT.jpg

The new opening:

CMWU6OPT.jpg

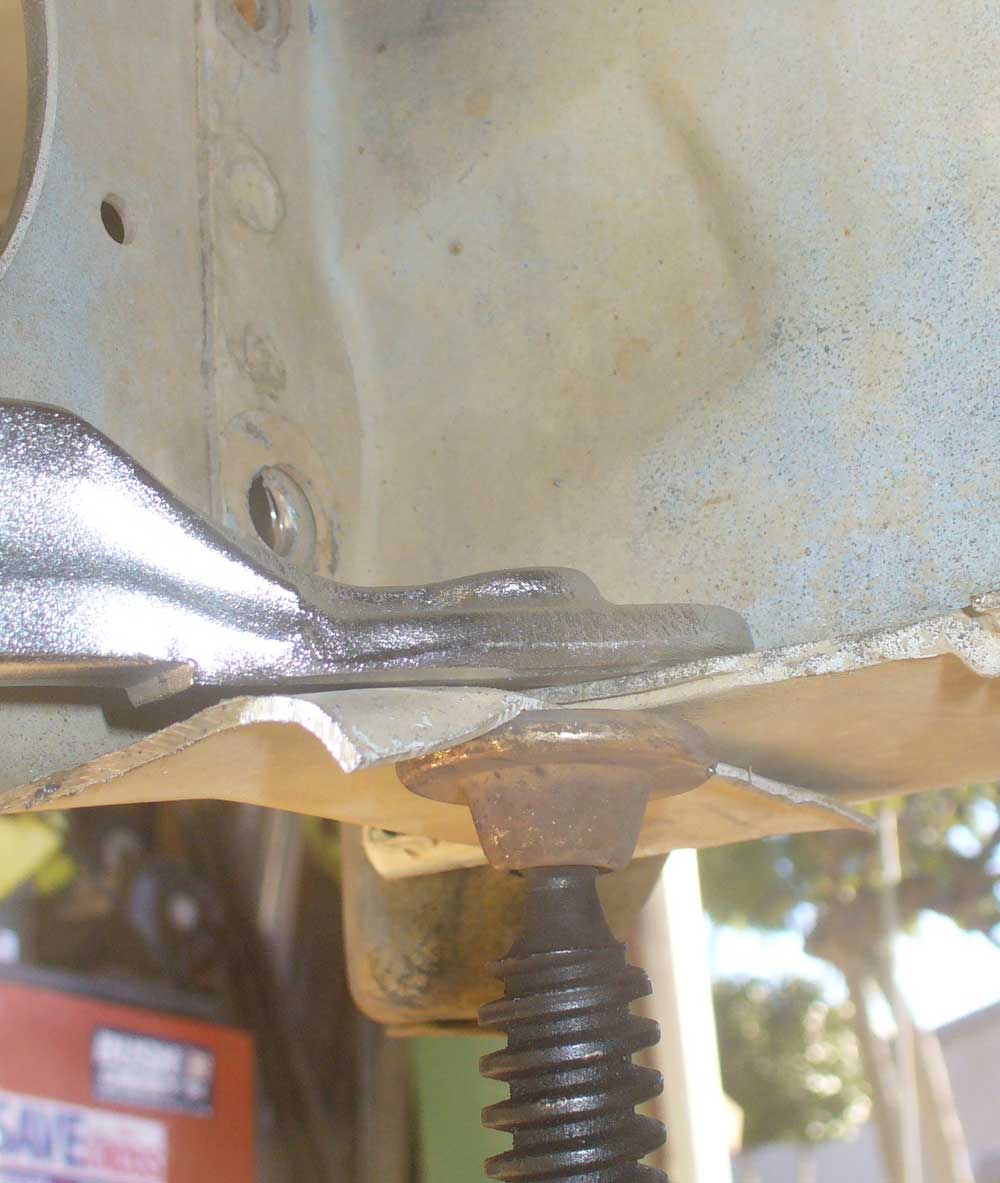
Next, some areas need to be flattened out for the mount to sit flush against the rails. The instructions for the Comp Mount haven’t been written, but Bryson sent me a copy of the instructions for the Ultimate Steering Brace. Those call for flattening the seams with a hammer. I found a hammer would get me two thirds of the way, but the last third would just bounce back. I had better luck finishing it off with a clamp.
CMWU7OPT.jpg

On the driver’s side I had a big old glob of weld booger than a previous owner had applied to said seam. That had to be ground down:
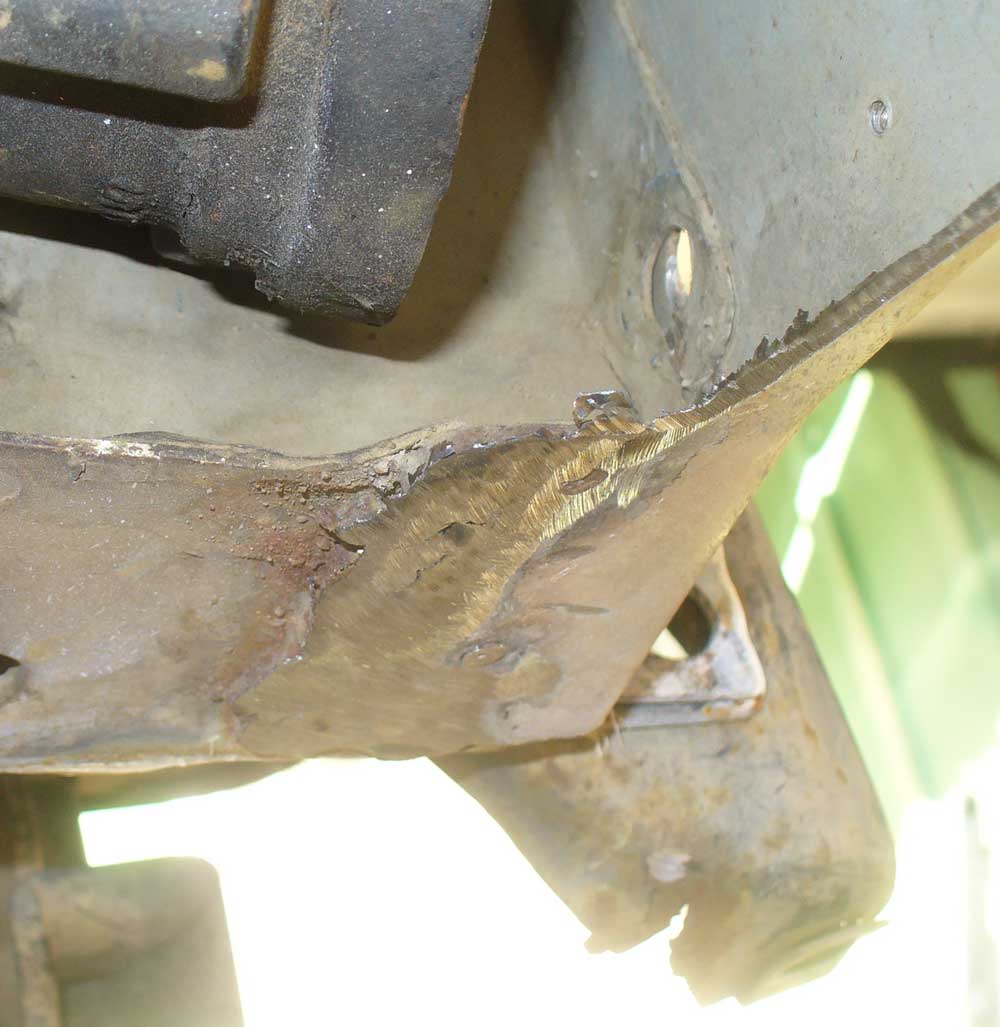
CMWU8OPT.jpg

And the factory left behind a nice collection of weld boogers on the passenger side. These had to be ground down too:
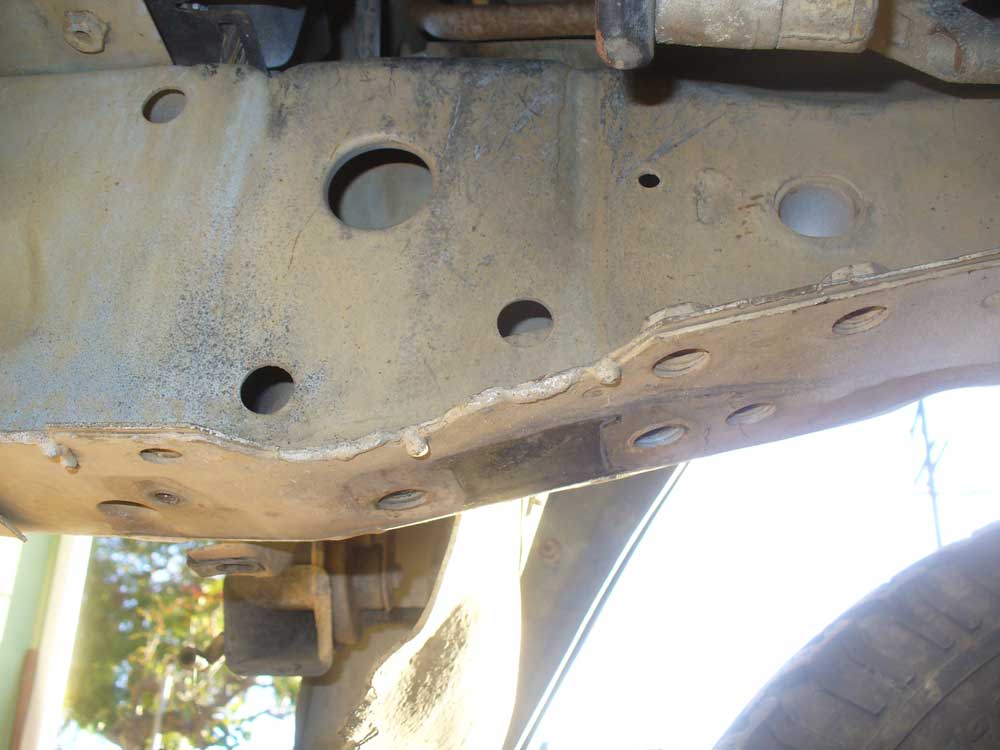
CMWU9OPT.jpg

And I was able to make a first trial fit (note: no winch and no sector shaft support bearing):
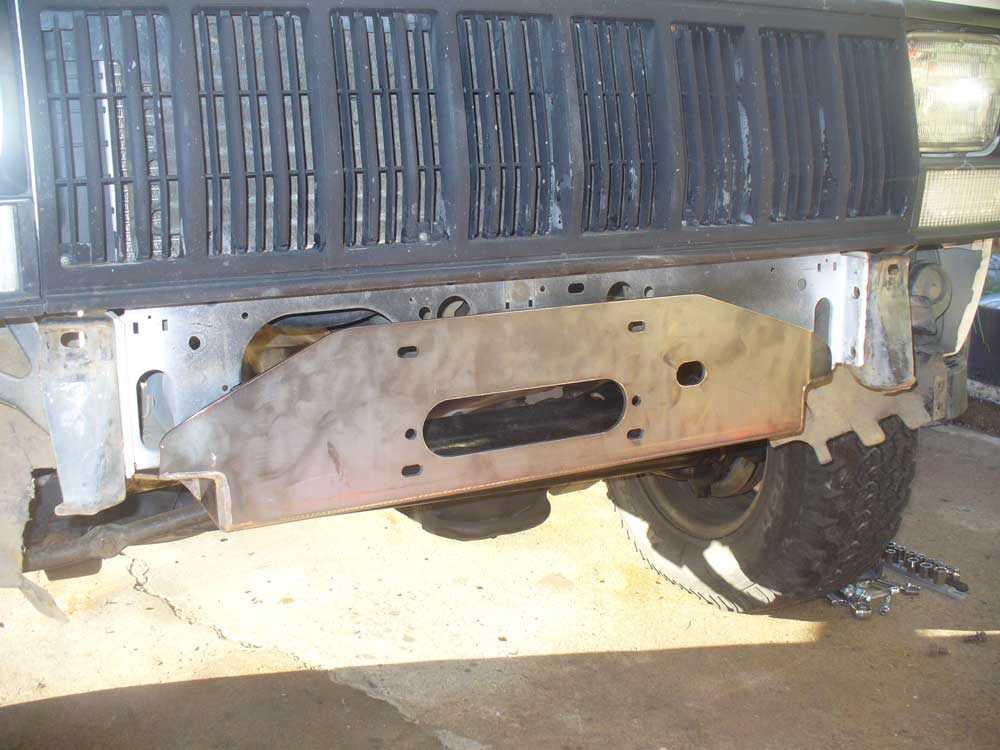
CMWU10OPT.jpg

That fit told me that I needed to clean up the line of this flange if I wanted to have any hope of fitting my too-large winch in here:
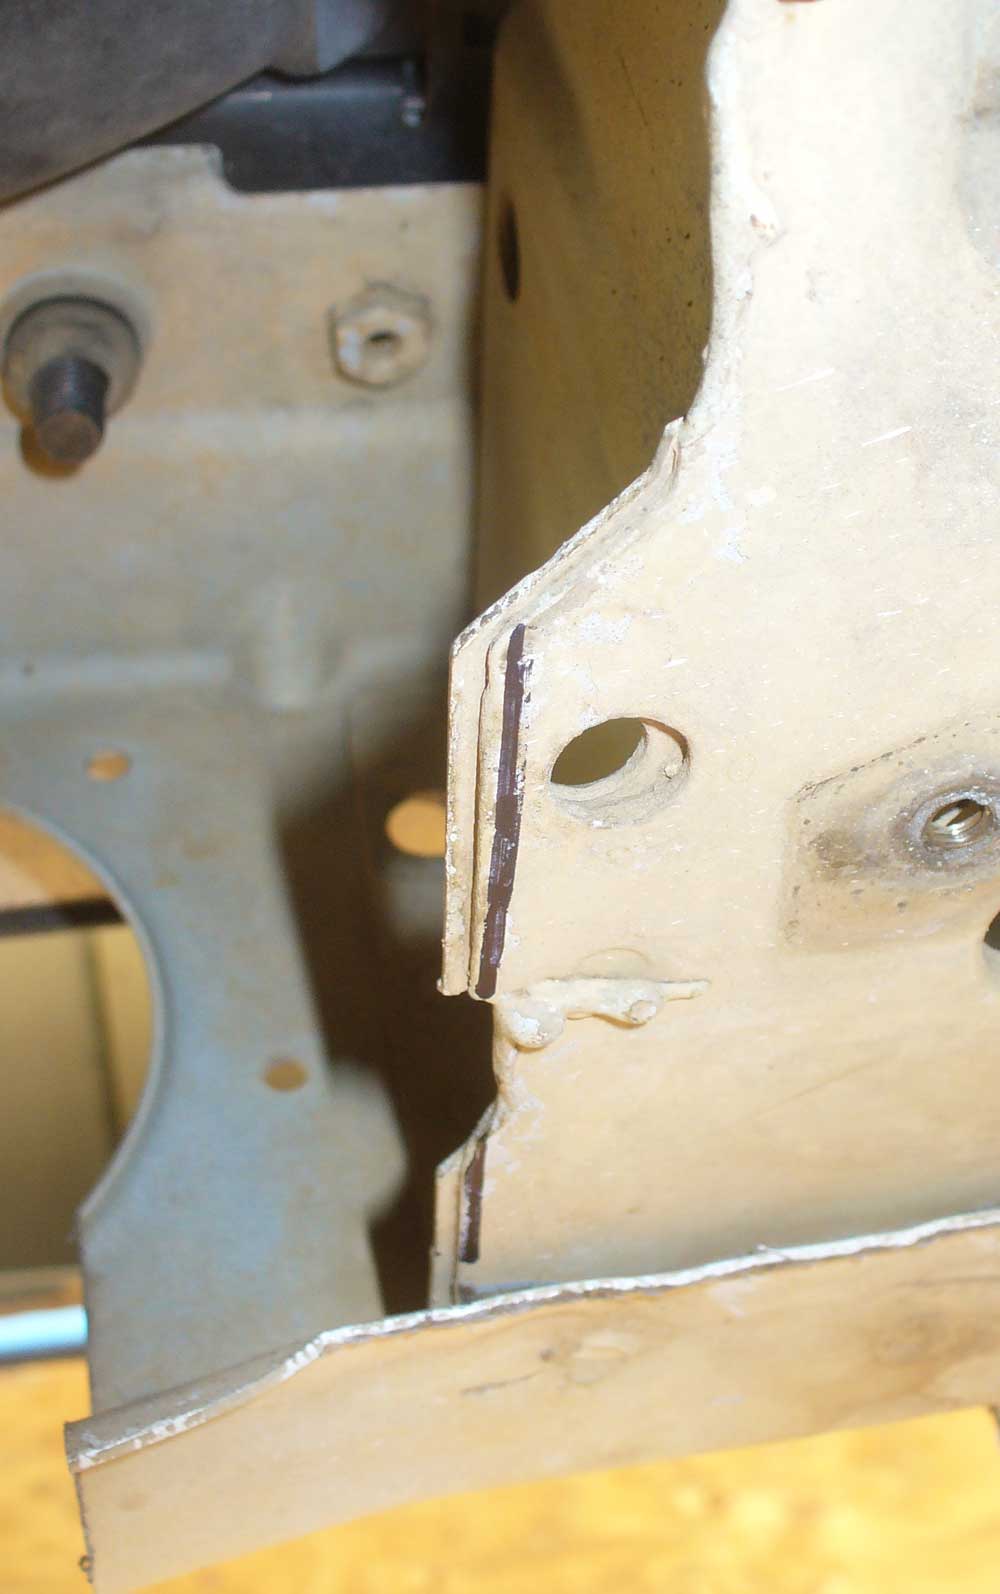
CMWU11OPT.jpg

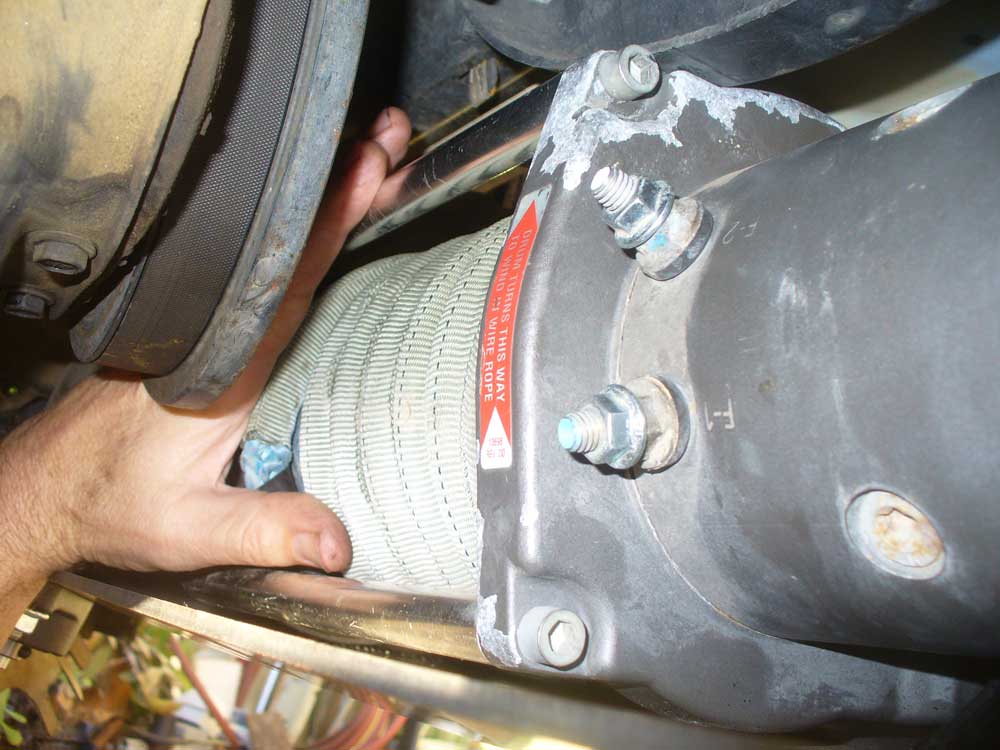
Next step is to mount the winch in the Comp Mount. I knew I needed to rotate the gear box 180 degrees. Warn has a brief note about this very thing right here:


Link: https://www.warn.com/blog/2011/09/2..._winch_end_housing_to_fit_an_arb_bumper.shtml


And because links seem to go dead over time, the text of that reads as follows:
To make the clutch handle easily accessible, stand the winch up on end
so the housing is straight up in the air. Next, remove the 10 screws
from the end housing then you can lift the winch up about a 1/4" and
rotate it every two holes to the desired position. Reinstall the screws
and you are done.
What they don’t bother to tell you is that you are likely to need a new gasket if you do this:

CMWU12OPT.jpg

The rotation was made for the sake of progress and new gaskets were ordered so that detail could be revisited properly before the final install.
 
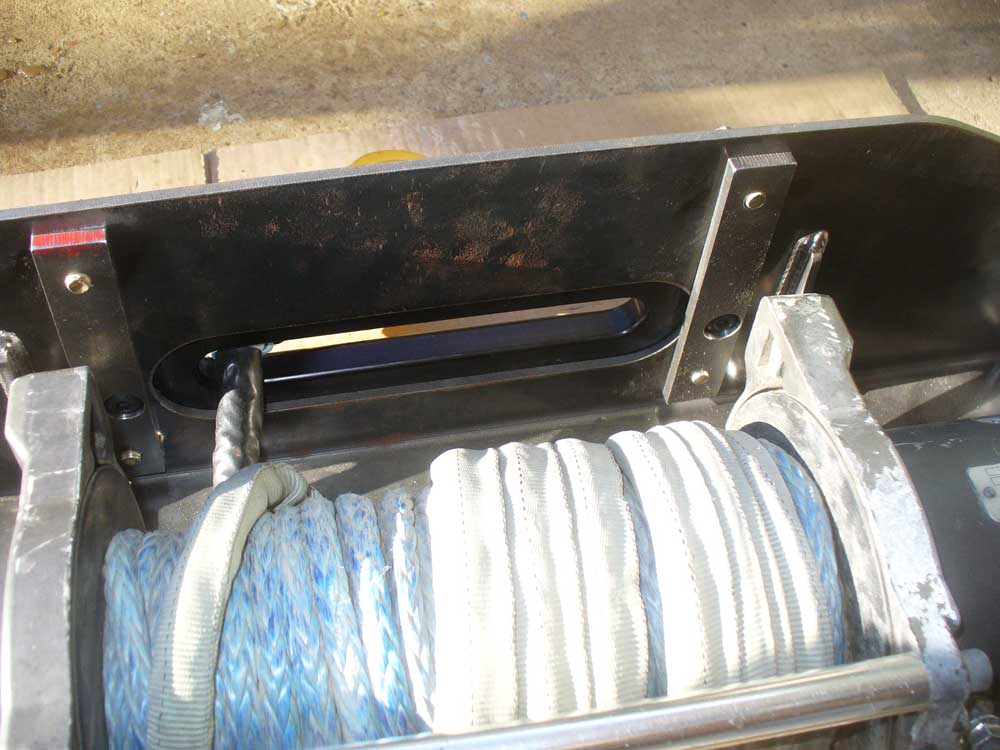
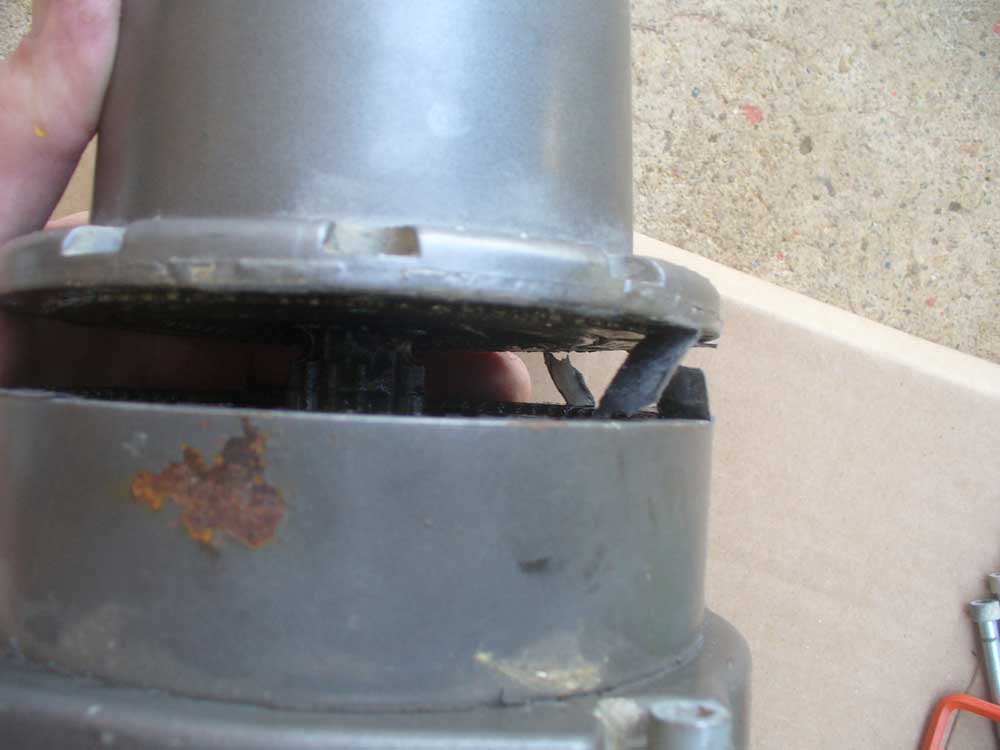
I then was able to attempt the mounting of the winch in the Comp Mount. I thought I could feed the engagement lever through the hole and then line things up, but it would not play nicely. I finally removed it, got things aligned and bolts started and then tried to reinstall it. No luck that way either. This is a detail I am still working on. My goal is to have it accessible through the bumper. When it came to bolting everything up I also had some issues with the gear box interfering with one of the interior gussets, and there was no clearance for the bolts for the fairlead. I initially attributed these problems to my choice of winch, but later Bryson informed me that he forgot to include the spacers that are needed. Production units should come with these. At any rate, I was able to get things assembled well enough to make another test fit:

CMWU13OPT.jpg


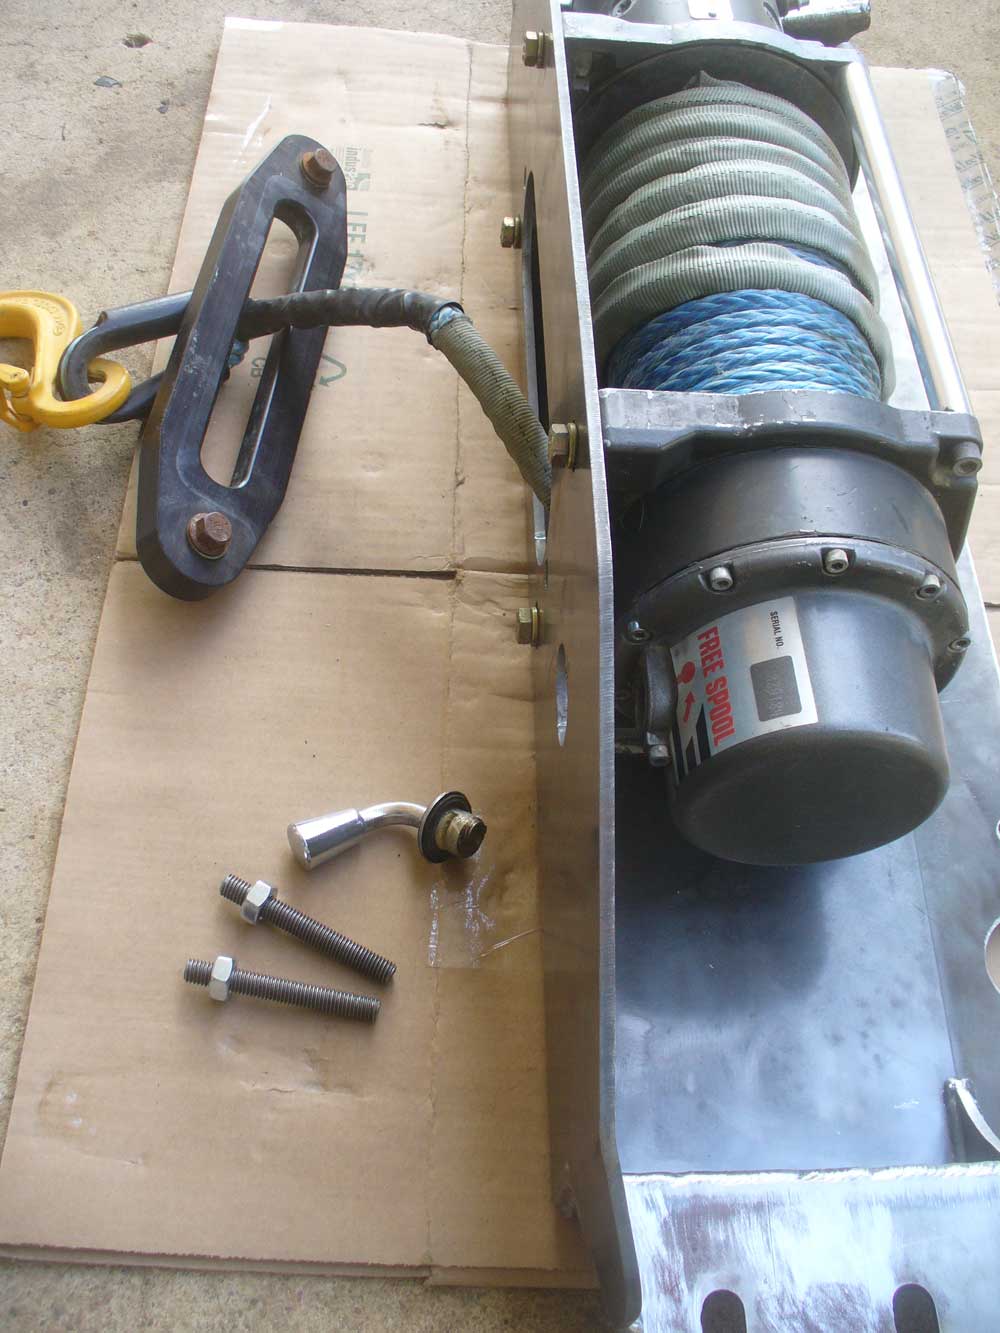
Note the two pieces of allthread. Those are an assembly aid. At this point I was trying them using the sway bar threads. I have since refined my methods and am using the size of allthread that matches the plates that go in the frame horns. More on this later, but keep it in mind as a very helpful aid.

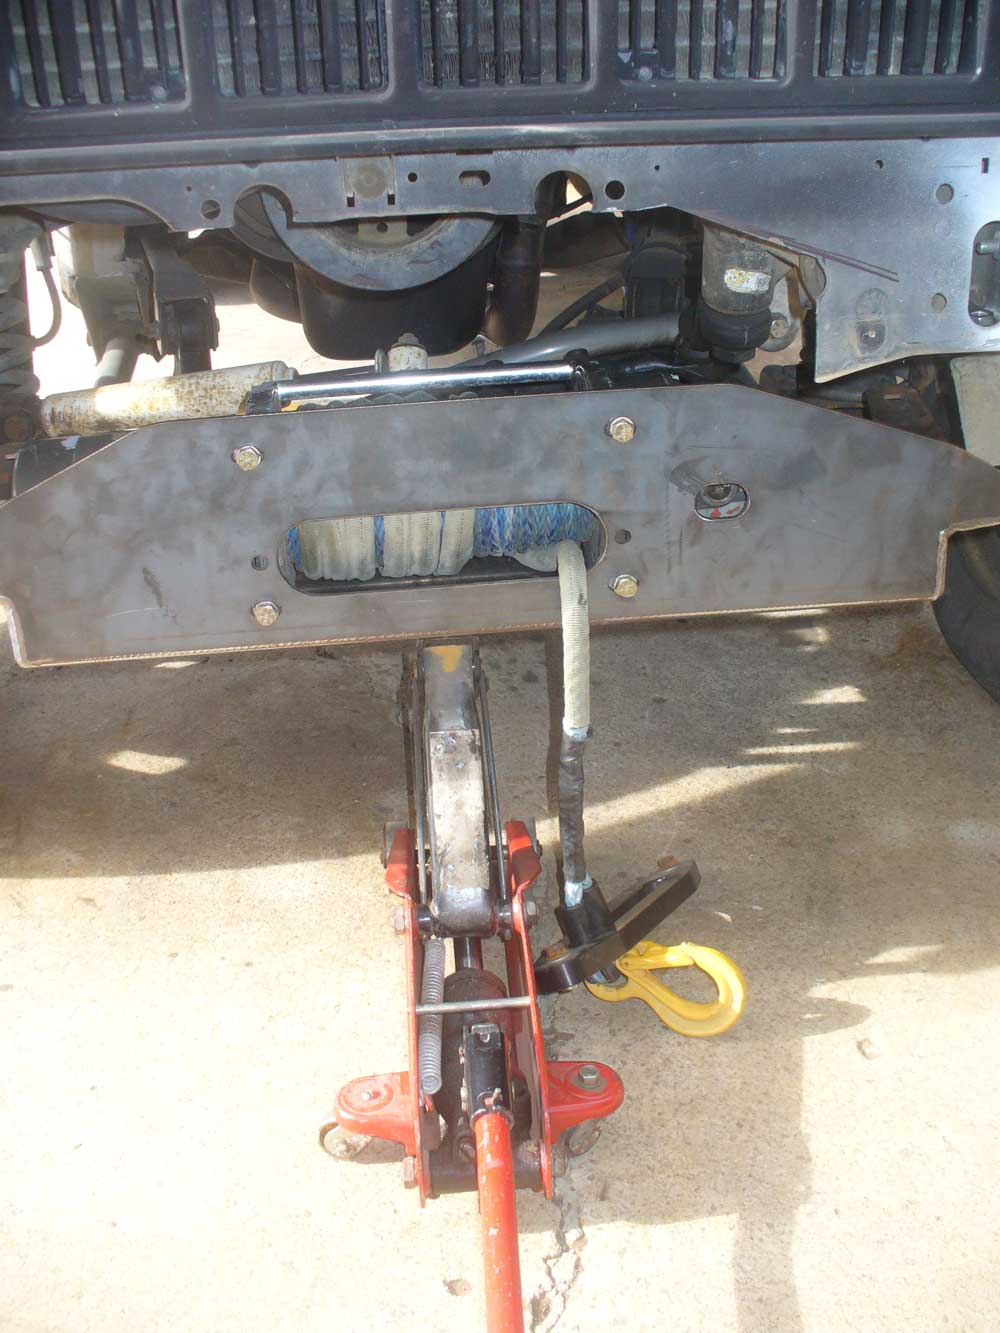
Getting this unit into place was something I knew would be a challenge. I had asked Bryson about this and he told me he highly recommended a jack, such a transmission jack, and that he liked to have killed himself the first time he tried this. I don’t have a working transmission jack (I have a dead one, but that is another project in and of itself). I didn’t have high hopes for this, but I tried it anyways:

CMWU14OPT.jpg

Yep. That is as high as that jack goes. And I am only running about 3” of lift and 235/75r15s. It is going to take a lot of jack for some folks’ rigs. A two post lift and a stand-up transmission jack would be the cats meow. I have neither of those. So bench press it was. I employed a Varmint for starting the nuts and bolts while I held the assembly in place. It wasn’t too bad getting it up, but keeping it there was another matter. Especially with young hands who have neither the experience nor the strength for the task. But we got it done. And no one died. However, I found a better way when removing the unit. More on that later.

Here are some pics of how it fit:

CMWU15OPT.jpg

Note the Sharpie marks on the shroud. Bryson had warned me that I might need to trim the shroud, particularly given my choice of winch. This may not be the case if you are using an M8000. I can bolt things in place, but the winch is definitely pushing against the shroud. I doubt the interference will be good for the plastic. The marks show where I need to cut.


Here you can see how close I am cutting it on the passenger side. This fits, but barely.

CMWU16OPT.jpg


Here is the fit on the steering gearbox side:

CMWU17OPT.jpg

And another, slightly different view of the same:

CMWU18OPT.jpg


And here is clearance to the dampener:

CMWU19OPT.jpg


And the same, showing a bit of the steering:

CMWU20OPT.jpg

When it came to removing this I simply sat down on my creeper in front of the Jeep and put my knees against the bottom of the winch mount, pulled the bolts and lowered it down using my legs. That was a piece of cake, and the reverse works well too. Forget the bench press method. Those with higher lifts or shorter legs may want a rolling stool. Play around with options and find something that works for your combination.

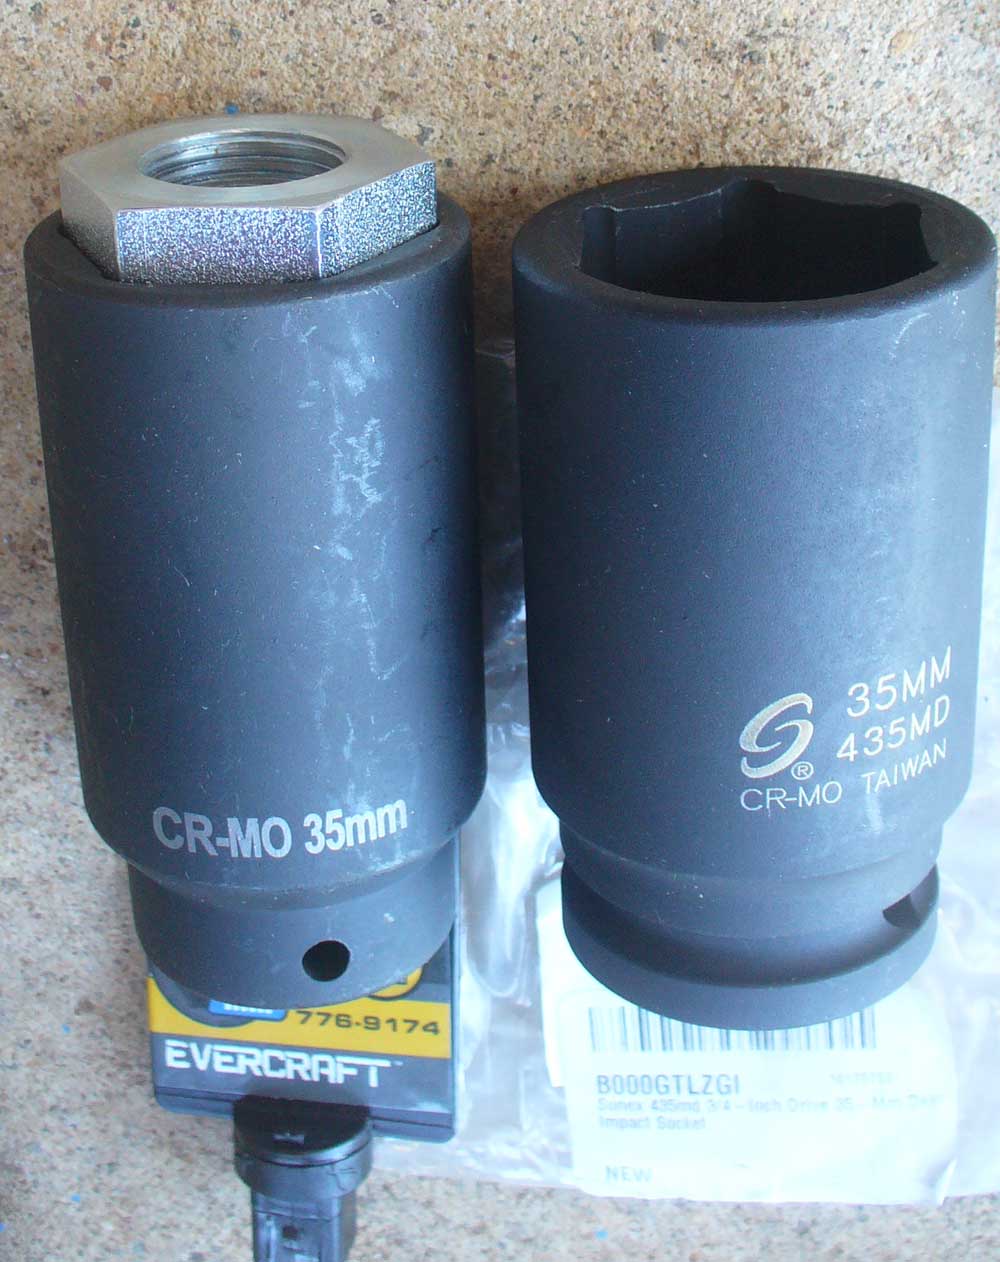
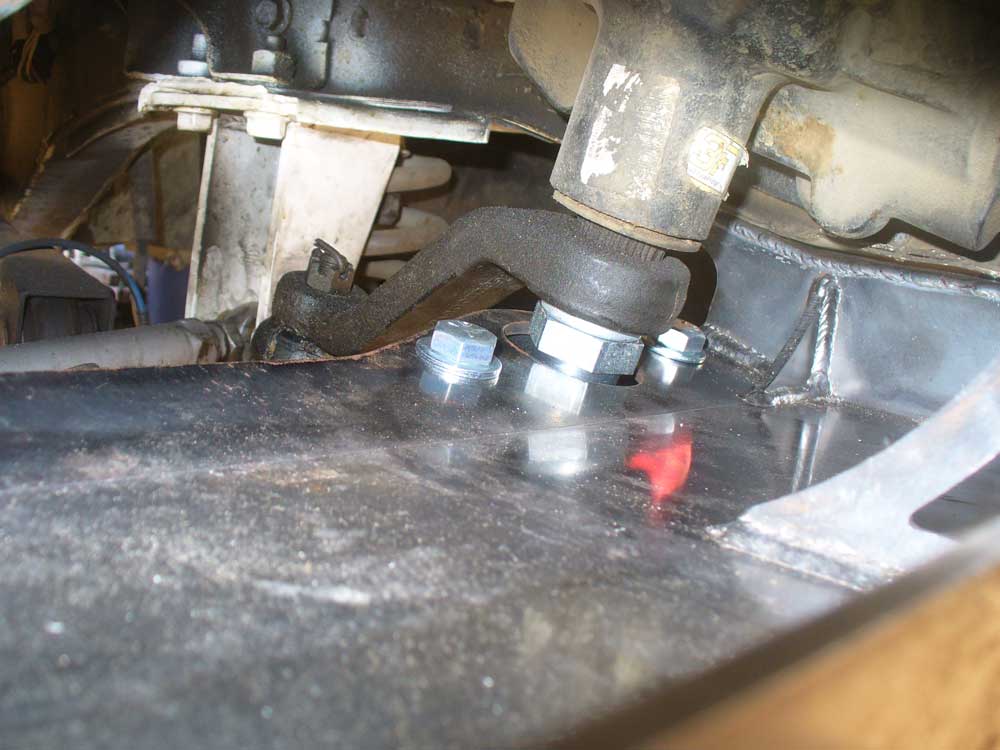
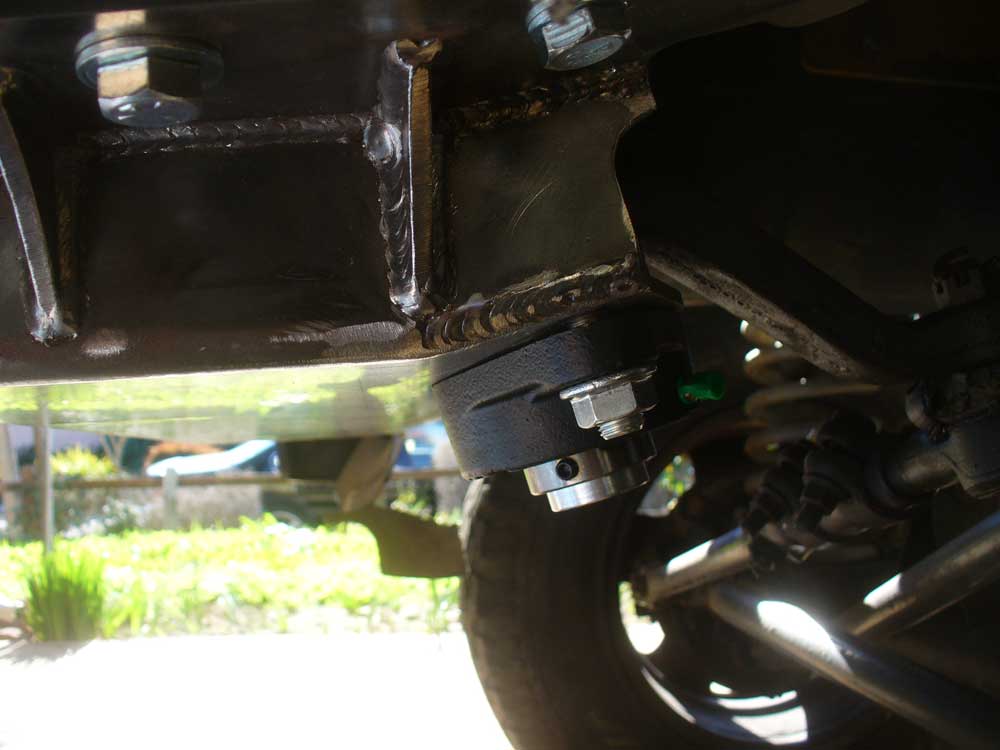
Now it was time to address the sector shaft support bearing. Instructions call for a 1 3/8” and a 1 5/16” deep well socket. The 1 3/8” is for the new, extended sector shaft nut and the 1 5/16” is for the old nut. On mine I certainly did not need a deep well socket for the original nut. A standard socket would have been fine. Check yours before you order anything. The socket for the new nut is another matter entirely. Deep well isn’t deep enough. What you need is extra deep, if you can find it.


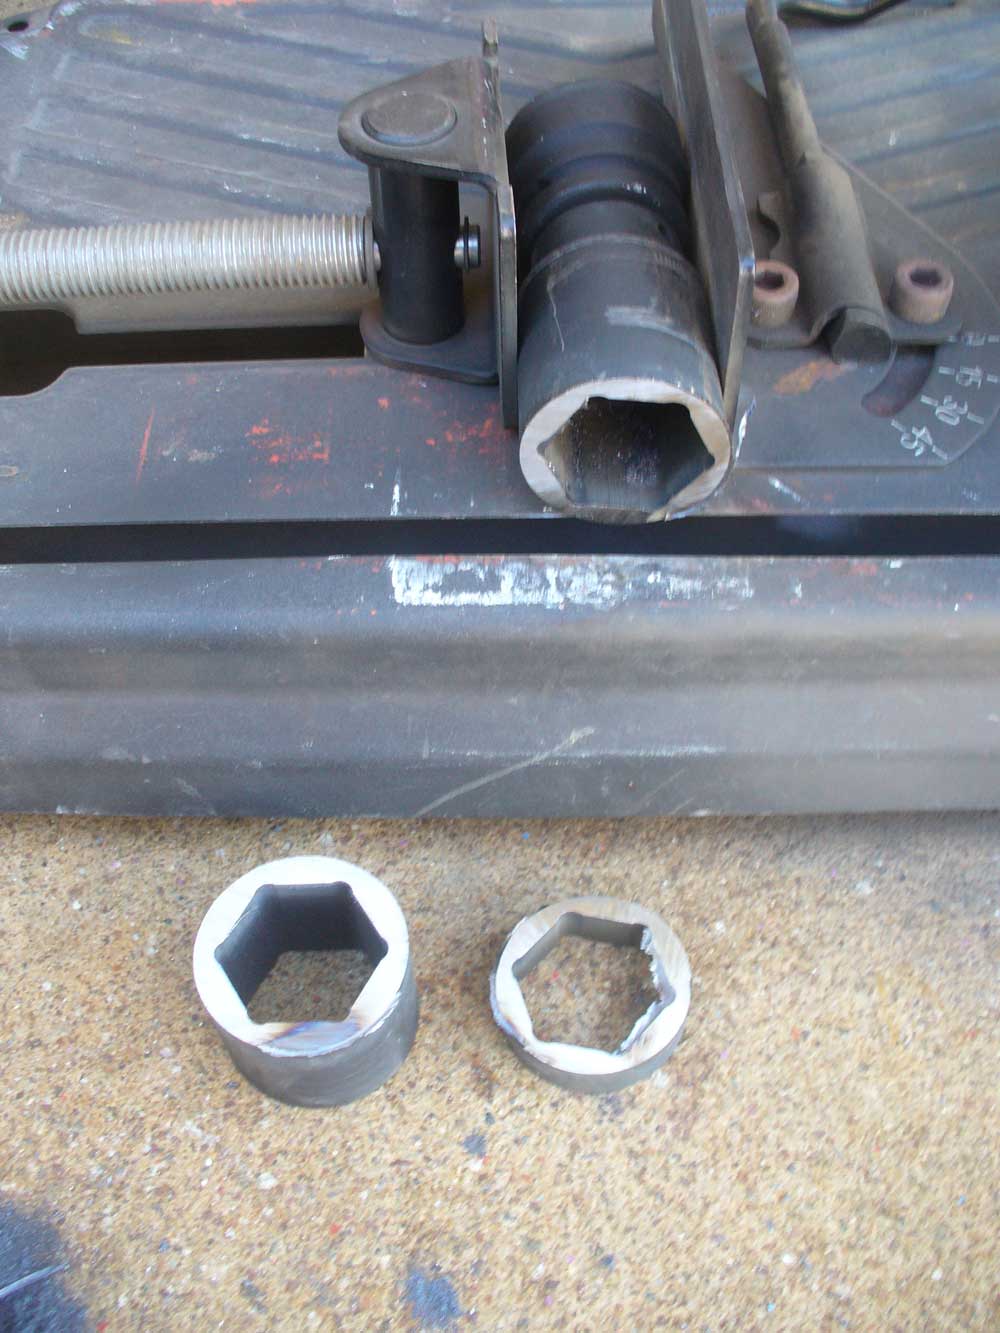
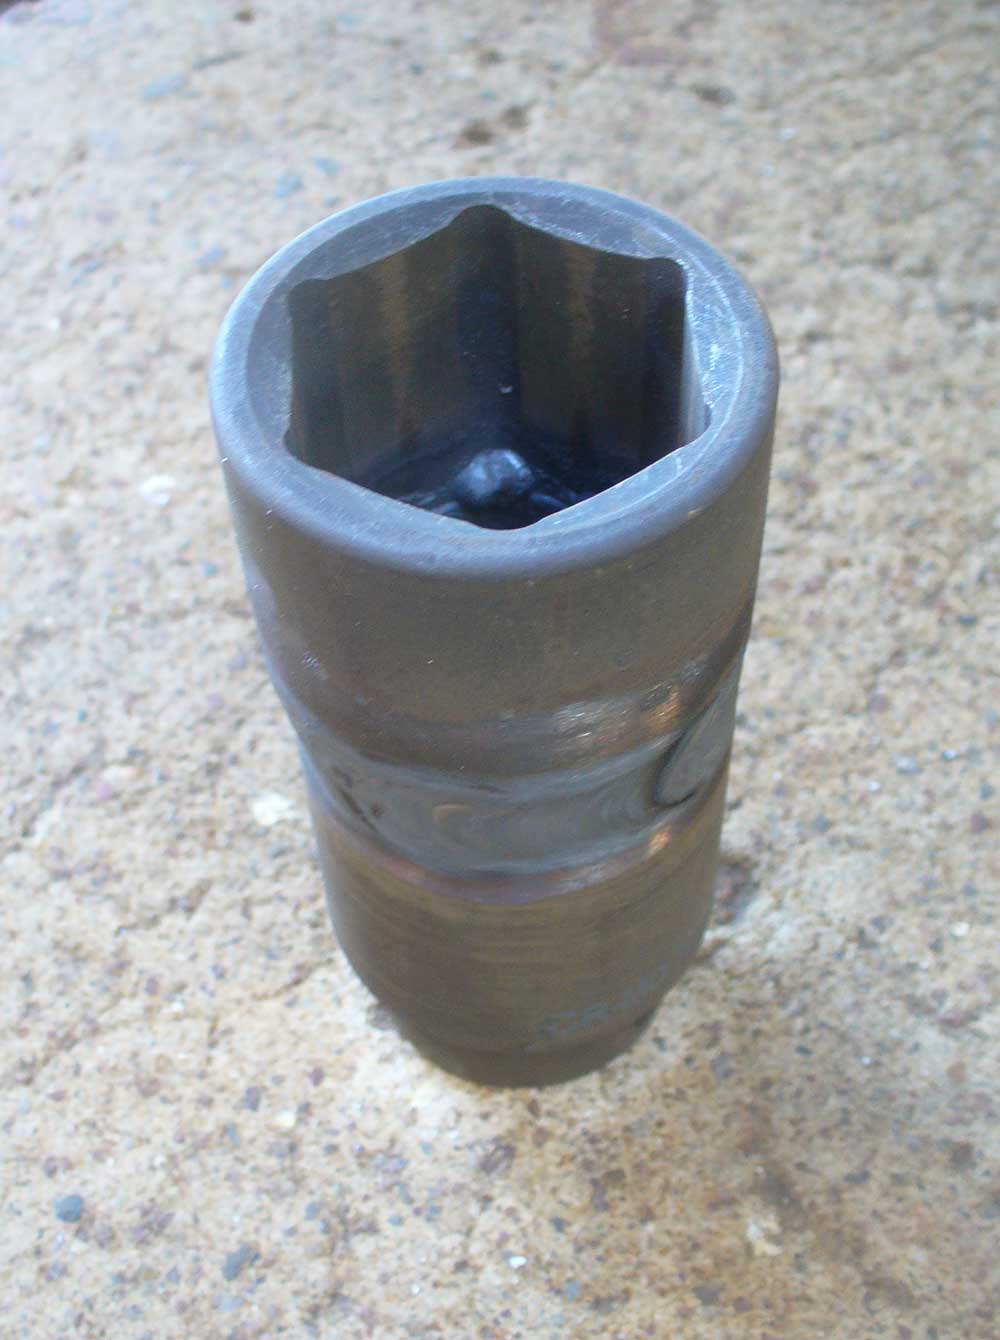
When I tried to order my sockets the 1 3/8” was out of stock, so I opted for 35 mm. It is pretty close. Not perfect, but at that size it will do. When it came in I found it too short, so I tried to get a longer one at Napa. No luck on the length, but I will say that Napa’s pricing was better than Amazon’s. I got a second socket and then proceeded to make my own extra deep socket.

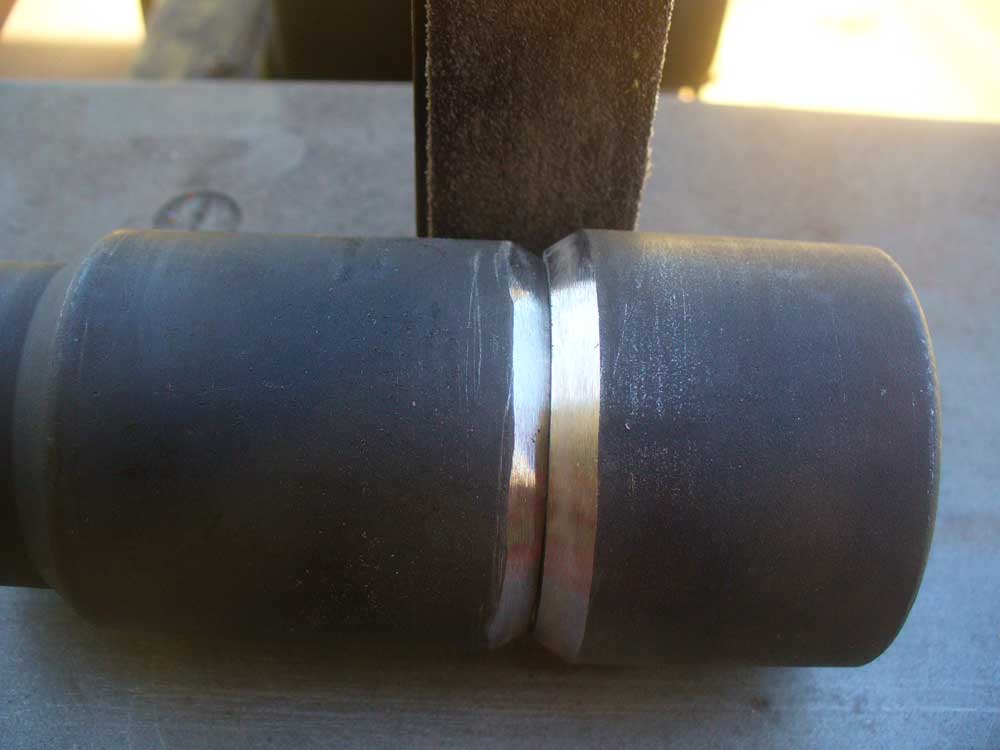
Here is the challenge:

CMWU21OPT.jpg

I decided to trim both in order to get the joint away from the contact area:

CMWU22OPT.jpg


Beveled:

CMWU23OPT.jpg


Welded:

CMWU24OPT.jpg


Final torque is probably a subject for some personal consideration. Instructions call for 180 ft/lbs (factory spec) with anti-seize (I don’t think the factory calls for that, but I do like something on my threads). If you hunt down the tech specs for Permatex they say to “Reassemble parts using normal torque values.” Personally, I am not so sure about that. From my experience elsewhere, the marketing folks will say just about anything in order to sell a product, regardless of outcome. Here would be the extreme view going the opposite direction: http://benmlee.com/4runner/threads/threads.htm


And this is probably the reasonable compromise position: http://www.garagejournal.com/forum/archive/index.php/t-226077.html

I am thinking this rule sounds like the path to take: “Using Never Seize versus dry uncoated steel, multiply the specified torque by 0.65.”

But that is a personal decision. From a “follow the rules so the lawyers don’t take your arse” perspective you may be best off following the directions.
 
That aside, back to the Comp Mount.

I had observed that my sector shaft did not exactly line up with the opening for it. Bryson suggested I loosen up the bolts for the steering gear box and try moving it. That did work. With some leverage from a pry bar, like this:

CMWU25OPT.jpg

And even at that, it only barely cleared. I think this is one of the changes that will be made in the production units, affording a little more room for adjustment here.

CMWU26OPT.jpg

And here is a view of how it clears on the inside (taken through the opening for the fairlead):

CMWU27OPT.jpg

And a view from the outside:

CMWU28OPT.jpg

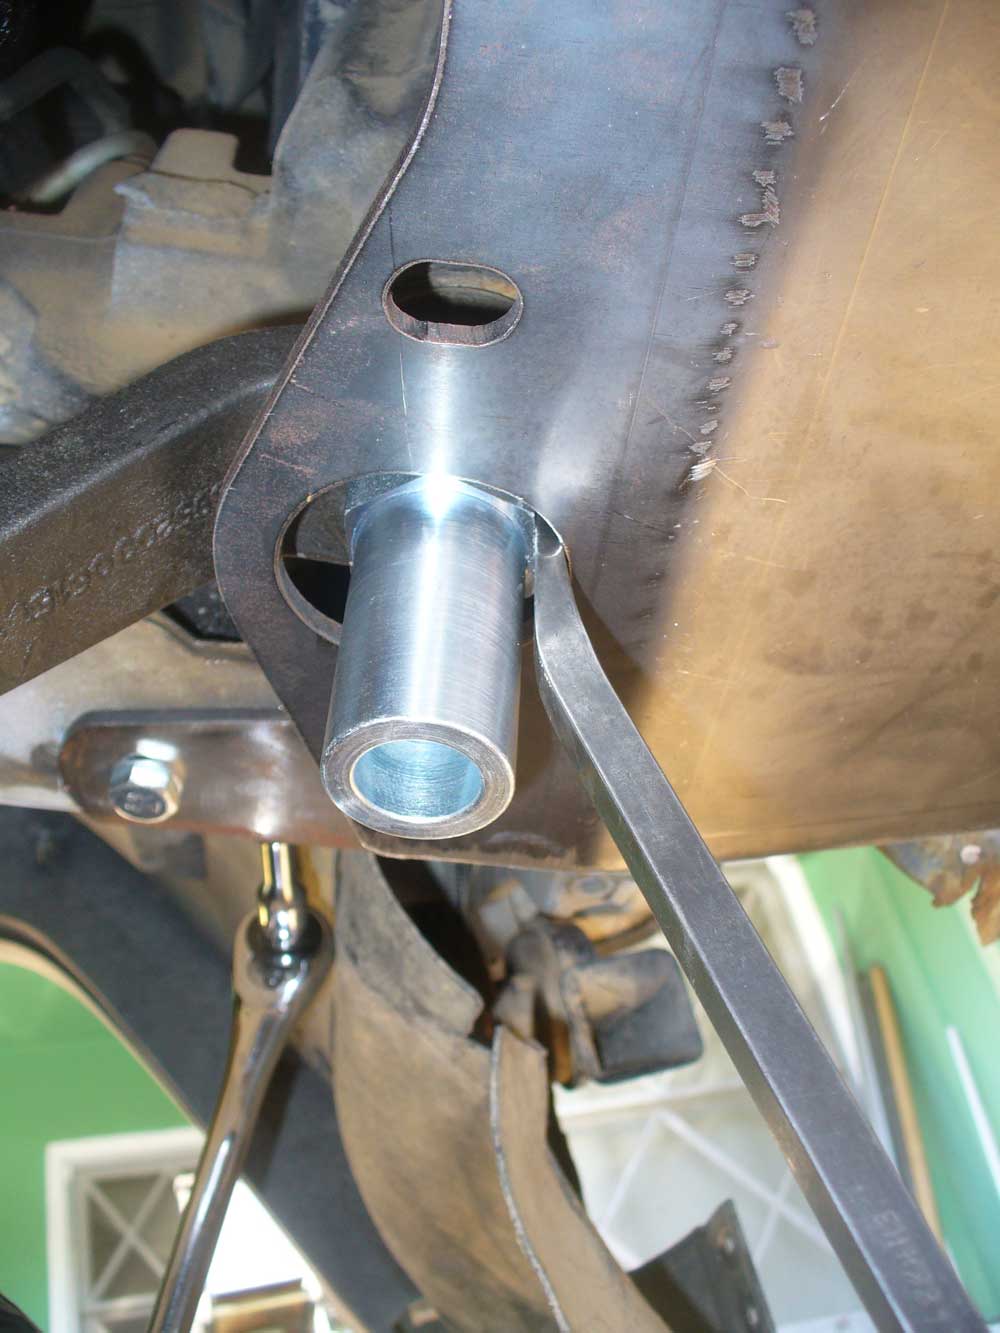
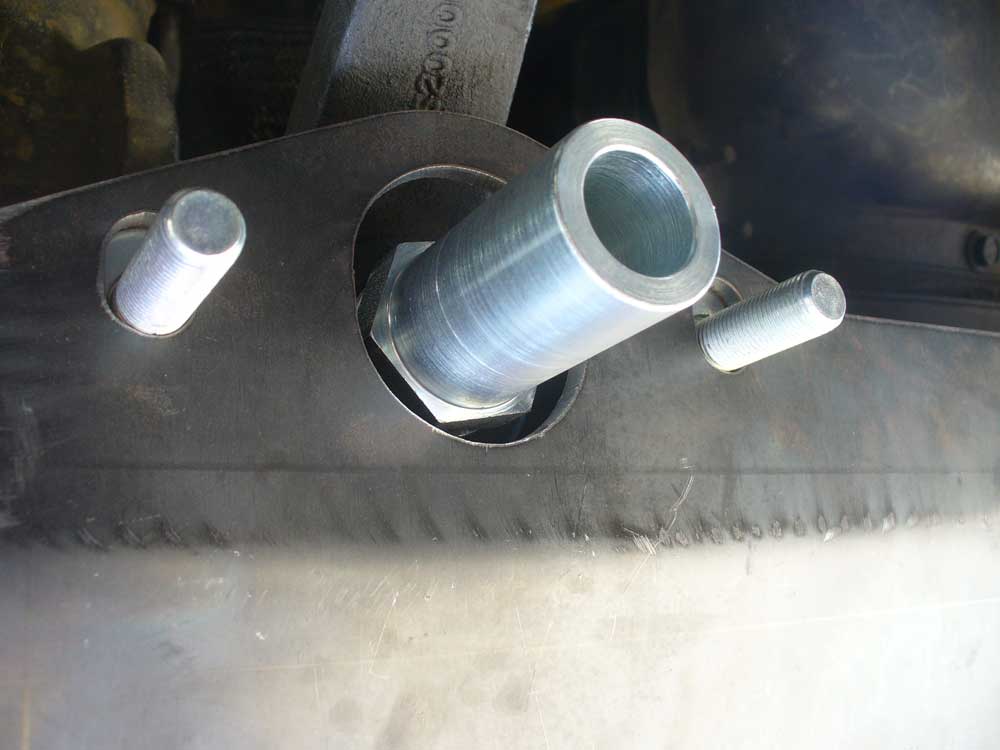
Now I needed to try to get everything all together all at once. I made some spacers to solve the problems of mounting both the winch and the fairlead (I expect production units to come with spacers, not necessarily identical to what I did, but effectively the same thing):

CMWU30OPT.jpg

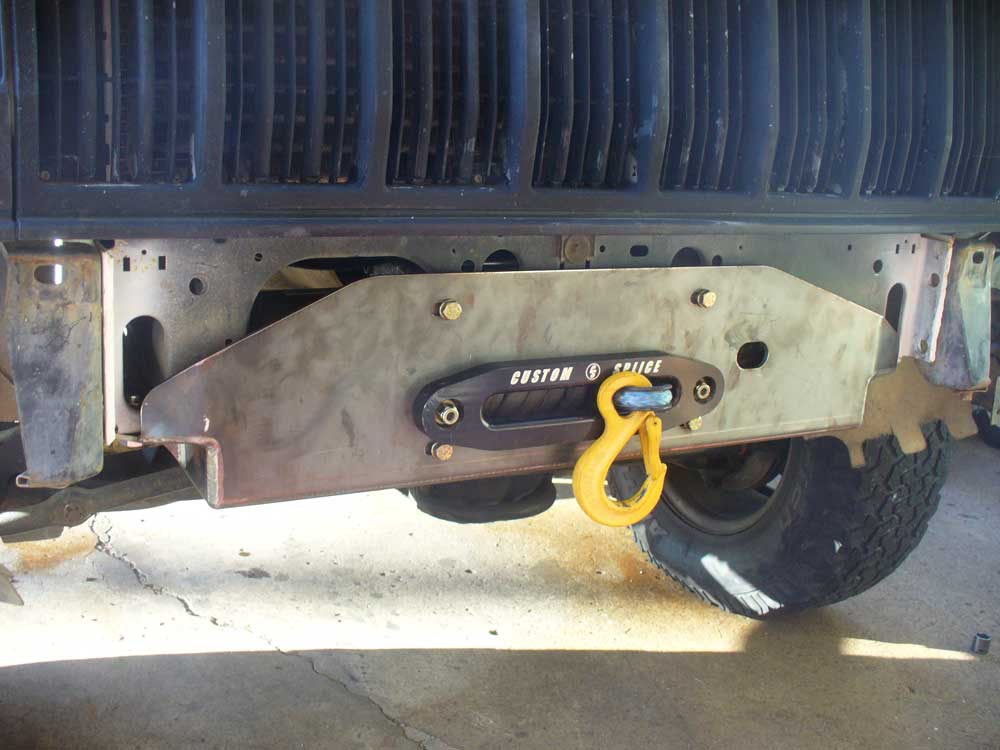
And here it is, all together:

CMWU31OPT.jpg

With my hand in place to give some sense of clearance:

CMWU32OPT.jpg

A side view, looks like a good skid plate to boot:

CMWU33OPT.jpg

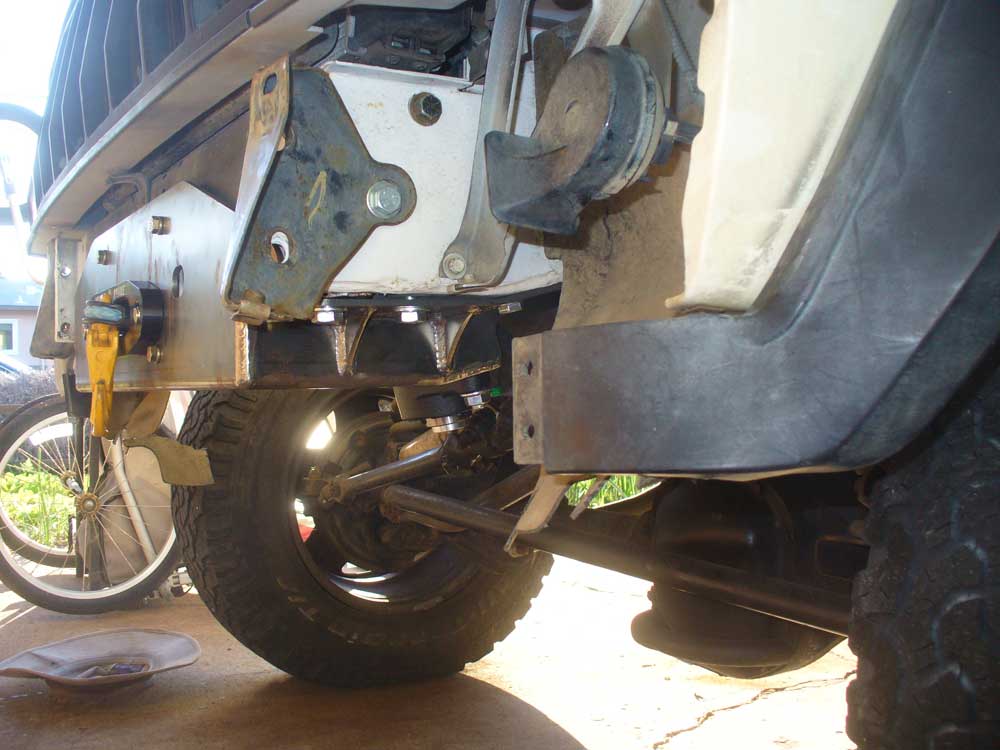
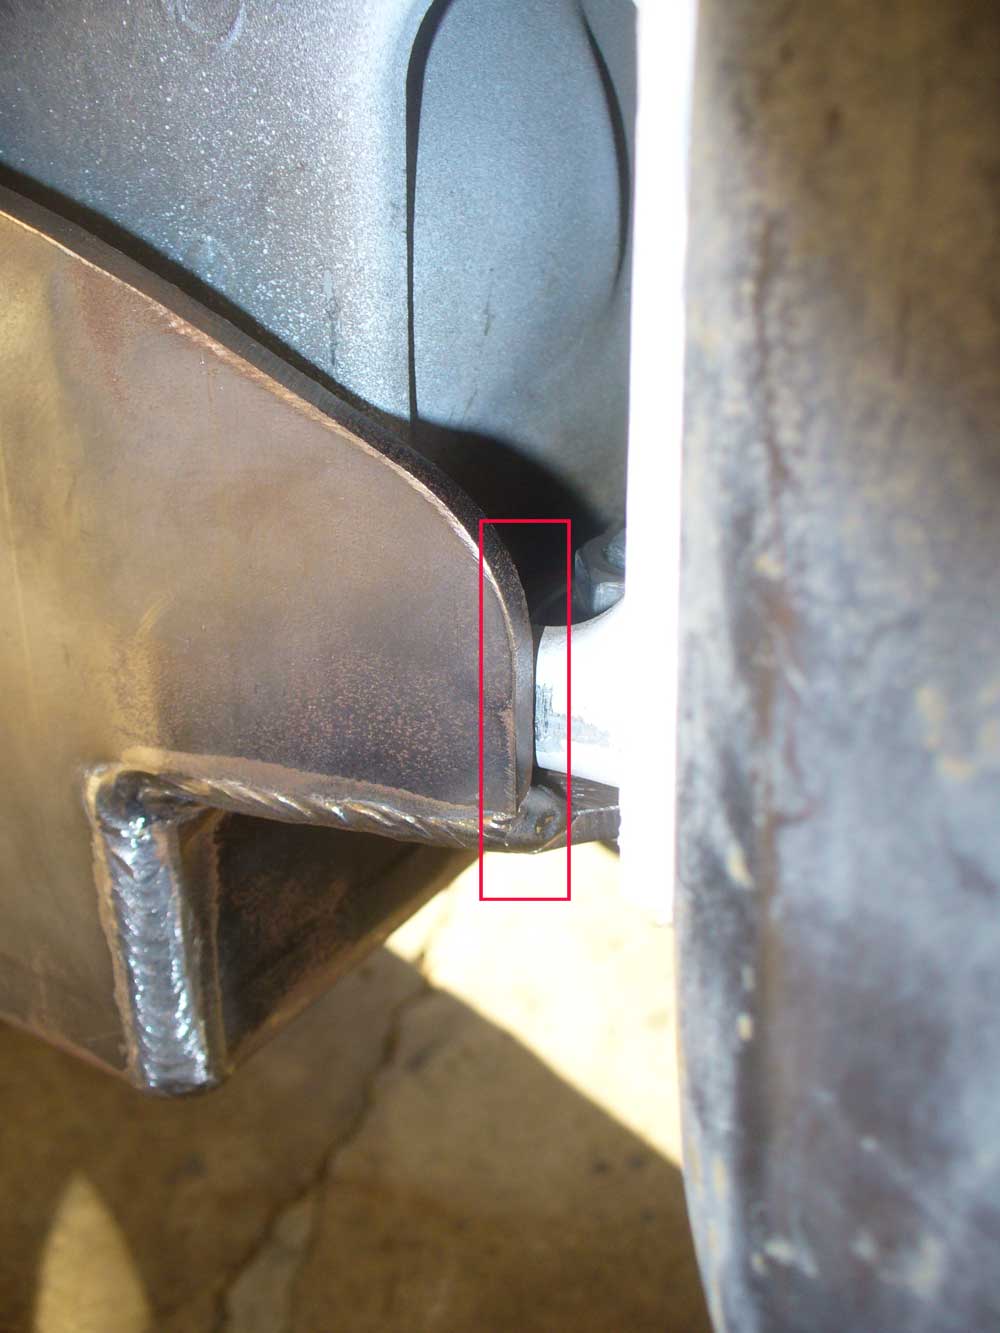
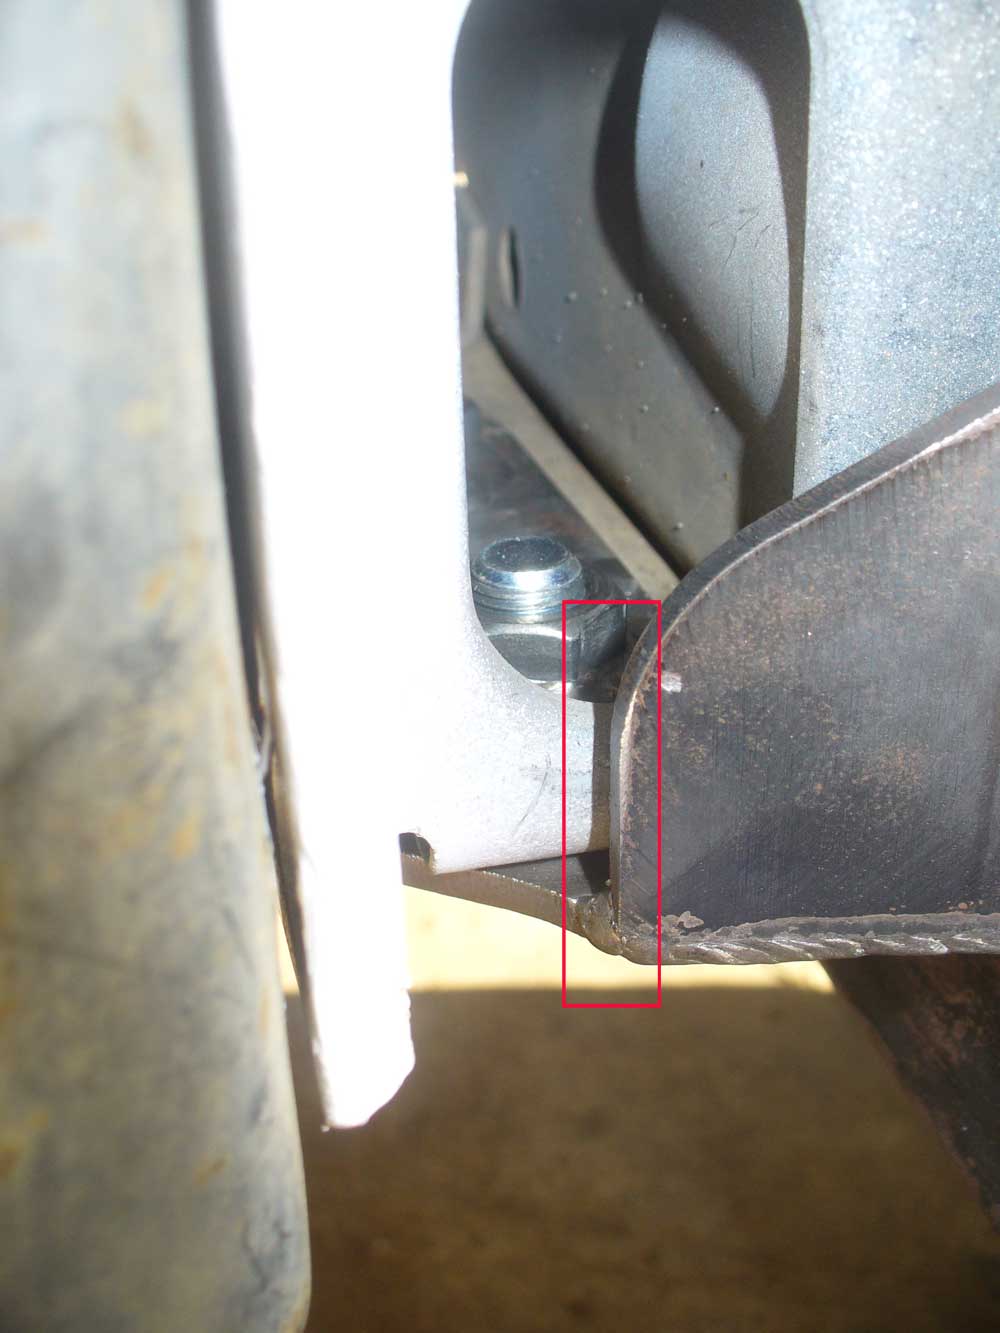
These next four pictures are to give a sense of clearance and of some of the challenges involved in trying to incorporate additional mounting points in a production piece.
At the driver’s side frame horn, no gap:

CMWU34OPT.jpg

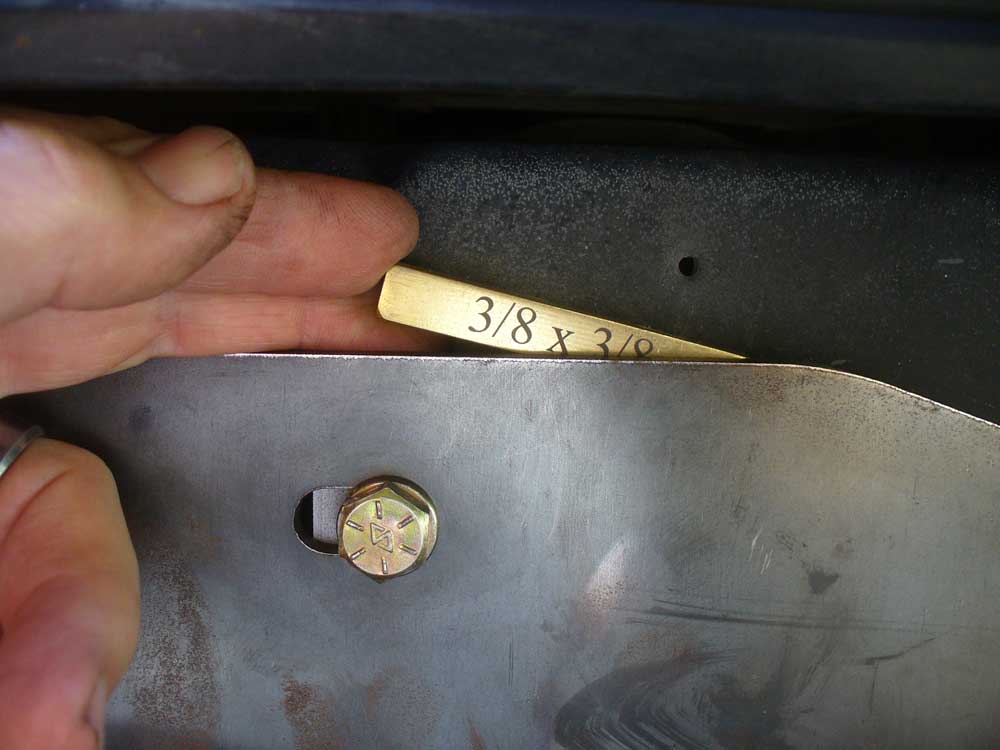
At the passenger side frame horn, approximately a 1/8” gap:

CMWU35OPT.jpg

At the driver’s side radiator support, 3/8” gap:

CMWU36OPT.jpg

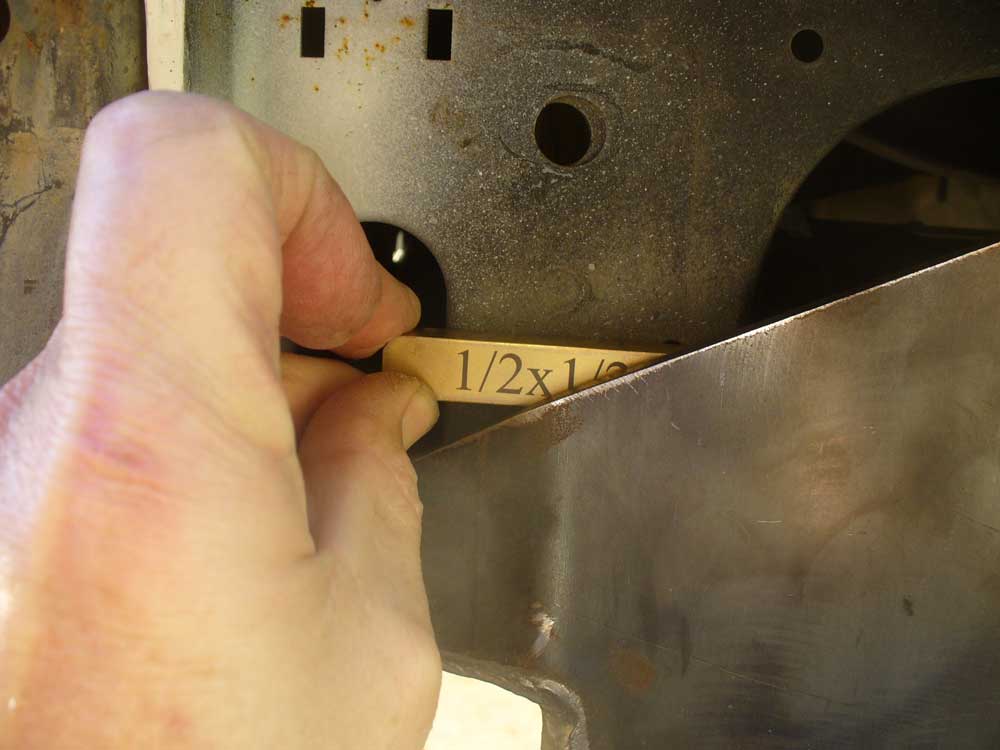
At the passenger side radiator support, ½” gap:

CMWU37OPT.jpg

I would still like to attempt to weld in some brackets to tie those pieces in, but that turns this into a fabricator’s piece. I doubt most customers will want to go to those lengths. As it is, this piece could have been sent to me powder coated and I could have a final installation with no modifications. If I were the manufacturer I would not mess with that. I would say job well done.

I still need to deal with the sway bar. Bryson is sending me some of his drop brackets so I can take care of that detail.

I also still need to get the bumper back up and see what sort of modifications are required to run the front bumper. Odds are this is going to work best with something like a pre-runner bumper, but my goal is to keep this as boring looking as I can.

Once I have the bumper figured out I will then try to figure out the engagement lever.


And there is the mounting of the control box and its associated wiring.


More to come, but this should get folks an idea of what the Comp Mount will be.
 
Very nice. This would go a long way to strengthen and reinforce the front unitbody.

I already have Boostwerks' steering brace
 
Thank you for the Eye Candy
 
It occurs to me, I have neglected a few potentially relevant details regarding the vehicle used in this fit test.

It is a '96.

It has HD Offroad Engineering's frame stiffeners in the front. These have no impact on the fitment. Only possible issue I can see would be if they were positioned such that repositioning of the steering gearbox were limited.

It has a JCR Offroad steering spacer. This pushes the gearbox over a bit further than the stock spacer. The slots in the Comp Mount take care of this just fine.
 
dadgummit!

Post up a bunch of pictures and my hosting service takes a dump. For the third time in as many weeks.

Inmotion hosting doesn't seem to have their act together particularly well lately.

Pictures will be back. At some point.
 
Beautiful, but too much effort...I'll stick with a plain old winch bumper
 
Looks slick. Cant wait till this goes into production. He will take my money.

party1:

On a side note, I'm going in for some much anticipated surgery next week, but getting these to market will be my primary goal once I've recovered.

Thank you again for your help Tom!
 
Action Fab on Pirate4x4 and I believe he was on here for a period of time makes the stubby bumpers. His website is called Off Road Specialties. His bumper is what I fabbed mine out of.

Just another alternative to folks who want a hidden winch plus a bumper :idea:
 
Action Fab on Pirate4x4 and I believe he was on here for a period of time makes the stubby bumpers. His website is called Off Road Specialties. His bumper is what I fabbed mine out of.


Just another alternative to folks who want a hidden winch plus a bumper :idea:


Don't understand the thread jack but those bumpers don't look like they compare close to Bryson's winch mount. His looks to tie in to the uniframe better plus sector shaft support


Sent from my iPhone using Tapatalk
 
I think the idea is that the stubby is a compatible bumper, not an alternative product.
 
Don't understand the thread jack but those bumpers don't look like they compare close to Bryson's winch mount. His looks to tie in to the uniframe better plus sector shaft support
Sent from my iPhone using Tapatalk

Didn't intend for a thread jack approach. It is really apples to oranges in this case. This is solely a winch mount and steering brace. The alternative is a bumper and winch mount. Both have offer great approach angle and winch protection which a lot of people prefer.

Since this is "pre-production" and I have not seen this piece in person I figured I would voice my only concern. All lateral alignment appears to be controlled by the mounting bolts and the fitment around the bolts. I have no idea how much un unbraced steering box moves during normal offroad use but if there is a hard lateral pull and the whole mount slides say 1/4" to one side and takes the steering box shaft with it, will the steering box survive that? I will put on my flame suit now :gee:
 
Since this is "pre-production" and I have not seen this piece in person I figured I would voice my only concern. All lateral alignment appears to be controlled by the mounting bolts and the fitment around the bolts. I have no idea how much un unbraced steering box moves during normal offroad use but if there is a hard lateral pull and the whole mount slides say 1/4" to one side and takes the steering box shaft with it, will the steering box survive that? I will put on my flame suit now :gee:

That is a great question actually and is something I've considered in the design.

1. The front two holes require drilling once the position has been set. The tolerance around the bolt is tight as well, so once torqued down the mount won't be able to shift even-though the other mounting holes are slotted (The prototype shown here has all slotted holes however).

2. I'll include this in the instructions, but side pulls should only be done as a last resort. Ideally your going to want to rig a snatch block and angle the line to prevent excess strain on the cable, mount and chassis. As far as I'm concerned this is very important and considered proper technique, although I realize that not every situation allows for this.
 
Awesome write up. I have been waiting for this to hit the market as well. I have held off building a recessed winch mount for this and am about to weld up my front frame stiffeners but had a question. It's a little hard to tell from the pictures but do you think there would be any issue running the Hooligan Offroad frame stiffeners that wrap under the frame rail? They wrap under the rail around where the sway bar mounts. I see that you have to flatten part of the rail but not sure if its the same area that these are tying into.

12038472_865121163610039_7829112355563682478_n_grande.jpg


https://www.hooliganoffroad.com/collections/xj/products/xj-front-stiffeners
 
Not having those stiffeners on hand to hold in place, take this as a half-educated guess.

It looks to me like those end right behind the flange that needs to be flattened.

I see three issues which will need to be addressed.

First, the thickness added by the stiffener (its own thickness + whatever gap may be present) will need to be made up at the front bolt. If it were me I would want to weld in an additional plate, but a stack of washers might be adequate.

Second, and more challenging, the added thickness at the sway bar mount is going to result in moving the entire mount back by a fraction of an inch (some measurements and some trig and you can figure out exactly how much, or just try holding it up in place). Slotting of the swaybar holes would not help fix this. The thickness of the material will force a slightly different position. Grinding a bit of material off the front flanges (where I have no additional clearance on the driver's side, but 1/8" clearance on the passenger side) might solve this. Then the second hole back from the very front (for 1/2" hardware) would need to be slotted a bit (at 90 degrees to the current slot) to match the existing hole in the frame. The very front hole has to be drilled by the user anyway, so that one should not matter. Then it is simply a matter of the mount being that much thickness lower in the vehicle.

That brings up the third issue which will be the available length of the sector support nut. I might have an extra quarter inch available in my installation. That is going to be cutting it pretty close. Perhaps there may be a bit of slop in the steering gearbox mount such that it could be dropped a bit lower, but I kind of doubt that. I expect gravity will have already claimed the lower range of movement from the time of first installation.

Those are the thoughts that come to mind for me. I don't think any of those are insurmountable obstacles, but I would want to order the mount bare (no powder coating).
 
Back
Top