• Welcome to the new NAXJA Forum! If your password does not work, please use "Forgot your password?" link on the log-in page. Please feel free to reach out to [email protected] if we can provide any assistance.

New Paint :) Help me decide a color...

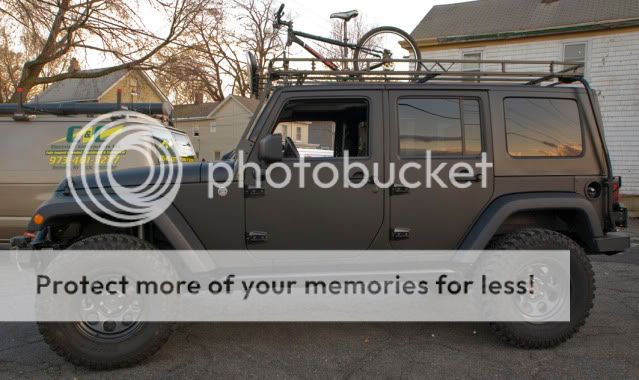
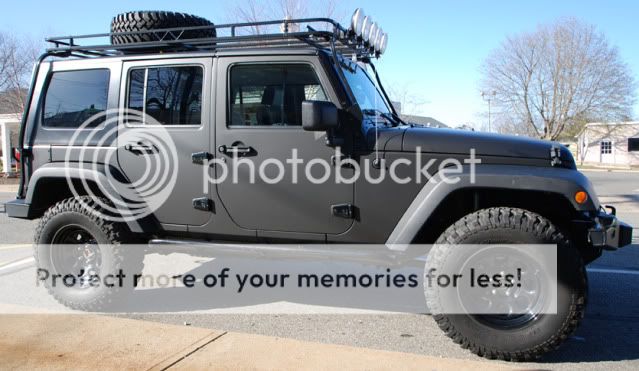
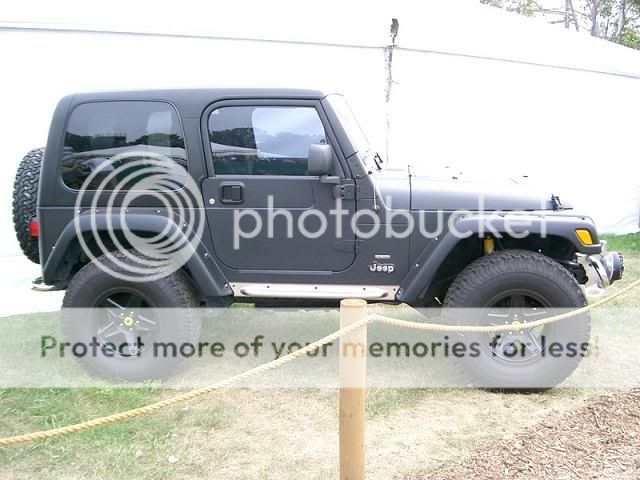
Well took some pictures as promised. I got the basecoat tint today and mixed that all together. It's weird getting used to the shutz gun, a little different from a sata rp3000. The color looks like it might end up a tad lighter than what will be on the rest of the car but I'm not gonna sweat it. It will be a little bit til I get my fenders and wheel wells prepped so I did a test panel and a fender flare. Enjoy.

The kit. They give you 4 jars of liner, one was being used.
IMG_3167.jpg


Poured it all into a mason jar, it didn't look like the liner, activator, tint, and reducer would fit into the supplied bottles.
IMG_3170.jpg


The basecoat tint. This will be the color of the rest of the Jeep.
IMG_3169.jpg

IMG_3168.jpg


200ml of tint per bottle of liner
IMG_3171.jpg


And mix it up good.
IMG_3172.jpg


I sprayed some test panels first to get the feeling for the gun and textures. Takes a little expirimenting if you want a consistent look. Both of these are in direct sunlight
IMG_3173.jpg

IMG_3174.jpg


The texture.
IMG_3176.jpg

IMG_3175.jpg


And then moved on to a spare fender flare I had laying around.
IMG_3179.jpg

IMG_3178.jpg

IMG_3180.jpg

IMG_3177.jpg
 
Disclaimer: before I say anymore - yes, I am a pic whore.

Well got a little more done. Today has been pretty slow, but productive. Tomorrow I will be devoting all day to finishing the metalwork on the rear fenderwells. Those things get DIRTY. Here are some updates:

Here is what I'm starting with
IMG_3181.jpg


Kind of half-assed, half-painted, not up to par on my standards.
IMG_3182.jpg


The pinch seam along the top of the fenderwell that will be getting filled with seam sealer
IMG_3183.jpg


You can see all the dirt and factory undercoating crap caked on
IMG_3184.jpg


And huge dents in the pinch seam from when I still had a rear swaybar.
IMG_3185.jpg


The backside. Semi-smoothed, but I know there is a lot of body filler under that black paint.
IMG_3186.jpg


A good look at the pinch seam that will be folded over and stitched to the frame.
IMG_3187.jpg


A wire wheel on the grinder and a little while later you get this
IMG_3188.jpg

IMG_3189.jpg


No more mud, no more undercoat, no more hassles. Will be getting a nice coat of SPI epoxy primer after it is all taken down to bare metal.
IMG_3190.jpg

IMG_3191.jpg
 
That's all for tonight. I looks like a coalminer, am sunburned, and have mesquito bites all over my legs. Tomorrow should be filled with pictures and updates. Stay tuned :)
 
Lunch time. Updates. Inverted welds suck. Inverted welds with a mig suck even more. Inverted welds with a broke mig FTL. Welding up all those little tabs had to be the most annoying part of my entire Jeep build to date. The wire piled up like bird shit, popped and stuck, bunched up inside the reel, basically did everything except work right. So I had to go grind down and try to re-weld everything about 3 times. Also, if the metal isn't clean, forget about it.

I also tried to put a few welds along the upper pinch seam at the top of the fenderwell. I planned on laying about 4-5 along the whole length of it just for a little more rigidity. Screw that. After 2 of them I gave up, there was no way to clean inside the little crevice and it all around sucked.

Weld in pinch seam, towards front
IMG_3196.jpg


Weld in pinch seam towards rear
IMG_3197.jpg


A look at how exposed the frame rail now is. This could really come in handy when I re-work my rear bumper. I can now drill tie-ins to my hearts delights.
IMG_3193.jpg


The start of a long day.
IMG_3198.jpg

IMG_3194.jpg

IMG_3195.jpg


A look at the terrible welds. But they do work, which is my main concern. They'll be hidden anyways.
IMG_3199.jpg

IMG_3200.jpg
 
Well looks like the day won't be so long after all. 60% chance of thunderstorns. Fail. I can't do to much more anyway without my SPI epoxy primer. Which won't be in for another week probably. Once that gets sprayed I'll be able to smooth out everything and then shoot the liner. Slow process, but I want to make sure I NEVER have to worry about this area again.

Overall view, no more pinch seam.
IMG_3202.jpg


Had to pull the carpet back so my car didn't burn to the ground when I was welding. Found this out after my little rust repair incident with the rocker. The black is rustoleum covering where the paint burned off.
IMG_3203.jpg


And more rustoleum in the wheel wells. I still have to drive the Jeep so something had to go on temporarily to stop any rust. Comes off super easy with a wire wheel.
IMG_3204.jpg

IMG_3205.jpg


And the little D that will be getting welded, ground, and smoothed.
IMG_3206.jpg
 
And I'll end with an update on the bedliner since it's dry. This stuff is really cool. Unlike Herculiner, it dries hard. Very hard. I think if you had the back of your truck done in this and threw the dog back there he would slide all over the place. But, like most urethane products it can still flex. I could not get the stuff to crack or flake. Even after stcratching it with a nail, and then trying to peel that point.

The texture and color.
IMG_3207.jpg

IMG_3208.jpg


And flex test. This is an OEM flare.
IMG_3209.jpg
 
now, is that a spray on bedliner? or a roll on? i skimmed threw your pics on page 3.. love the outcome of this stuff, but dont have the equipment for a spray on..
 
Yes, it is spray on (all you need is a compressor). However, You can roll or brush it on as well. You can rent a compressor for mega cheap. I love the fact that it is 2 part, letting you control the pot life. With herculiner, it seems like once you open the can, it gets harder and harder to roll on with each use. With this all you have to do is mix in the hardener, and you have a liter of product to use within an hour.
 
yes it does jerk. <3

just got it up and running good yesterday. SO BITE YOUR TOUNGUE! u taint.

this thread also reminded me that i should fold up that pinch weld in the wheel well....

io also took off my doors today. now my radio doesnt work... LAME!
 
Thought I'd bring this thread back up to speed. I got the epoxy primer in the mail a few days ago. I'll be at the beach until the 1st, but when I return expect this project to hit the fan as far as progress.

A little teaser of what color my wheels will be when I return :)
17-1.jpg
 
Murder it out! Satin Black is tits!!!
2385273858_de014ffcd3.jpg

3300759d.jpg

575.jpg

599-GTB-Fiorano-Ferrari_2.jpg

insane_corvette_2.jpg

ds1.jpg
side.jpg

v8dmb9.jpg

FOR SURE....Satin black is the whip! It reminds me of the old hotrod primer look.....like in the movie deathproof and the car Kurt Russel drives with the skull and crossbones on it. DEFINETLY DO NOT GO WITH THE ORANGE OR GREEN!!!
 
Unfortunately, no. Just like 90% of other paint projects people post up lol.

I have most of the supplies, but I'm at the point of deciding whether or not it's worth it. My windshield is leaking, rear pinion gear going, trans going, engine with 250k+ miles. I might wait until this one dies out, and start again from a clean slate. I feel like for the price it would cost to fix all those goodies, I could get an entirely new nice condition xj :) So everything is currently on hold.
 
Back
Top