xj_mike
NAXJA Forum User
- Location
- San Diego, CA
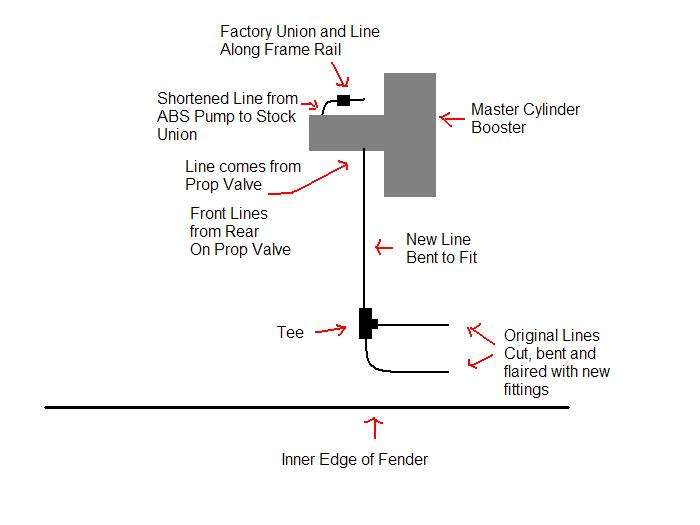
Since I have had a number of people ask me about the removal of the ABS pump and how I did the brake lines, I figured I should get some pictures and post up what I did. This was performed on a 2000 XJ. I think 97+ XJ’s would be the same but don’t know about earlier. Doing this also assumes you are very good at making double flared ends and can do this in the engine compartment, in a tight area. Luckily I have a lot of experience with doing double flares. Reason for removing the ABS pump is, according to the FSM, to bled the pump correctly, you have to hook it to a computer that will cycle the pump and valves. Outside of a dealer, I don’t know where you could have this done. Since I removed all my wheel sensors, it was easier to remove the pump and not deal with it.
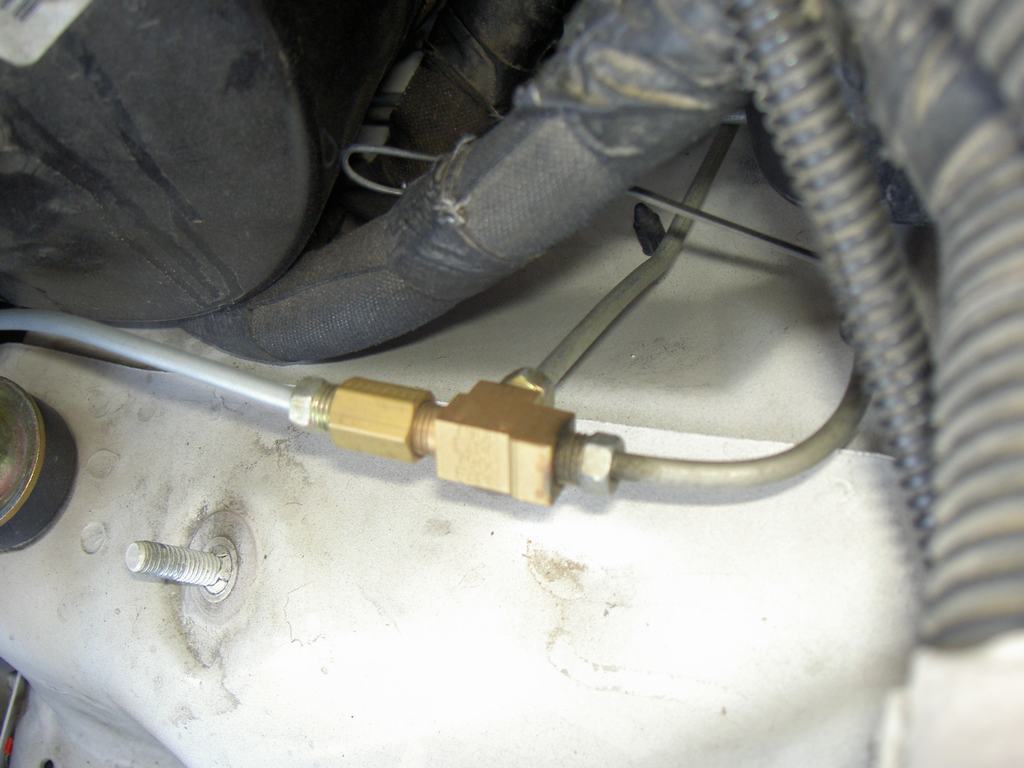
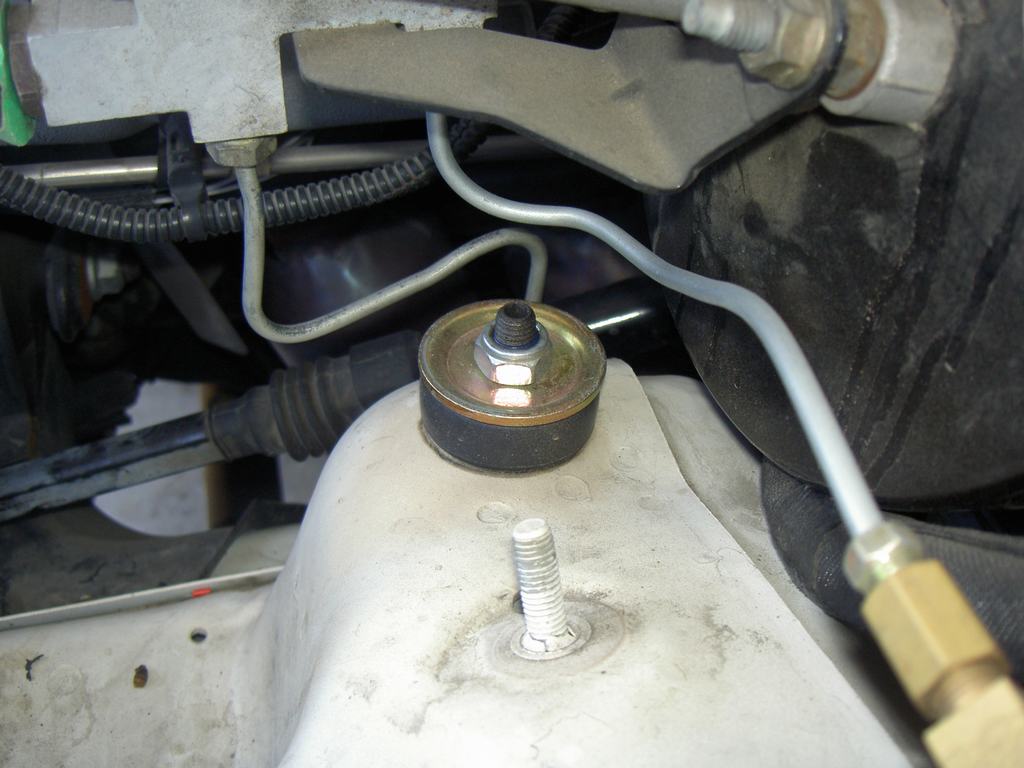
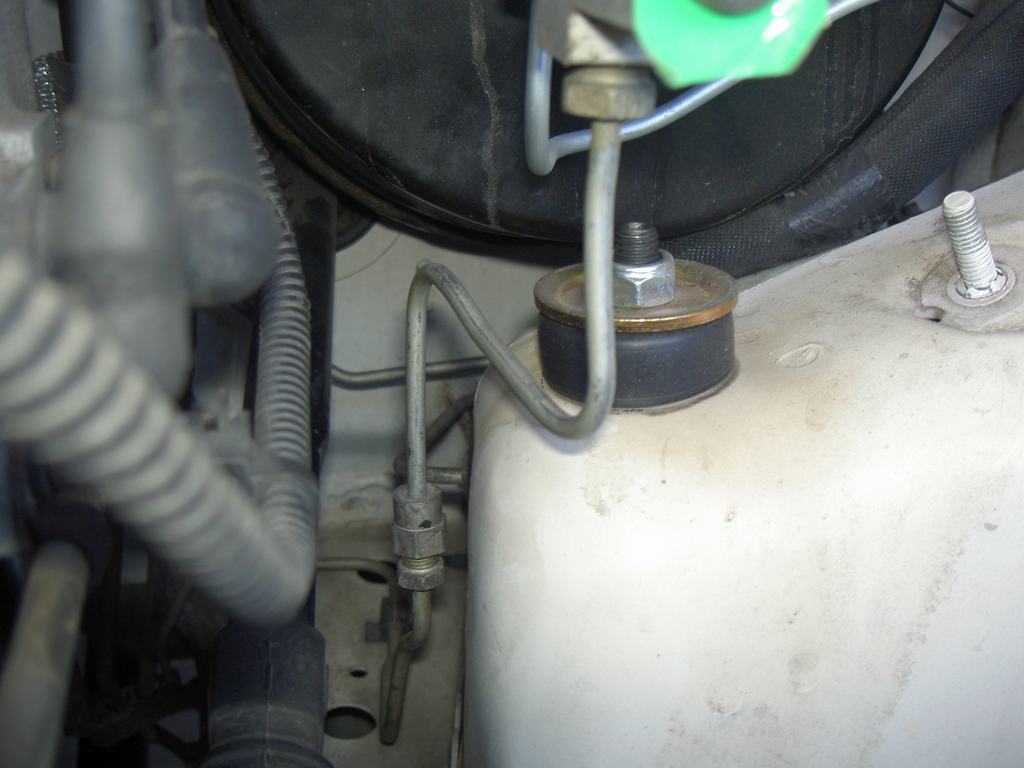
The flare nuts on the prop valve are the original ones. I just cut them from the factory lines. The rear line is modified to fit so this one does not need to be replaced. The two front lines were cut after the ABS pump, bent, flared (with stand 3/16” double flare nuts) and hooked to the Tee. A new line was bent from the Tee to the prop valve, using the stock double flare nut at the prop valve end.
Remember when flaring ends, lube up the end with some brake fluid, debur the cut line and follow the directions with the flaring tool. I am just using a NAPA brand flaring tool, nothing special. One very big thing I have learned over the years is, anytime you are tightening new lines or fittings, tighten them snuggly, then loosen about a ¼ turn, then retighten it. This seems to seat the fitting better and keeps them from leaking. Before doing this, ever fitting I did leaked. After using this technique I have not had a fitting leak since and that’s been about 40 fittings.
All of this is done at your own risk. Blah, blah, blah. Also, don’t forget to remove your ABS pump relay and fuse in the under hood fuse/relay holder and the ABS fuse inside. My XJ has been this way for over a year and about 4000 miles without any problems. Nice firm pedal, better then when the ABS pump was in. Good luck on your removal and hope this pictures help.