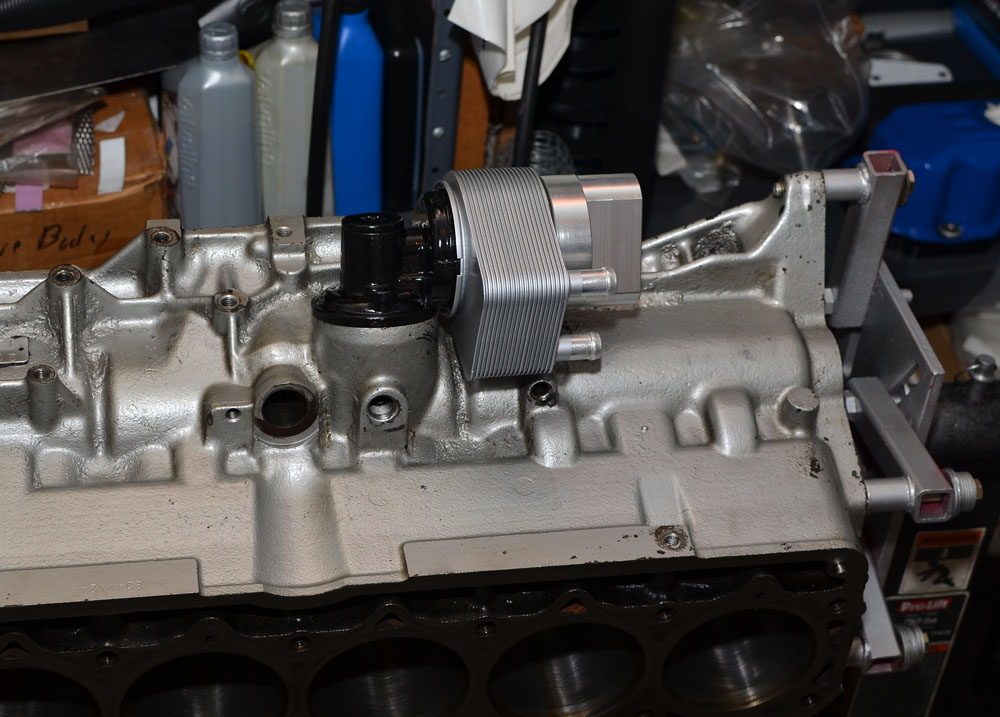
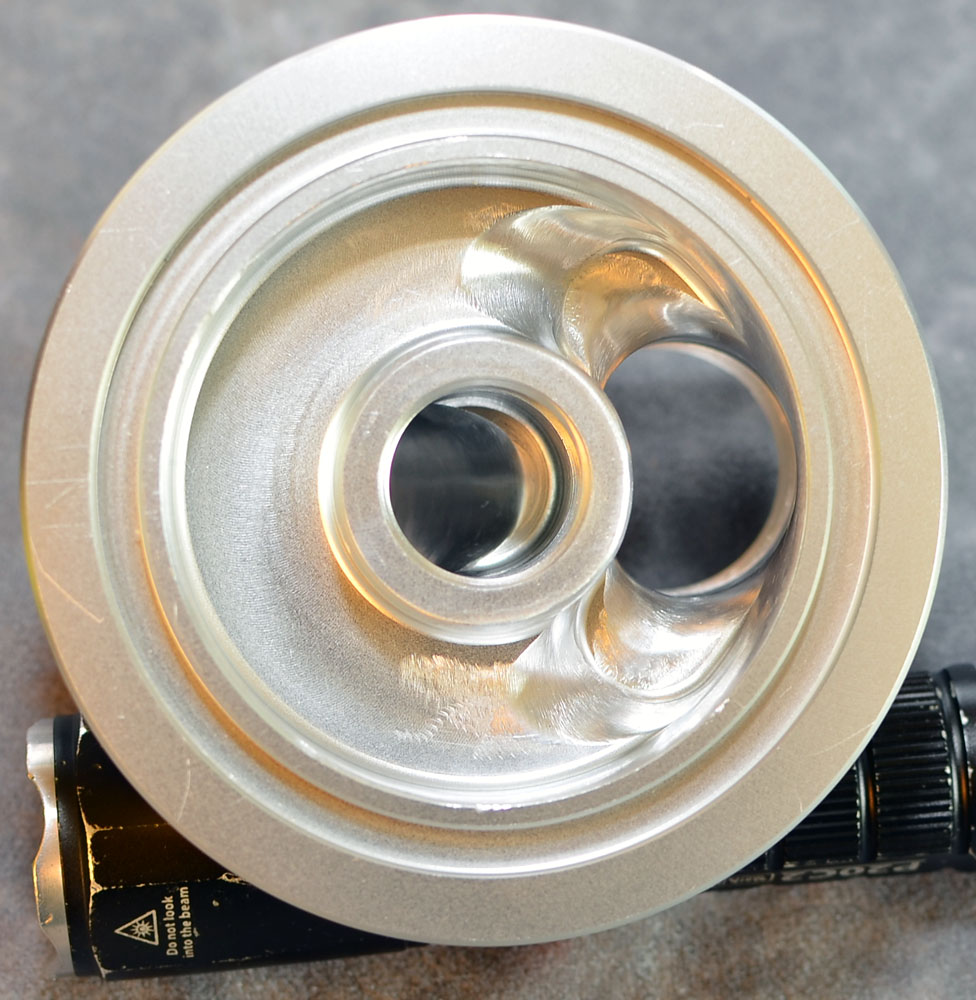
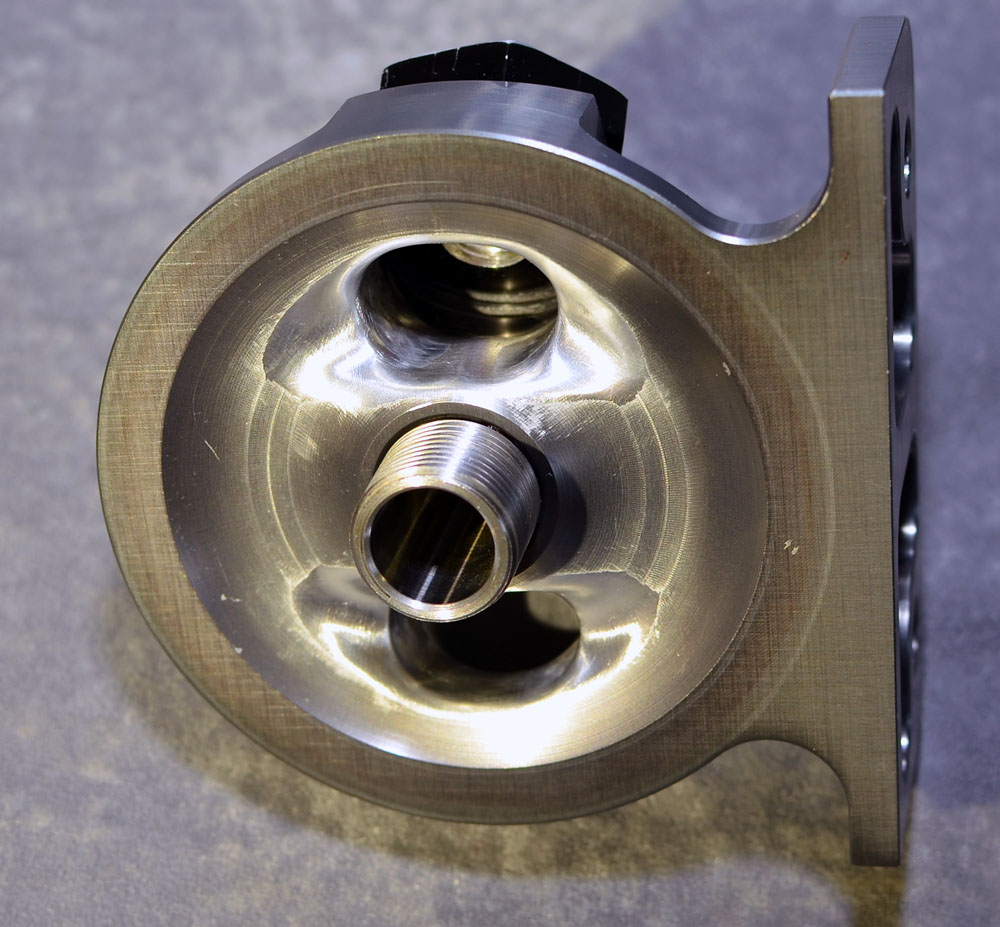
I also finished grinding on the oil filter adapter. See the above images for before. There was plenty of meat on it to smooth out any rough transitions and sharp edges. Between rough grinding and final polishing it probably took 5 hours or so. But i have no doubt it flows much better this way.
And for those of you that haven't followed my 4.6L stroker build, my oiling system is slightly different than stock:
1) Tied into the main girdle I have a windage screen
2) Melling HV oil pump
3) Both the stock and after market pressure sensors are located at the end of the main oil galley at the rear if the engine. On a stock engine it would be right after the filter. I feel that my location gives a better reading as far as final oil pressure is concerned.
4) The oil temp sensor is where the stock pressure sensor use to be, directly after the filter.
5) I also have a restricted orifice, .013" (IIRC) direct lubing the cam/oil pump gear. The is fed from the same place the oil temp sensor is, directly after the filter.
6) The oil pan has baffles front and rear.
7) Smith Brothers pushrods with a restricted orifice, .020". Wish I could go smaller.
Hit a small snag today. I went to paint the heat exchanger and the paint started wrinkling. It didn't look like there was any paint or coating on it, but something interfered with the paint. And I did clean it well first with a paint prep spray.
So I had to strip it down. Waiting for it to dry and sanding it down was out of the question due to the ridges. Sand or glass bead blasting was also out due to the fact that it would be nearly impossible to remove the sand from the internals. And no matter how well you tape it up or what tape/mask you use sand will get in there. Sand + engine bearings is never a good idea. I also don't know of any one local that does soda blasting... so it was chemical paint stripper. What a mess, but it worked well. Its currently drying.
I should probably have left it bare, but I have believe that anything metal needs some sort of coating except stainless (the grade that doesn't rust). Be it powder coating, painting, or anodizing. Salt will attack nearly anything.
I also had an issue getting the o-rings for the oil filter adapter. The closer dealer didn't have then in stock and they weren't placing any orders due to the fact that they are closing tomorrow. So I called Shelor, which is 25 minutes away. The person on the phone said they had it in stock and gave me a different part number then what my parts manual has, but research showed they fit. I should have wrote that part number down and took it with me, but I didn't. I leave work early to get there before they close. When I get there I told them exactly what I told the guy on the phone. They said they didn't have it... left work early and drove 25 minutes for a part which they now don't have. I'm sure the bitch could see my anger building, but even after I told her what the guy on the phone told me they were of no real use. They couldn't figure out any other way to look it up. Really? Finally, I told her to look it up on Amazon for the part number in stock and that worked. Even after all that they refused to give me any discount. F Shelor.
Part 1 of the install is going to happen his weekend. The oil filter adapter is painted and I have the o-rings. I'm curious to see if the oil pressure will change due to the mods to the bolt and adapter or not.
It will be interesting to see how this turns out. I just finished a similar install doing an air to oil cooler, I'm less concerned about getting up to temp though and more concerned about getting rid of heat.
It will be interesting to see how this turns out. I just finished a similar install doing an air to oil cooler, I'm less concerned about getting up to temp though and more concerned about getting rid of heat.
I don't think that is because the engine oil is getting up to temp faster than the coolant as your post leads me to thing you believe. But, because the thermostat will not open until the coolant is up to temp. E.G. when its cold you have very little flow through the radiator but full flow through the oil cooler.
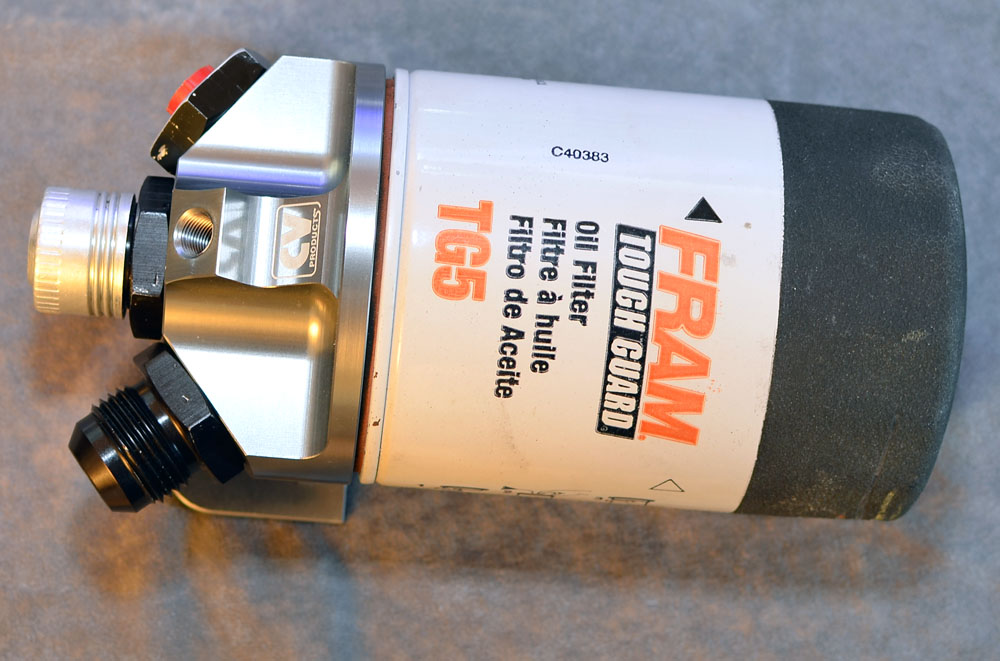
Yes, I know its a Fram. It came with it but it is just being used to keep it clean and for mock up. It will be discarded for a real filter.
A little smoothing with the die grinder:
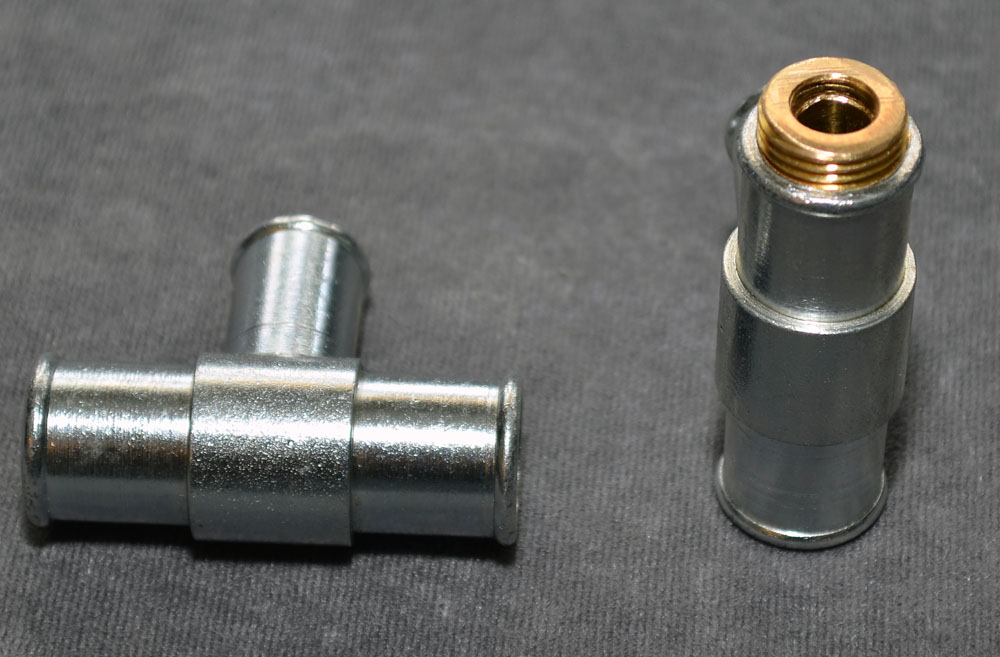
Fittings came with it:
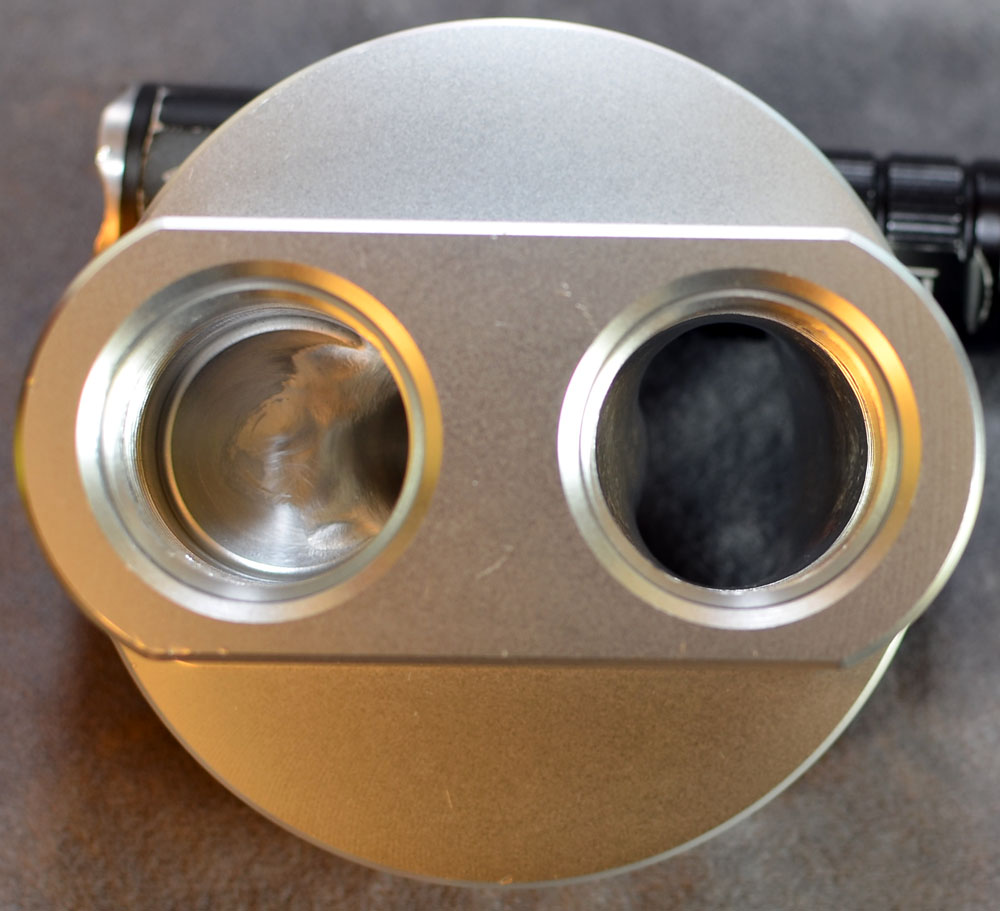
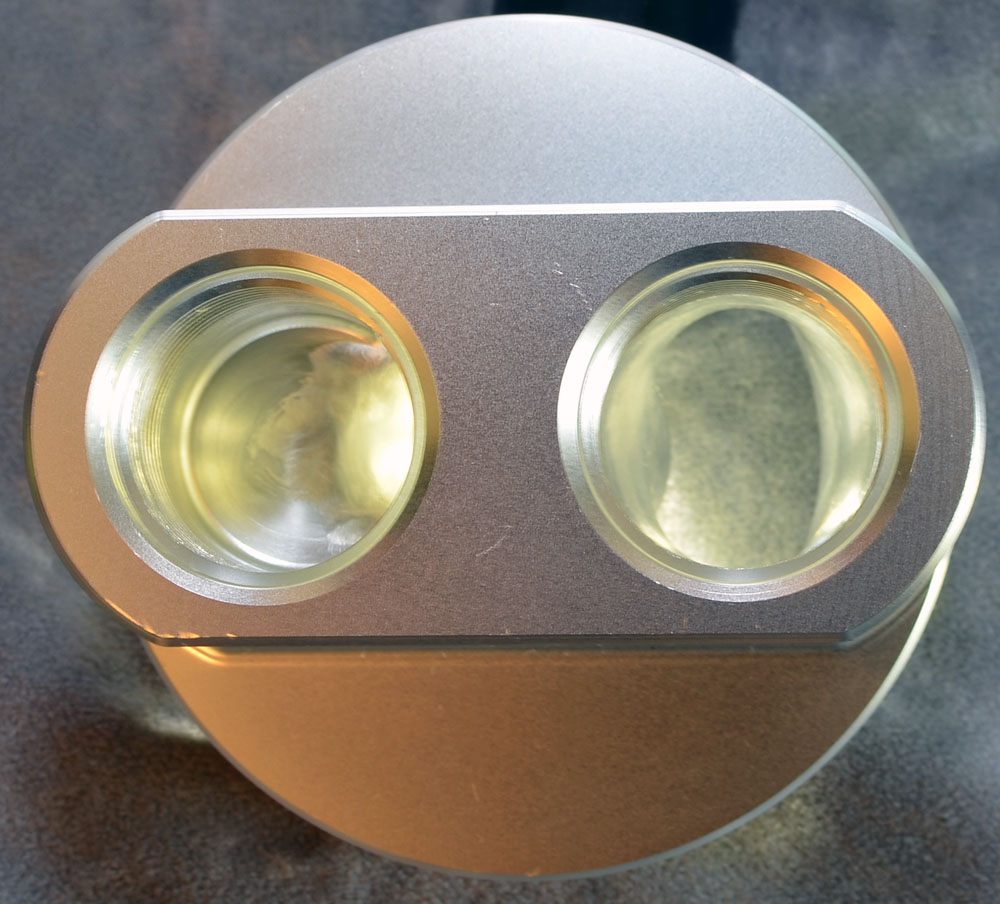
The oil filter outlet is .60" in diameter with an area of .2826 in sq. The old one was .56", area of .2463 sq in. I was hoping for larger, but that still a 15% increase in area and not a bottle neck.
Napa didn't have VR1 10w40 in stock, so it enabled us to step down to 10w30
Prior to the cooler we run 60psi cold idle and 40 psi hot idle. Havent had the engine above a warm idle yet but we're at 60 psi cold idle and 40 psi warm idle. To be fair though, we swapped engines, so its apples and grapes.
I don't think that is because the engine oil is getting up to temp faster than the coolant as your post leads me to thing you believe. But, because the thermostat will not open until the coolant is up to temp. E.G. when its cold you have very little flow through the radiator but full flow through the oil cooler.
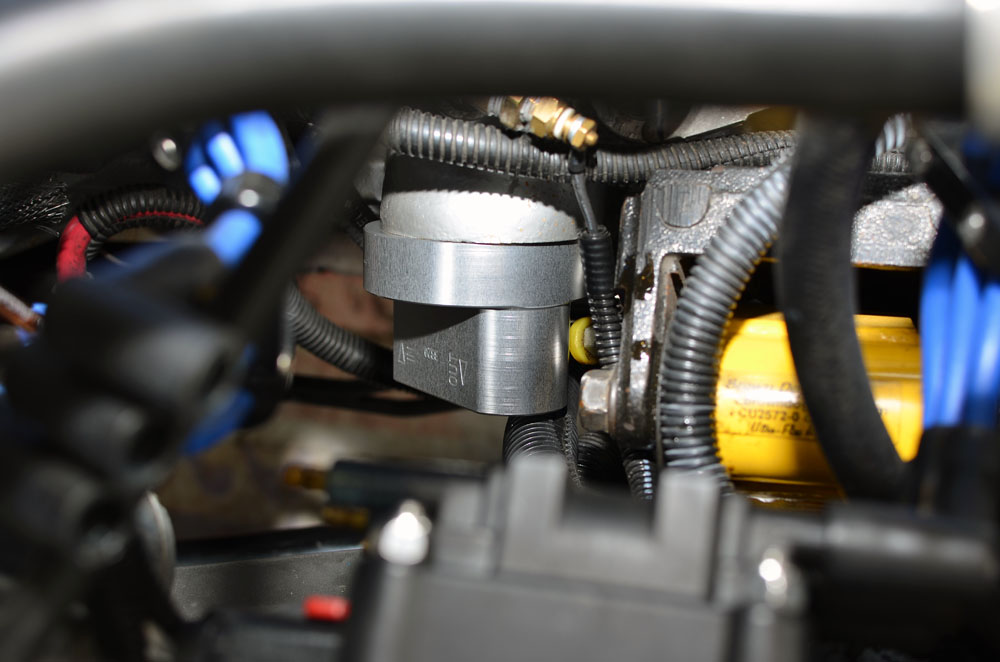
I installed the modified oil filter adapter today. Results look some what promising but more data collection will be needed. The 3 samples that I took (idle) showed an increase of 2 psi. Not much, but something. I also did some test fitting.
For the remote filter mount it looks like I may need to wait until I get the Brown Dog engine mounts as the new mounts could either interfere with the intended mounting location or provide me with a better mounting surface. Should be about 2 weeks or so.
Test fit on mock-up block:
Remote adapter only, plenty of room if you want to go that route:
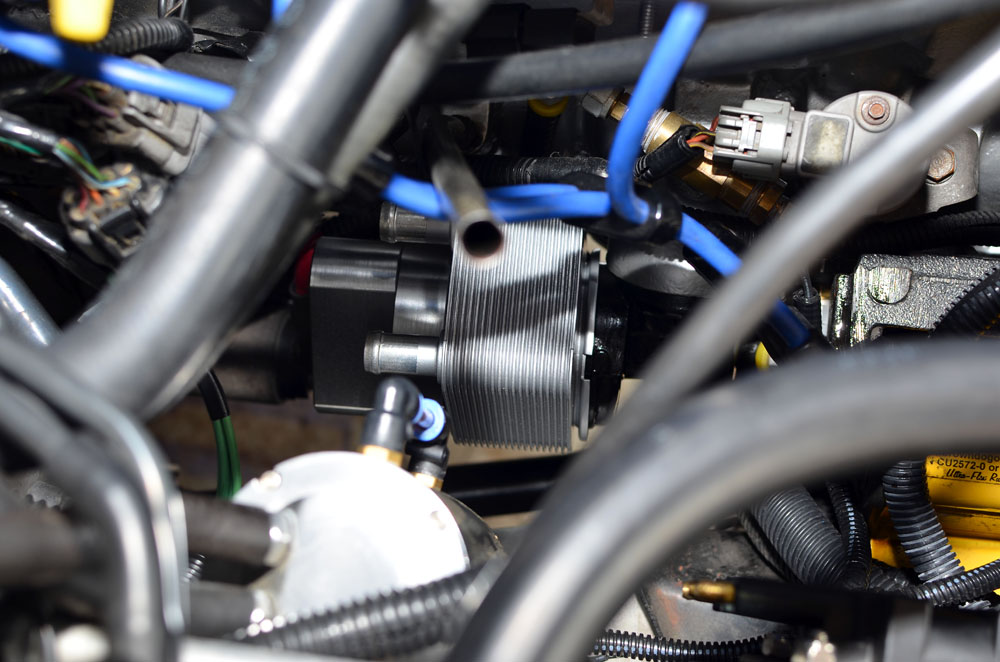
Modified adapter, heat exchanger and remote adapter test fit in bay.. a bit hard to get pics of it though:
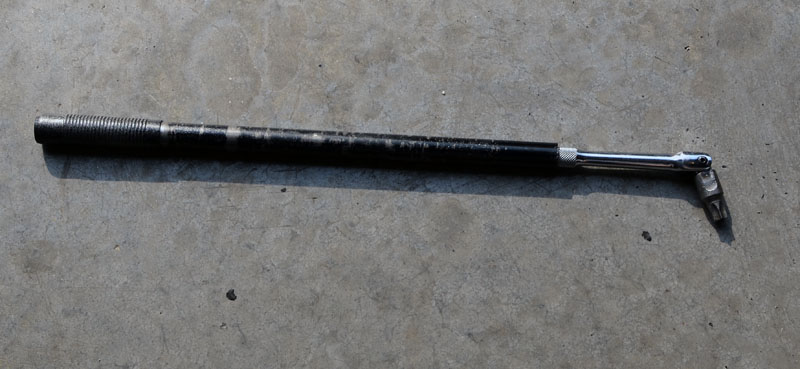
Tool used to remove oil filter adapter bolt:
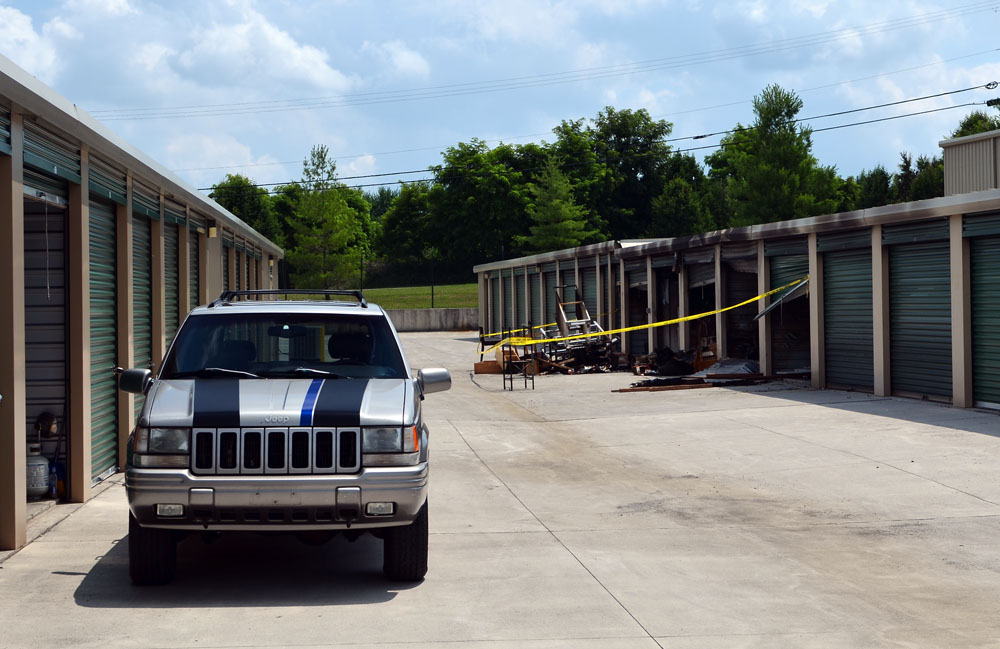
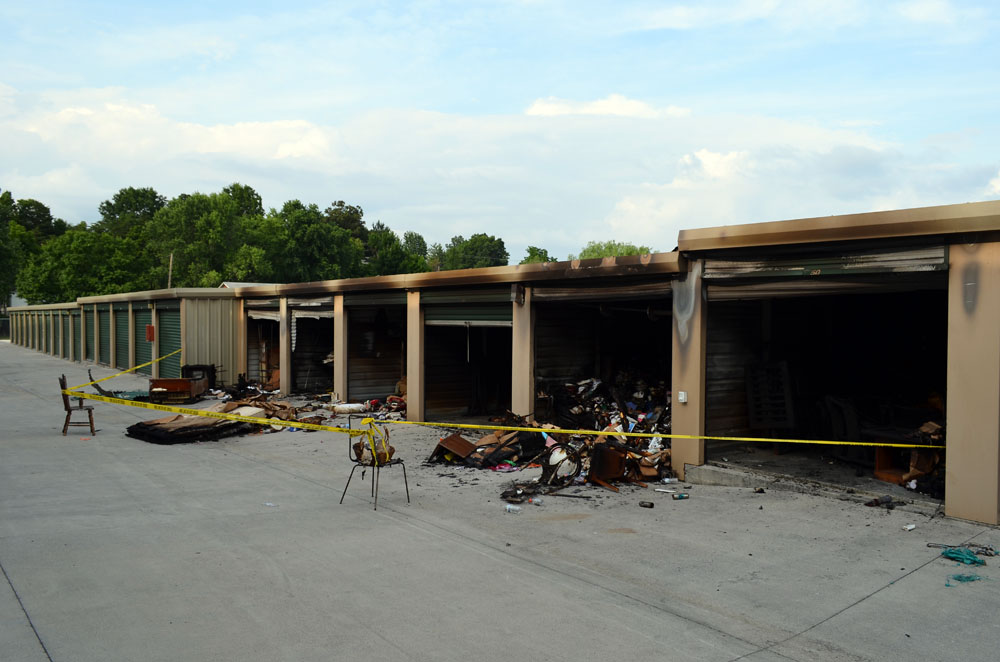
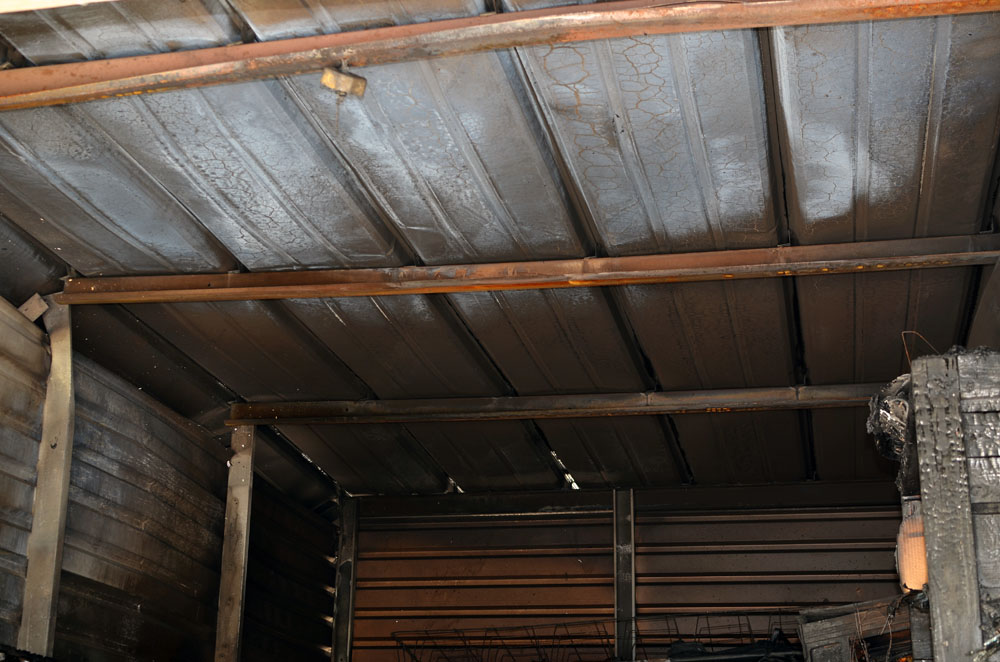
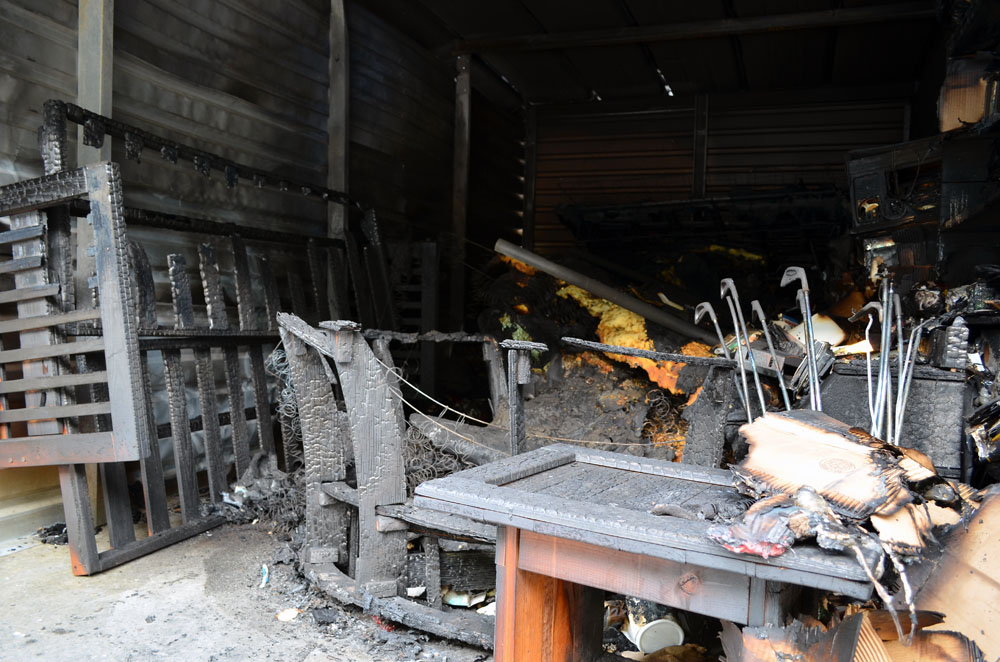
In other news there was a fire at storage. Luckily it was not in my building, but the one across from it. You can see where my unit is in the pic with the ZJ. Damn close and damn scary. There was a car and two bikes in the building that the fire department was able to move from harm. Unfortunately one of the units severely damaged had a woman's whole house contents in it. Very sad.
I am following this very closely. My XJ rarely gets driven regularly and most of it is for short distances, this mod should really help me. My oil filter adapter has a leak so this thread has come up at an opportune time.
I bought a spare adapter bolt and the o-ring kit. I am planning to have a nut welded on it. I also got the tool with the Torx bit but it seems like the PO has already had a go at it and has stripped the head...
I found a pic of the Hesco one attached on JU:
How much have you spent on this so far. I was looking at the hamburger adapter and it is pricey at around~ $96. Would really appreciate if you could post where you got the parts from.
IIRC That is MrShoeBoy's setup. Several reasons I don't like that. It uses the older style VW heat exchanger of questionable quality (possibly Dorman?). And over priced as well. The Adapters are cast, which from what I have read are known to leak. The hoses used are also quite small and there was possibly a significant pressure drop. They are also push lock style hoses. While I have no problem using them on a low pressure transmission cooler or something attached to a less costly system I would be more comfortable with the standard AN hose and or a crimped hose end on the engine oil. The mounting location is high above the sump, easy drain back. I'm wondering if he added the Accusump system after or before the heat exchanger install. In his case he could have easily just removed the stock filter and just ran straight into the block. The Orange Can of Death? Really?
As for my setup I chose the parts mainly because of fairly open and straight passages, -12 AN fittings, and billet construction. I did still try to find the cheapest prices though. The heat exchanger came new from ebay for $60, the CV products filter mount came slightly used with fittings from ebay as well for right around $100. The Hamburger remote adapter was new from Amazon for $66. The coolant line Tees (not shown yet) came from Cold Hose for $20 total. Right around $246 total so far. The single most expensive part will be the AN -12 hoses.
Small update. I received the 3/4 to 5/8" tees from Cold hose and performed the restrictor modification to one. The restrictor will go between the two leaving a partial passage so flow after the heat exchanger will remain as if its a full 3/4" hose. It will also push coolant into the heat exchanger instead of just bypassing it completely.
Unfortunately I no longer have access to a lathe to make a very nice press in piece. So the easiest and cheapest method was just to use a NPT reducer. It is partially pressed into the 3/4" opening (~.2"). It won't be going any where. Then the hex head was cut off. Leaving roughly a .36" diameter hole, which is roughly the difference in area between the ID of the 5/8" and 3/4" hoses.
Should work perfectly.
Brown should be getting the mounts out to me soon. They said last week that they are caught up and will be getting to mine in the next few days.
All the projects I have in process are held up for one reason or another. The MP90 manifold has been at the welder since around the 15th of May. The manifold for the 5.2L ZJ and a bike frame have been at the powdercoater since around the same time. Now I am waiting on the Brown Dog mounts to see if I can bolt the oil filter mount to one.
I'm also at a bit of an impasse on hose end selection for the oil filter adapter (not the remote mount). Do I go with say a 90* or 120* and let the hose do the rest of the bending or do I go with a 180*?
I'd let the hose do as much of the bending as space / aesthetics will allow on the logic that more gradual curves flow better than the sharp radius 180 (or 120, or 90, or...) that you are sometimes forced to use in tight spaces.
Not being able to visualize things very well, I'll call it a hunch that the 90* or possibly even a 45* are what you want. I mean, you've done a *lot* of beautiful work to make things flow as much as possible... would be a shame to cramp things with a more restrictive fitting than necessary.
The oil filter adapter, engine side, has its ports point straight back, basically where the filter would have been. Its then going to have to come to the fromt behind the alternator (hopefully) and connect with the remote filter mount which has a port pointed up, and one at a 45* angle towards the rear.
Gotta say you do some amazing work especially in your attention to detail.
Thanks for sharing the stuff you do, I appreciate it.
Its a poor picture and nowhere near as neat looking as your stuff but I've been running a VW heat exchanger for a little over a year now and it works great.
I don't have any scientific data but before installing it (this was in late april IIRC and temperature was around 60-70F), even after 5 minutes of driving when the coolant was fully warmed up and sitting at 195F I could grab the filter and at most it'd be a bit warm to the touch (I'd guesstimate around 70-100F).
With the heat exchanger after 5 minutes the filter would be at the same temperature as the coolant.
It's been great in the winter since the heater core hose its tied into starts to get warm to the touch after 2-3 minutes of idling.
I'm pleased with how mine works and I'll bet you'll like your setup once you get it all together.
Well, after drama with sourcing the throttle body bearings and then a week up north I'm back on track.
I installed the heat exchanger today. No coolant hooked up yet because a) I need to take a look at some hoses to see which may work the best and b) I want some oil temp vs. pressure points w/o coolant flowing through it to see if there is any noticeable pressure drop. Now, the remote filter isn't installed either, just the filter on the back of the heat exchanger for the same reason, to see if there is any change in pressure vs. temp.
So far I only have two data points. Looks like no change to maybe 2 psi drop, which is nothing really. BTW, my checking method is done at idle since that will be the lowest pressure point. I record the mileage, ambient air temp, stock gauge oil pressure, oil temp, Arduino multigauge oil pressure, tranny temp, and coolant temp.
As far as the coolant hoses the Gates catalog has a few hoses that look like they will fit and make it look like an OEM install. I'll try to check them in person w/o having to order them. It looks like a C shaped hose would work best considering the coolant fittings on the exchanger point toward the rear and positioned slightly behind the upper heater hose.


")


")