Flop resurrection

I had one, they are a C clip axle, they are a good alternative for pre super duty axles, my problem was I had the super 60 front axle with the super duty pattern, pain in the A$$ getting matching bolt patterns front and rear, finally had to just re drill my front unit bearings to 8X6.5 lug pattern
 
Finally got around to finding the pics of how I did the driveshaft I made.
https://www.facebook.com/photo.php?....536361031322.2049523.29101008&type=3&theater
https://www.facebook.com/photo.php?...6361031322.2049523.29101008&type=3&permPage=1

Let me know if the links don't work.

Basically did this twice (or should have, I did it the way you did for the rear and it was more of a pain in the ass than the front was!) to turn two $30 4.0/auto XJ front driveshafts into custom front and rear driveshafts for an 87 YJ with an SYE and a swapped rearend. We couldn't find a stock 4.2/4.0 + ax15 + np231 front shaft anywhere in the yards and wanted the double cardan XJ style front tcase output anyways, so $60 in JY shafts and $10 in DOM from ruffstuff plus a bit of welding and it was done.

The YJ needed a lengthened front XJ shaft and a shortened front XJ shaft for the rear, so I just cut them in a way that let me swap halves and end up with two long parts spliced and two short parts spliced.
 
It's been a while since I've updated this, and since I'm getting ready to 4 link the rear, I figured I'd start back in on this thread too.

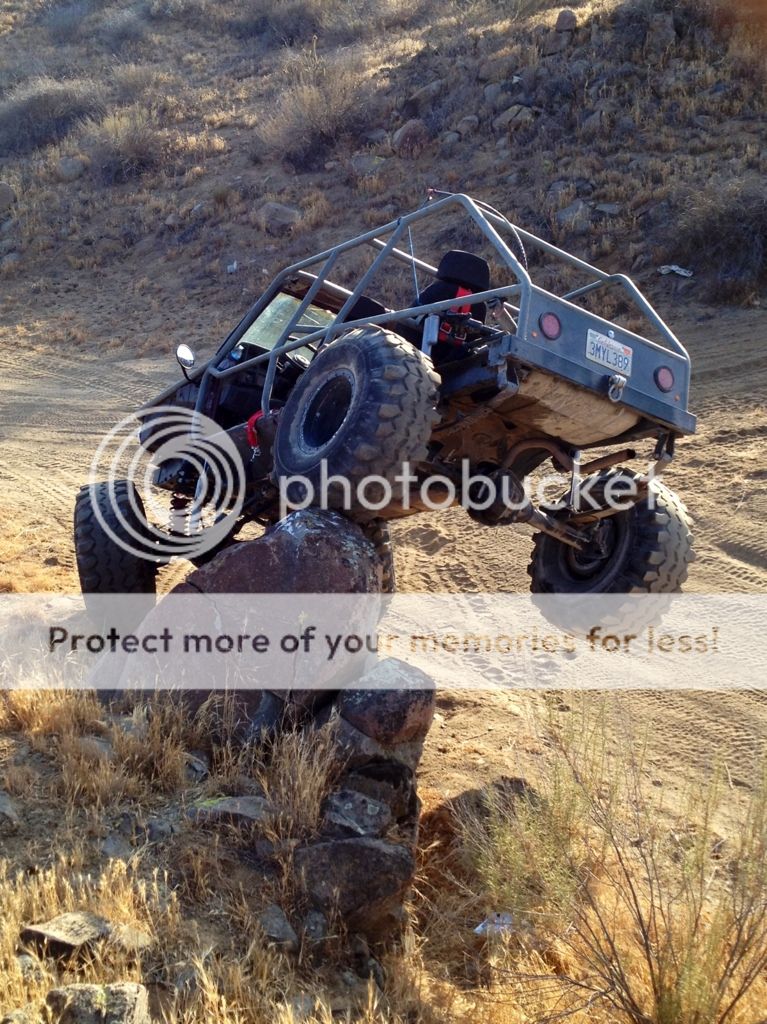
We have been having a real good time wheeling some simple easy trails out here. Found some things that I would like to change, but all in all it's been a blast.

http://i1159.photobucket.com/albums...6-9FE8-5A6DF6D7838D-9717-000007828305C88E.mp4

FDAAB81E-C2DD-4F36-9F40-FE790210E9B4-9701-00000780ABD67BC0.jpg

87642AB9-A304-40C8-B79F-106E23A7944D-9701-000007809E9AC300.jpg

14F11C68-4255-4E25-8060-7AB6151D1DBA-9701-00000780BBF61B1F.jpg

EABE716C-335F-4245-A4C7-49C7FA42CECC-8066-00000575FB9904D3.jpg

BEEEC12B-0AE3-44C0-A621-7E6CFDC04094-3839-000002AFCCE190DA.jpg

1A396093-399C-42B2-AFC6-9C45955CD8AE-276-000000F5F4E30114.jpg

43AFDFB8-03C9-4BEC-A6BF-A806B284624F-276-000000F616C0692B.jpg
 
Aaaaand my leaf springs hate me...

59970BBF-6E4A-4920-A81A-CFD5E96D1620-276-000000F6541B96E6.jpg


I built a bastard pack on the quick with a couple leaf packs I had laying around. I used the main leaf from a rustys 6.5" leaf pack and 3 other mix matched leafs below that. This set up combined with an extended shackle from rustys gave me about a 5" lift and about 11" of travel without going into the negative on the up travel. The only problem is they are so soft that backing into an obstical causes the spring to bend.... A lot.

So before I start breaking leaf packs Ive decided to 4 link the rear.

My plan is to do a dual tri 4 link set up with 16" coil overs. I'll get into more detail on this once I start, but for now, anyone that is even thinking about attempting a 4 link should read this, http://www.therangerstation.com/Magazine/winter2007/4_link_tech.htm

This is by far the best thing I've read in regards to designing a suspension set up.
 
Time for an update...

After numerous months of collecting parts, it was finally time to get back to work.

I started by taking the tires off and staring at it in my garage for a couple weeks...


Then I dug into the 231/300 doubler I picked up last year. I very unhappy when I found out that is was not the 23 spline that the guy told me it was, (I'm an idiot for taking someone's word instead of taking the time to count splines) so I swapped the input from my Tcase in this one, clocked it the way I wanted it and sealed it all up. This is the DD machine kit with twin sticks from somewhere I can't remember at the moment.


Them just cut a bunch of huge holes...


Only to find out you can't just flip a 231 and expect it to bolt right up. Had to pull the rear trans to transfer case adapter to make a template of the bolt pattern, then flip that and drill 3 new holes.


With that all squared away, I was finally able to get the doubler bolted in


Sorry for all the crappy pics, I really suck at taking pictures.
 
Next up was to get rid of the old drop down cross memeber and build something a little more flush.

I used 2x4, .250 Wall tube for the main cross memeber, then added .250 plate at the ends, and some 3x3, 3/16 box tube for link brackets. I also picked up some 2" dom bushed sleeves from ruff stuff, and used that as trans mount.


That brings me to today. I was able to get it all bolted up, cut new lower links using 2.25x .375 DOM and used new 1.25 Heims (from QA1 I think).


Yes I'm going a little over board on the link material, but I wanted something comparable to 2", .250 wall chromoly. I really don't want these to bend.

Now what I'm contemplating is if I'm going to do a True three link, two control arms, one with a Y link, and the track bar, or if I'm going to go back to a "three link", with two lower, one upper, and the track bar.

I really like the idea of not using a upper link. I need the room for the passenger to be able to sit comfortably, so I really don't want to hack up the floor board to be able to do a full length upper link.

So what I have mocked up at the moment is this,

 
Rod ends at the oh ends of the UCA won't work....need a solid joint in there for it to work
 
Run the AS numbers with the upper just underneath the floor on the passenger side.

I'd bet you'll be fine without having to cut the floor. Even then, it's not that huge of an intrusion.

 
Run the AS numbers with the upper just underneath the floor on the passenger side.

I'd bet you'll be fine without having to cut the floor. Even then, it's not that huge of an intrusion.

Good idea. I'll play with the numbers and see what I can get away with. I was worried about what Avery said, I would have to build a new UCA axle mount to be able to run solid joints
 
I couldn't be happier than with a single sided radius arm.....seems to get me through the Back Door challenge 'ok'

C819FE45-CAF6-4756-93EA-426F284E5C26.gif


Doesn't unload and I don't need a suck down winch to get it to climb. :)

This is what happens if you run all rod ends (click on image):


Regarding the rod end garrett, there is a simple solution:

20130129_131738.jpg


20130129_174206.jpg


Run this solid joint at the LCA end of the set up, adjust it and tighten it all down.

They are cheap too: http://www.polyperformance.com/shop/Solid-Rod-Ends-p-20322.html

This is an image of what I run for an UCA/LCA set up.....this is right after heat treat.

20130406_102525_zpsb7ad3f50.jpg


and on the buggy:

20130908_180145_zpsppdb1d2d.jpg
 
Last edited:
Back
Top