Incredible Hulk
NAXJA Forum User
- Location
- Burnsville, Minnesota
I figured I would add a littel tech for the sake of those that have asked about my doors in the past.
You will need a spare set of doors from the junk yard, or a big set of cajones to cut up your stock doors. I started with junk doors and cut up my stock ones later....
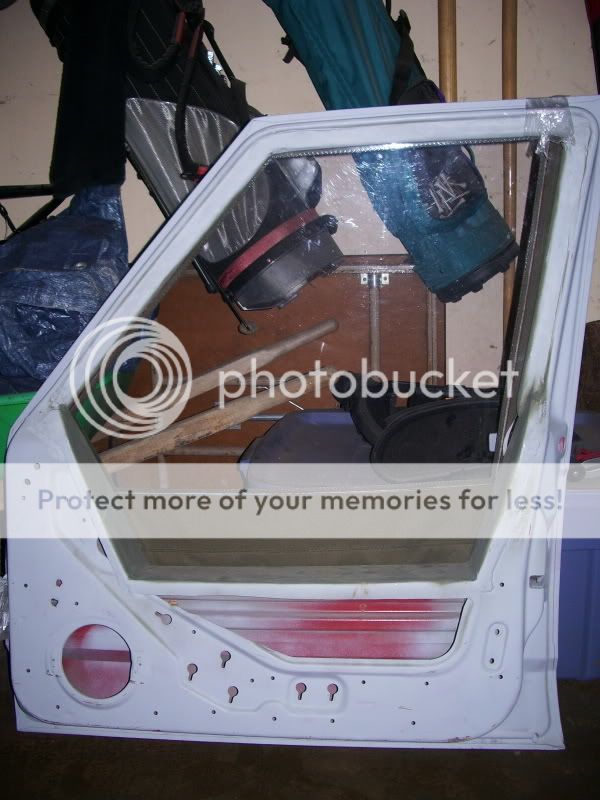
Step 1: Gut your doors. Everything needs to come out, and it kinda sucks to get it out without breaking the glass. Bring friends and beer...
Step 2: Put some masking tape up on the lines you want to cut. Measure them about 15 times each to ensure accuracy, cuz you only get one shot at this. After you know they are square, set them in a place you can see them frequently in passing for a few days to ensure you really like where you placed the lines.
Step 3: After you've made good and sure you like where you are going to be cutting. CUT.

You need to cut the front and back out at the same level, so keep your tape handy.
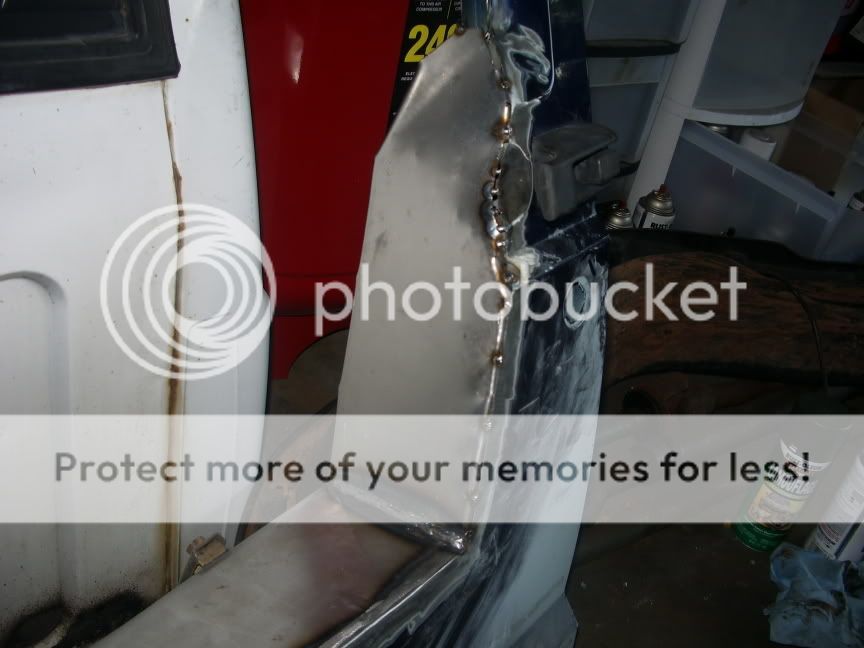
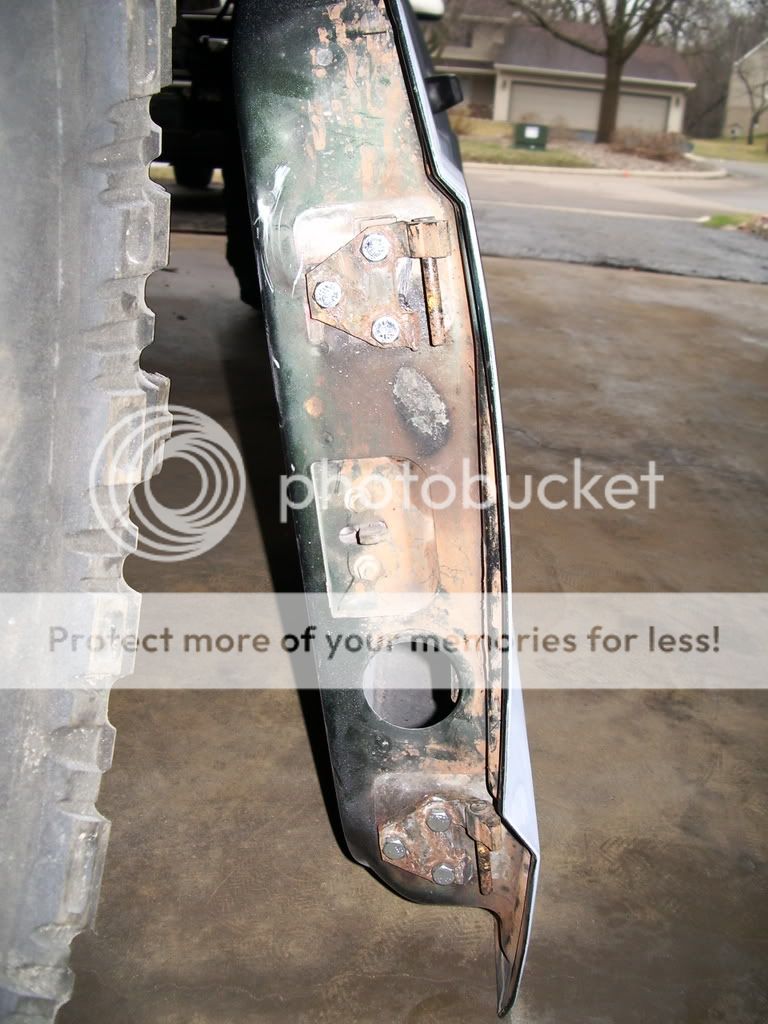
Step 4: Cut and fold flat stock into place. You can see how I did the bottom section in the pic above. Use your tape measure and your good sense to figure out your dimensions. I used 16g sheet, and I found good dimensions and prices at Menards surprisingly. This part is the worst of it. You need to cut your sheet and leave a 3/4" lip on the edge of each lip that you are going to fold over. You do this in order to have a good edge, and more solid surface to weld to. Welding sheet metal suck by itself, dont add a butt weld to the equation. It also helds add rigidity to your sheet. Do your best to get your edges/corners as close to your stock sheet metal as possible to avoid having to pinch in the stock metal as that will leave dimples and wrinkles htat you will have to fix with bondo. The less bondo the better. The bottom piece needs something to rest the inside edge on, so I simply welded in a piece of 1/2" square stock to accomplish that.
The sections on the sides are the absolute worst, especially around the door handle, but be patient and its worth it. The more cuts you make in your lip, the easier you can make a lip on crazy angles and bends. Dont forget to add a lip to the back edge of you sheet as well.
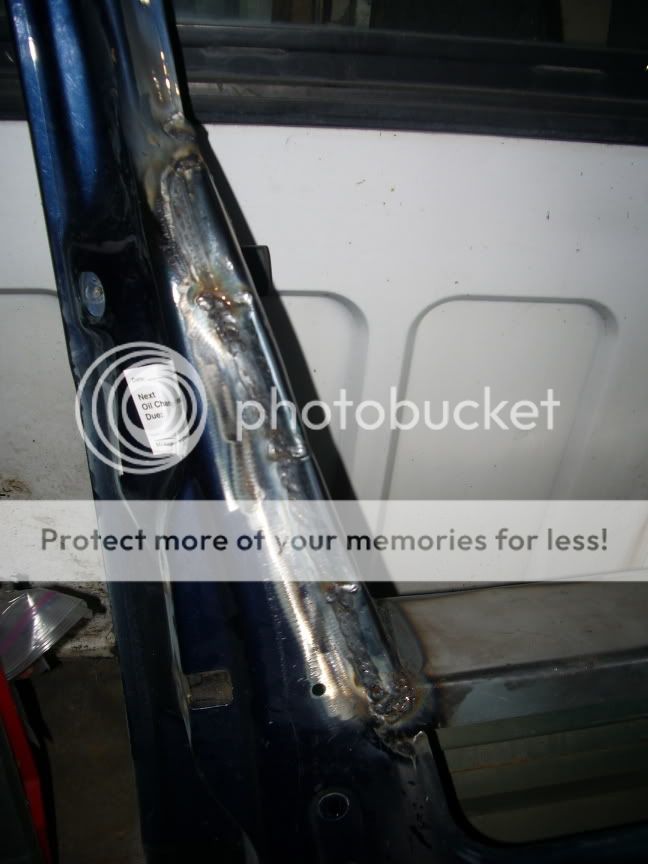
Step 5: Once you have done that you can start welding. Just tack tack tack, welder on low, since this is nothing structural. Fill in all the gaps, chase those holes, and from there, a flap wheel is your friend. Grind it smooth and reflect on what a sheet metal guru you are becoming. The below pic has hte front edge welded in and ground down, and the back sheet tacked in place for reference.
You will obviously repeat this step all the way around until your sheet is welded in.
Step 6: Dont froget you need to weld in the back. You can fold those edges over and tack them in place to keep the structure nice and strong.
Step 7: Once you have cleaned up all the edges sufficiently you can move on to the window crease. I filled mine with 1/2" round stock and stitch welded it itn, and filled the rest with bondo. Sorry, no pics of this step. Just bend it in your vice to match the curve of the window and weld it in, pushed up against the front edge since 1/2" doesnt quite fill it. If you can find slightly bigger round stock it will fill nicer, but I couldnt find any.
Step 8: Now you're home free. Sand down all your joints nice and smooth with your grinder, and get to shluppin' bondo. Not fun, but it sure cleans it all up nice. If you need me to tell yuo how to bondo, this project isnt for you.
Step 9: Chop your handle in half, so the back bolt still holds it in place and you can use the stock handle linkage to open it. That way you dont have to rig any fancy handle or anything.
Paint it and you're done!
Should look somethin like this...
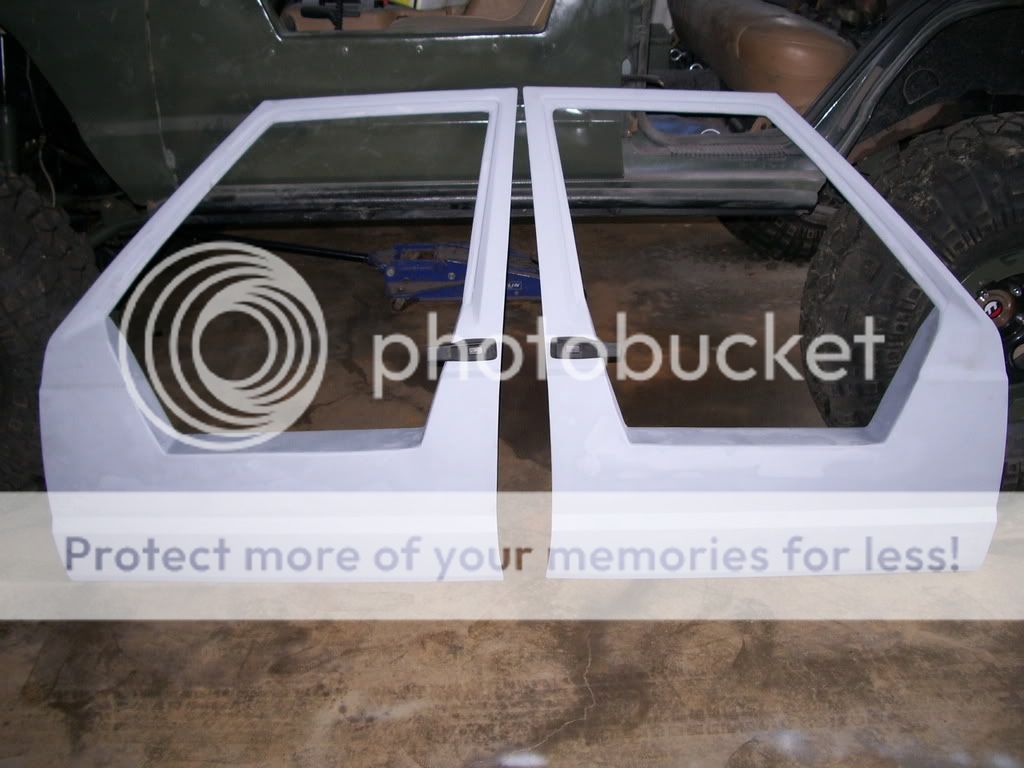
It's a butt-load of work, and is very time consuming, but all in all not a terribly hard project. The increase in visibility is awesome, and my armpitt doesnt hurt anymore. Love it.
If you arent much for fabrication, the set in the last pic is up for sale on ebay under Cherokee half doors.
Feel free to ask questions if you got em...
j
You will need a spare set of doors from the junk yard, or a big set of cajones to cut up your stock doors. I started with junk doors and cut up my stock ones later....
Step 1: Gut your doors. Everything needs to come out, and it kinda sucks to get it out without breaking the glass. Bring friends and beer...
Step 2: Put some masking tape up on the lines you want to cut. Measure them about 15 times each to ensure accuracy, cuz you only get one shot at this. After you know they are square, set them in a place you can see them frequently in passing for a few days to ensure you really like where you placed the lines.
Step 3: After you've made good and sure you like where you are going to be cutting. CUT.
You need to cut the front and back out at the same level, so keep your tape handy.
Step 4: Cut and fold flat stock into place. You can see how I did the bottom section in the pic above. Use your tape measure and your good sense to figure out your dimensions. I used 16g sheet, and I found good dimensions and prices at Menards surprisingly. This part is the worst of it. You need to cut your sheet and leave a 3/4" lip on the edge of each lip that you are going to fold over. You do this in order to have a good edge, and more solid surface to weld to. Welding sheet metal suck by itself, dont add a butt weld to the equation. It also helds add rigidity to your sheet. Do your best to get your edges/corners as close to your stock sheet metal as possible to avoid having to pinch in the stock metal as that will leave dimples and wrinkles htat you will have to fix with bondo. The less bondo the better. The bottom piece needs something to rest the inside edge on, so I simply welded in a piece of 1/2" square stock to accomplish that.
The sections on the sides are the absolute worst, especially around the door handle, but be patient and its worth it. The more cuts you make in your lip, the easier you can make a lip on crazy angles and bends. Dont forget to add a lip to the back edge of you sheet as well.
Step 5: Once you have done that you can start welding. Just tack tack tack, welder on low, since this is nothing structural. Fill in all the gaps, chase those holes, and from there, a flap wheel is your friend. Grind it smooth and reflect on what a sheet metal guru you are becoming. The below pic has hte front edge welded in and ground down, and the back sheet tacked in place for reference.
You will obviously repeat this step all the way around until your sheet is welded in.
Step 6: Dont froget you need to weld in the back. You can fold those edges over and tack them in place to keep the structure nice and strong.
Step 7: Once you have cleaned up all the edges sufficiently you can move on to the window crease. I filled mine with 1/2" round stock and stitch welded it itn, and filled the rest with bondo. Sorry, no pics of this step. Just bend it in your vice to match the curve of the window and weld it in, pushed up against the front edge since 1/2" doesnt quite fill it. If you can find slightly bigger round stock it will fill nicer, but I couldnt find any.
Step 8: Now you're home free. Sand down all your joints nice and smooth with your grinder, and get to shluppin' bondo. Not fun, but it sure cleans it all up nice. If you need me to tell yuo how to bondo, this project isnt for you.
Step 9: Chop your handle in half, so the back bolt still holds it in place and you can use the stock handle linkage to open it. That way you dont have to rig any fancy handle or anything.
Paint it and you're done!
Should look somethin like this...
It's a butt-load of work, and is very time consuming, but all in all not a terribly hard project. The increase in visibility is awesome, and my armpitt doesnt hurt anymore. Love it.
If you arent much for fabrication, the set in the last pic is up for sale on ebay under Cherokee half doors.
Feel free to ask questions if you got em...
j
")