• Welcome to the new NAXJA Forum! If your password does not work, please use "Forgot your password?" link on the log-in page. Please feel free to reach out to [email protected] if we can provide any assistance.

Boatsides

Alright, so this is pretty much the last update until spring break:tear:

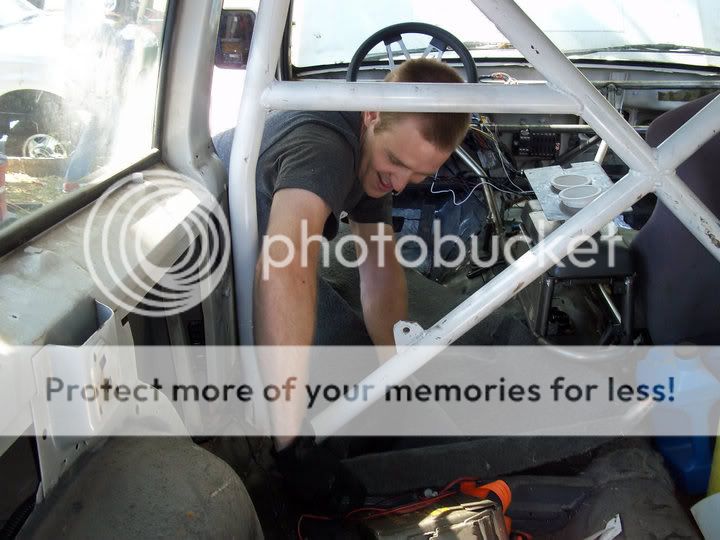
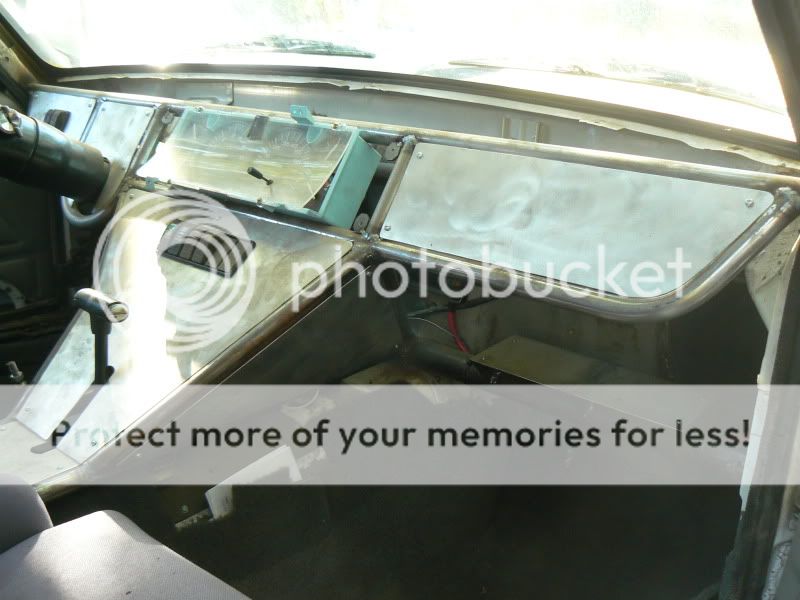
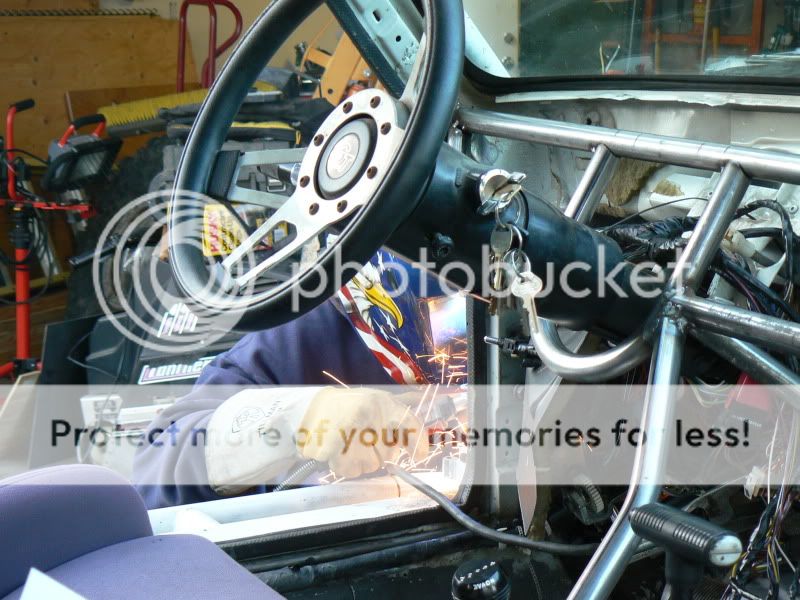
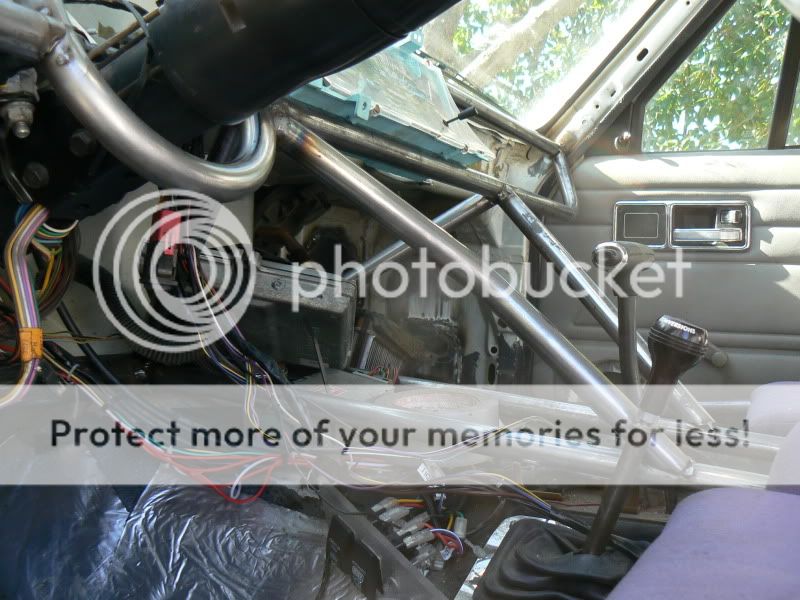
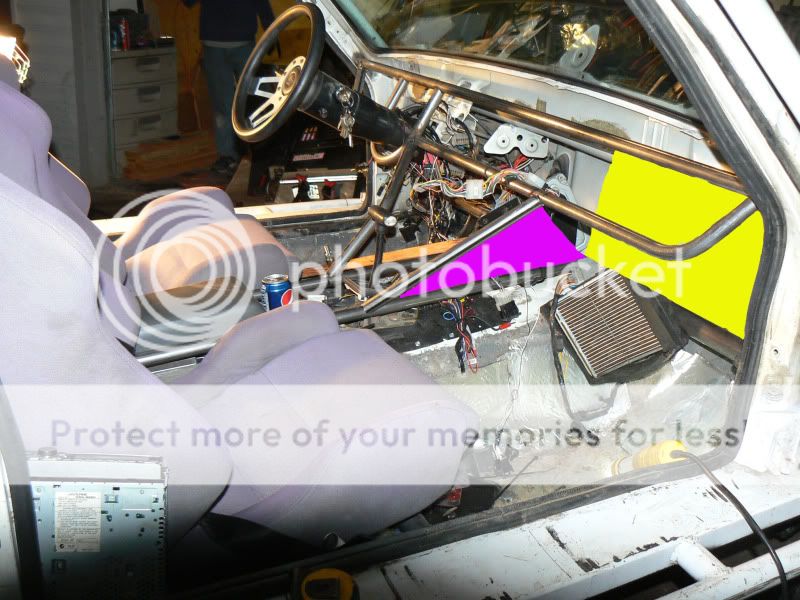
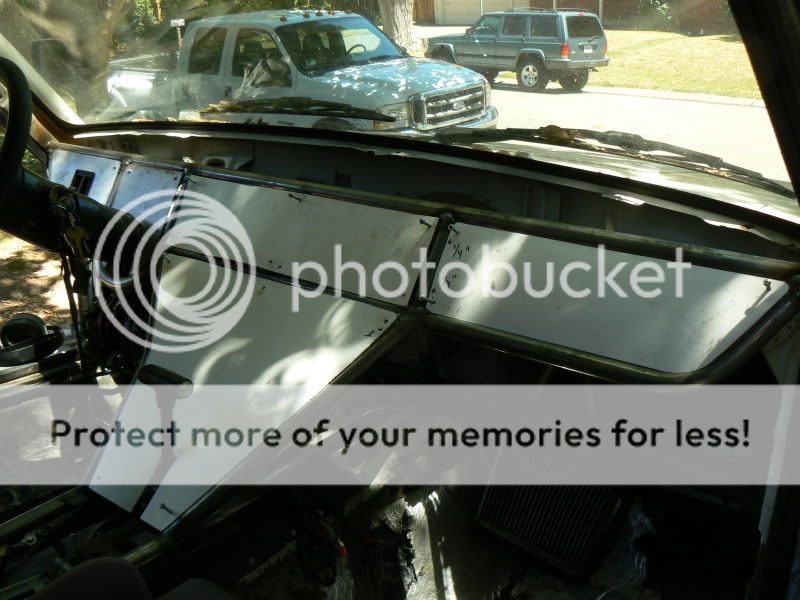
We got the dash structure finished. Needs to be final welded, and a couple small supports added. Center console needs to be made, but ran out of time and materials. Finished the A pillar support and got a basic idea of where things will go.

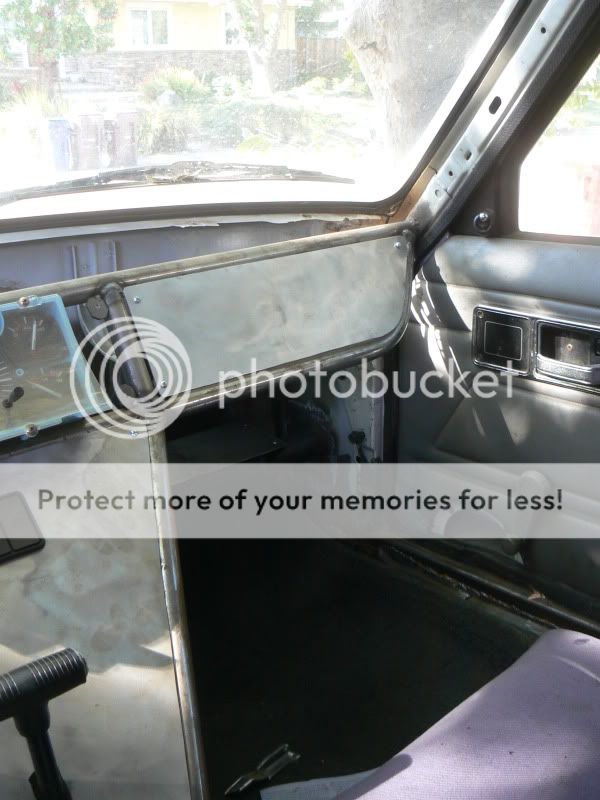
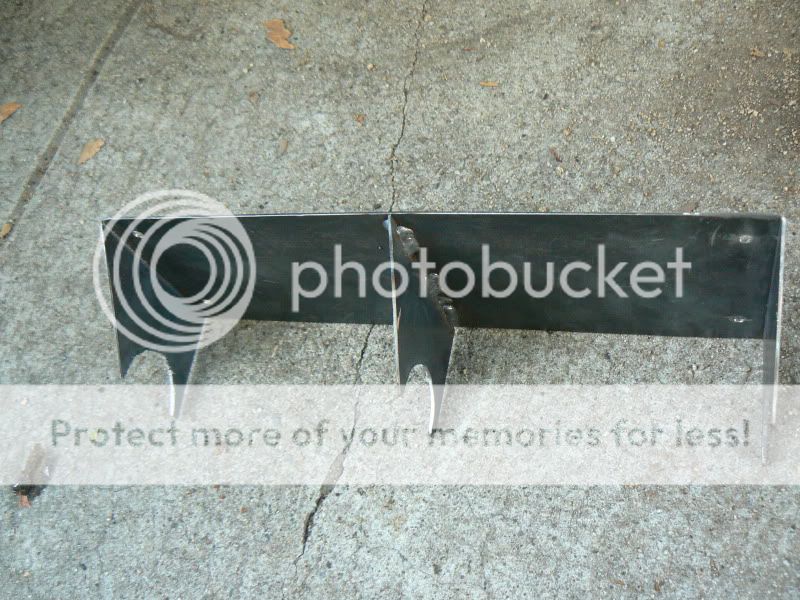
A pillar support welded up and painted.
002-12.jpg


009-4.jpg


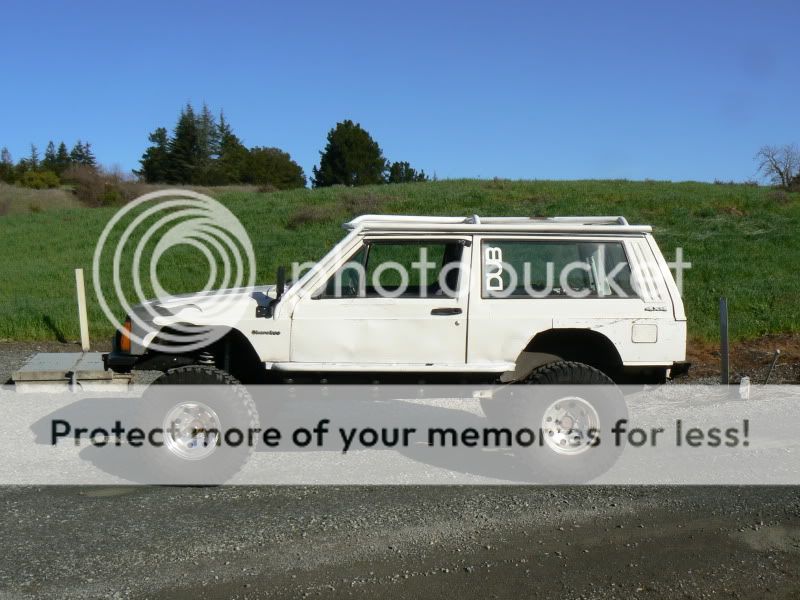
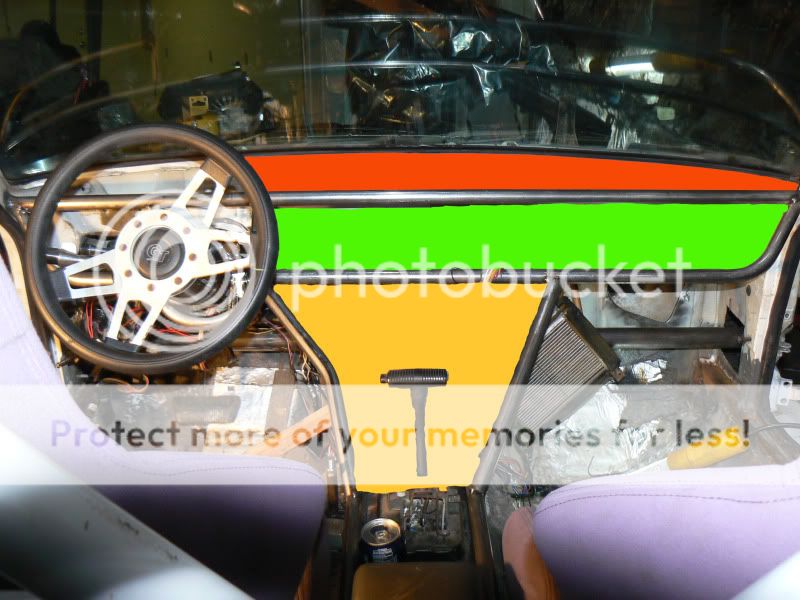
I realize now that the light didnt really work, but a semi flat general idea of what the entire Jeep looks like
015-1.jpg


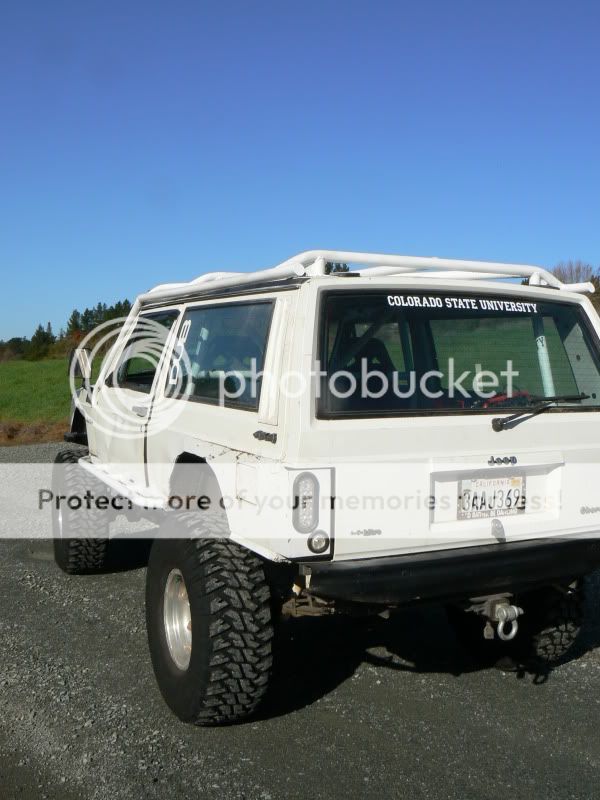
Also got the halo capped and a new CSU sticker put on
019-1.jpg


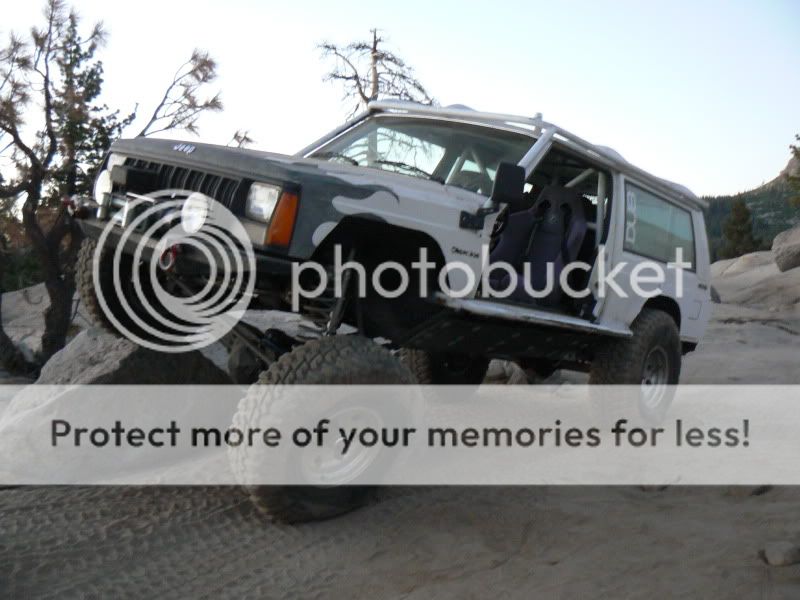
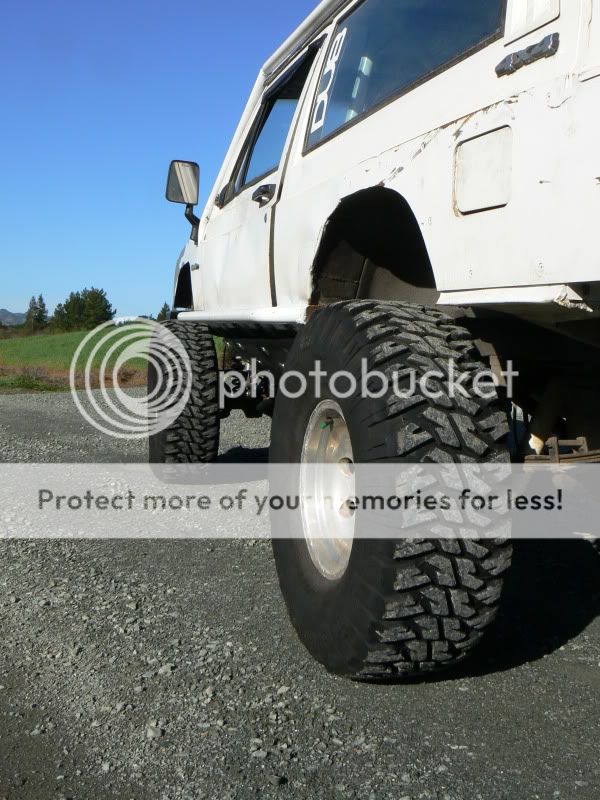
Boatsides stick up to about the top of a 35'' MTR
021-1.jpg


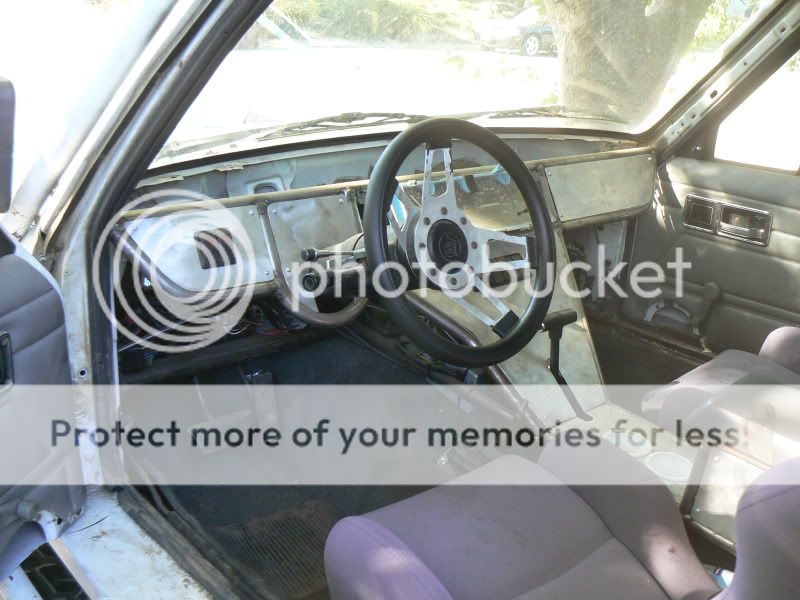
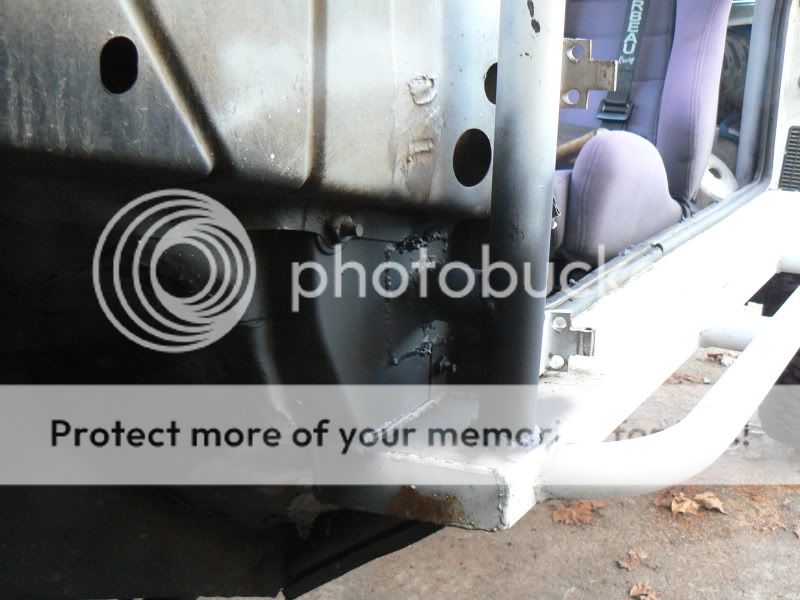
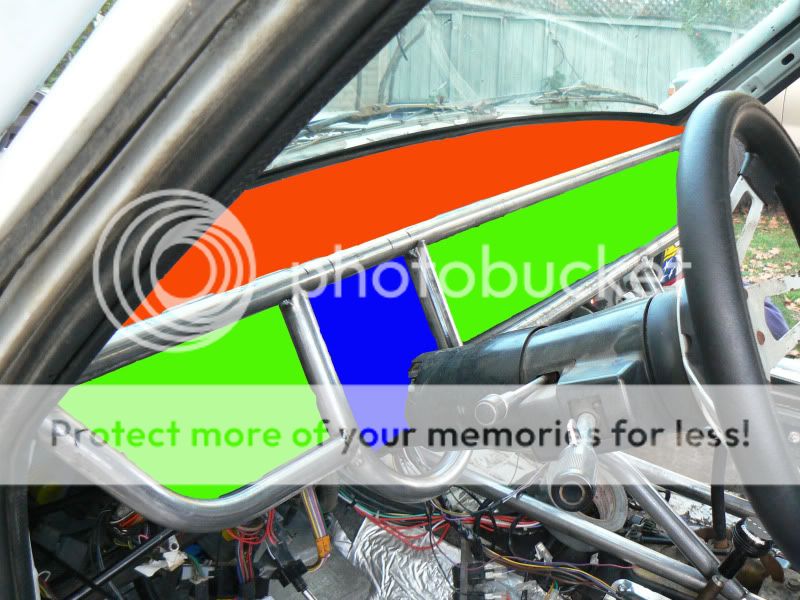
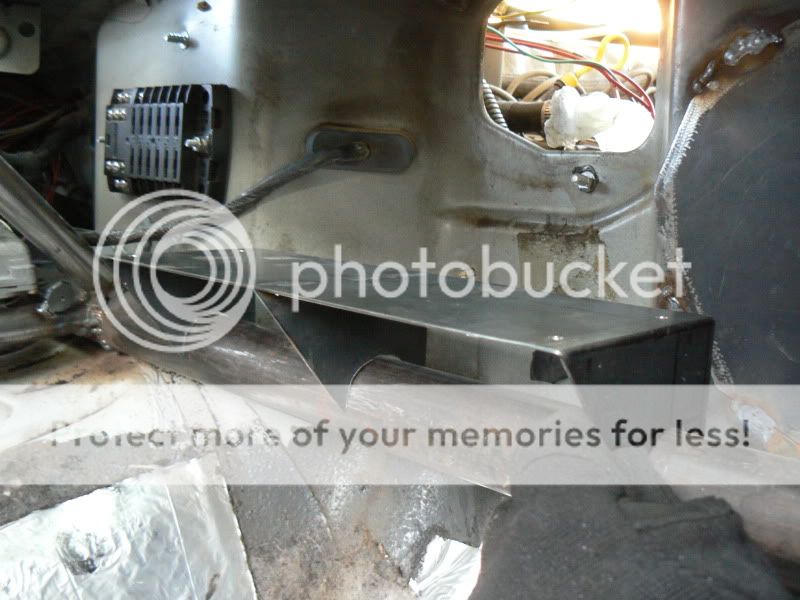
You can make out the dash support going towards the front from where the dash meets the angled dash.
025-2.jpg


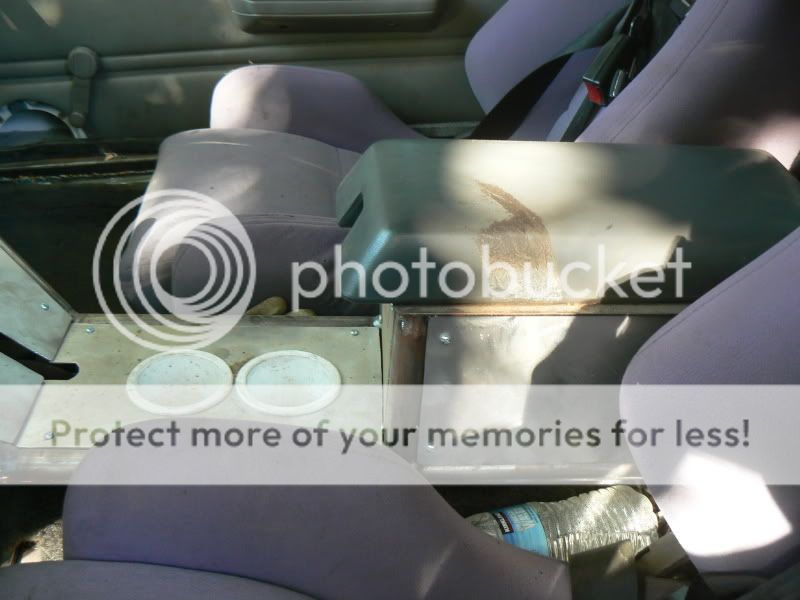
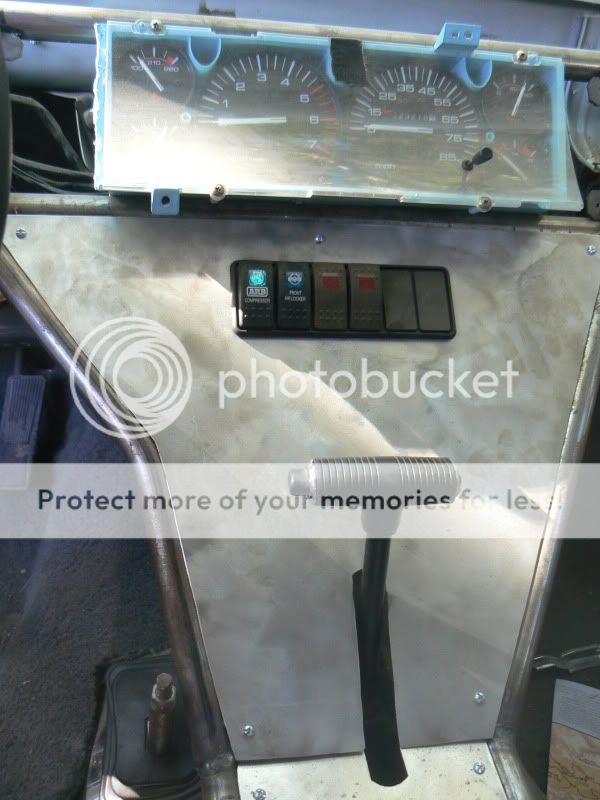
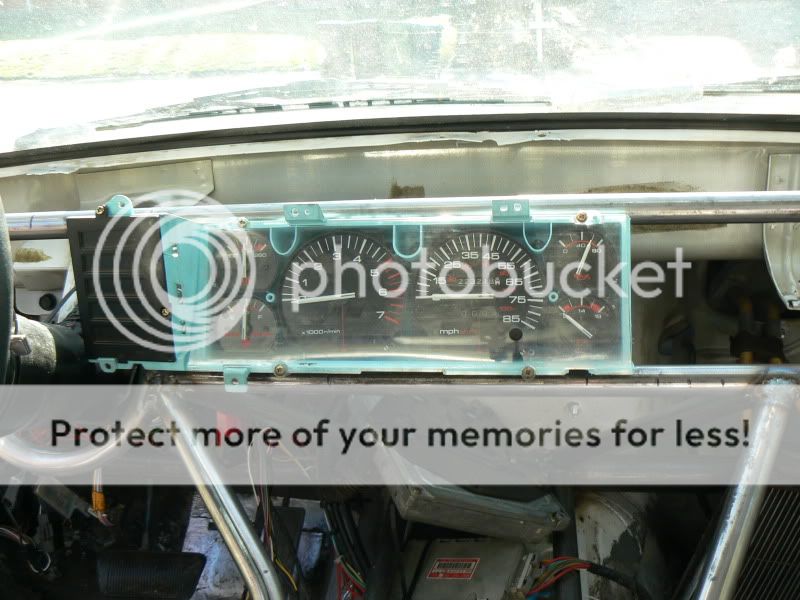
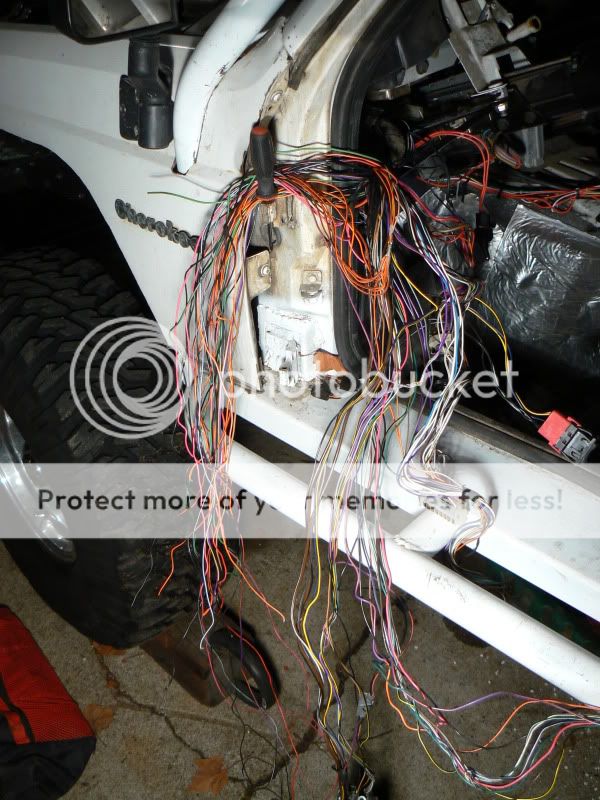
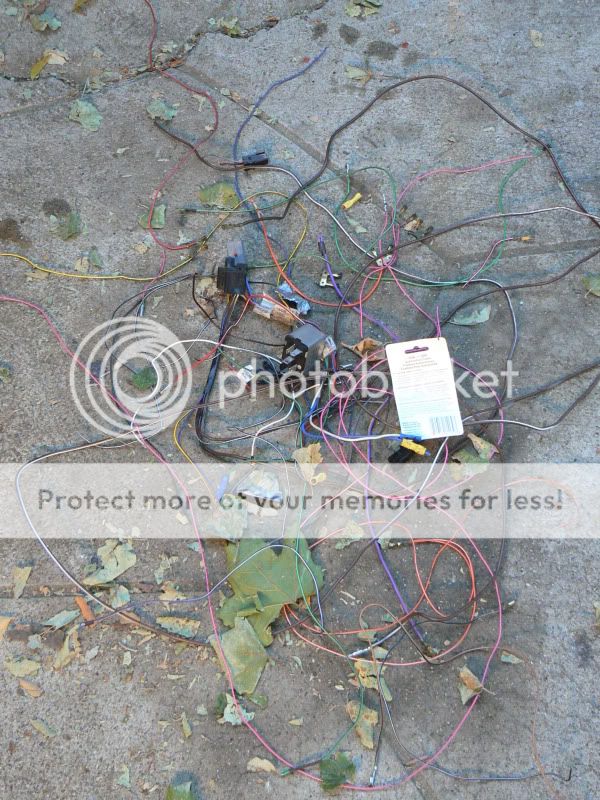
And to drive the Jeep home I had to put the gauge cluster back together and tuck it into the dash. We hadnt planed it that way, but it worked. Plus, no zip ties!
028-1.jpg


And thats it. I go back to school tomorrow, and I need to figure out how to get my Jeep back into my parents garage, strip two axles of brakes, pack all my junk up, and clean my room:dunce:
 
That looks pretty cool, might be time to build a rear bumper though... ;)

-Alex

He hasn't had his vision of that yet... Needs a good lab class with no hotties.


Nice work...
 
That looks pretty cool, might be time to build a rear bumper though... ;)

-Alex

Yes, rear bumper does need to be replaced, especially after wheeling in the rocks and having to use a sledge hammer to hammer the bumper back down so I can get my hatch open and closed.


I have a plan to do a tube bumper with integrated gas tank skid and rear shackle relocaters, but like everything else I seem to do, other things have to be done first.

Ideally I would like raise my gas tank at the same time, so thats another can of worms. Then when I do the shackle boxes I would also like to get new shocks and mount them on the Ubolt plates which in turn mean making new upper mounts, and also to redo my spring pack with some Teflon paint and full length liners as well as adding a couple more leaves.


And... and...
 
Alright, so here is a couple quick photoshops of what I am going to do with the skins on the dash.

Green is set. Im not sure what to do with the blue area, especially around the bottom of the column.
010copy.jpg


The yellow I am not sure if I am going to follow this design and cut out a hole for the shifter, or if I will stop the panel before the shifter and bring it down to the floor there.
002copy.jpg


Yellow will be the "backing" of the dash, just so you cant see the firewall and hopefully clean up the look a little bit. Drivers side will be significantly harder to do because of all the junk under the steering column so we shall see what happens there. Purple is the sides of the dash part. Not sure how I will connect the two parts, so again, we shall see.
007copy.jpg
 
Those panels are going to be removable, right? At least the ones you'd have to pull to get to the shifter mechanism and column?

I think it'd look pretty good if you cut a hole for the shifter and put your own shifter legend on there - you could do one pretty easily with some small bulbs (say, 74s behind labeled lenses) wired to the NSS.
Yes, all panels will be removable. Hard part will be doing all those tabs and getting the panels cut and bolted up. I hate doing finish work that I will see every time I drive.

I will either use the stock surround or come up with some other way like you mentioned. Lighting Im not so sure about since I rarely wheel at night and unlike you Im not all that electrically talented.

Speaking of which, here are some links for others/myself so I dont loose them.

Switches
http://www.otrattw.com/products.php?cat=5

Switch mounting/relay boxes
http://naxja.org/forum/showthread.php?t=937436

Fitch VAs' site with the OG relay box, although down at the moment
http://fitchva.com/jeep/?p=42


Part numbers for the AutoMeter gauges I would like at some point
ATM-4314
ATM-4327
ATM-4337
ATM-4357
ATM-4492
SUM-G2886

Almost $400:shiver:

And seems a stock 89 uses 0-88 ohms for the gas gauge
http://naxja.org/forum/showthread.php?t=1016467

No one posted back in this one, but at some point it might get some info in it
http://pirate4x4.com/forum/showthread.php?t=633715
 
hopefully you don't actually use those colors....it'd look like a clown car :p
 
hopefully you don't actually use those colors....it'd look like a clown car :p
Obviously those different colors are just to distinguish the panels for visual purposes.


The final panels will be a light purple with pink bars:gee:
002copy.jpg


How come you didn't bend that passenger side bar to match the driver's side? That would drive me nuts! LOL!
Billy
Leg room for the driver. Passenger side has plenty of leg space, but I found that with a strait bar I would be hitting my knee on the tube every time I put my foot on the gas pedal.

Those stupid little bars took us almost 4 hours to make them both, although that was making them twice because we realized the issue with my knee. Anyone who is shorter than me didnt have an issue, but since I hope I am the main driver of this Jeep, we decided to suck it up and make them again.


Im hoping my layout of the gauges and switches will make the non symmetrical layout look good, but we shall see.
 
It has been awhile since I updated this thread. Part of the time was spent away at school, and the rest I have been slowly working on the Jeep. Very little progress has been made, but its getting there.

First thing I did was redo the wiring I had done here:
http://www.naxja.org/forum/showthread.php?t=1020229&highlight=fuse

010.jpg


and actually pull all of the wiring out from the fuse panel. At a later date I will post back in that thread, but for the time being, for my 89 Renix I needed a 1/4'' socket on the engine side of the plug to pull the two halves apart. Had to remove the washer bottle and contort my hands in ways I dont think I will be able to do again, but it does come apart!
002-3.jpg


The two portions of the interior pieces
006-1.jpg


I pulled a lot of wires out, and also took out a lot of wires out of the rear wiring loom. A dental pick and a small regular screwdriver work rather well in removing all the pins in the connectors.
007-1.jpg


Then I got back to work on the dash. I needed around 60 panel tabs to hold all of my dash panels on, and I orginally thought about buying them, but at almost $1.50 per tab, that was a lot more money than I wanted to spend, so I made them all myself. Cut, drilled and tapped a whole bunch of these little boogers.

Put most of them on, which isnt much to take pictures of, but those are some of the most time consuming things.
Jeep045.jpg


Due to material costs, I decided to forgo the aluminum sheeting I originally decided upon and went with a more cost effective approach and use poster board.
Jeep051.jpg


Made a bracket for my Summit Racing heater. Turned out pretty damn good if I do say so myself, but no one will ever see it, so it was most likely a wasted effort. It was also the first time I drew out exactly what I wanted on the metal in detail, and it worked out nicely.
Jeep055.jpg


Jeep056.jpg


Jeep058.jpg


And thats all of the updates for this part.


Tomorrow I need to:
-Install shorter limit straps
-Install rock lights
-Put in a "new" carpet kit
-Wire up select accessories, ARB, fan override, rock lights and ejector seats
-Remount both seats
-Plumb cooling system with new heater
-Pack, throw the Jeep on the trailer


And then I head to the Rubicon for the weekend, followed by the NAXJA 
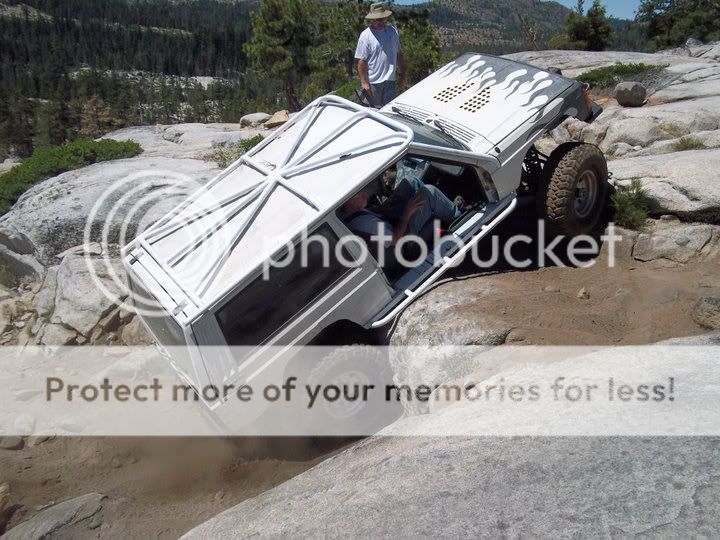
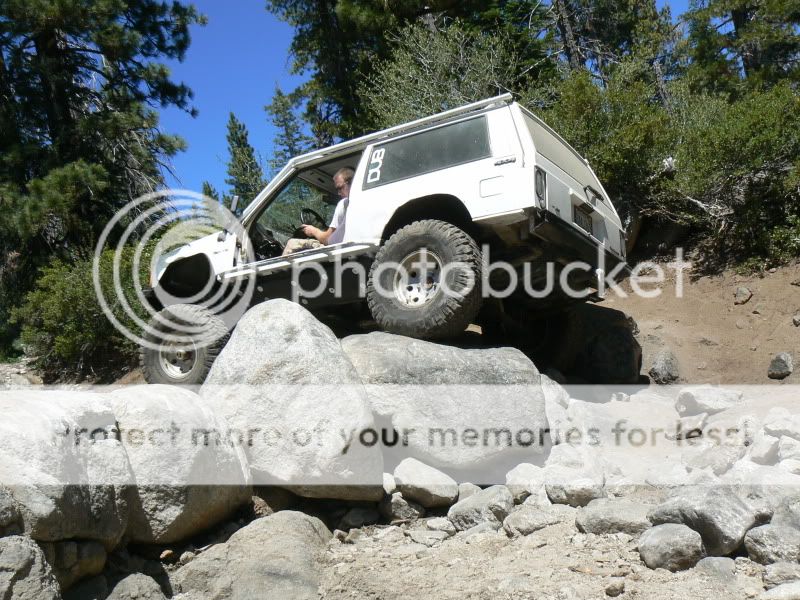
SierraFest, and right after that is done I leave to go wheeling for a week in Moab, Utah! :thumbup:
Ill be gone a full two weeks. All of it, minus the days of driving, will be wheeling!

For those of you who I will see at SierraFest, please dont notice the missing panels, the ghettoriged stock gauge cluster or the other hundred details I havent finished yet. Its a work in progress, I swear:laugh::eyes:
 
Well its time for the end of summer updates. For once in my life I actually went wheeling during the summer rather than work on my pile o junk and it was awesome! I love working on the Jeep, but I had forgotten just how much fun wheeling is.


Beginning of summer I went to Hollister Hills and got to use my cage as a rub bar of sorts. Driver rear stuffed into the dirt/tree, but the cage saved my rear body.
DSCN5506_edited.jpg


Came home and worked on the dash as you can see above. Progress was slow until the day before I left for a two week trip to the Rubicon, NAXJA Sierrafest 2010, and finally a week in Moab.

Two friends and my dad worked with me and we hammered it out.


Pulled both seats and seatbelts and installed a stock carpet kit. With an automatic and wheeling during the summer it would get really hot inside, to the point of burning your leg if you touched the tranny tunnel, and I can say that it cut my interior temps by 10-20*:yelclap:
It was rather interesting installing something that should drop right in, and then realize just how much you have changed to make it not fit
40498_419093369889_563914889_4412905_453439_n.jpg


Dash "done"
017.jpg


Cup holders! And a center console that uses the stock lid.:yelclap:I love being able to open a drink and set it down, and then rest my arm on something.
021.jpg


Passenger side as seen from the drivers seat
022.jpg


Shifter hole, switches and the awesome stock gauge cluster
023.jpg


Passenger side
025.jpg


It still needs a couple more panels to be finished, but it was good enough to go wheeling.

Reinstalled my homemade limit straps made out of an old seatbelt. I had my girlfriends mom sew them up originally almost 4 years ago, and they worked flawlessly until I had her remake them.
MattsPics001.jpg

One side ripped after the first hour due to bad installation, the other finally gave out in Moab after two weeks of abuse.
Broken:
MattsPics027.jpg


After all the work, loaded the Jeep on the trailer, packed the truck and headed up hoping I hadnt forgotten anything since I would be wheeling for the next two weeks.


Got to the Rubicon Saturday afternoon and decided to set up camp and start wheeling Sunday.

Sunday got up and wheeled in from Loon Lake only to encounter every single person coming out after the weekend. Progress was slow until we got to the Wentworth Springs cutoff and we made good time until Soup Bowl. From there we turned around and got back to the slabs when my friends CJ blew a power steering hose. I toasted a powersteering pump going back to camp to get them parts and tools. :gee:

Got them off the trail and Monday trailered their Jeep to a semi local parts store and swapped lines in a NAPA parking lot.
40563_419097399889_563914889_4413193_7253256_n.jpg
 
Night wheeled Monday night in Wentworth to the slabs, had dinner on the slabs and wheeled out Loon. Tuesday wheeled in Wentworth again, messed around on the slabs and came back out Loon again.

Poseur shots on the slabs
MattsPics006.jpg


MattsPics046.jpg


Some of you might remember my issues last summer breaking my steering box on the slabs and getting denied on a ledge. Well I tried it again, and got denied yet again.
So this is the only picture I have of me wheeling, and right where I had to stop. We look at my air line going to my front axle and find that at full compression my drivers side upper control arm was hitting my trackbar which then pinched my air line. Quick fix got that fixed, but then I realized that my upper part of my radius arms was hitting my yoke and breaking the ujoint Ubolts. I figured it had self clearanced itself, and put a new ubolt in. Start to pop back up the ledge, and bang, there goes the Ubolt. We decide that if we use the trackbar to shift the axle over to the side so the ubolt wont hit.
5720_118343614889_563914889_2130134.jpg


Tried it for a good 10 minutes and just couldnt get it. Next day I let my dad drive and he walked right up. Twice.
Me getting denied
40028_419097139889_563914889_4413173_7208090_n.jpg

I did finally get it, but it took me a lot of trying and failing. Funny to see my dad walk right up and me struggle.

And another posuer pic of me on the Wentworth entrance.
MattsPics026.jpg


Next stop was the NAXJA SierraFest, so we packed up Wednesday and drove to Hermit Valley. I wheeled Slickrock for a night run (hopefully putting on a good show on the last obstical), and Deer Valley.

I heard via CB that Sharkmark had tried this mud pit and hadnt made it, so I figured I would show him up. I got even more stuck than he did:roflmao:
40614_419098049889_563914889_4413234_129114_n.jpg

F*%$ mud! Never going in that crap again.

Doing an optional ledge on Deer Valley. See Letterman, I did do it!
DSC07078.jpg

(Thanks srmitchell for the pic!)
Had an awesome time seeing old friends, meeting new people and enjoying a fun weekend wheeling.
 
Last edited:
Didn't read all the way back but what summit racing heater did you use?

Not winter yet so I'm sure you haven't tested it, but I'm going to run into issues with the stock HVAC unit and if I can't patch it together I might have to go that route.
 
Didn't read all the way back but what summit racing heater did you use?

Not winter yet so I'm sure you haven't tested it, but I'm going to run into issues with the stock HVAC unit and if I can't patch it together I might have to go that route.

I ended up getting this heater:
http://www.summitracing.com/parts/SUM-991102/

I have not installed it yet so I cant say for sure how well it works, but I found a ton of reviews on Pirate which all say its better than the more expensive Mojave heater. Supposedly on low it hot enough to roll down your windows.


I didnt have time this summer to install it, and I didnt think I would need a heater in Moab in the dead of summer. :laugh:Hopefully over Thanksgiving Ill throw it in and see how well it works.
 
Back
Top