SyCo
NAXJA Forum User
- Location
- Spokane, WA
Scored a set of leather seats from a 97 ZJ for pretty cheap and decided to install them this weekend. Like any good forum member, I used the search option pretty extensively, but not any one single thread had all the information that I thought was needed for a complete, easy to follow write-up. Therefore I decided I would post my own.
FRONTS
The front seats are really easy, provided you swap your XJ brackets to the ZJ seats. I didn't take any pictures of the install, because it's such a simple swap, just remove your stock seats, remove the brackets, swap them over to the "new" seats, reinstall seats, done. Four 13mm bolts removes and reinstalls the brackets, and I found that both my 98 XJ and the 97 ZJ used the exact same holes on the seat bases.

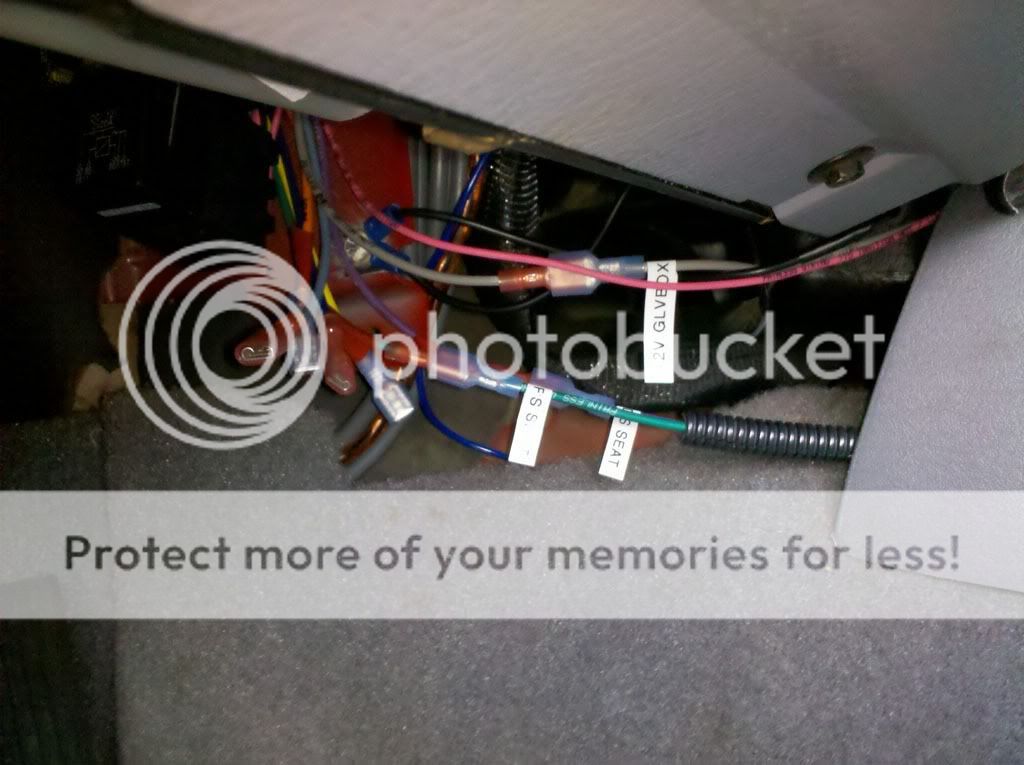
Since the ZJ seats are power, I ran 12V power to the original seat wiring harness. I tapped them into my painless fuse block, and decided to go with leads that were always hot, in case I wanted to adjust them without the ignition on. Since my XJ had manual brackets, my "new" leather seats have manually adjustment front to back, and power recline.
REARS
Here's where the fun begins. First thing to do is to remove the stock bench seat, cushion and back, as well as the brackets above the wheel wells where the seat back posts lock in.
I would recommend installing the seat cushions first, before the seat backs. The reason being is that if you don't install the seat backs in the correct position, then the seat cushions won't flip forward or back correctly.
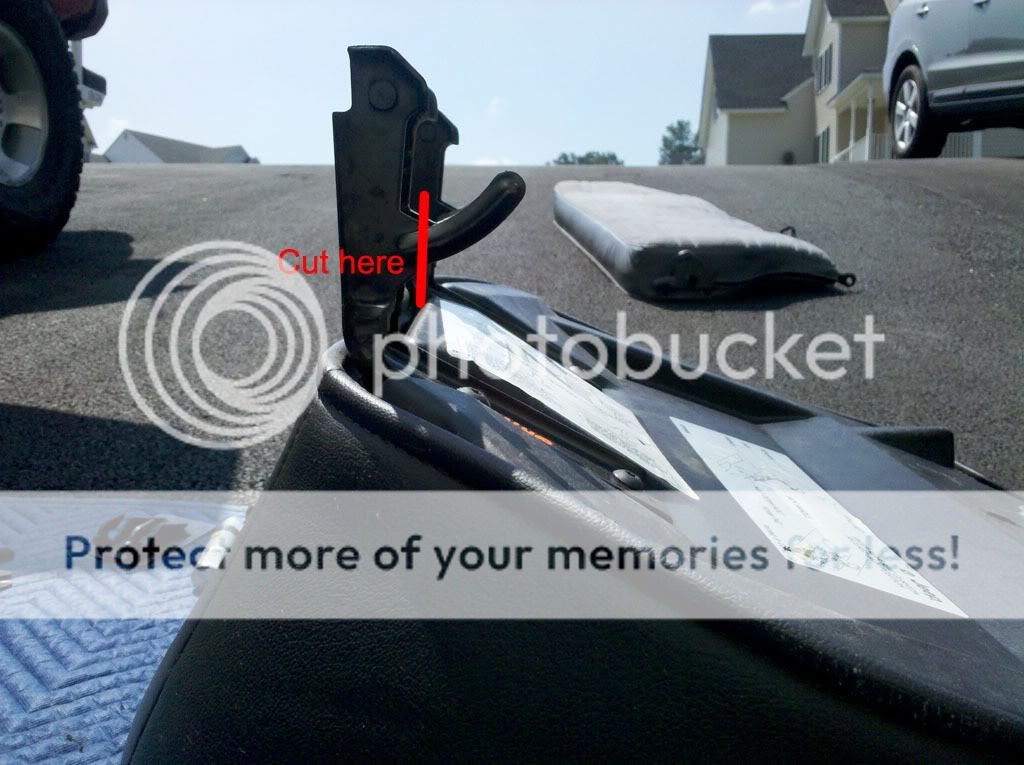
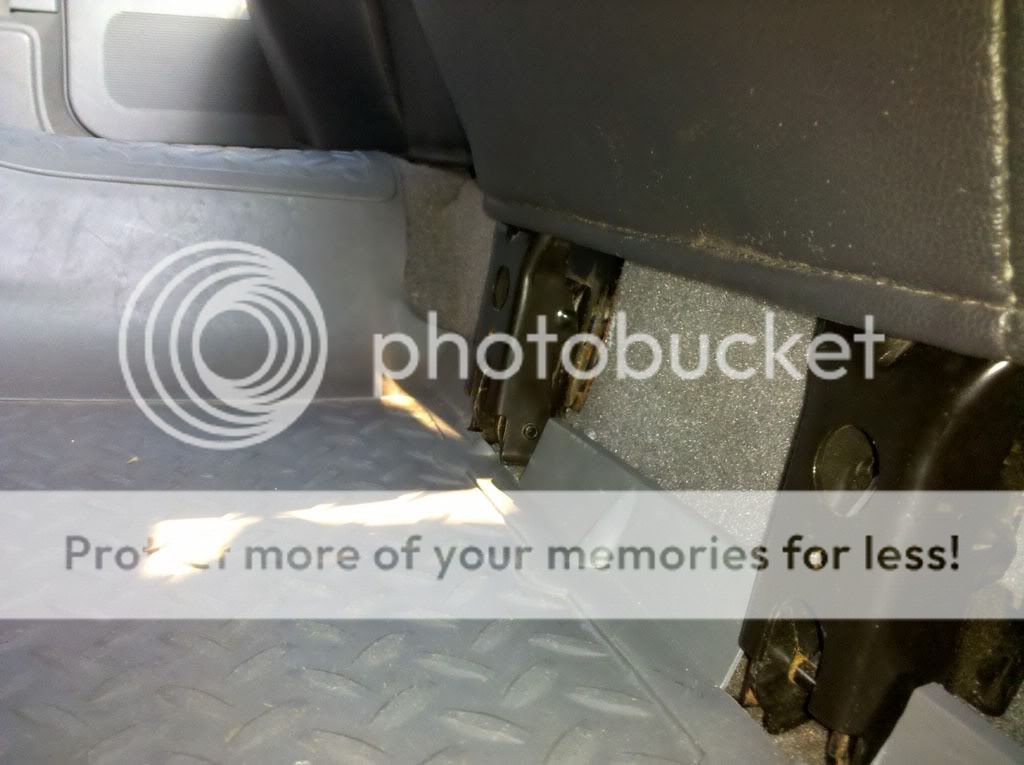
The ZJ seat cushions have a two part bracket, one part is bolted to the seat and the other is bolted to the vertical metal part that runs along the width of the XJ. The first thing to do is to cut the "ears" off the seat bracket since they will hit the metal section when you try to mock the seat up.
The second problem you'll run into is that the ZJ seats are wider than the XJ, so you'll have to trim the bottoms of the seat cushions in order to make them fit. I think I trimmed more than others have, but it worked out well and all you have to do is follow the lines that are already there. I used an angle grinder with a cut off wheel and jammed a piece of cardboard between the plastic and the foam to protect the foam and fabric. The fabric is secured with plastic pop rivets that easily come out with a flat head, then just pull it back over the foam.
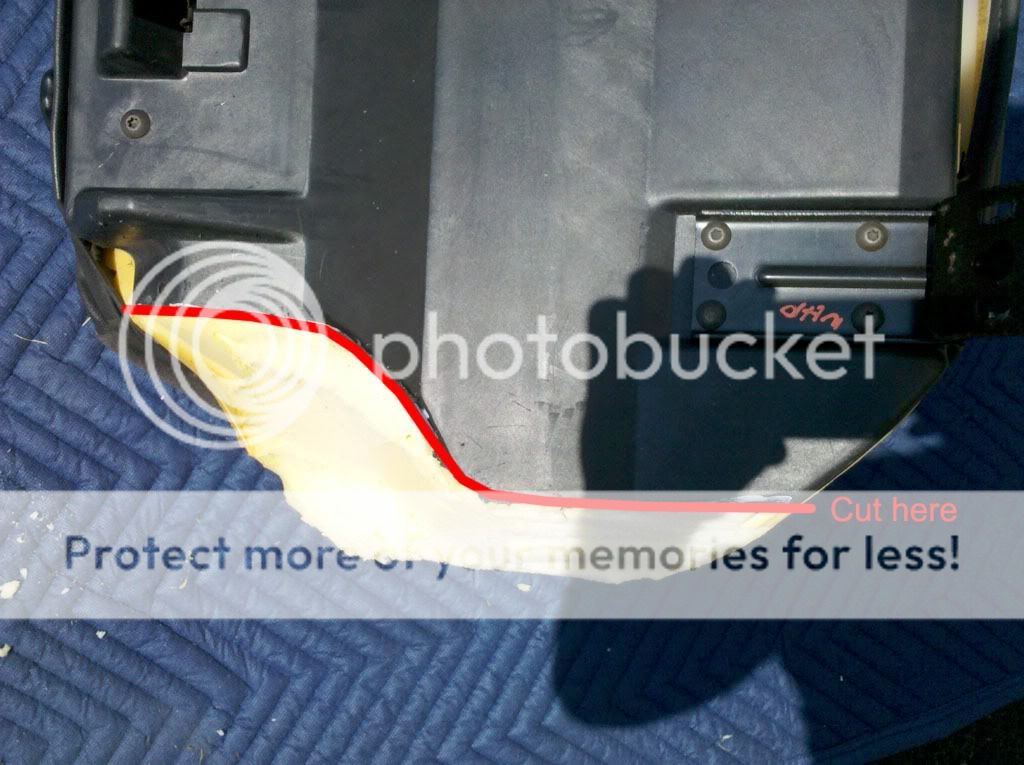
I then took a hack saw and started cutting away the foam. You don't have to cut too much from the top of the cushion but you definitely have to take away from the bottom. Use the cut you made as a reference and cut at an angle so you don't chop too much off that top. After that you can fold the fabric back over the foam and reuse the pop rivets, I just drilled new 1/4" holes in the plastic and popped them back into place.
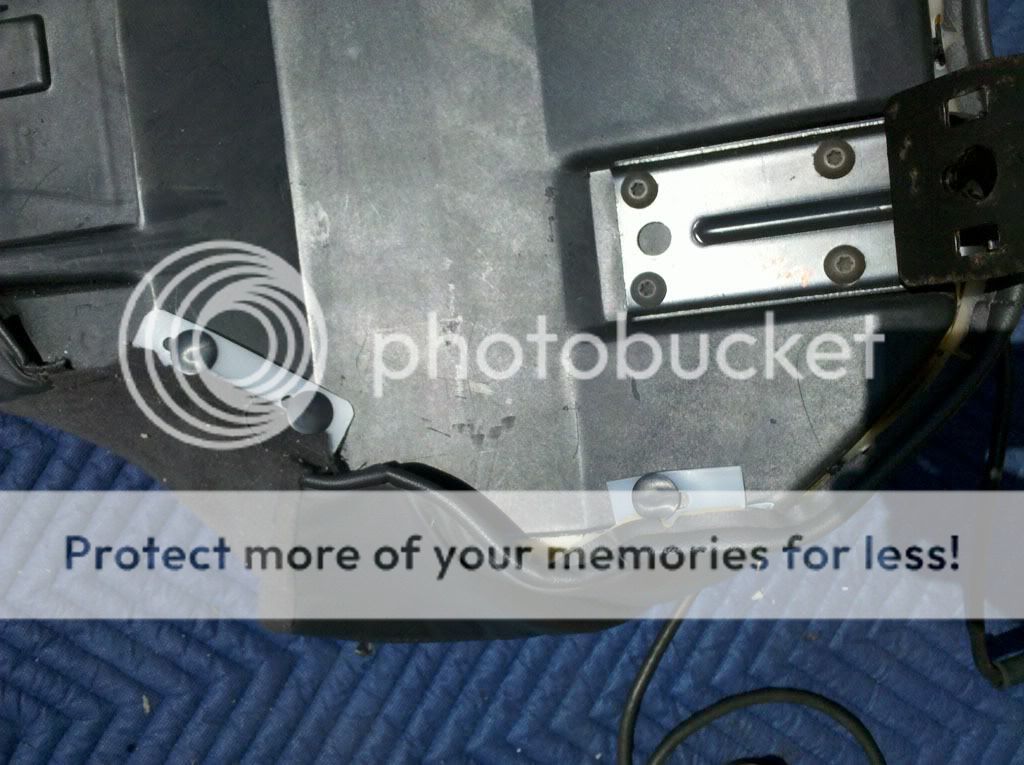
Now the seat cushions should fit without hitting the wheel wells. Assemble the two-piece bracket and brace them against that vertical section. Make sure to put both the driver and passenger side seat cushions in so you don't screw up where you're supposed to drill for the brackets. Mark the holes with a marker or paint or whatever, then drill. At the time I used some #12 self tapping bolts, but self tappers suck. They hold but not very well, but they're good for mocking up everything. If you use them, I would recommend using actual nuts and bolts later.
If you have floor mats you may have to cut them to make clearance for the brackets, like I did with my husky liners.
Once your seat cushions are installed you can start on the seat backs. Since the seat backs have an internal lock that keeps them upright, you can lock them in place and position them where you need them to be. I recommend getting both the driver and passenger seat backs in place so you know they'll both fit before drilling.

I have a JL stealth box and a false floor, both of which turned out to be very handy in holding the seat back upright while I was trying to figure out where to drill holes for the brackets.
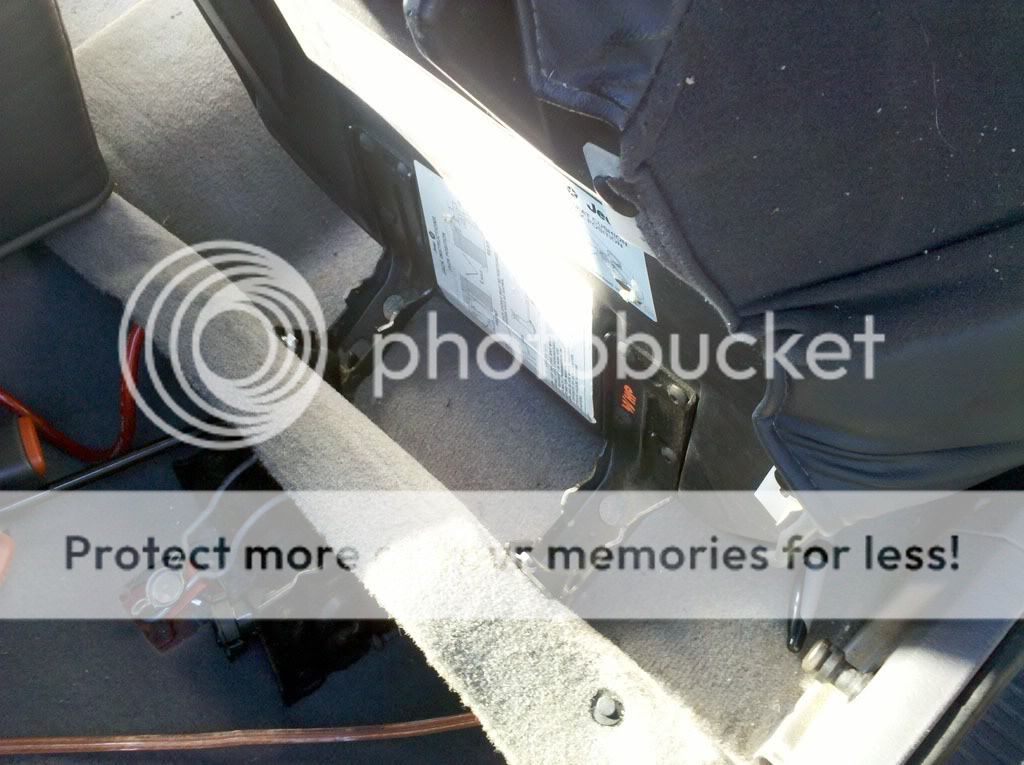
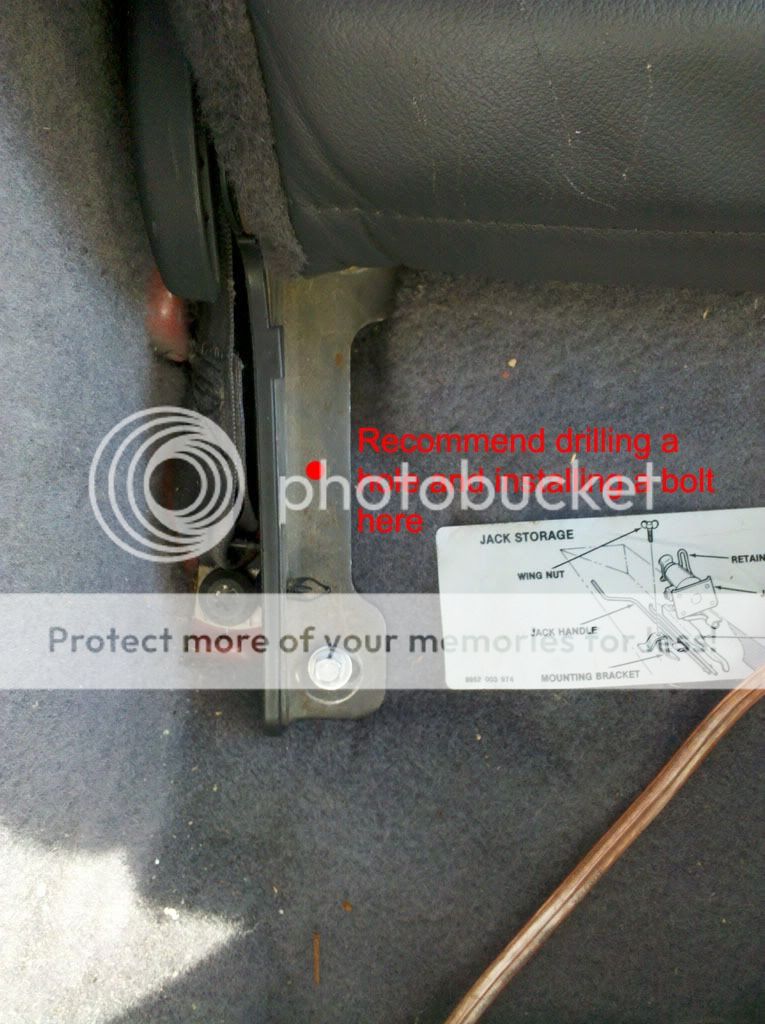
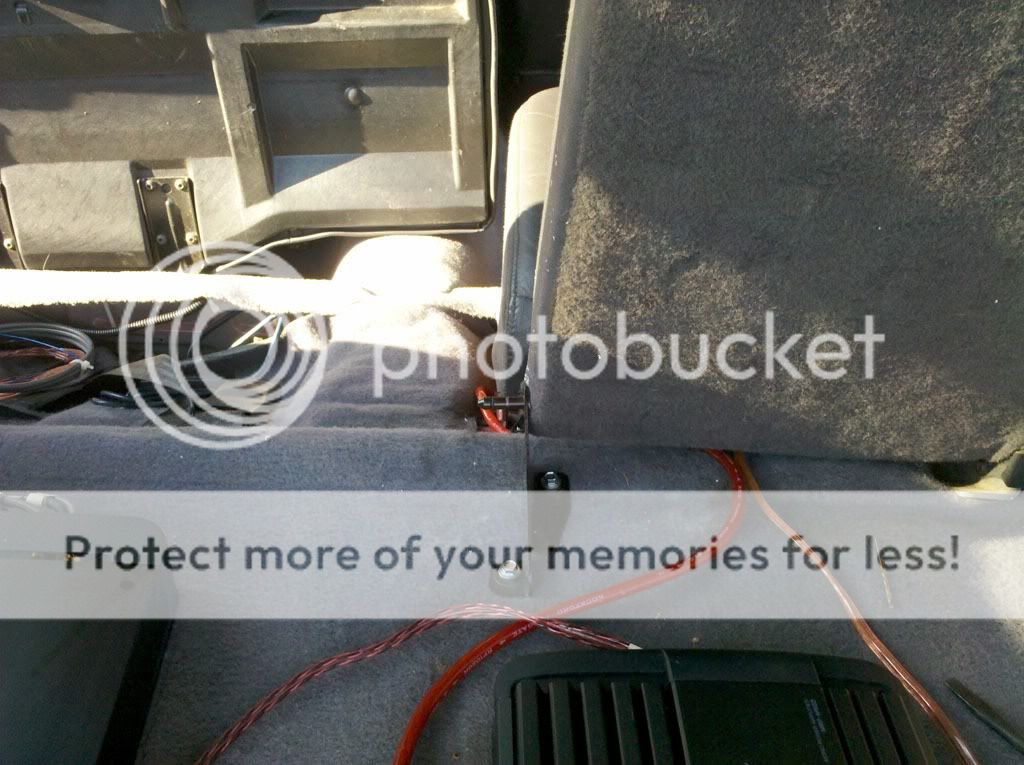
I started with the passenger side seat, since it's narrower and once it was bolted I could use it as a guide for the driver seat. I reused the hole in the front of the side brackets, but also recommend drilling a new hole in the middle of the bracket as well. I wasn't able to use the rear hole since it wasn't flat with the floorboard.
Now there's another bracket with posts that aligns the two seat backs together and allows them to fold down independently of one another. This bracket was turned around backwards and bolted to the floor of the cargo area.

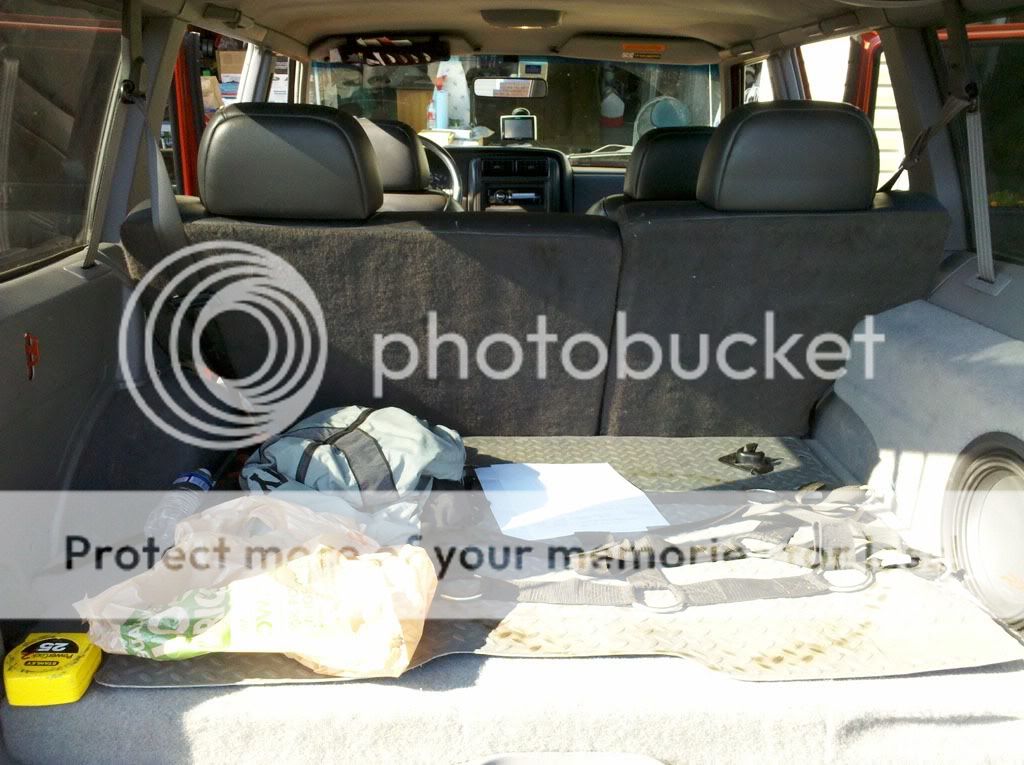
Now you can install the driver side seat by aligning the post in the center bracket and drilling holes for the side bracket. Once everything was bolted in I made sure that the seats would fold down without any clearance issues. You'll notice the driverside tilts to the side a bit, but that's because the center of the seat cushion hits the transmission tunnel when it's folded down.

Like others have said, the seat backs won't be perfectly flat with the cargo area when they're folded down, they're about an inch higher. Worked great in my application since I have a false floor.

FRONTS
The front seats are really easy, provided you swap your XJ brackets to the ZJ seats. I didn't take any pictures of the install, because it's such a simple swap, just remove your stock seats, remove the brackets, swap them over to the "new" seats, reinstall seats, done. Four 13mm bolts removes and reinstalls the brackets, and I found that both my 98 XJ and the 97 ZJ used the exact same holes on the seat bases.
Since the ZJ seats are power, I ran 12V power to the original seat wiring harness. I tapped them into my painless fuse block, and decided to go with leads that were always hot, in case I wanted to adjust them without the ignition on. Since my XJ had manual brackets, my "new" leather seats have manually adjustment front to back, and power recline.
REARS
Here's where the fun begins. First thing to do is to remove the stock bench seat, cushion and back, as well as the brackets above the wheel wells where the seat back posts lock in.
I would recommend installing the seat cushions first, before the seat backs. The reason being is that if you don't install the seat backs in the correct position, then the seat cushions won't flip forward or back correctly.
The ZJ seat cushions have a two part bracket, one part is bolted to the seat and the other is bolted to the vertical metal part that runs along the width of the XJ. The first thing to do is to cut the "ears" off the seat bracket since they will hit the metal section when you try to mock the seat up.
The second problem you'll run into is that the ZJ seats are wider than the XJ, so you'll have to trim the bottoms of the seat cushions in order to make them fit. I think I trimmed more than others have, but it worked out well and all you have to do is follow the lines that are already there. I used an angle grinder with a cut off wheel and jammed a piece of cardboard between the plastic and the foam to protect the foam and fabric. The fabric is secured with plastic pop rivets that easily come out with a flat head, then just pull it back over the foam.
I then took a hack saw and started cutting away the foam. You don't have to cut too much from the top of the cushion but you definitely have to take away from the bottom. Use the cut you made as a reference and cut at an angle so you don't chop too much off that top. After that you can fold the fabric back over the foam and reuse the pop rivets, I just drilled new 1/4" holes in the plastic and popped them back into place.
Now the seat cushions should fit without hitting the wheel wells. Assemble the two-piece bracket and brace them against that vertical section. Make sure to put both the driver and passenger side seat cushions in so you don't screw up where you're supposed to drill for the brackets. Mark the holes with a marker or paint or whatever, then drill. At the time I used some #12 self tapping bolts, but self tappers suck. They hold but not very well, but they're good for mocking up everything. If you use them, I would recommend using actual nuts and bolts later.
If you have floor mats you may have to cut them to make clearance for the brackets, like I did with my husky liners.
Once your seat cushions are installed you can start on the seat backs. Since the seat backs have an internal lock that keeps them upright, you can lock them in place and position them where you need them to be. I recommend getting both the driver and passenger seat backs in place so you know they'll both fit before drilling.
I have a JL stealth box and a false floor, both of which turned out to be very handy in holding the seat back upright while I was trying to figure out where to drill holes for the brackets.
I started with the passenger side seat, since it's narrower and once it was bolted I could use it as a guide for the driver seat. I reused the hole in the front of the side brackets, but also recommend drilling a new hole in the middle of the bracket as well. I wasn't able to use the rear hole since it wasn't flat with the floorboard.
Now there's another bracket with posts that aligns the two seat backs together and allows them to fold down independently of one another. This bracket was turned around backwards and bolted to the floor of the cargo area.
Now you can install the driver side seat by aligning the post in the center bracket and drilling holes for the side bracket. Once everything was bolted in I made sure that the seats would fold down without any clearance issues. You'll notice the driverside tilts to the side a bit, but that's because the center of the seat cushion hits the transmission tunnel when it's folded down.
Like others have said, the seat backs won't be perfectly flat with the cargo area when they're folded down, they're about an inch higher. Worked great in my application since I have a false floor.

")