- Location
- In a strange land
My first look at an Ox Locker was almost 20 years ago at the SEMA show when they were a new product and the covers were machined out of a solid billet. I liked what I saw and spent some time talking to the sales guys and playing with their display. I wanted one.
Over the years I have seen a number of criticisms of the Ox Lockers. They seem to have collected a pretty good share of folks who don’t like them. But as I have seen the complaints I have held in reserve a suspicion that many of the complaints were largely founded on poor installation practices. That opinion has become more strongly held as I have looked for install write-ups. I can find very little information about cable routing, passage through the floor or even shifter mounting brackets. All of these details are going to play into a reliable installation. Lacking those details leads me to suspect that most folks are not proud of what they have accomplished on that front. And that leads me to suspect that the complaints are related to that as well.
I decided that I would go ahead and go the Ox Locker route in spite of the opposition. I like the fully mechanical operation, particularly in light of the relatively recent failure of my 18 month old Optima Yellow Top on a trail. Independent systems are more robust systems.
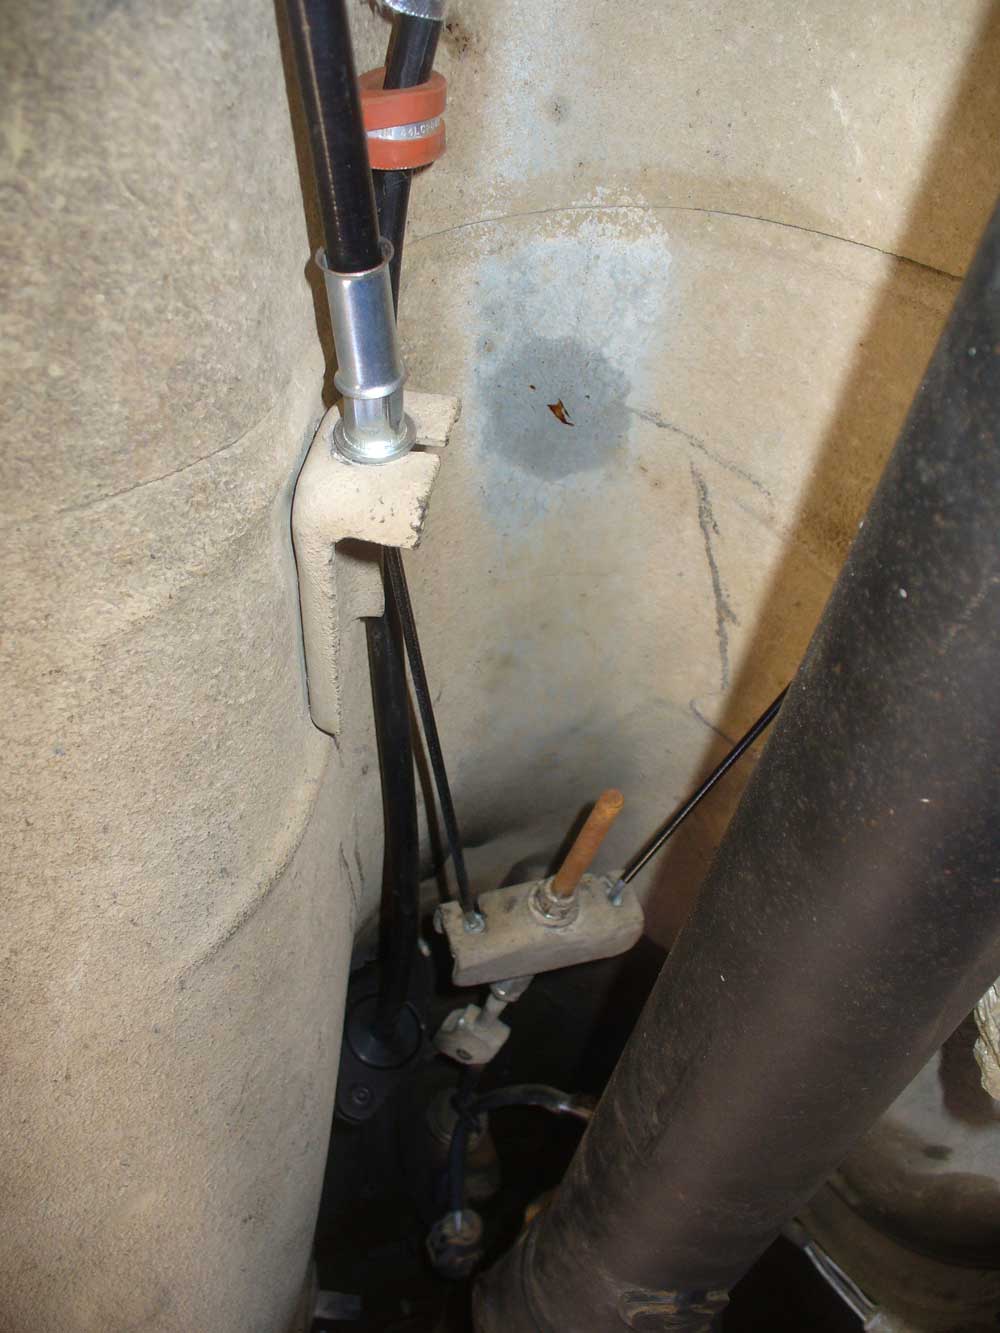
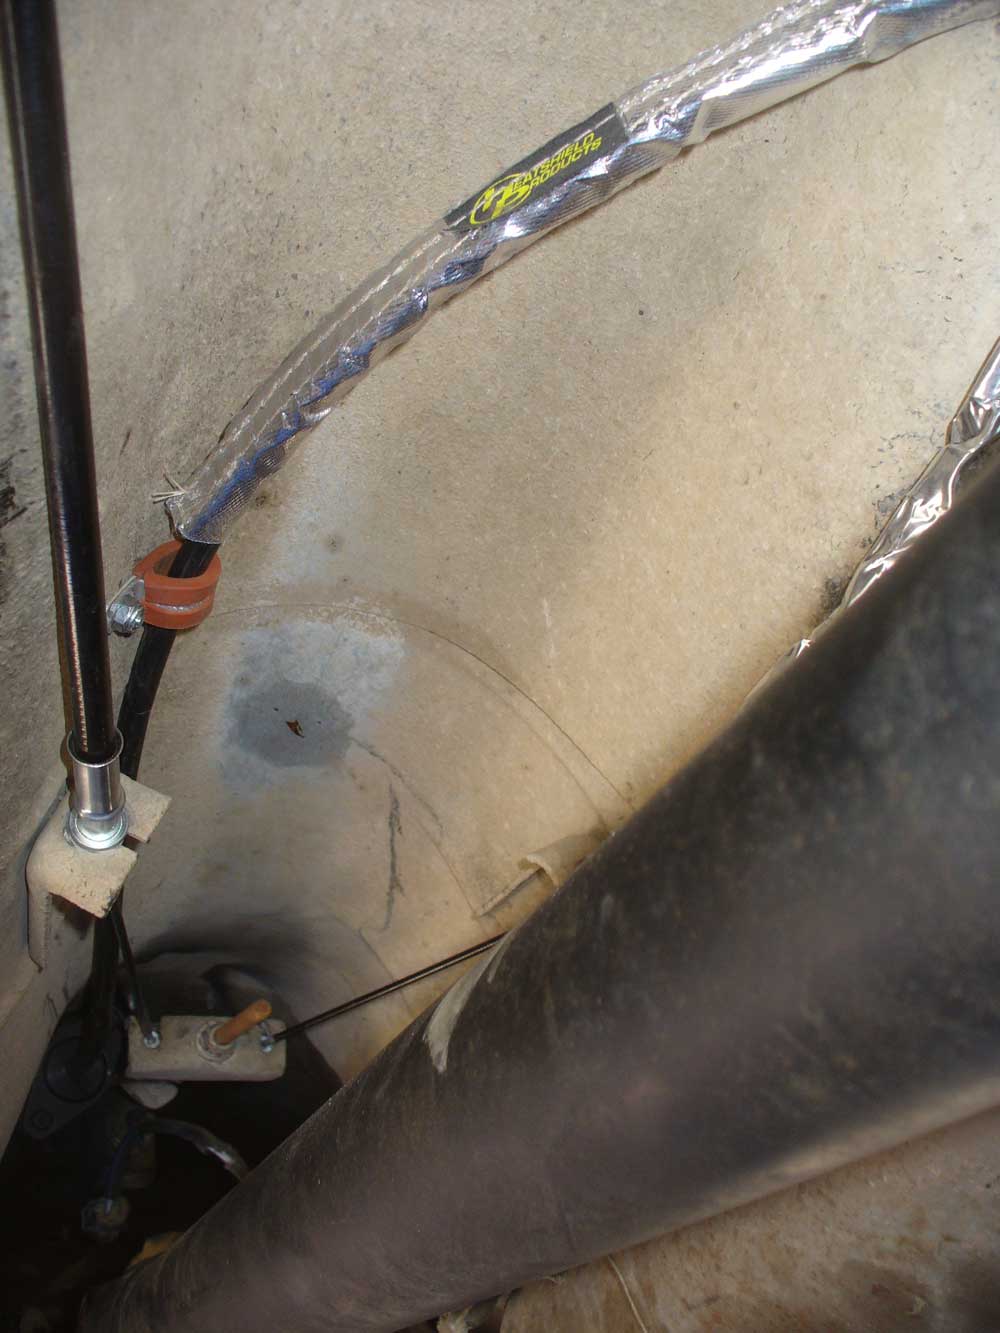
When I received my locker I was not at all surprised at this statement in the instruction manual: “Poor cable routing and shifter adjustment are the leading causes for an inoperative locker.” This write-up is about trying to prevent that situation for as many XJ owners as possible, and it is also a bit of a suggestion for Ox Off Road as to what they should be doing themselves to help their own cause.
I decided that I wanted the shifter mounted in the console to the left of the e-brake. I used one of these cheap Harbor Freight flush cut saws in order to cut the console where needed.
https://www.harborfreight.com/12-in-flush-cut-saw-62118.html
Sorry, I don’t have any pictures of this part of the process. It was a figure it out as I went sort of thing, and I didn’t stop to photograph progress that I wasn’t even sure would go anywhere.
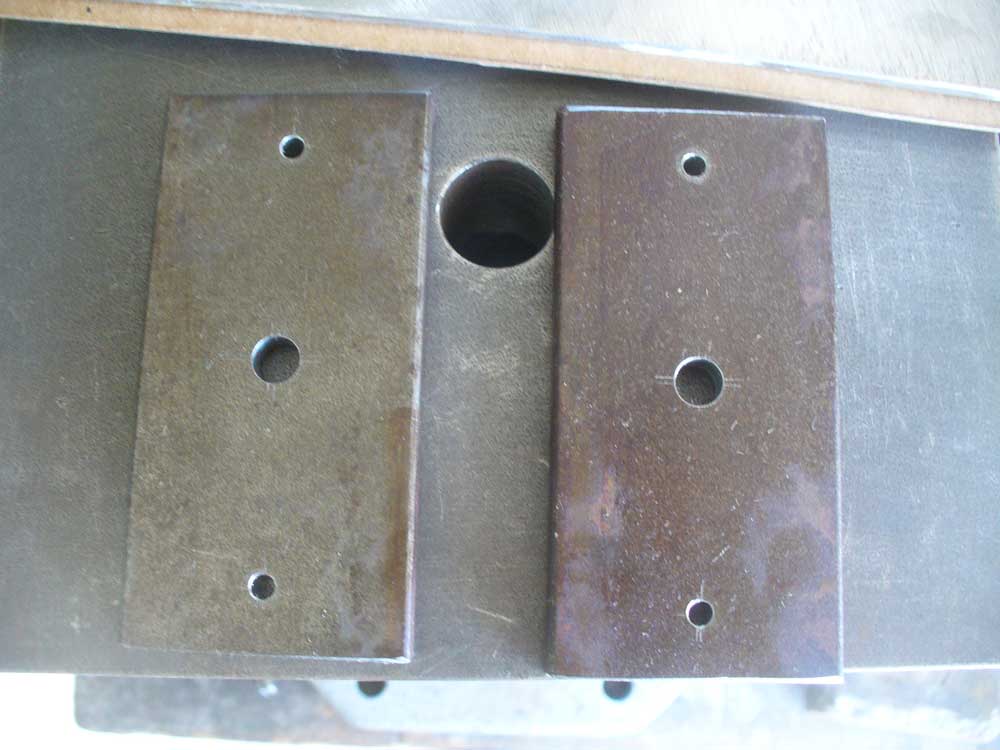
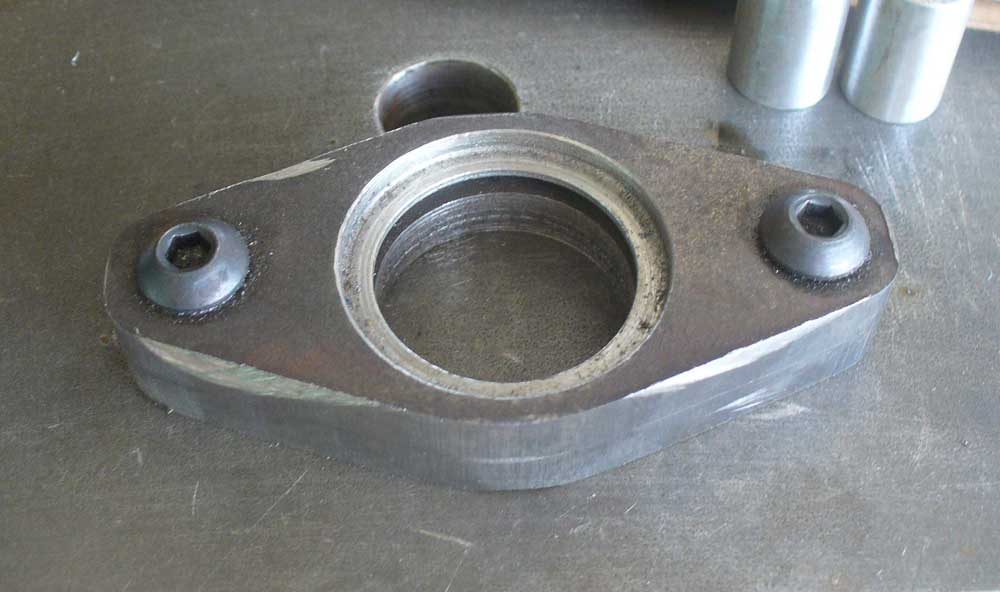
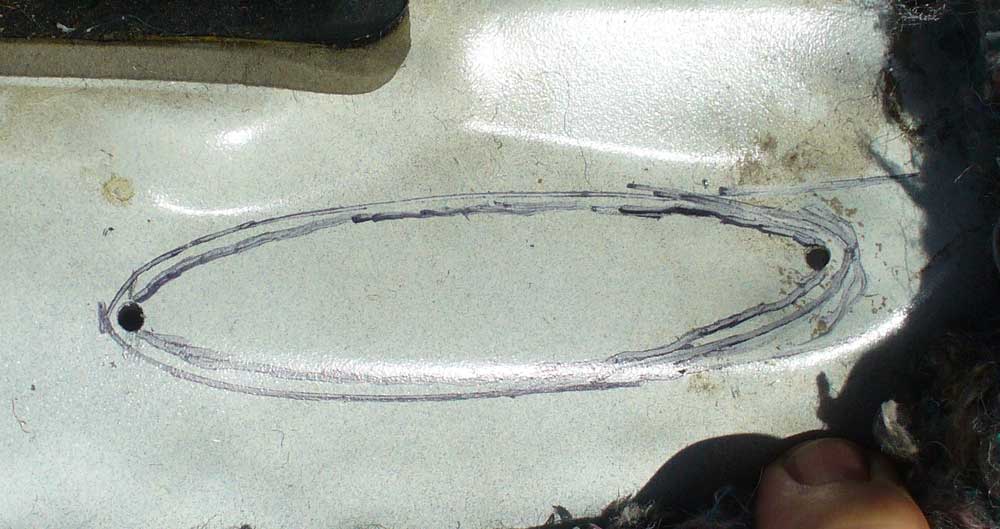
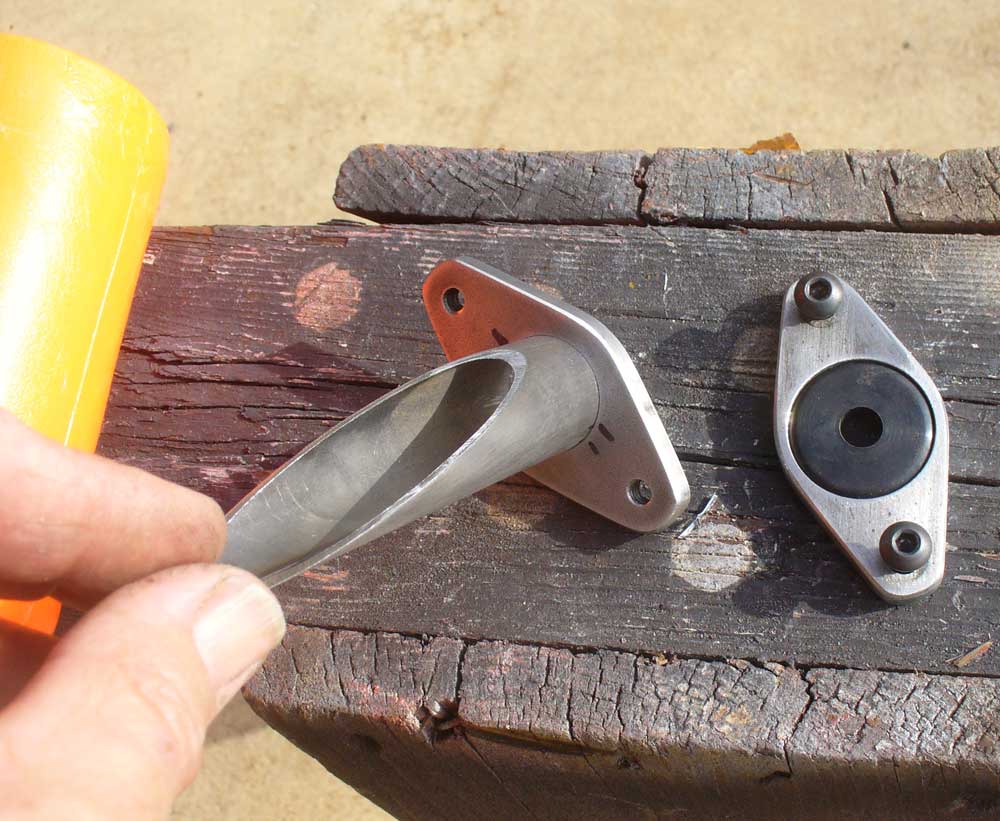
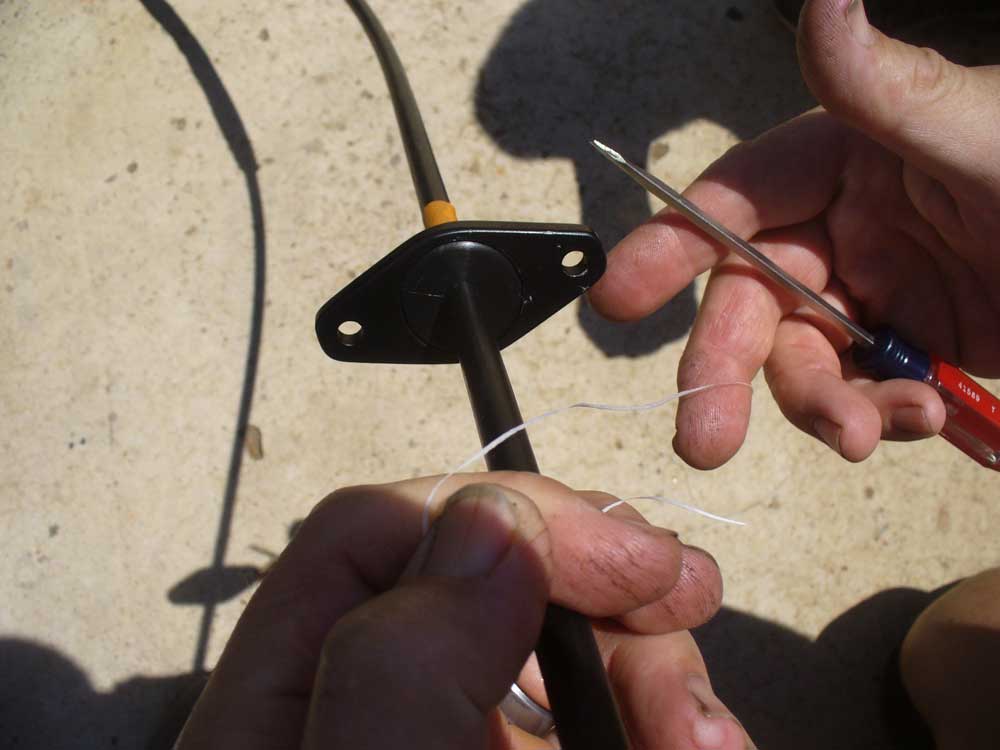
Once I had it figured out where the Ox shifter was going to sit relative to the console I was able to make a cardboard template and then a metal base as a starting point. This is the earliest picture I have of this part of the process:
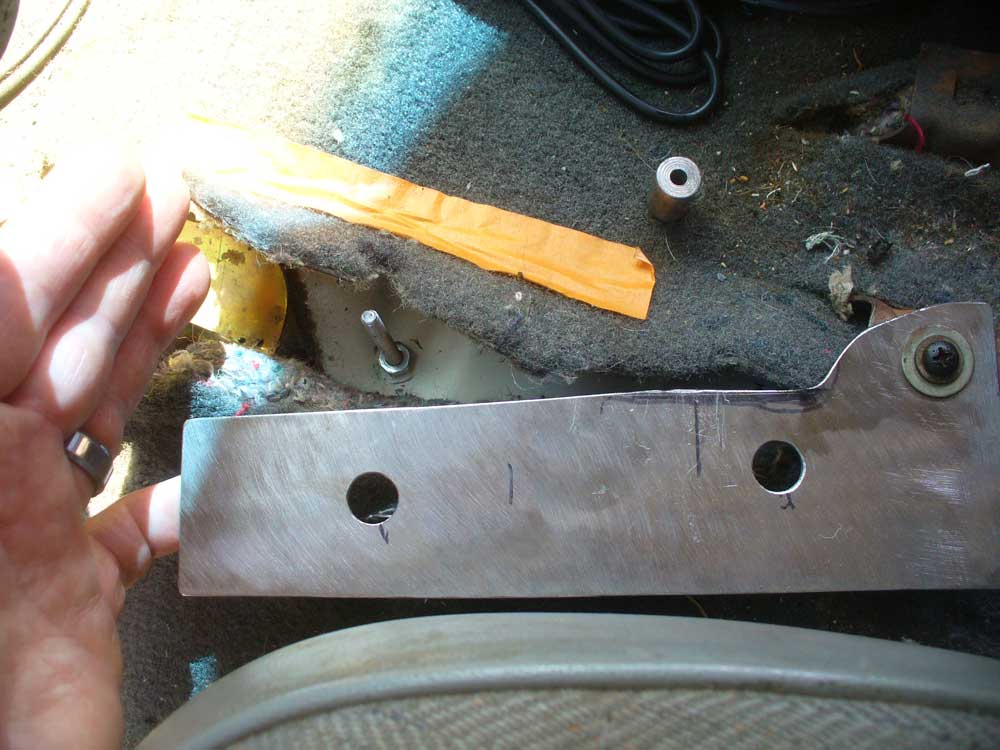
You can see that I used one of the console mounting holes as a starting point for attachment. That particular mounting point happens to be broken off my console anyways, so nothing lost there. You can also see the front mounting point that I am creating and the spacer which will become part of the base. You will also note the second, large hole that I wound up not using. You may also note the overall shape of the base plate and then compare it to the end result. There was a bit more material to be removed.
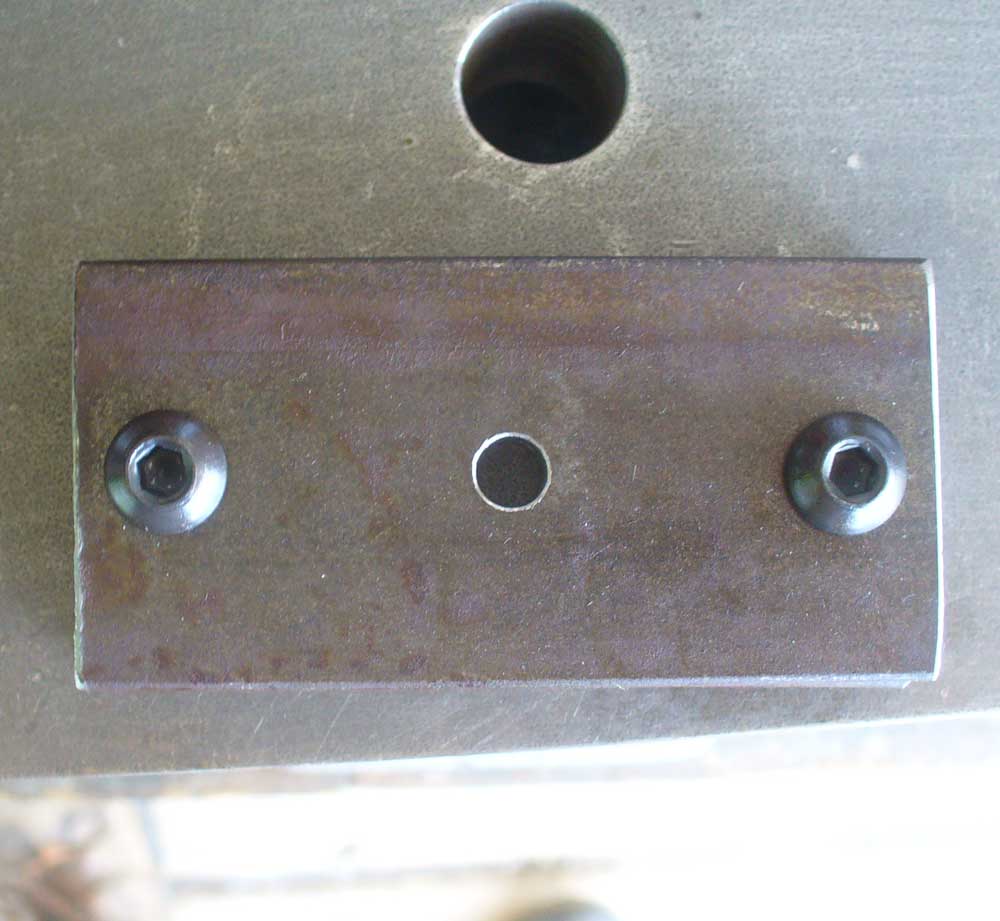
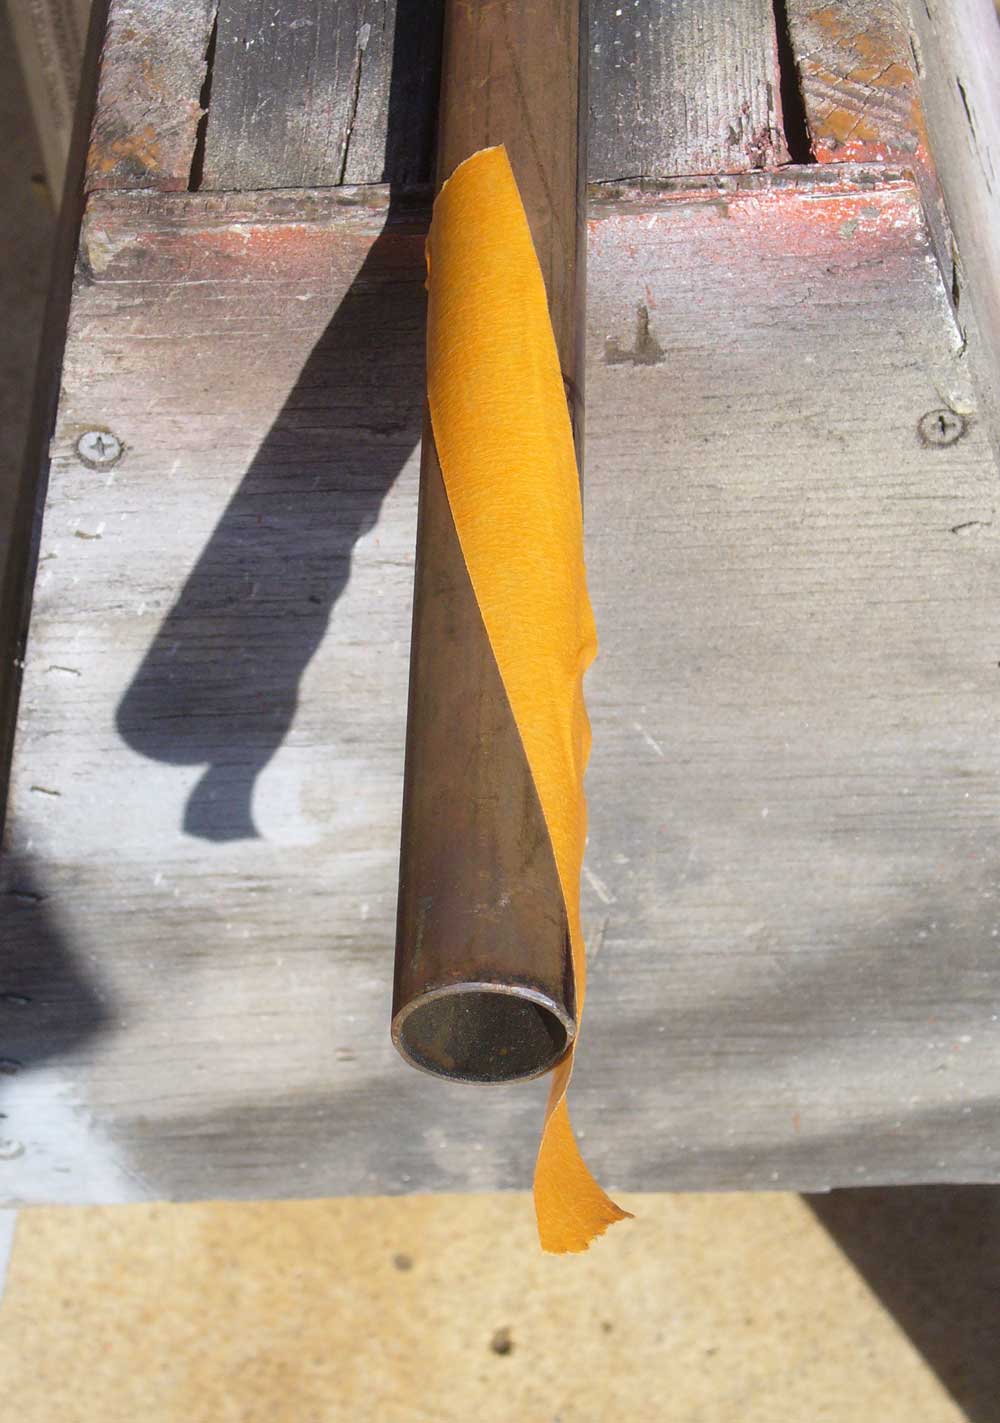
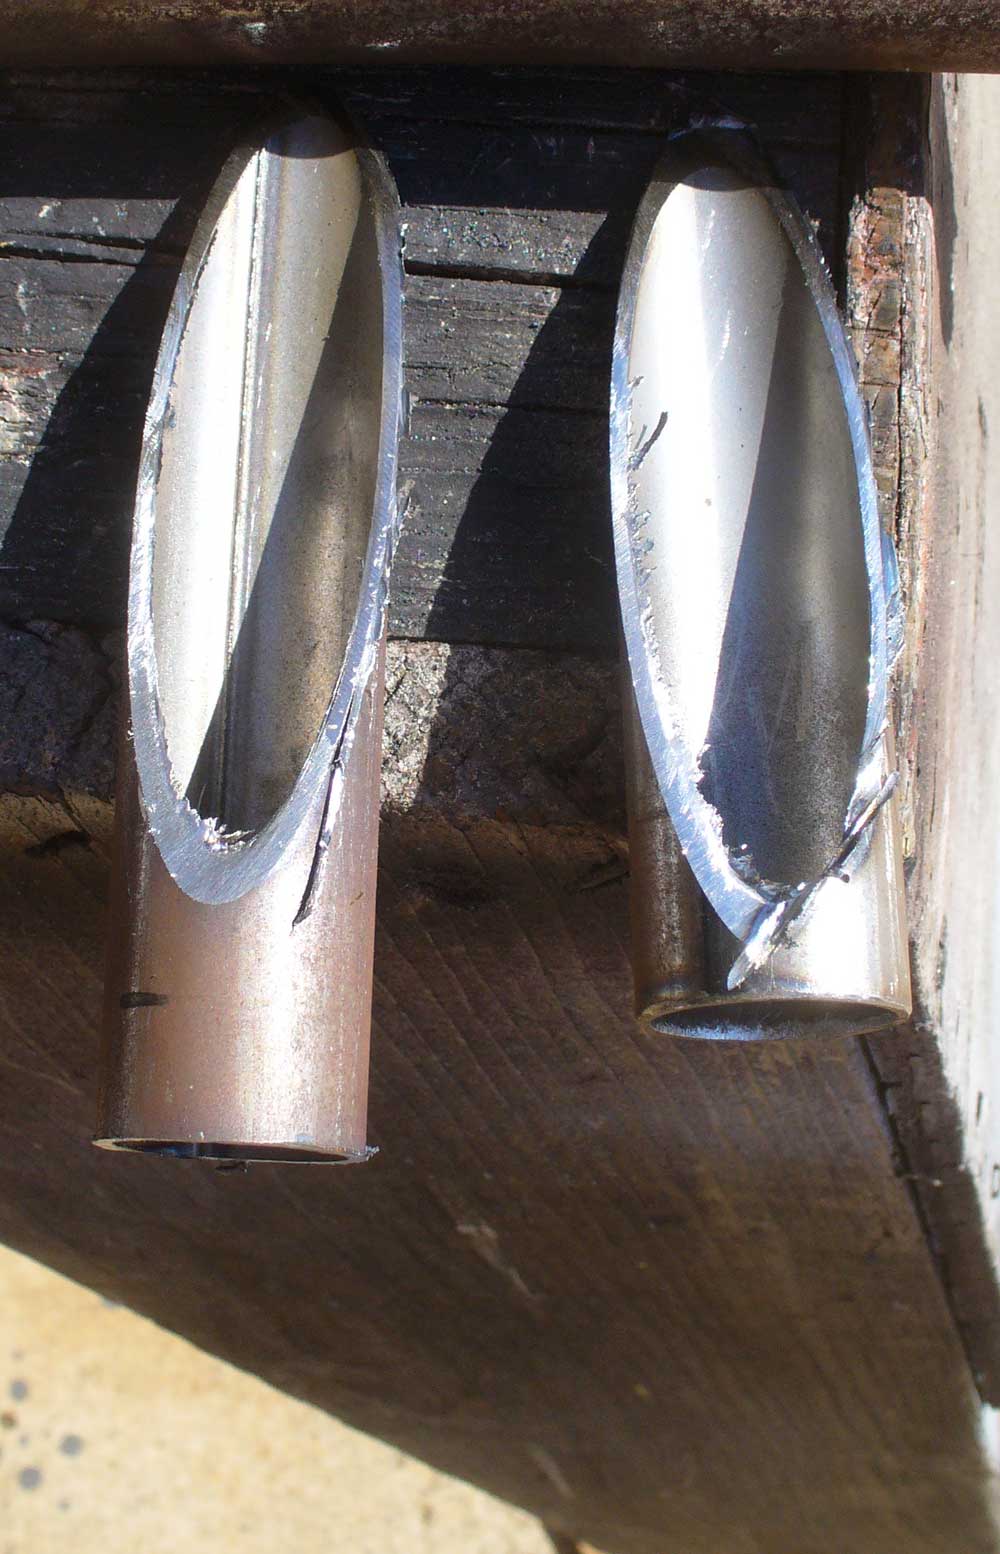
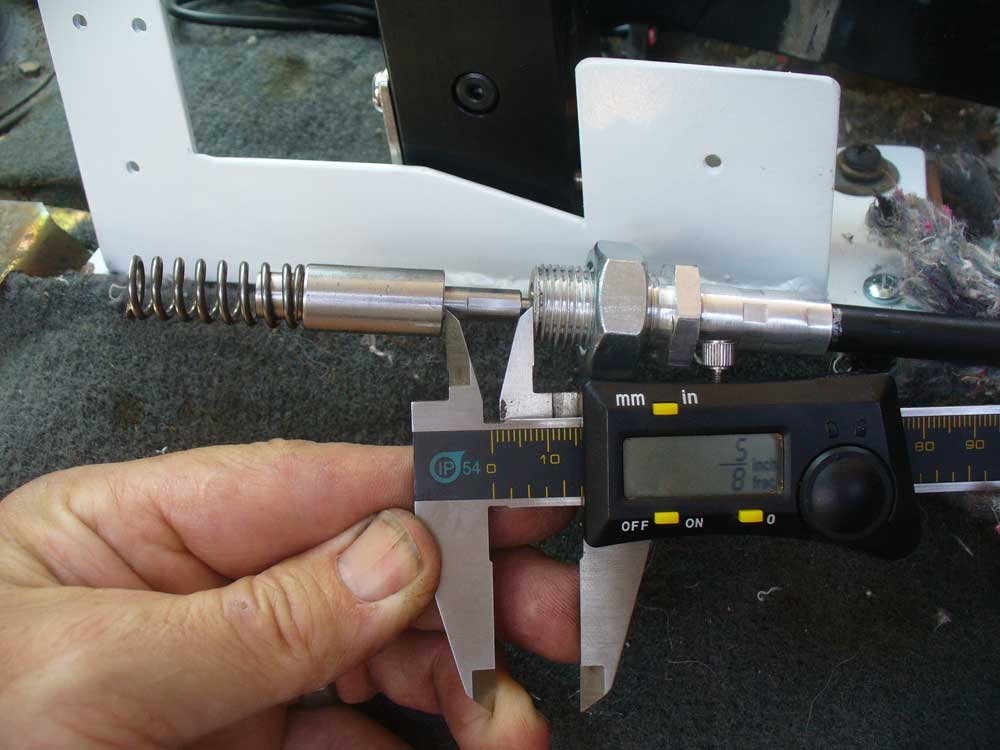
Here is the fitment over the spacer, note that it has a bit of an angle to it:
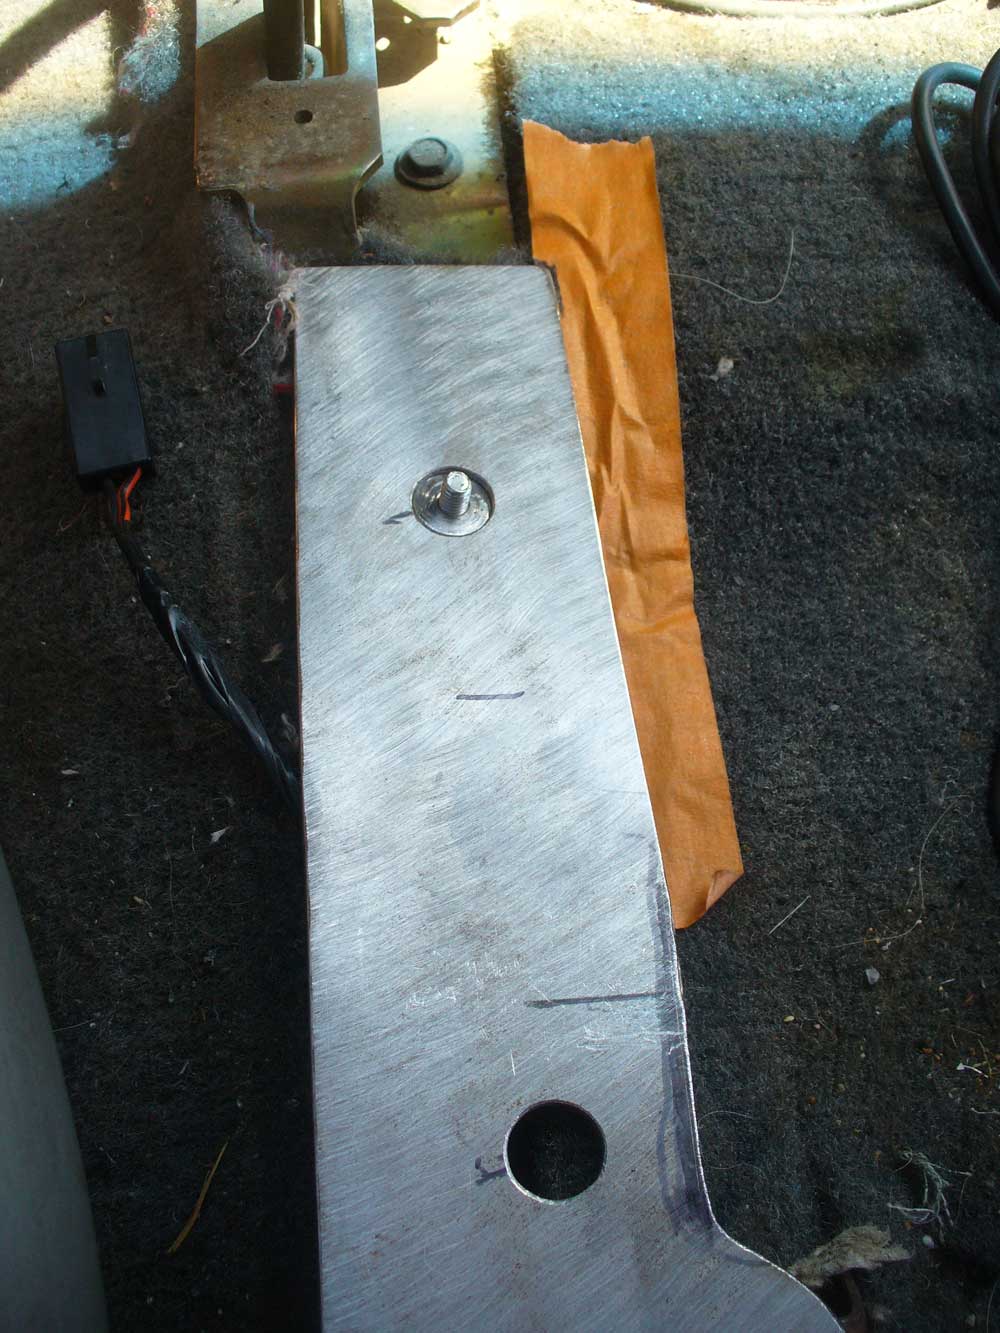
The orange tape was an early reference point. It located my inside edge at this stage of the process.
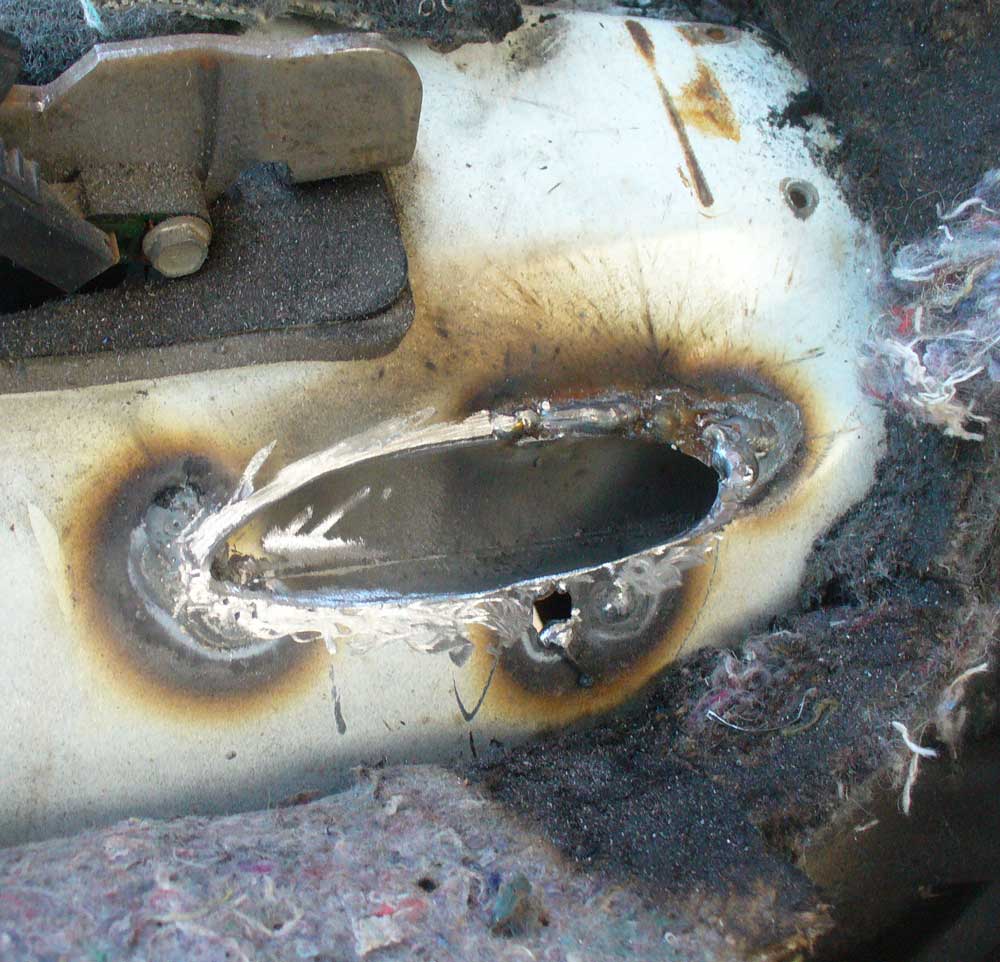
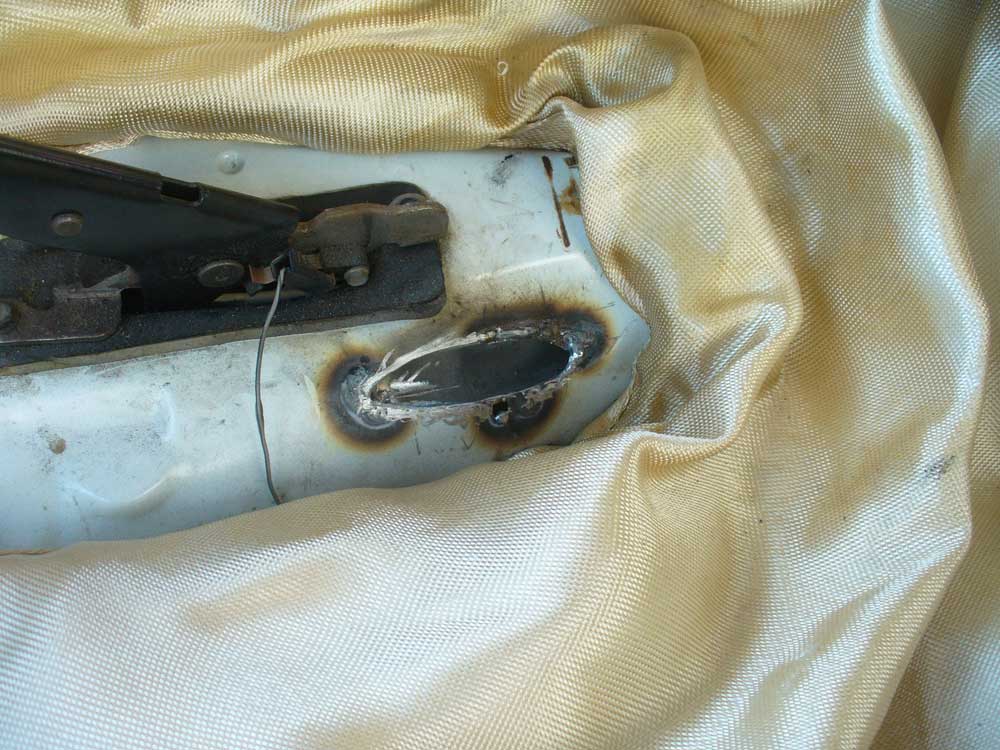
In preparation for welding I just grabbed some random scraps and tried to cover things that I didn’t want getting hit with spatter:
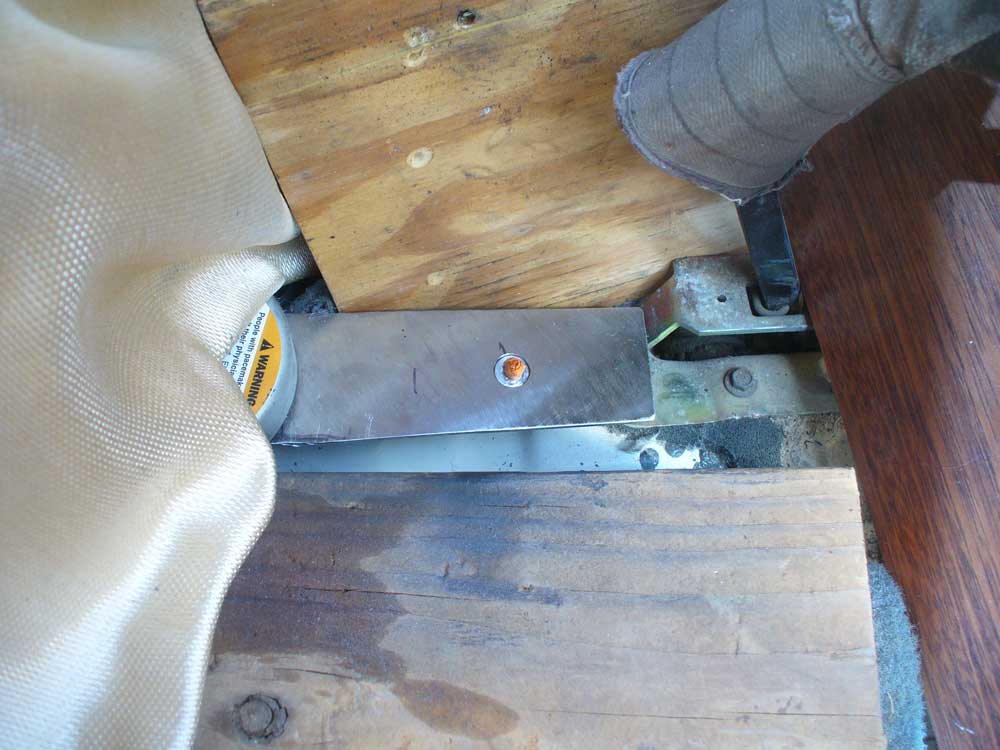
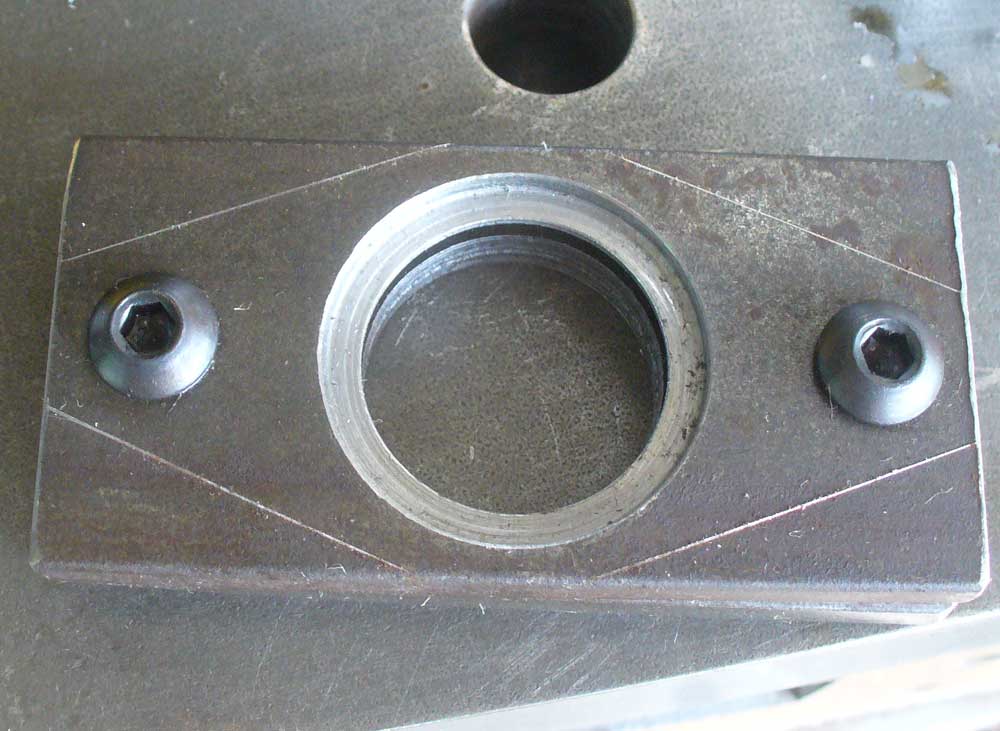
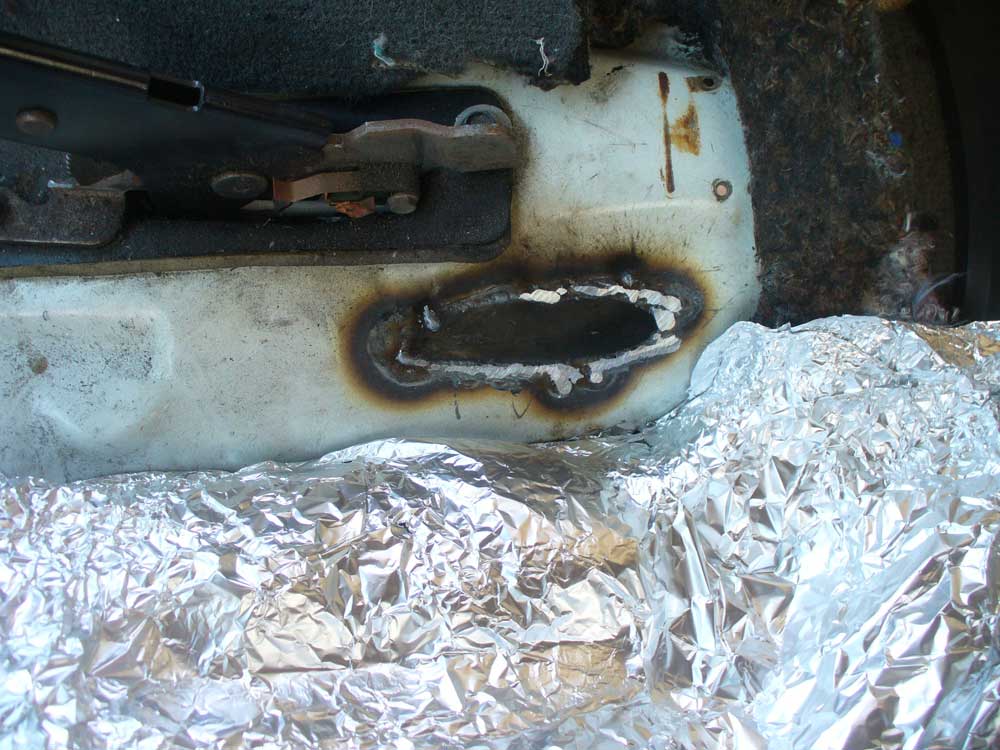
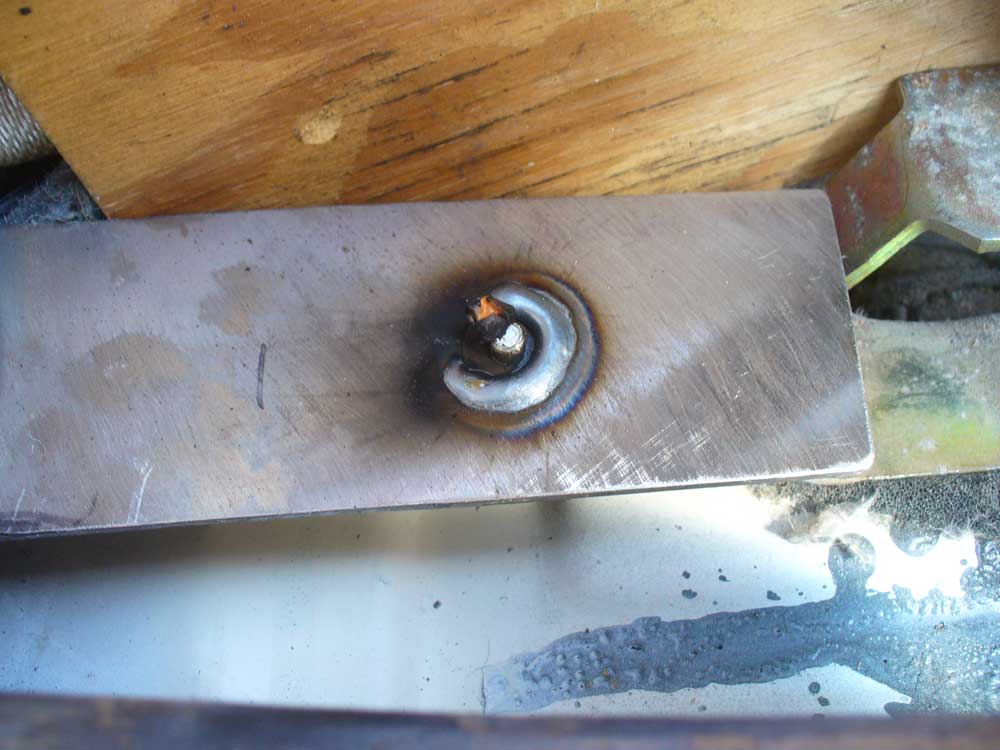
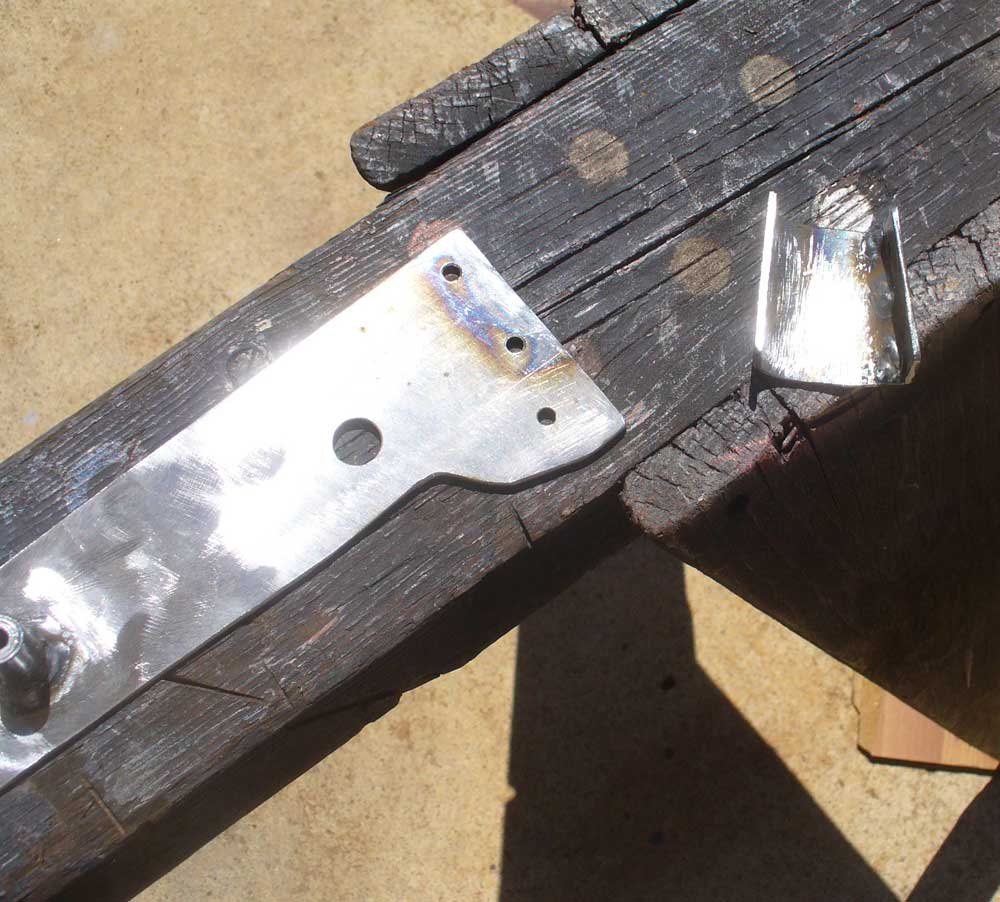
Here is the top side, welded enough to stay put so I could take it out and weld the bottom side:
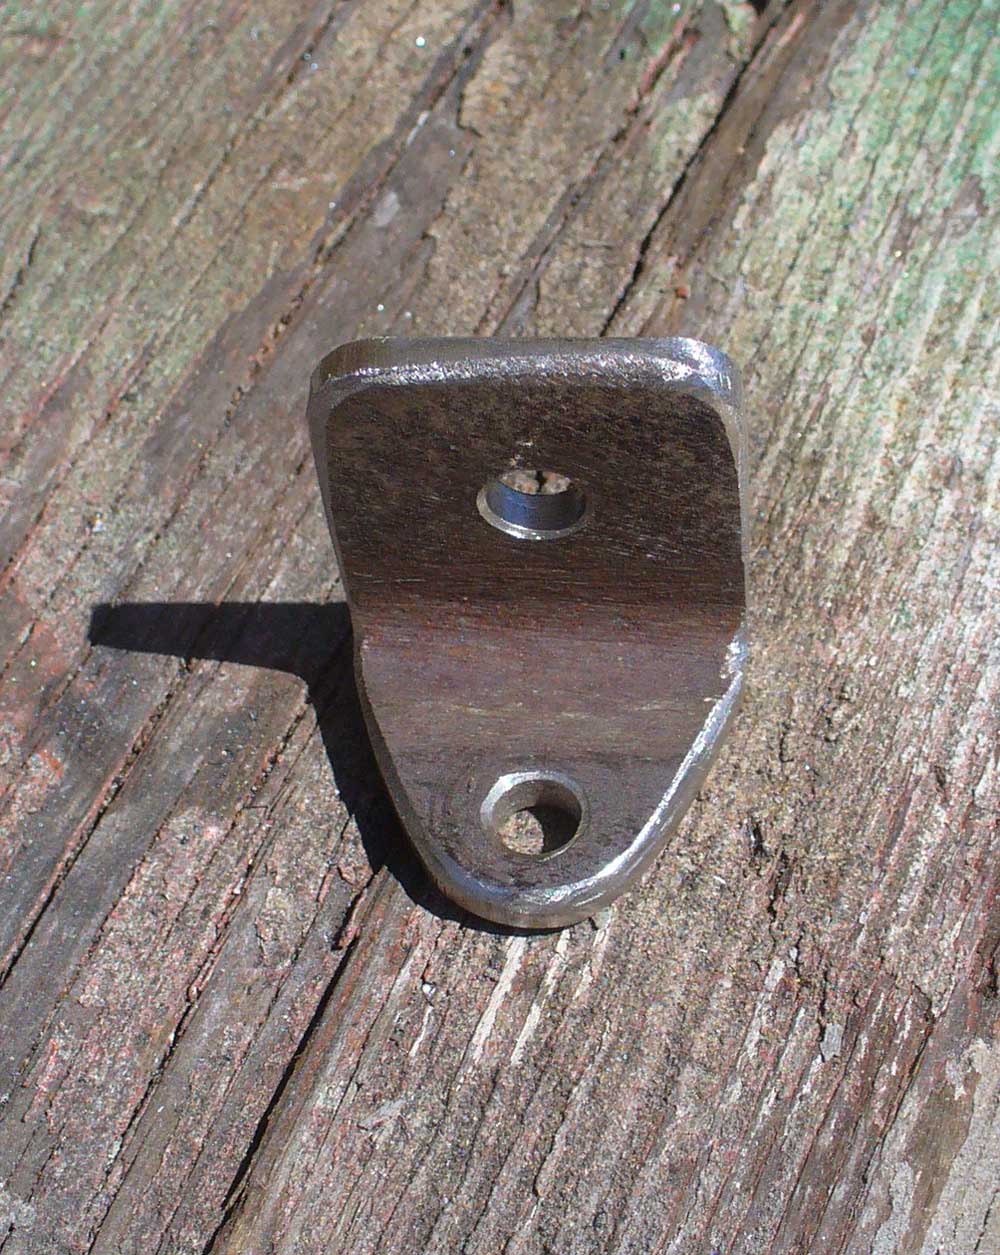
Again, for this next stage I have a lack of good pictures. I needed to come up with another mounting point. The one large hole that I decided against was too much in line with the other mounting points (not much extra stability to be offered) and would end up directly under the line of the cable coming into the shift lever. I needed some lateral support. I wound up making a bracket that was in line with the console screw that I had repurposed. That had the challenge of being at an angle relative to the top plate. So I bent a piece of steel in a vise, held that down on the transmission tunnel and against the shifter mounting bracket and scribed a line to cut it off. I then made a nut plate (just another piece of steel, but threaded to mount under the shifter bracket) and bolted that in place, then with everything in place on the transmission tunnel I welded the nut plate to the bent piece of steel. That got me to this point:
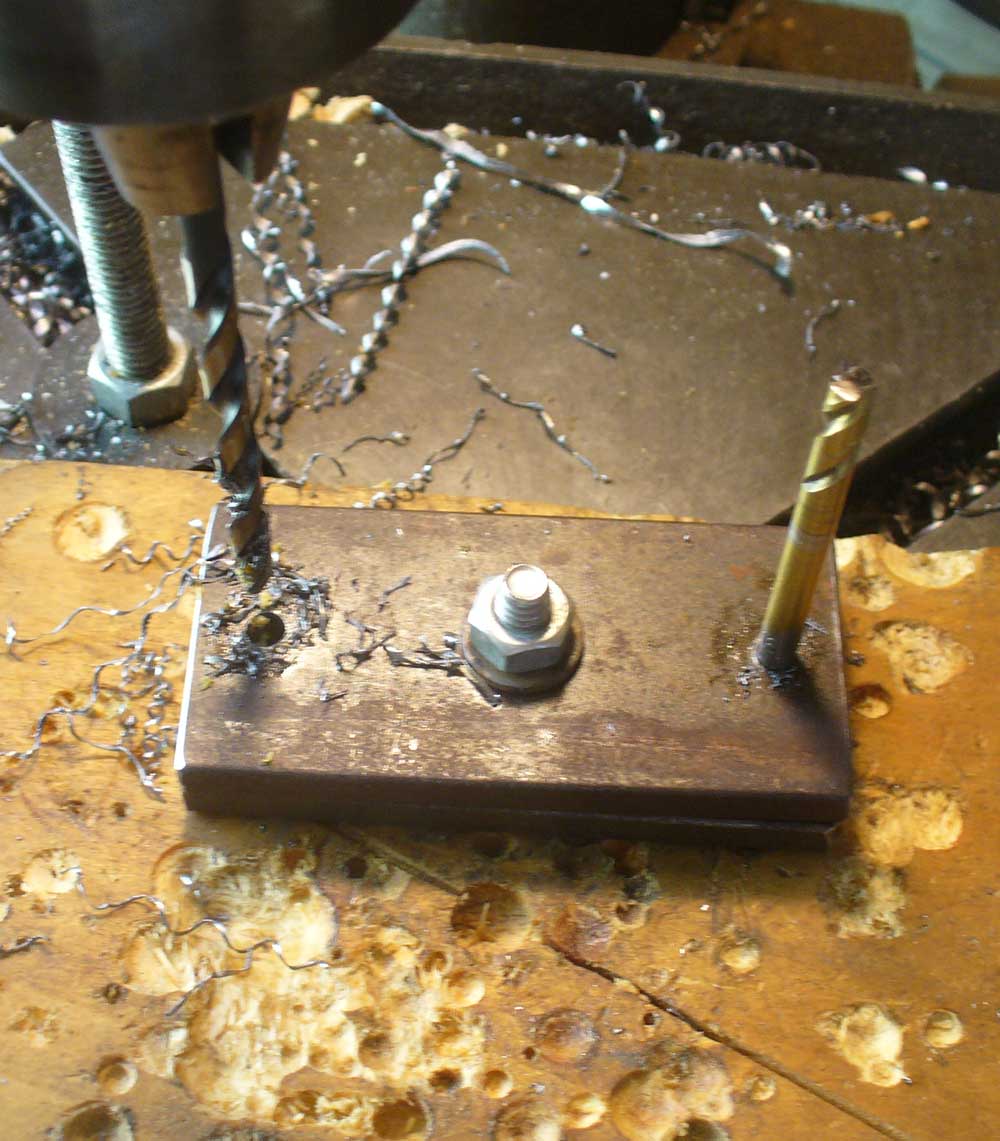
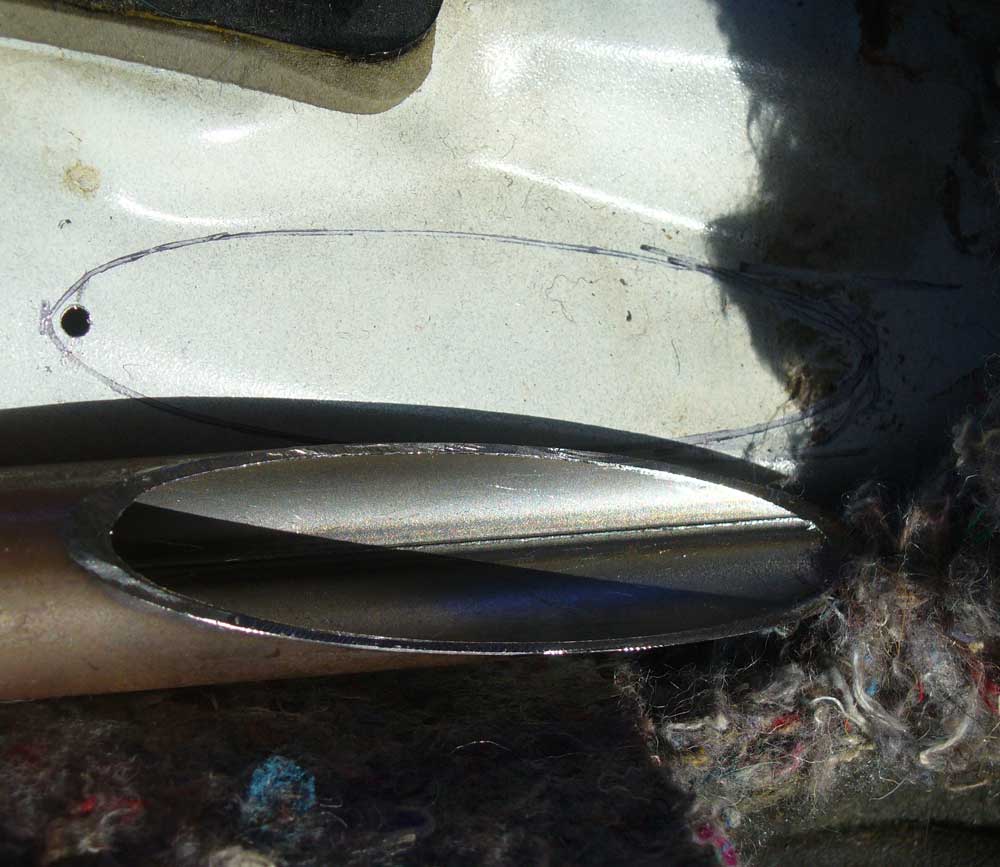
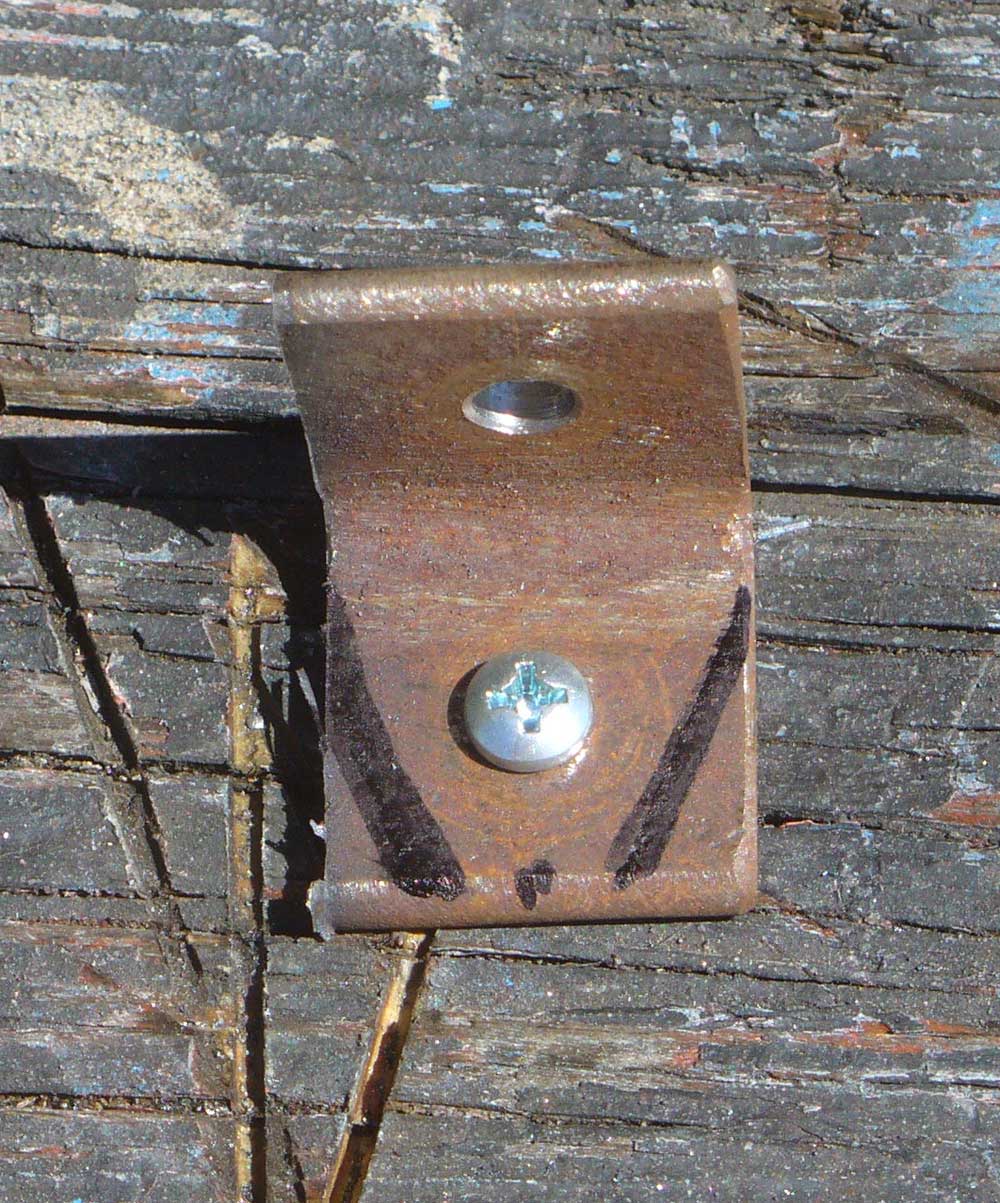
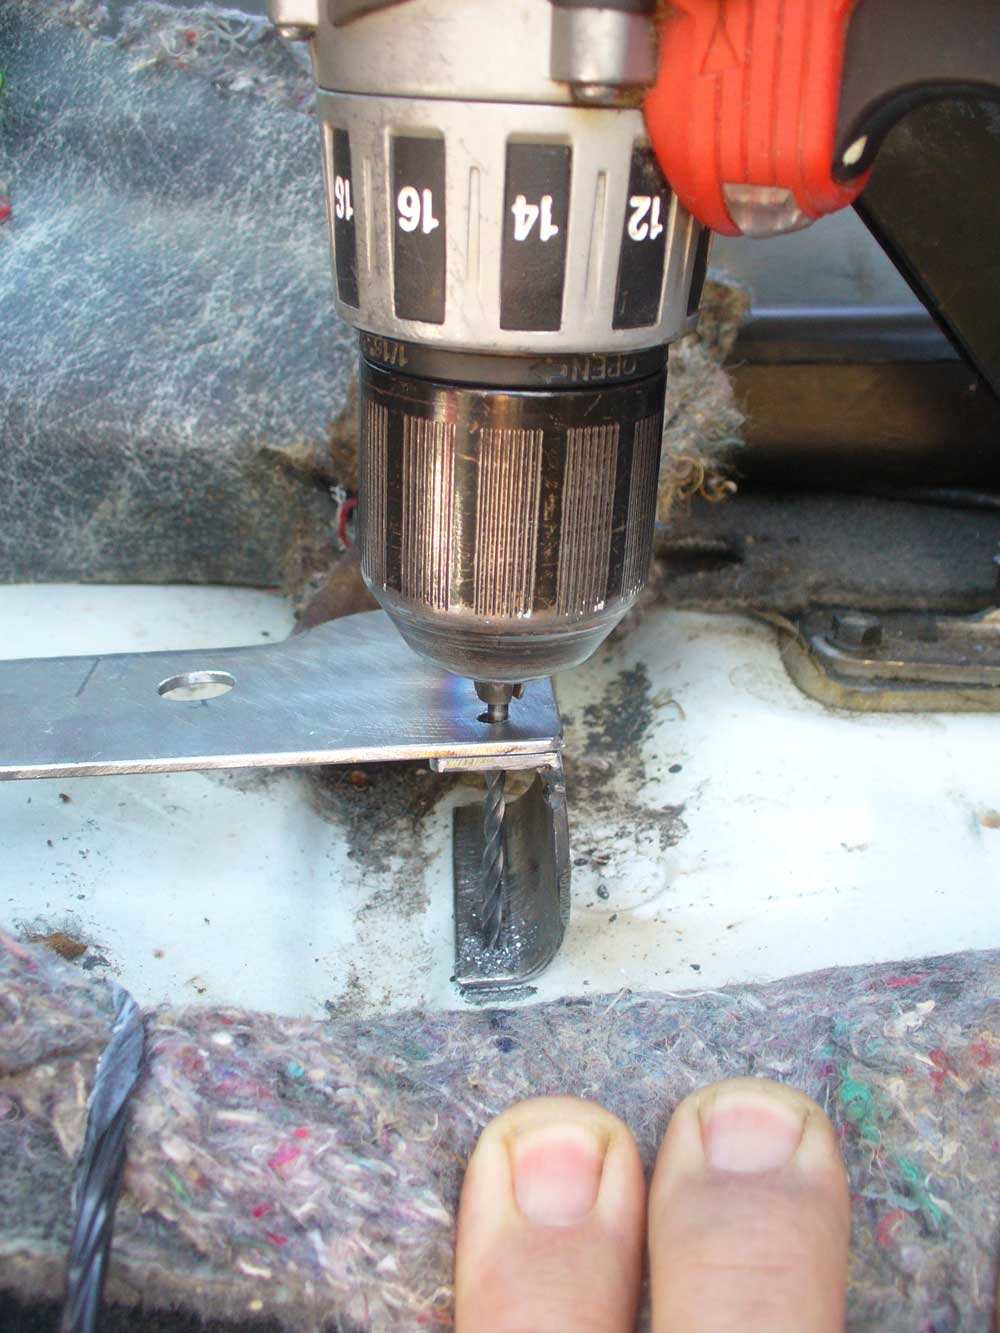
I then drilled through from the top (being careful not to damage my threads) in order to locate the bracket on the transmission tunnel:
That pretty much established the base for the shifter.
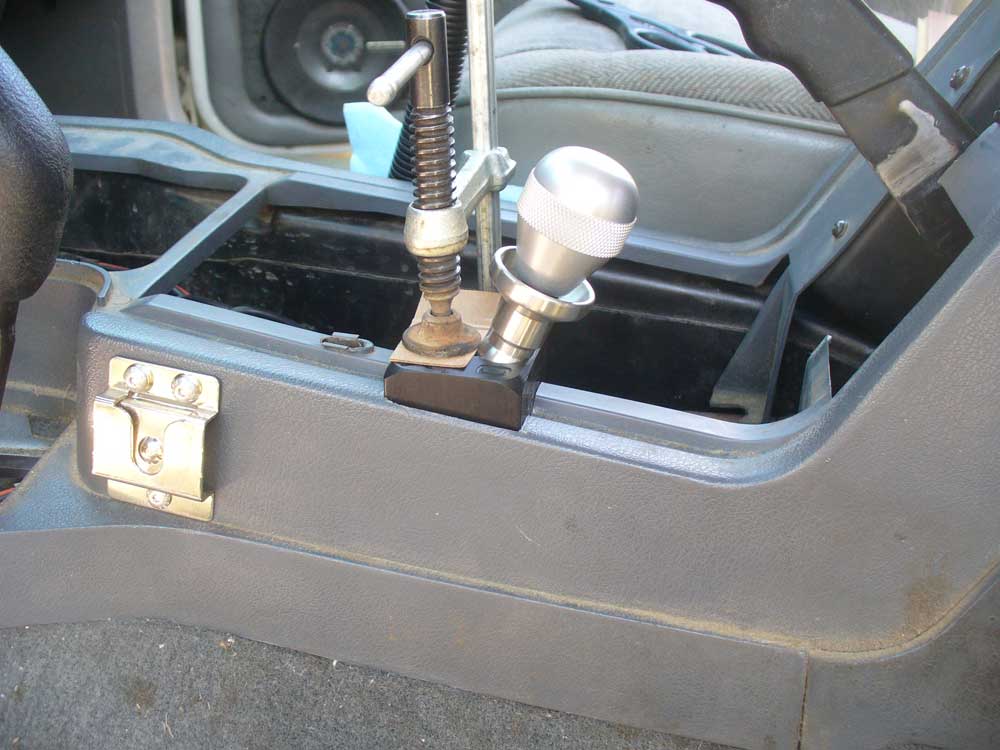
Mounting the shifter was the next challenge. I knew exactly where it needed to be relative to the console, but it is difficult to mount something inside the console when the console is installed. But I could clamp the shifter to the base with the outer part of the console in place:
I removed the console and then pulled out the shifter base with the shifter still clamped in place and tack welded the Ox shifter bracket to the new base.
With that done I was able to remove the shifter from the Ox bracket and drill through those four holes in to the new shifter base, then cut the tack welds. That got me the precise location I needed and the ability to unbolt the shifter from the new base.
The last issue was the possibility of the base flexing in use. I took care of that by adding an edge along the side of the console. This edge was then threaded for my mic mount and an extra screw was added further back to make up for the missing mounting location at the base of the e-brake lever.
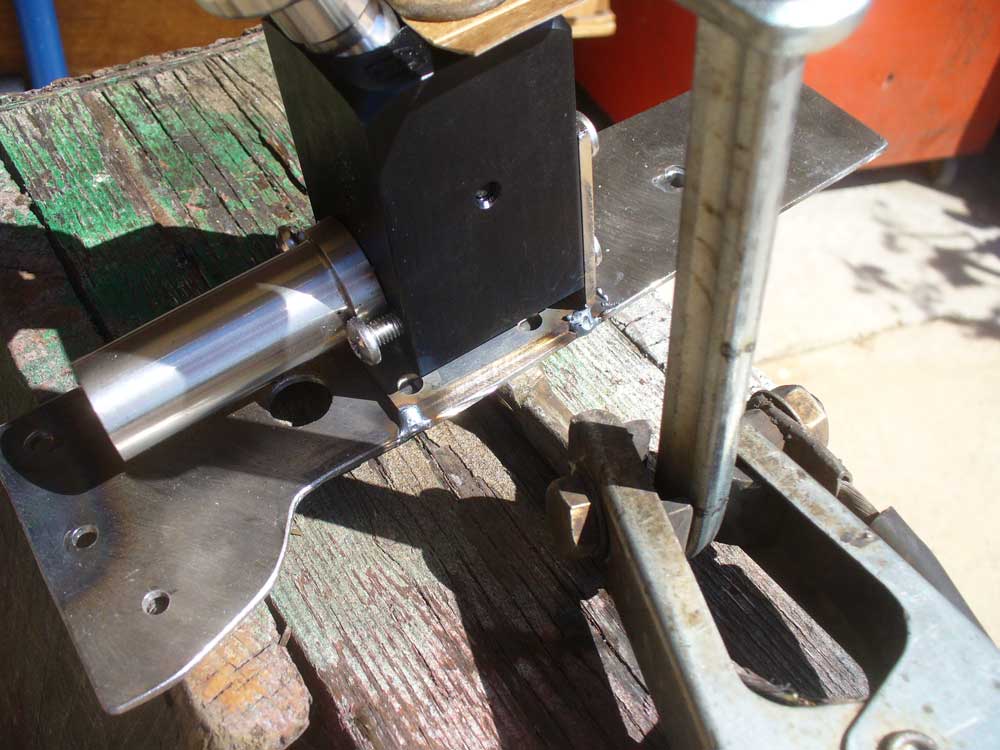
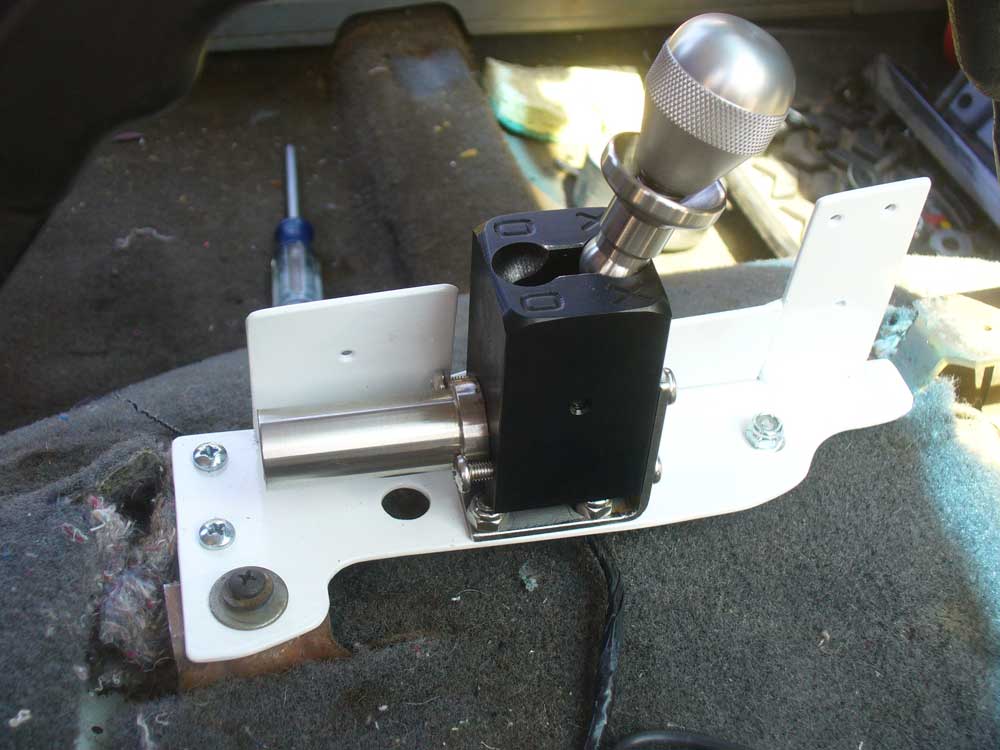
Here is the finished bracket:
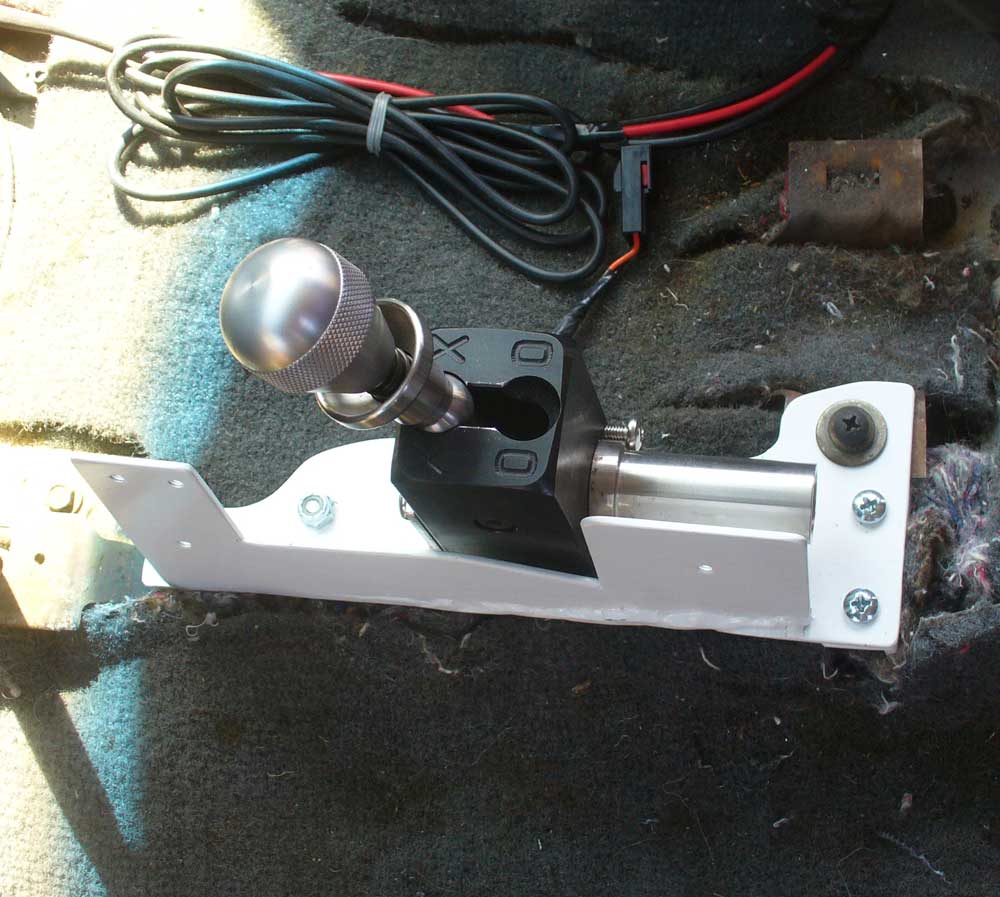
And:
Looking at the end result it would have been better to have started out with a bent piece of sheet metal. I am going to guess it would require the capacity to bend 110 degrees. I don’t have that capacity, but for someone else who may be considering doing something similar, that would be a rough estimate of what is needed.
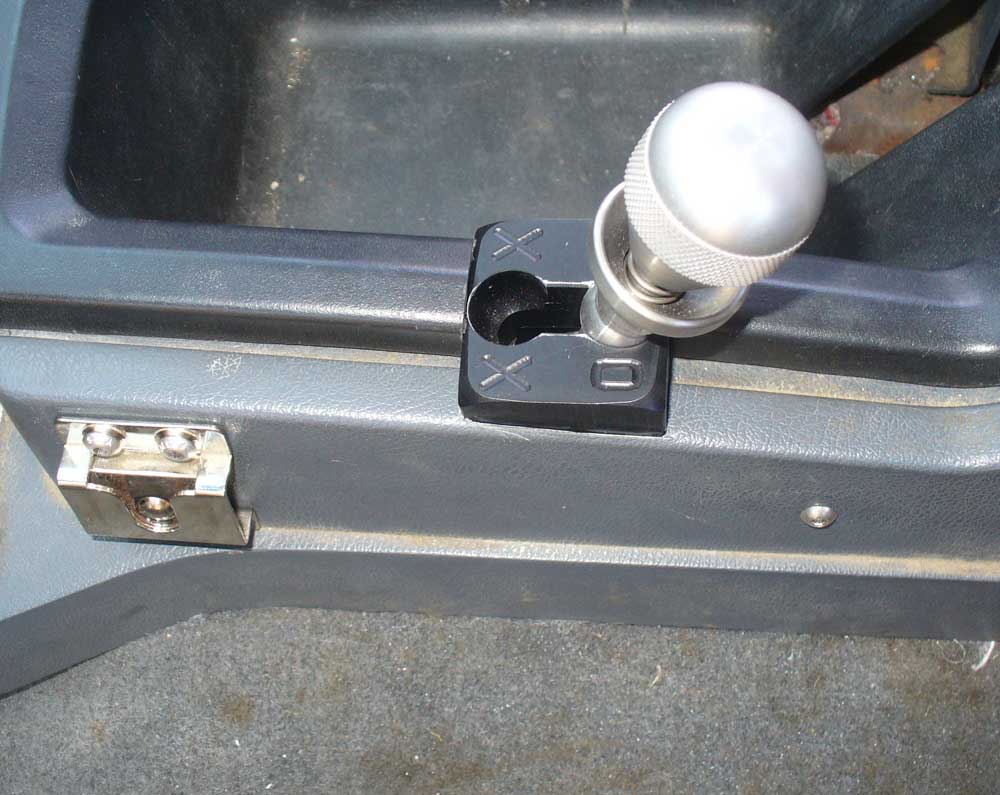
This is it fully assembled:
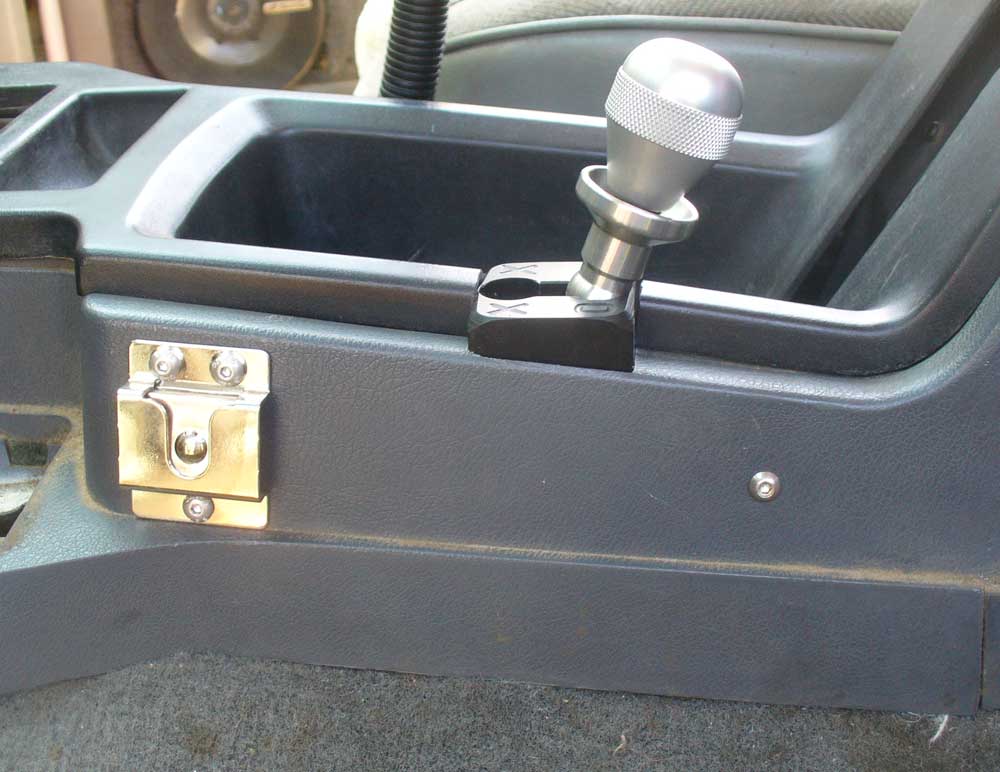
And:
Over the years I have seen a number of criticisms of the Ox Lockers. They seem to have collected a pretty good share of folks who don’t like them. But as I have seen the complaints I have held in reserve a suspicion that many of the complaints were largely founded on poor installation practices. That opinion has become more strongly held as I have looked for install write-ups. I can find very little information about cable routing, passage through the floor or even shifter mounting brackets. All of these details are going to play into a reliable installation. Lacking those details leads me to suspect that most folks are not proud of what they have accomplished on that front. And that leads me to suspect that the complaints are related to that as well.
I decided that I would go ahead and go the Ox Locker route in spite of the opposition. I like the fully mechanical operation, particularly in light of the relatively recent failure of my 18 month old Optima Yellow Top on a trail. Independent systems are more robust systems.
When I received my locker I was not at all surprised at this statement in the instruction manual: “Poor cable routing and shifter adjustment are the leading causes for an inoperative locker.” This write-up is about trying to prevent that situation for as many XJ owners as possible, and it is also a bit of a suggestion for Ox Off Road as to what they should be doing themselves to help their own cause.
I decided that I wanted the shifter mounted in the console to the left of the e-brake. I used one of these cheap Harbor Freight flush cut saws in order to cut the console where needed.
https://www.harborfreight.com/12-in-flush-cut-saw-62118.html
Sorry, I don’t have any pictures of this part of the process. It was a figure it out as I went sort of thing, and I didn’t stop to photograph progress that I wasn’t even sure would go anywhere.
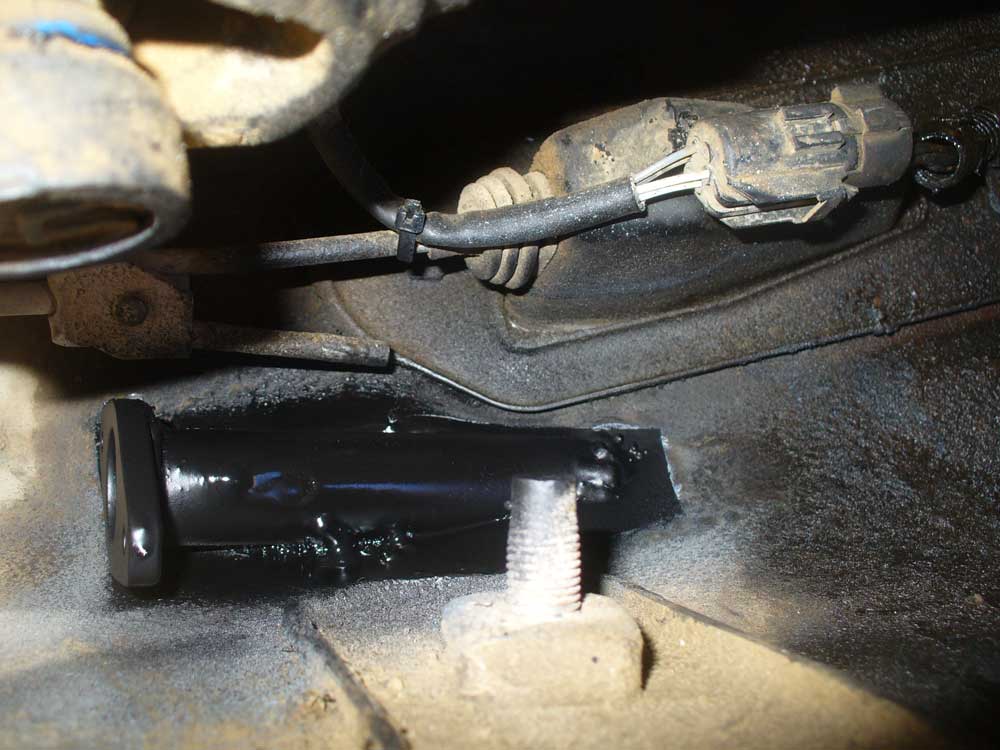
Once I had it figured out where the Ox shifter was going to sit relative to the console I was able to make a cardboard template and then a metal base as a starting point. This is the earliest picture I have of this part of the process:
You can see that I used one of the console mounting holes as a starting point for attachment. That particular mounting point happens to be broken off my console anyways, so nothing lost there. You can also see the front mounting point that I am creating and the spacer which will become part of the base. You will also note the second, large hole that I wound up not using. You may also note the overall shape of the base plate and then compare it to the end result. There was a bit more material to be removed.
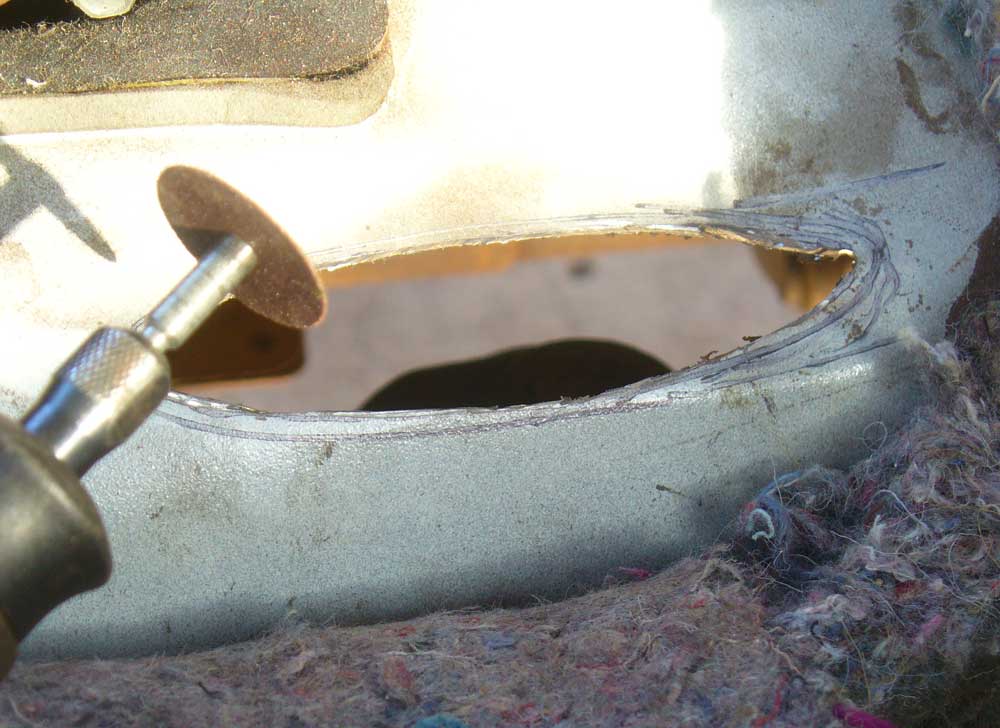
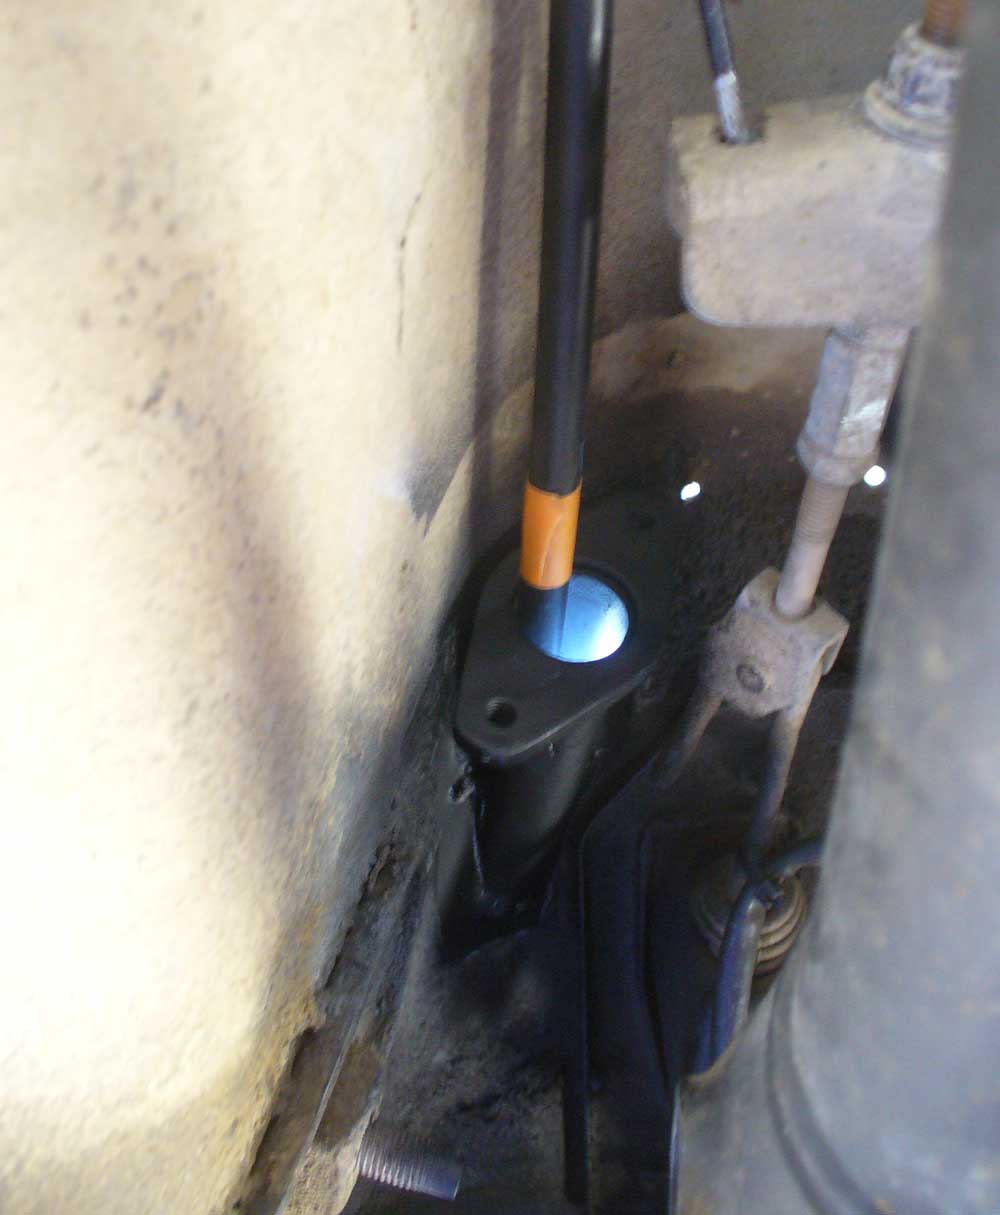
Here is the fitment over the spacer, note that it has a bit of an angle to it:
The orange tape was an early reference point. It located my inside edge at this stage of the process.
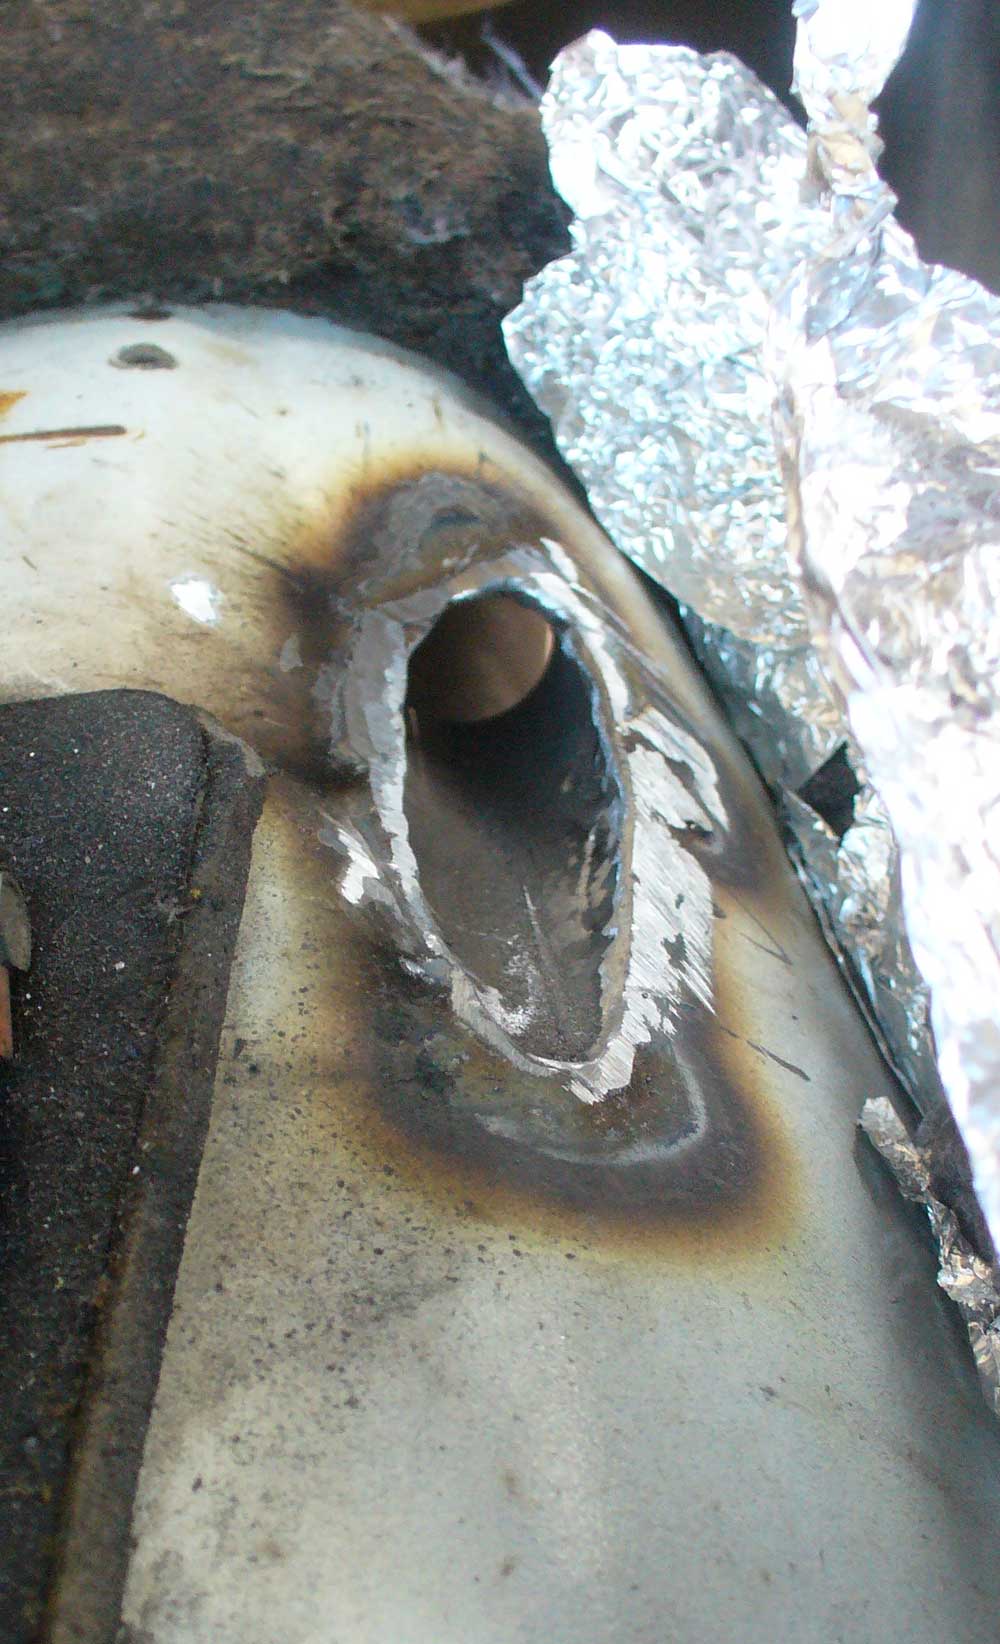
In preparation for welding I just grabbed some random scraps and tried to cover things that I didn’t want getting hit with spatter:
Here is the top side, welded enough to stay put so I could take it out and weld the bottom side:
Again, for this next stage I have a lack of good pictures. I needed to come up with another mounting point. The one large hole that I decided against was too much in line with the other mounting points (not much extra stability to be offered) and would end up directly under the line of the cable coming into the shift lever. I needed some lateral support. I wound up making a bracket that was in line with the console screw that I had repurposed. That had the challenge of being at an angle relative to the top plate. So I bent a piece of steel in a vise, held that down on the transmission tunnel and against the shifter mounting bracket and scribed a line to cut it off. I then made a nut plate (just another piece of steel, but threaded to mount under the shifter bracket) and bolted that in place, then with everything in place on the transmission tunnel I welded the nut plate to the bent piece of steel. That got me to this point:
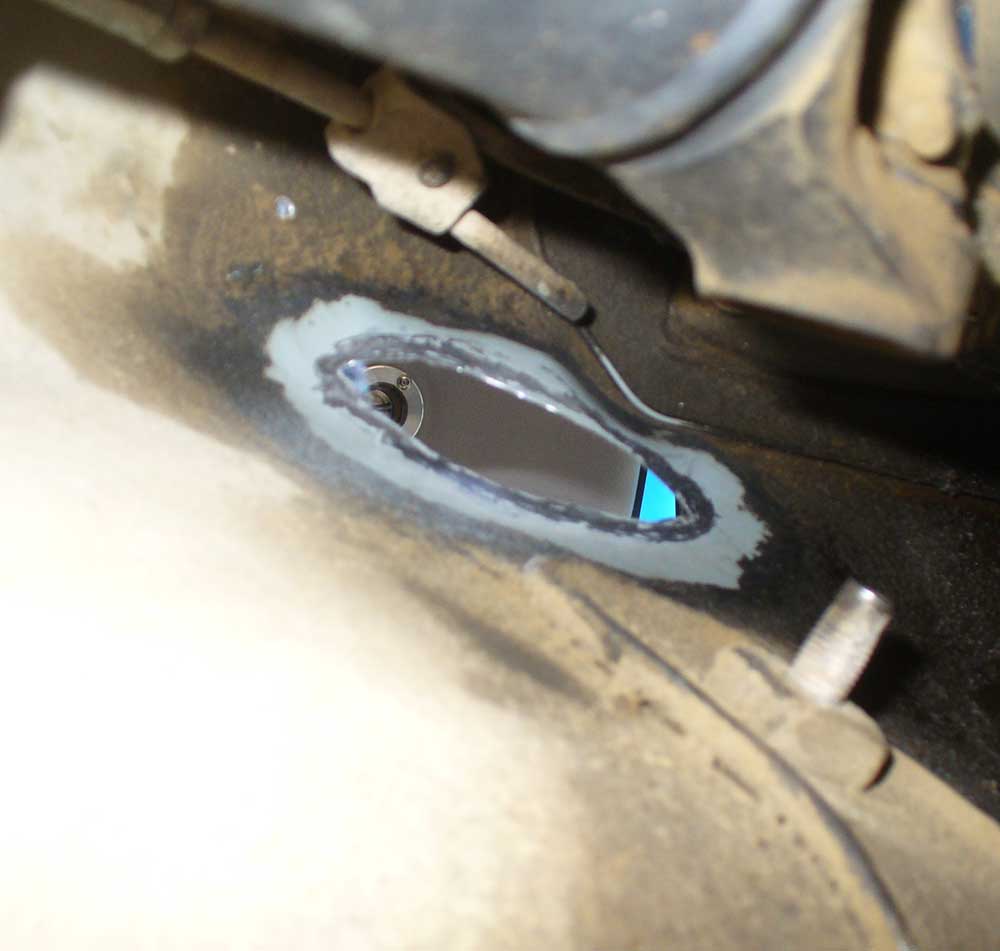
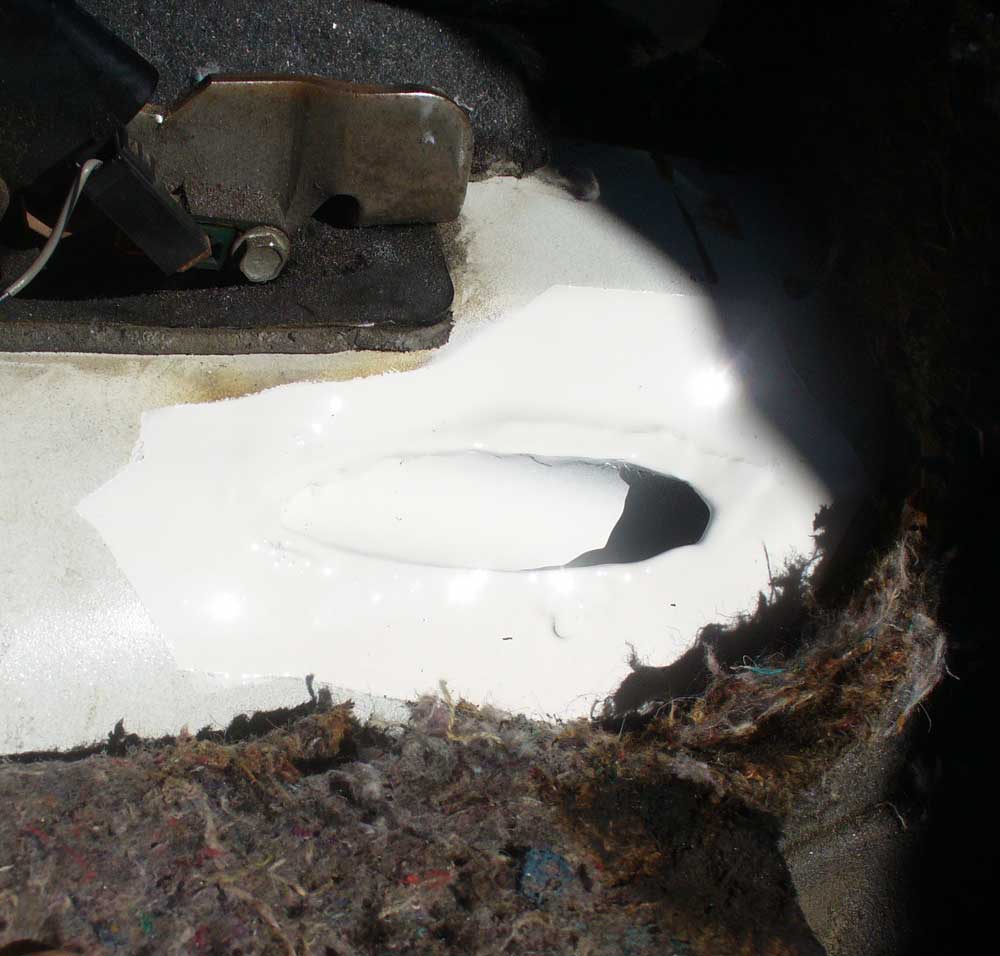
I then drilled through from the top (being careful not to damage my threads) in order to locate the bracket on the transmission tunnel:
That pretty much established the base for the shifter.
Mounting the shifter was the next challenge. I knew exactly where it needed to be relative to the console, but it is difficult to mount something inside the console when the console is installed. But I could clamp the shifter to the base with the outer part of the console in place:
I removed the console and then pulled out the shifter base with the shifter still clamped in place and tack welded the Ox shifter bracket to the new base.
With that done I was able to remove the shifter from the Ox bracket and drill through those four holes in to the new shifter base, then cut the tack welds. That got me the precise location I needed and the ability to unbolt the shifter from the new base.
The last issue was the possibility of the base flexing in use. I took care of that by adding an edge along the side of the console. This edge was then threaded for my mic mount and an extra screw was added further back to make up for the missing mounting location at the base of the e-brake lever.
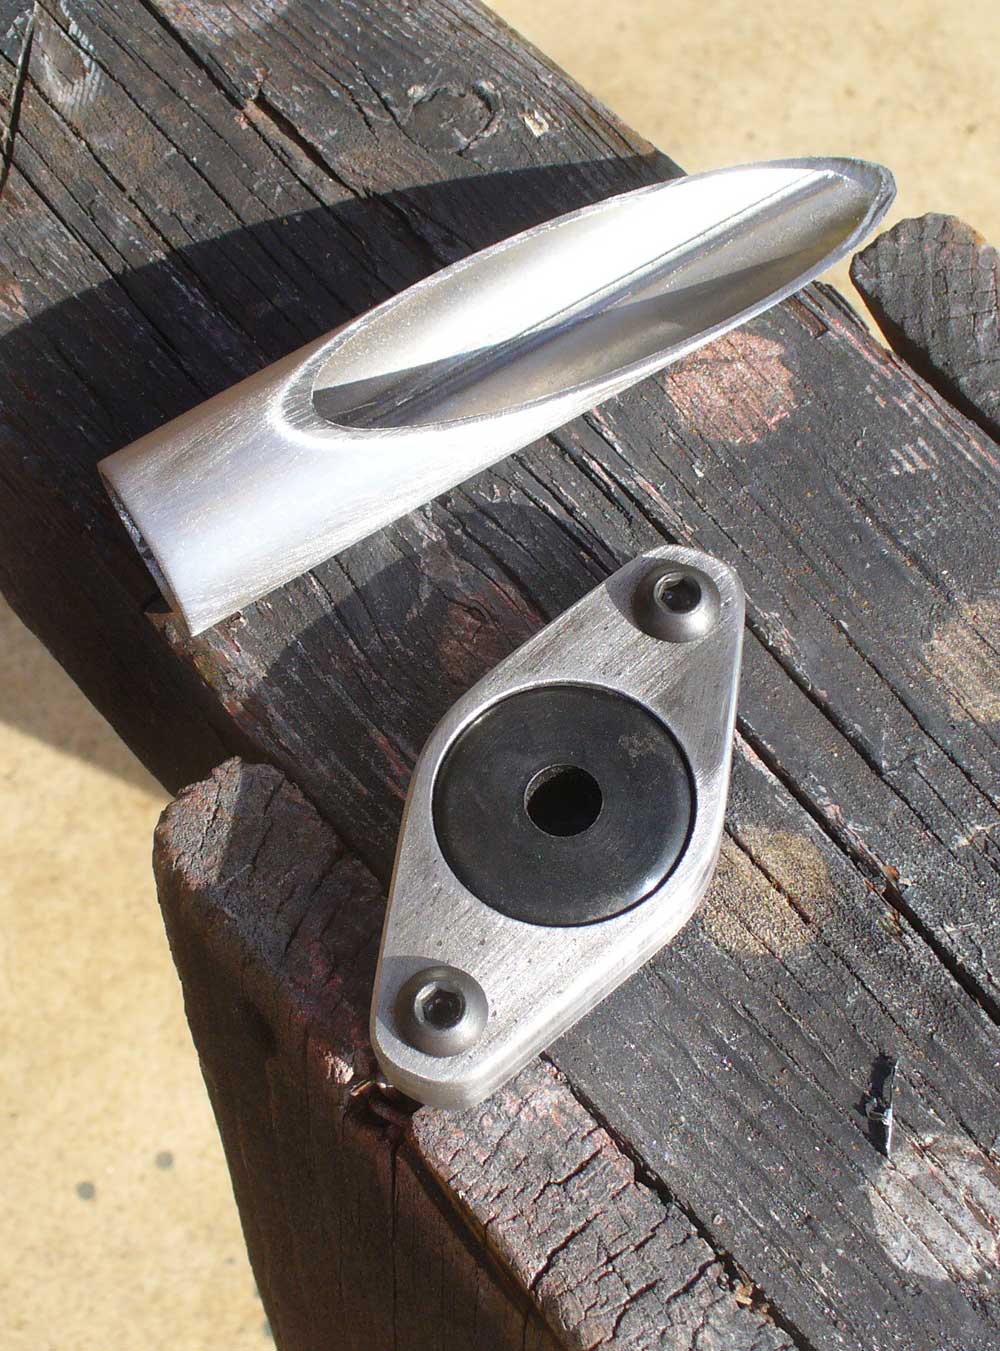
Here is the finished bracket:
And:
Looking at the end result it would have been better to have started out with a bent piece of sheet metal. I am going to guess it would require the capacity to bend 110 degrees. I don’t have that capacity, but for someone else who may be considering doing something similar, that would be a rough estimate of what is needed.
This is it fully assembled:
And: