• Welcome to the new NAXJA Forum! If your password does not work, please use "Forgot your password?" link on the log-in page. Please feel free to reach out to [email protected] if we can provide any assistance.

My Turn

I think there's a little bit of an artist mixed in with your wrenching skills.

Sent from my SM-N920P using Tapatalk

Thanks Steve. I have this vision in my head of how this thing is going to turn out and, unfortunately, I see this build going in two stages. The first one will end with the frame being painted or powder coated and the tank and side covers getting painted as well. I also plan on doing some more polishing and a major upgrade to the electrical system. If 2.0 happens it will include custom wheels and a modern front end which will take a while to collect the parts but I'll be able to ride it while I'm doing that.
 
I love it when the OCD kicks in.:anon:

Tom, you have no idea. I'm ashamed to admit that when I'm working on one of these pieces I tend to count the number of strokes :)roflmao:) so that each section receives the same amount of love and things look even. My buffer is only 1/4 hp model but it's what I have. I know a 3/4 would probably require less sanding and prep and all that but, most of the time, I enjoy watching the transformation. But that breather cover has been the most difficult piece because of the tight spots on each side of the bolt holes that are an absolute bare to get into.

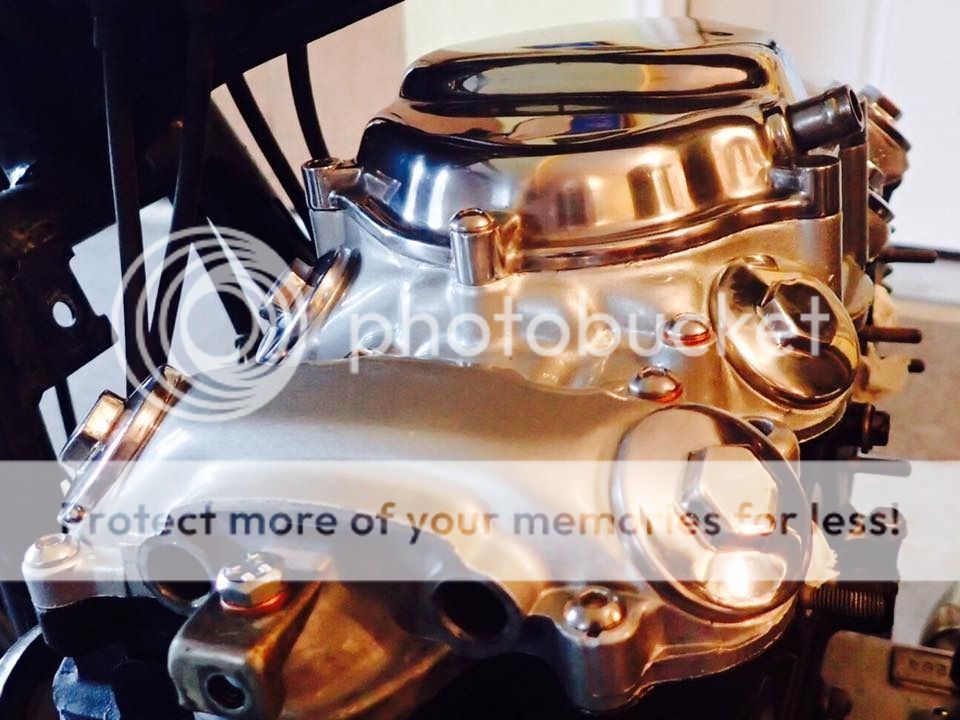
Question here...on the breather cover there is an inconsistency in the finish/metal that even after the last round of 1200 wet and buffing can still be seen if the light is right. What would that be? Maybe oil or contaminants deeper in the material? I even went back to 400 on that area and it's still there but maybe less visible. I did consider taking it to have it buffed by a professional but there's a part of me that would rather I do all the work on this thing (although I did have the head ported and built and powder coated).
 
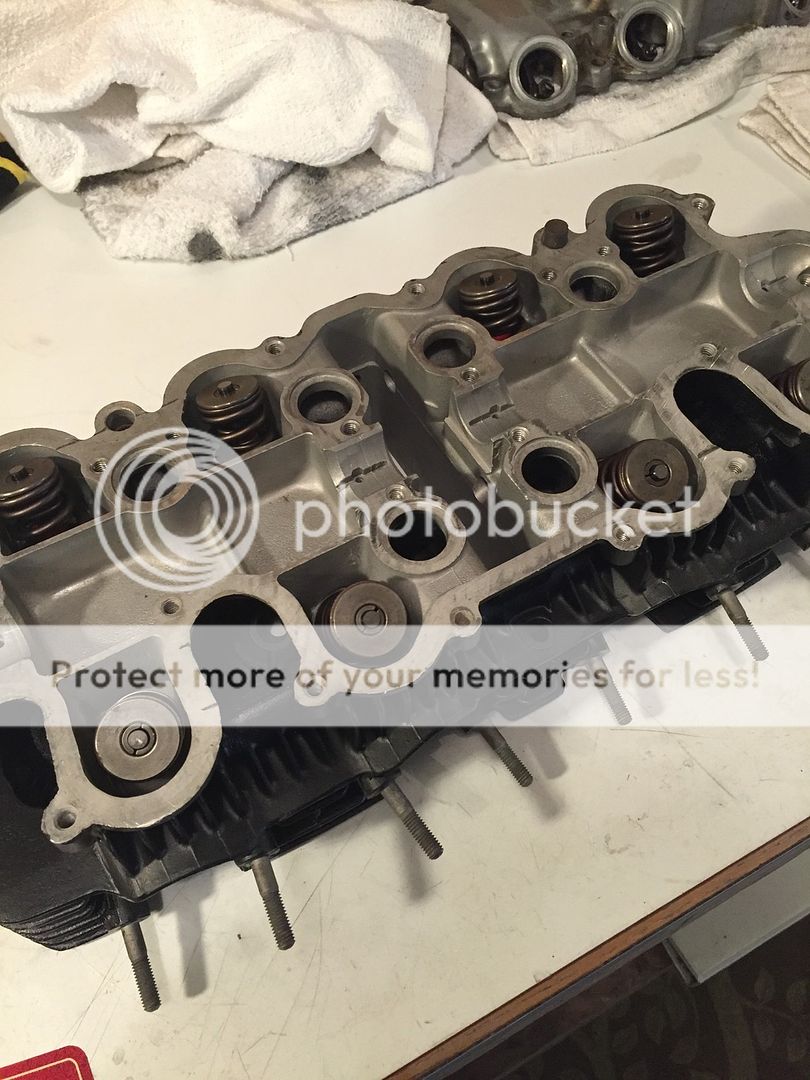
The head finally showed up.


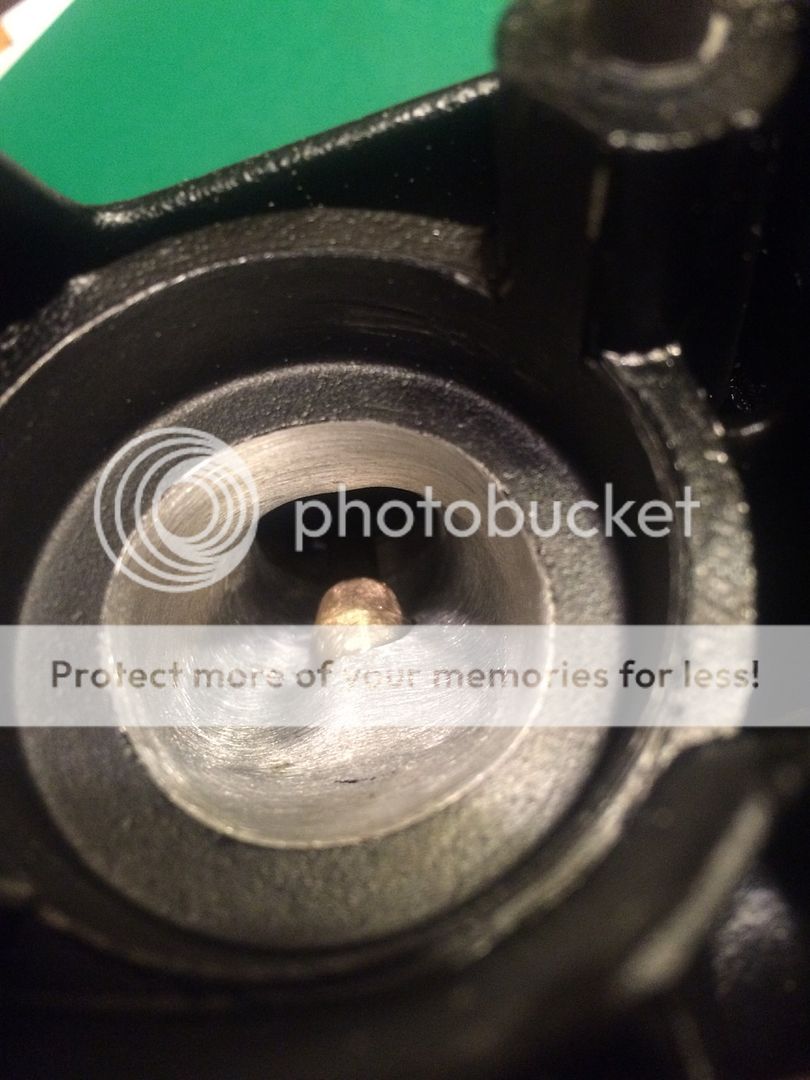
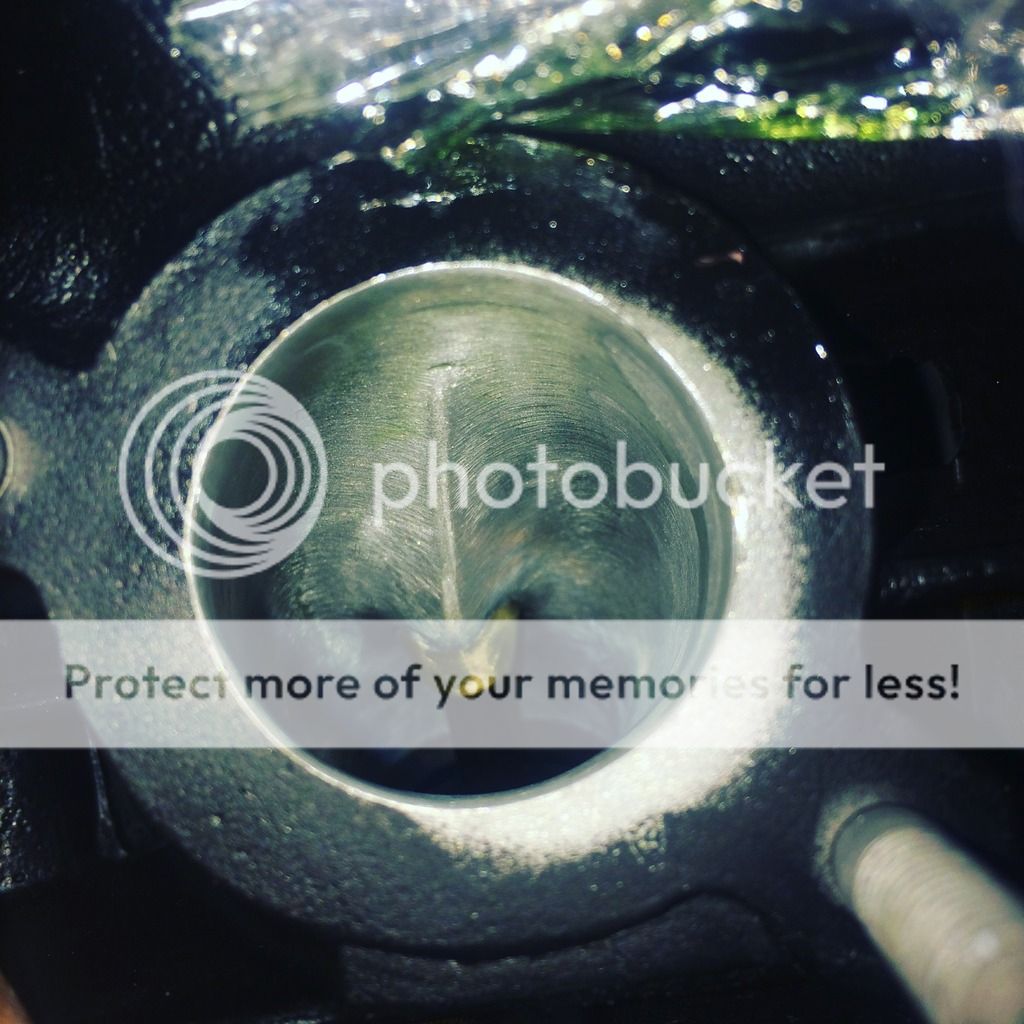
Heres some horrible pictures of the porting.


I got a genuine Honda head gasket and got the head installed last night.


The head is ported and polished and I ran 1mm larger intake valves. Everything is new. I was hoping to install a 650 camshaft but I'm having a hard time finding one. So today I decided to just go ahead and put things back together with the original cam and keep looking (I can always swap it out later on). I had a little trouble getting the cam, cam gear, and chain to get along but finally figured it out. The cam gear is held on to the cam by two bolts and I went to rotate the crank to get access to the second hole and the motor got tight. I went back to where I had it. Eventually I pulled the cam and gear back out and messed with the chain a bit until something felt different. Then I rotated the crank with my right hand and held the chain with my left hand and it did what it was supposed to do. So I put everything back in and got one bolt in and it rolled over just fine.

 
No clue. Stock was 50-55 I think. It should have a bit more pep with the oversized valves, extra 50cc's, and the porting/polishing. I also have a line on a 650 camshaft which should help but I'm waiting to hear if it's in good shape. I honestly just want it to be more reliable. Which...it will be. Sure looks faster.

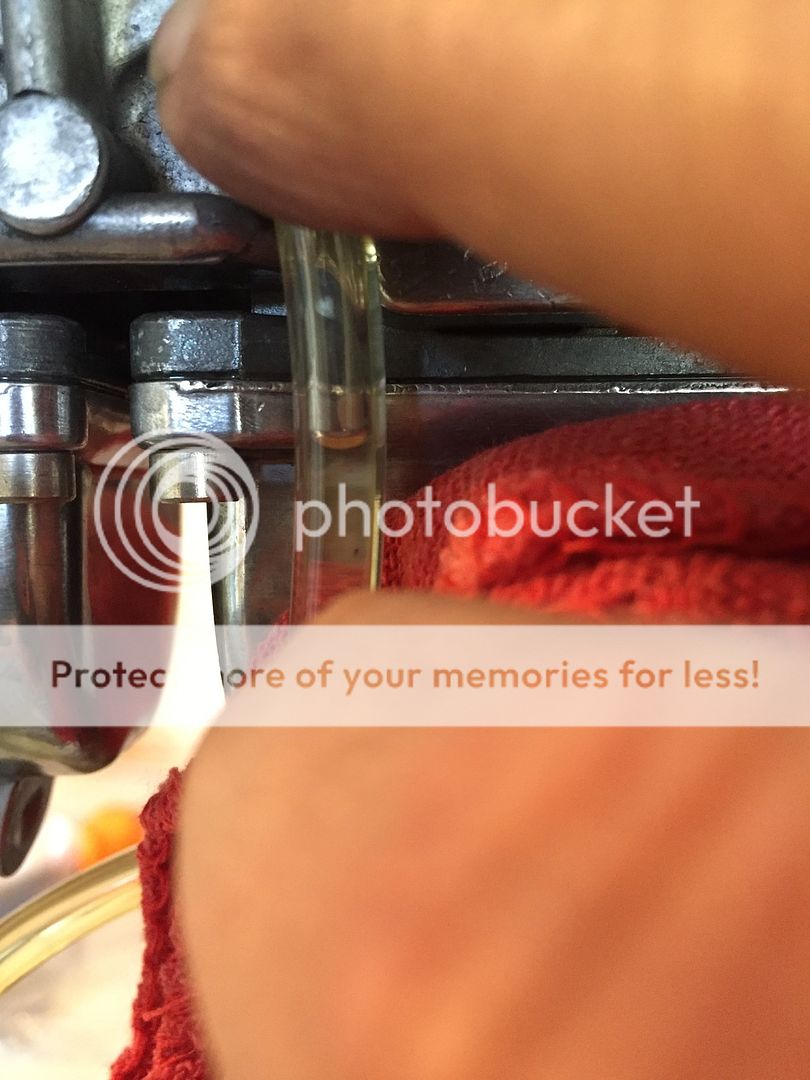
Got the float heights set in all the carbs today. This job is a royal PITA in my opinion. You set them to factory specs and then fill them up with fuel and use clear tube on one carb at a time to actually have a look inside the bowl and see where the fuel levels really are and then take that one apart, adjust, back together, repeat until you get them right. Took hours. But it's done. I also got the cam end caps polished and installed on the valve cover and replaced a leaky seal in the motor.

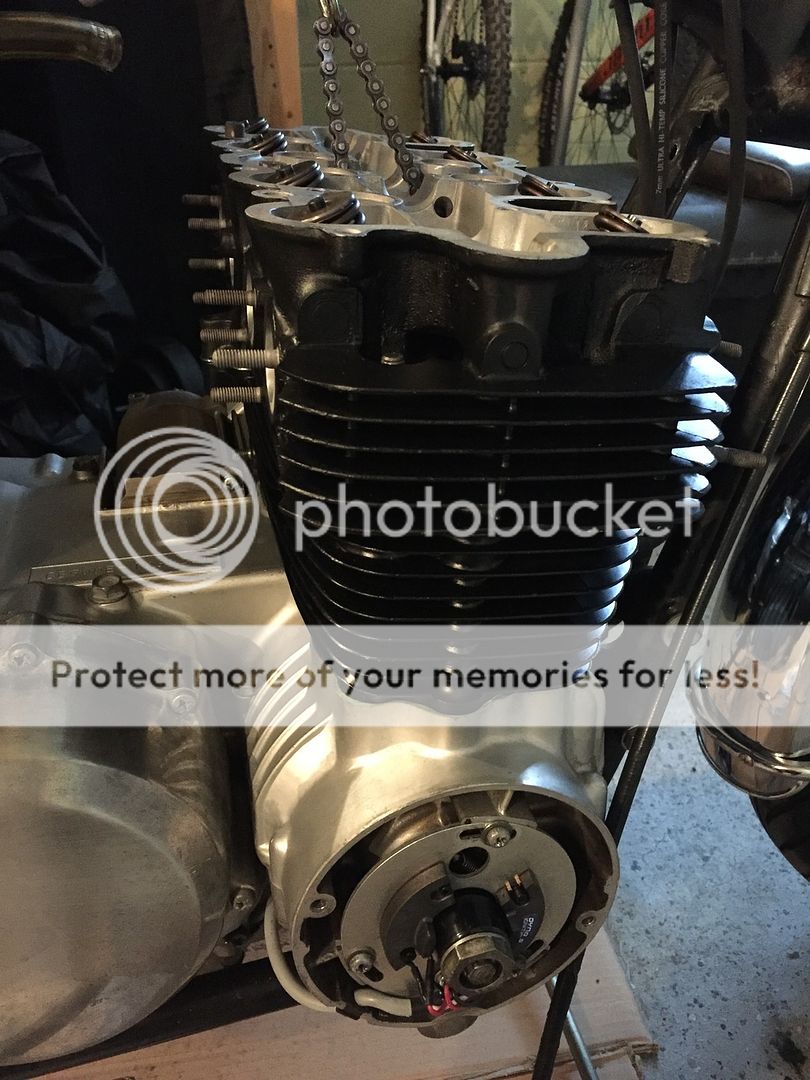
I'm waiting on four 65mm stainless bolts for the valve cover, another seal that I may as well replace while I have the left side cover off, 105 jets arrived today so those need to get swapped into the carbs, and I'm waiting on o rings for the tappet covers and for the intake manifolds. Then I'll put the rest of the stuff back on and be ready to fire it up real soon. Here's a picture of one of the carbs and it's fuel level and the top end of the motor all done except for the four bolts.


Time for an update.

I spent the majority of last weekend trying to get the bike started but it was not having any of it. Cranked over great but no fuel was getting into the cylinders (there was plenty of it in the carb bowls). Long story short...late Monday evening I finally realized that I had the valves adjusted incorrectly. I readjusted all of them and bumped the starter motor a bit and had loads of air moving out through the spark plug holes so I knew I had taken a huge step in the right direction. Got home from work on Tuesday and it fired right up. Sounds mean. I'm having a horrible time with Photobucket right now so I'm not able to upload a video.

A new battery is on the way and also a chain and new sprockets. Then I'll start tuning for this altitude.
 
https://vimeo.com/169185107

Here's a video of the start up. The lighting sucks but the sound is good. I'll do another one after I vacuum sync the carbs and install the new battery.
 
Been a very busy and frustrating last several days. This motor was originally a 500 in a 550 frame. The motor came with 627B Keihin carbs. I swapped cylinders and head to 550. I also picked up a set of carbs that came on the 550 bikes. The bodies are the exact same as what I had. Just different guts. But you can swap guts with what was in my 627's. Last week after I shot that video the bike started running like crap. It was dying and, in short time, very hard to restart. It felt/sounded very much like a fuel delivery problem. I walked away for two days and fished. Mmmmmmm slime.

I came back and decided to pull the 627 carbs off the shelf and go through them. The were still clean as a whistle but I broke them all down, soaked them in Chem Dip and rebuilt them anyways. A few days ago I got them back together, bench synced, adjusted the floats and installed back on the bike. I started it up and things were better. Not great but better. I went to vacuum sync the carbs and started having more issues. Carbs 1-3 were spot on but 4 needed love. Whenever I would adjust it, the motor would cut out, bog down, belch smoke, and eventually die but very quickly. Like an electrical problem. Header 4 was cool to the touch but the plug was wet. Spark was weak. I was really disappointed. I walked away again.

I have replaced the points and condensers and stock coils with Dyna stuff and kept thinking about that today. Late in the day I decided to test the ignition and coils. Both checked out fine but I did discover that I was losing almost 2 volts from the battery to the coils. Coils were seeing almost 10.5 volts. I don't know a lot about electrical but that seemed like a huge loss. So...I bypassed the stock harness just for testing purposes and made a jumper wire that went from positive at the battery to the coils so I knew the coils were getting the right current. I started it up and immediately knew things were different. The motor has never sounded like that. Very good throttle response. Header 4 was piping hot in a few minutes and when I pulled the plug, it's never looked so great. So then I started looking at the connectors in the harness and the fuse panel. It's all corroded and oxidized. I'd love to upgrade to a Motogadget unit but I just can't right now. So I went back to science class. I made a solution of vinegar and salt and another of water and baking soda. I took the fuse panel off and pulled each wire out of the multi-connector that attaches it to the main harness. I soaked it in the vinegar/salt solution for 5 minutes. It was bubbling. Then I neutralized it in the water and baking soda. In between I scrubbed it with a wire brush. The connectors looked brand new as did the exposed wire right at the connectors. So for now I'm planning on doing this to anything that supplies power to the coils and then retesting to see if it helps with the loss of voltage to the coils.

Getting closer. It's gonna be a bit until I know if this fixes the issue as I have a buddy coming into town and all he wants to do is fish. Oh the smell of the gear after 4 days on the river fishing and drinking will be.........delightful. :roflmao:
 
All of that electrical maintenance is probably really good for the bike. If it doesn't work the way you want, there's nothing wrong with a fused wire to the coil from the battery. Sometimes the wire is old enough that the resistance is too high no matter what you do.
 
I cleaned up a lot of wires today. I pulled every wire out of the multi connectors at the electrical panel and treated them all and put them back together with a dab of dielectric grease. I still have a loss of 2 volts. Now I know there's other wires that are keyed hot that need to be cleaned (I quit for the night a bit ago with the ignition wires pulled apart). Someone on a Honda forum mentioned that I should install a relay to power the coils. I know what a relay is. I think its job would be to deliver a consistent current to the coils. But I wouldn't have a clue how to do it.
 
Late in the day I decided to test the ignition and coils. Both checked out fine but I did discover that I was losing almost 2 volts from the battery to the coils. Coils were seeing almost 10.5 volts. I don't know a lot about electrical but that seemed like a huge loss.
That voltage drop is probably by design. In the automotive world, it was common to have a ballast resistor, or resistor wire, to limit the current going through the breaker points. That increases the service life of the breaker-points.

The idea of installing a "relay" is problematic due to the mechanical nature of the device. The switch to Solid State controls (way back in the 1970's) did much for the reliability of the systems involved.

The question remains, how do I get a breaker-point system to deliver full voltage to the coil?

It was a fun read (for me anyway :D):
http://advrider.com/index.php?threads/points-to-electronic-ignition-cheap-easy.417099/
http://www.gofastforless.com/ignition/tfi.htm
 
Last edited:

Yep. The relay is energized by the original wire harness sending power to the coil and runs to ground. The 12v power wire to the coils can come from the battery or wherever you have reliable 12v power. If it was me and I was having issues with 12v power to the coils, I would run that wire from the battery through the relay directly to the coils.

The fuse is there to prevent catastrophe and the relay is required so that you can turn the power to the coils off and make the engine stop.

Modern bosch relays are simple, reliable and cheap at any parts store.
 
That voltage drop is probably by design. In the automotive world, it was common to have a ballast resistor, or resistor wire, to limit the current going through the breaker points. That increases the service life of the breaker-points.

The idea of installing a "relay" is problematic due to the mechanical nature of the device. The switch to Solid State controls (way back in the 1970's) did much for the reliability of the systems involved.

The question remains, how do I get a breaker-point system to deliver full voltage to the coil?

It was a fun read (for me anyway :D):
http://advrider.com/index.php?threads/points-to-electronic-ignition-cheap-easy.417099/
http://www.gofastforless.com/ignition/tfi.htm


I'm using electronic ignition. System calls for no more than a 1 volt drop at the coils.
 
I'm using electronic ignition. System calls for no more than a 1 volt drop at the coils.

If you can find links for that system, I'd like to research the schematics. Also, include any to OEM line drawings and/or schematics.
 
The ignition is a Dynatek Dyna S. I pulled this off a KZ website but it's pretty much how mine installs.
http://kzrider.com/forum/4-electrical/597502-stock-cdi-vs-dyna

This is the testing procedure.
http://www.mpsracing.com/instructions/Dynatek/DynaS_Testing.pdf

When the cols were getting 10.5 volts, the motor ran like absolute crap. Cylinder 4 dropped right away. There just wasn't a strong enough spark to ignite the fuel. Plug was soaked. Bike was hard to start. Just awful after doing all that motor work. I pulled the harness off again today (second time now) and went through ti all again. I cleaned every connector and picked up a bit of voltage but not much. I then installed the relay. At the end the battery showed 12.4 with the key and coils were getting 12.1. Bike started up wonderfully and all cylinders were hot within a minute.

Thanks for the help RedHeep.
 
Back
Top