MfeMorley
NAXJA Forum User
- Location
- Albuquerque NM
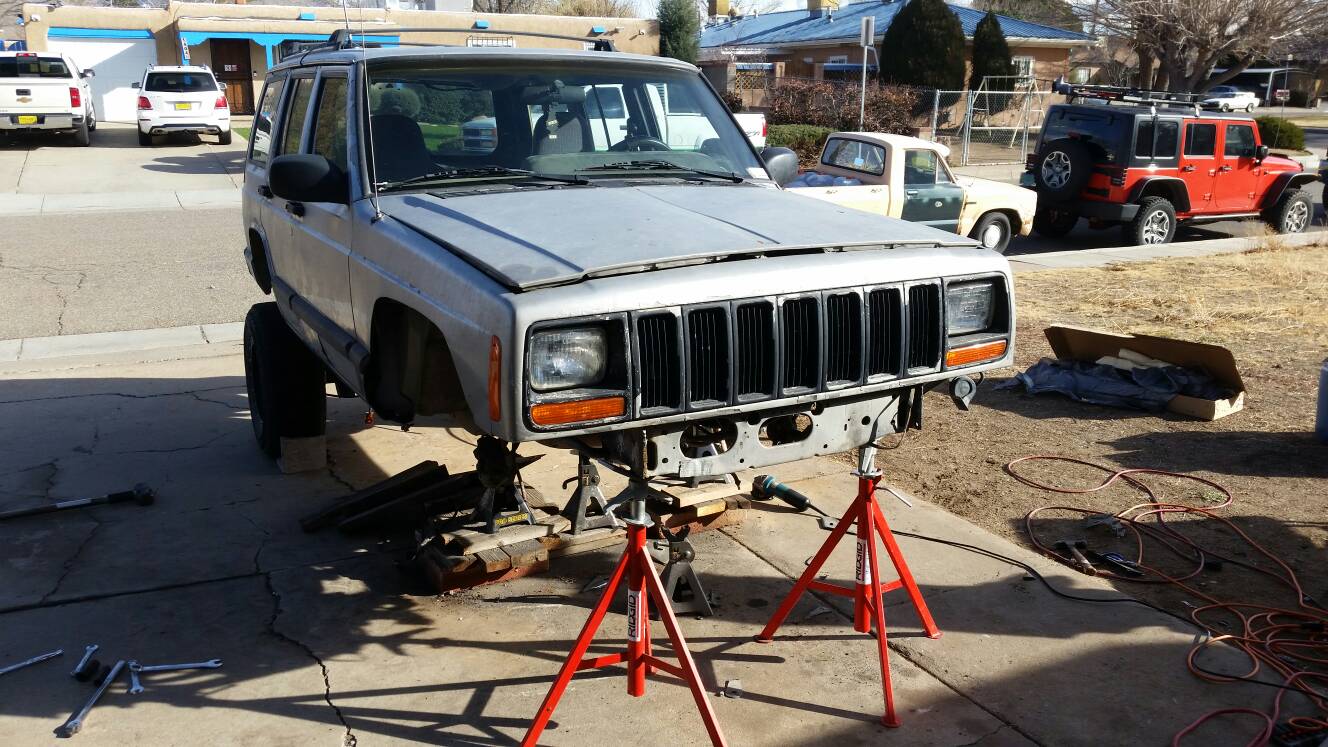
Hey guys please be patient with me on this one. I have searched forums for years on various builds and learned tons from them and this is the first time i have finally decided to post myself and contribute to the available knowledge. Im doing a full build on my jeep all at once and i searched and searched and only found 2 similar write ups online so i wanted to share my experiences as well. So to start I have an 01 4 door XJ with 75000 miles on it and of course the 4.0 and an auto. After many boring nights at work and talking for hours about how to build my jeep i settled on doing the rusty's 8 inch long arm lift, swapping in JK axles, and everything that goes along with it. As the jeep sits im about half way done. we will see how much i manage to write about tonight. Also as soon as i can figure out how to attach pictures i will attach a good amount of them.
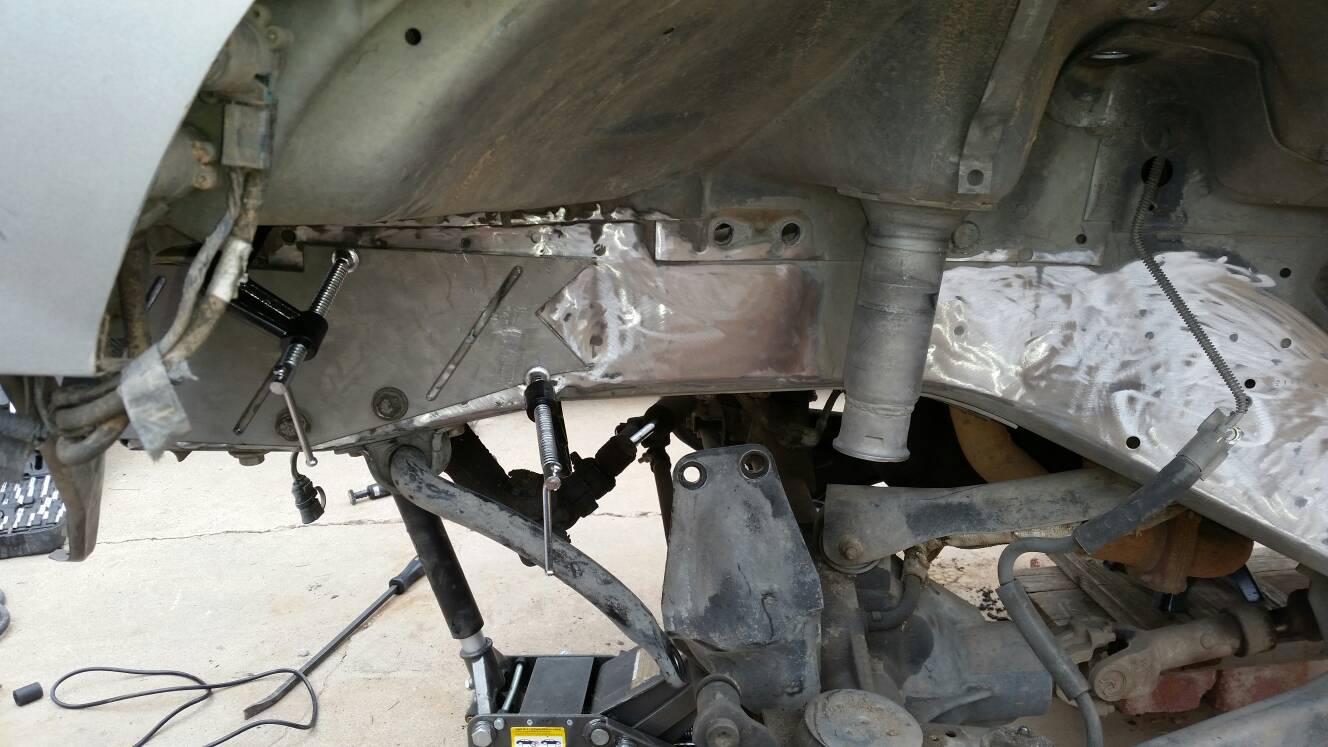
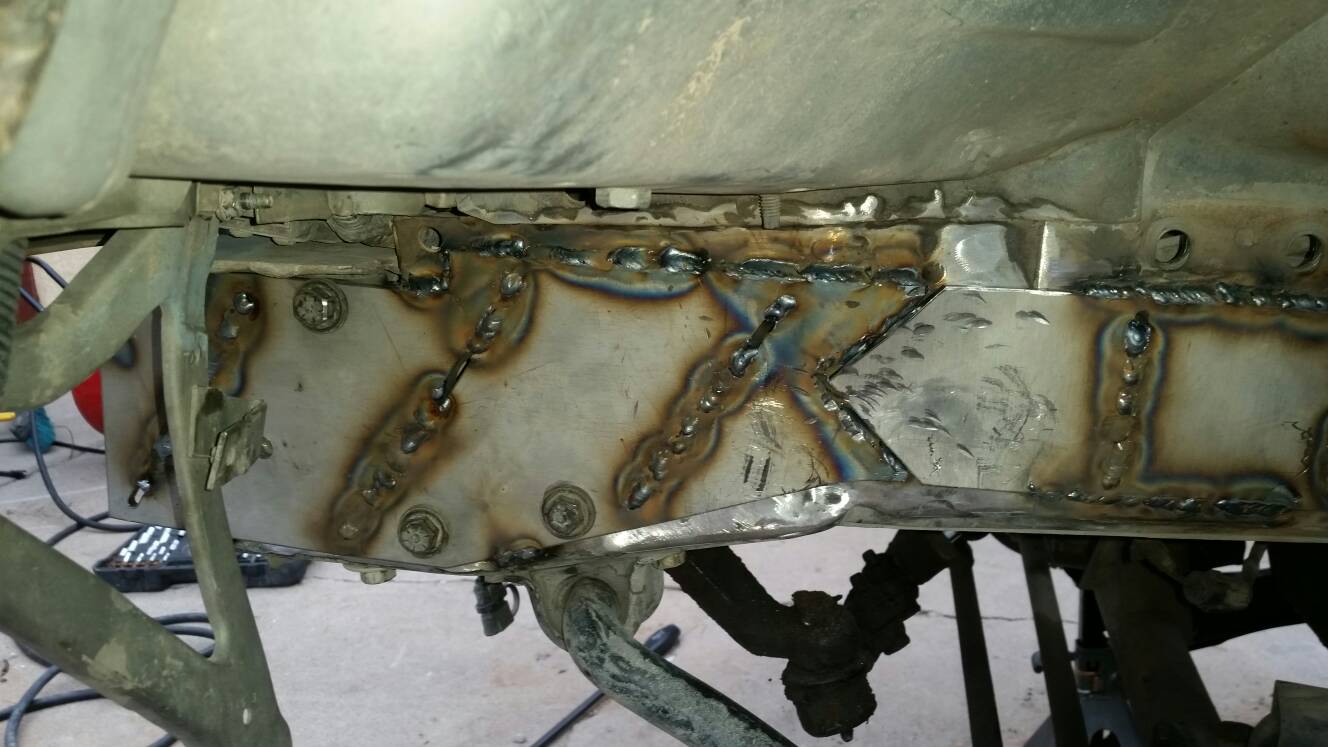
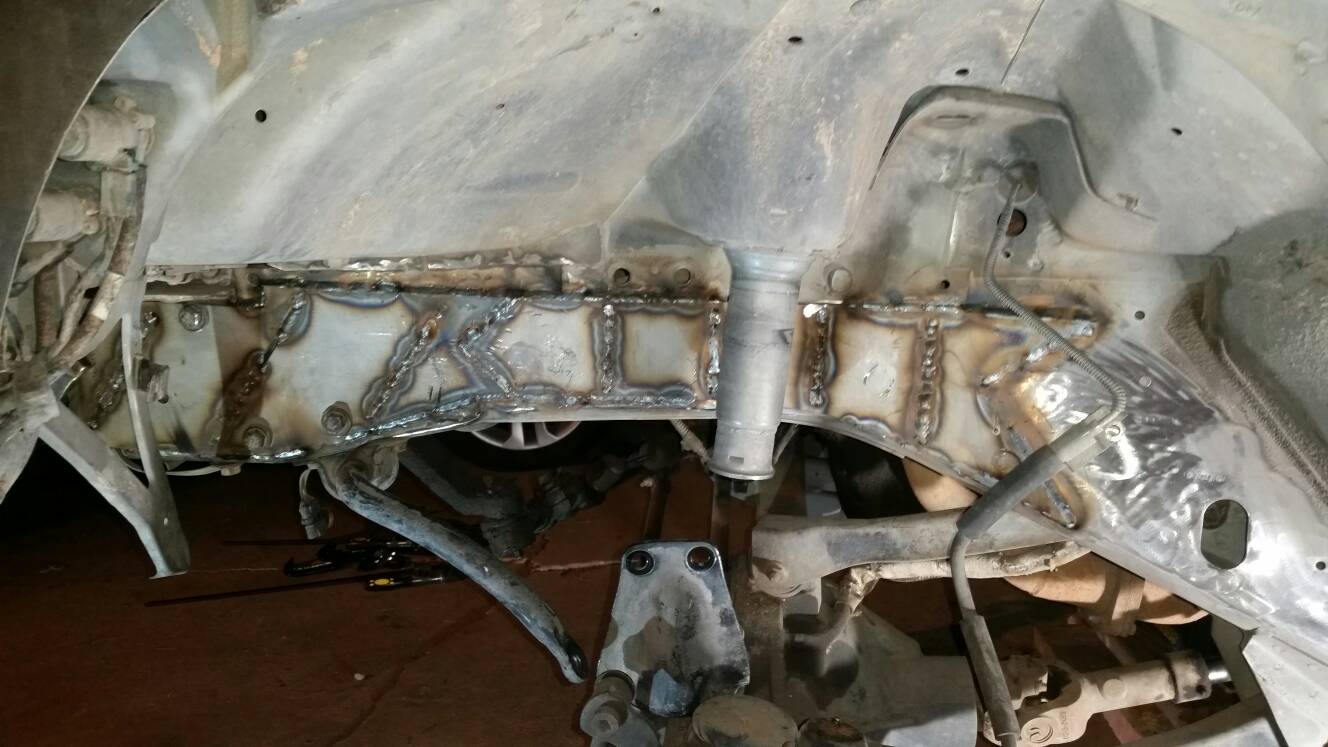
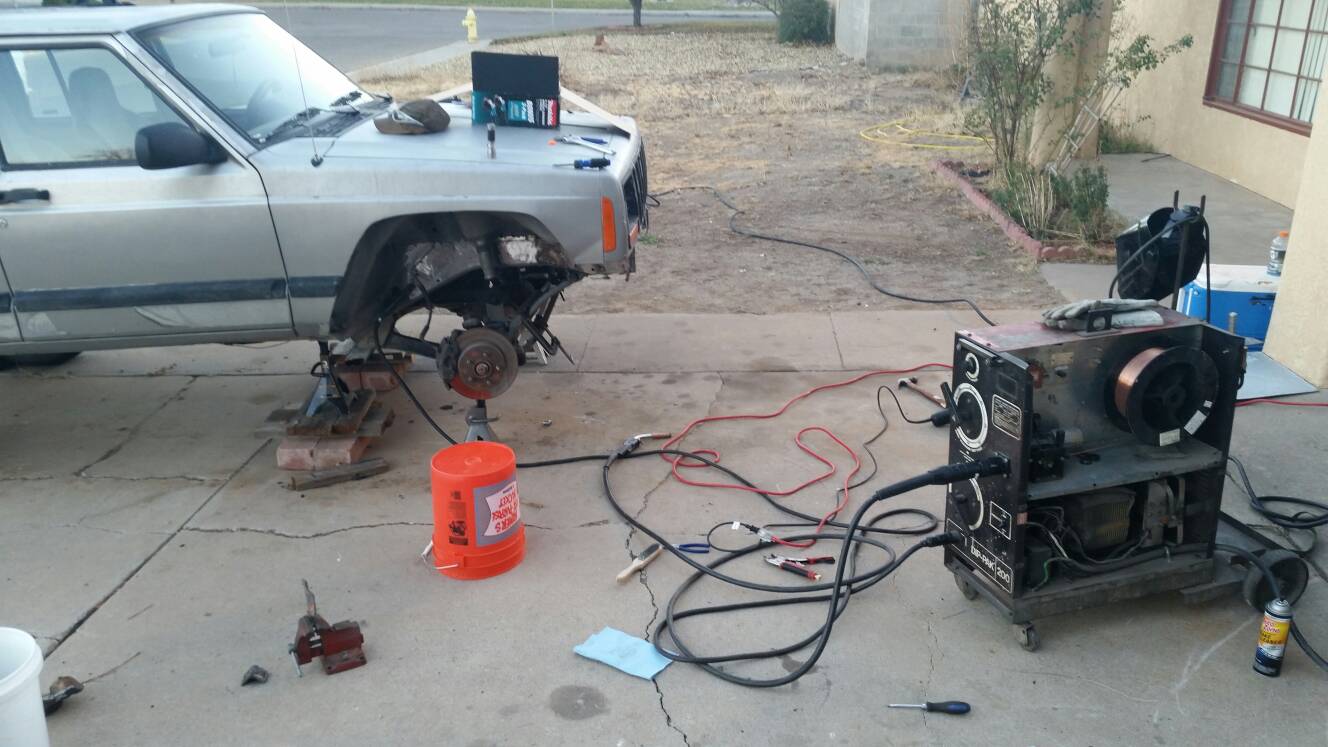
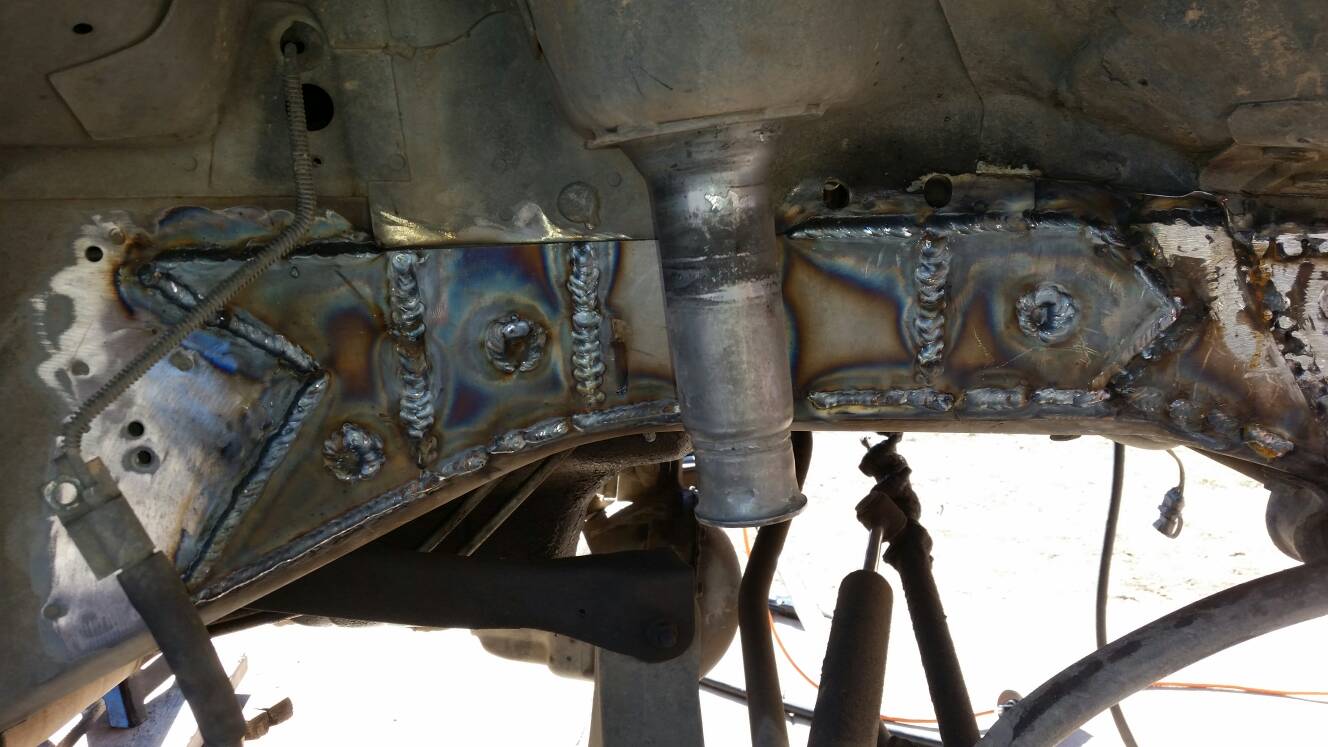
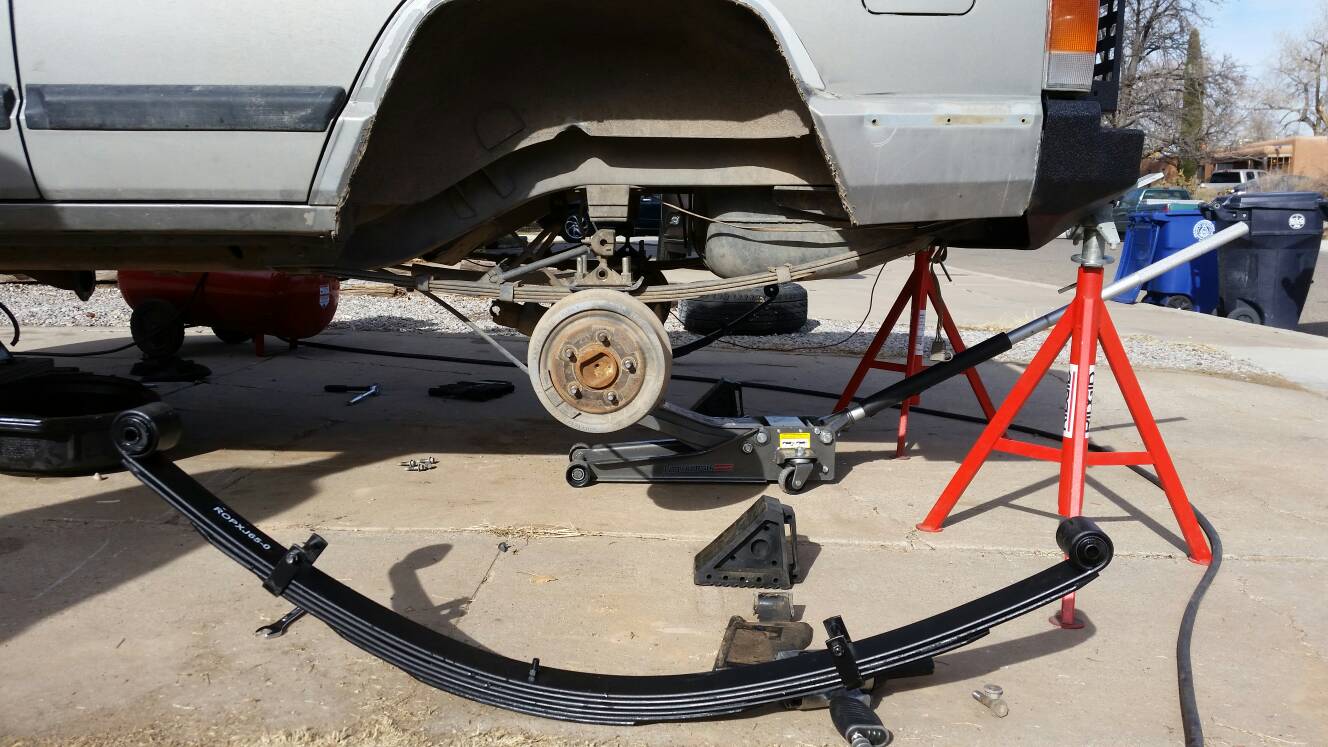
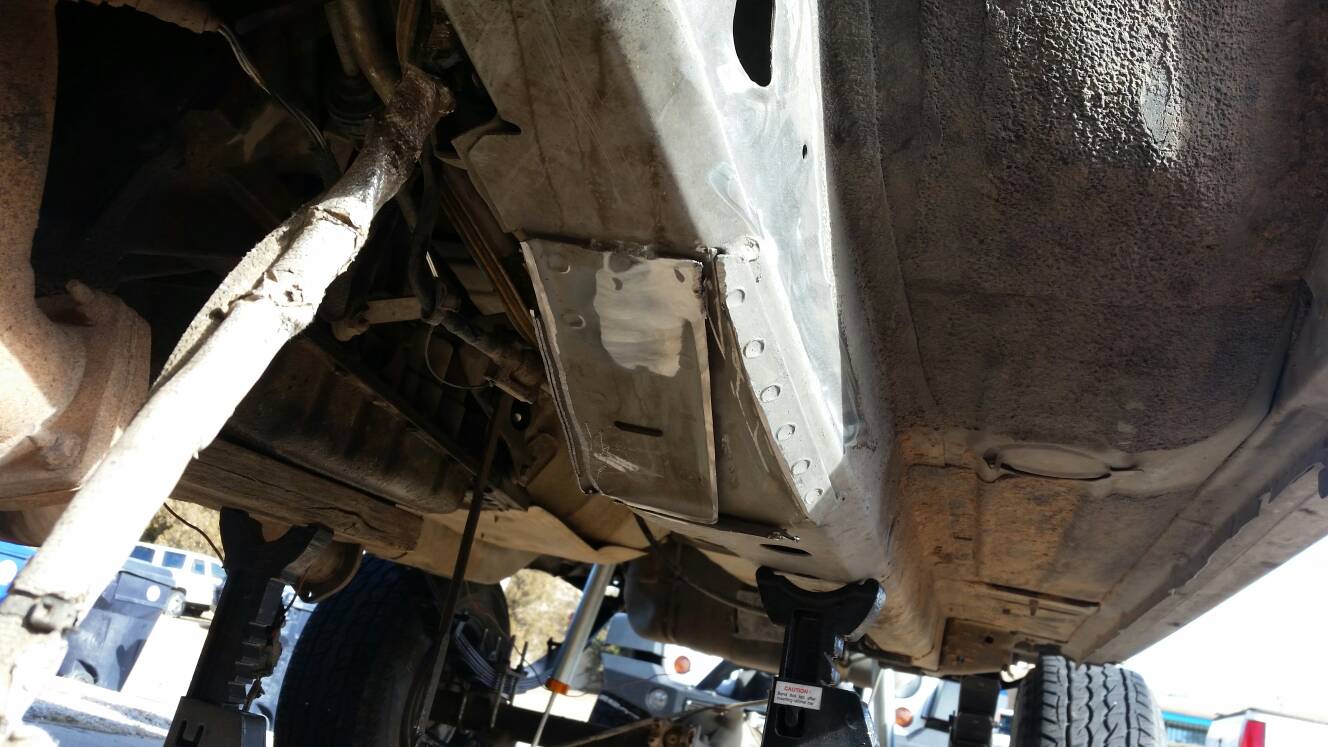
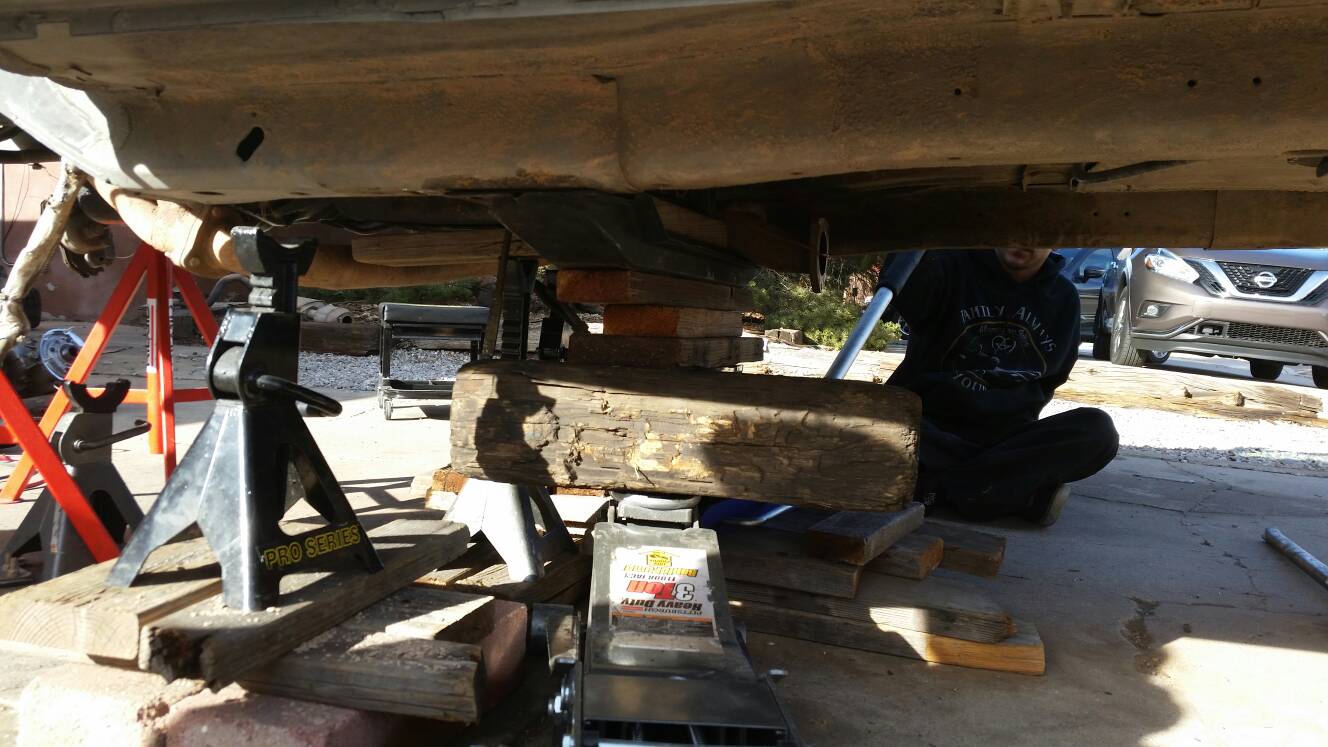
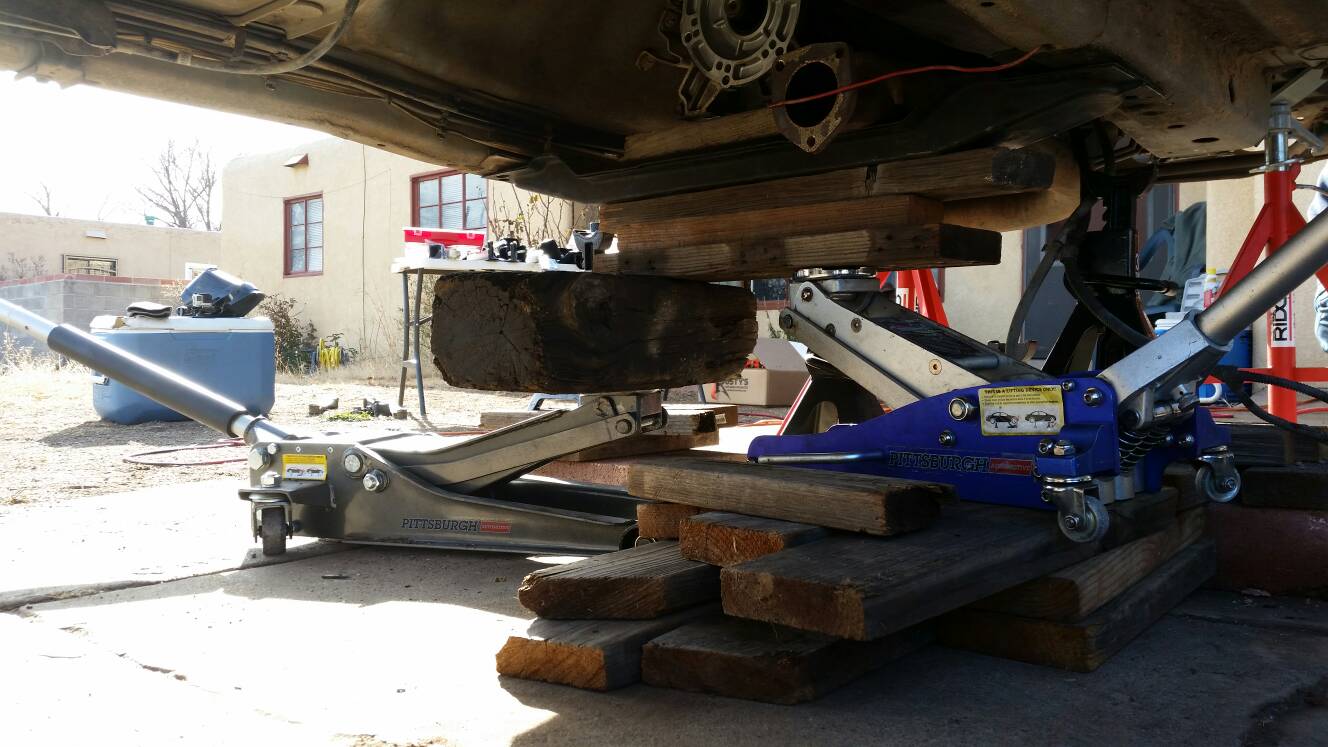
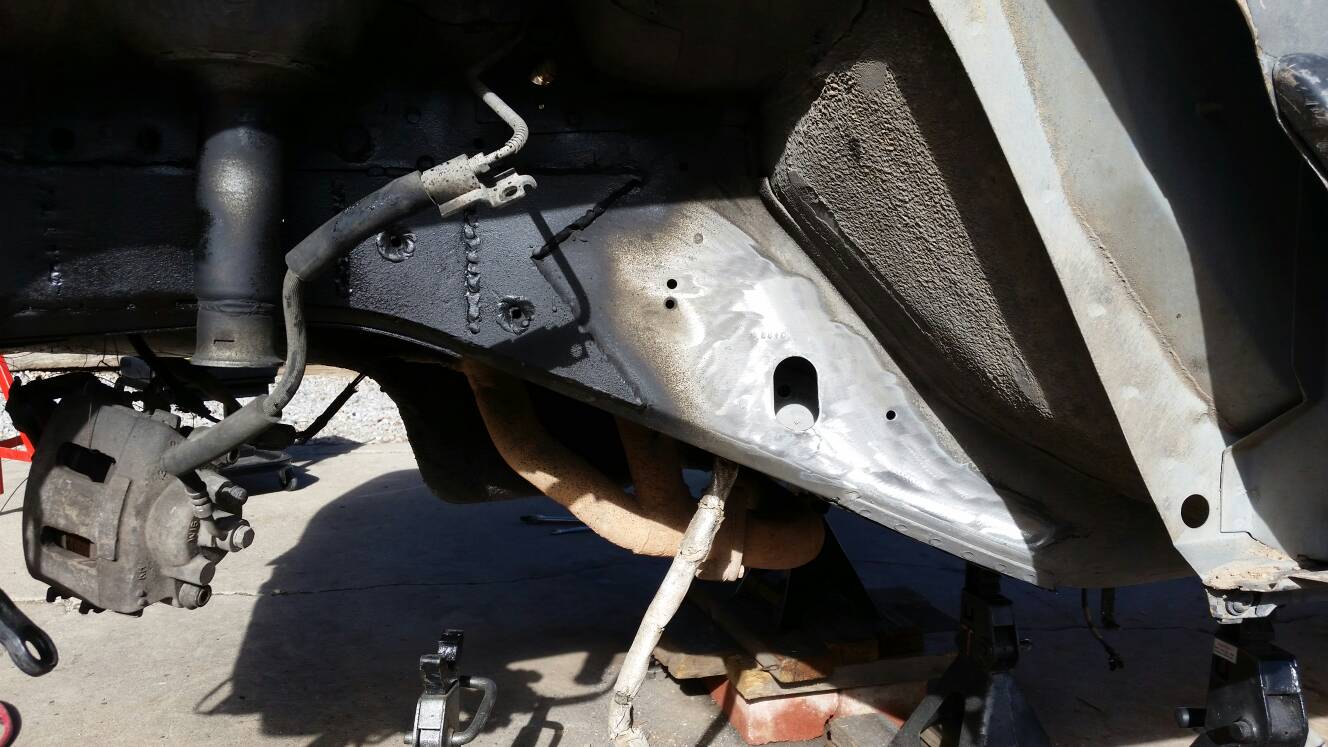
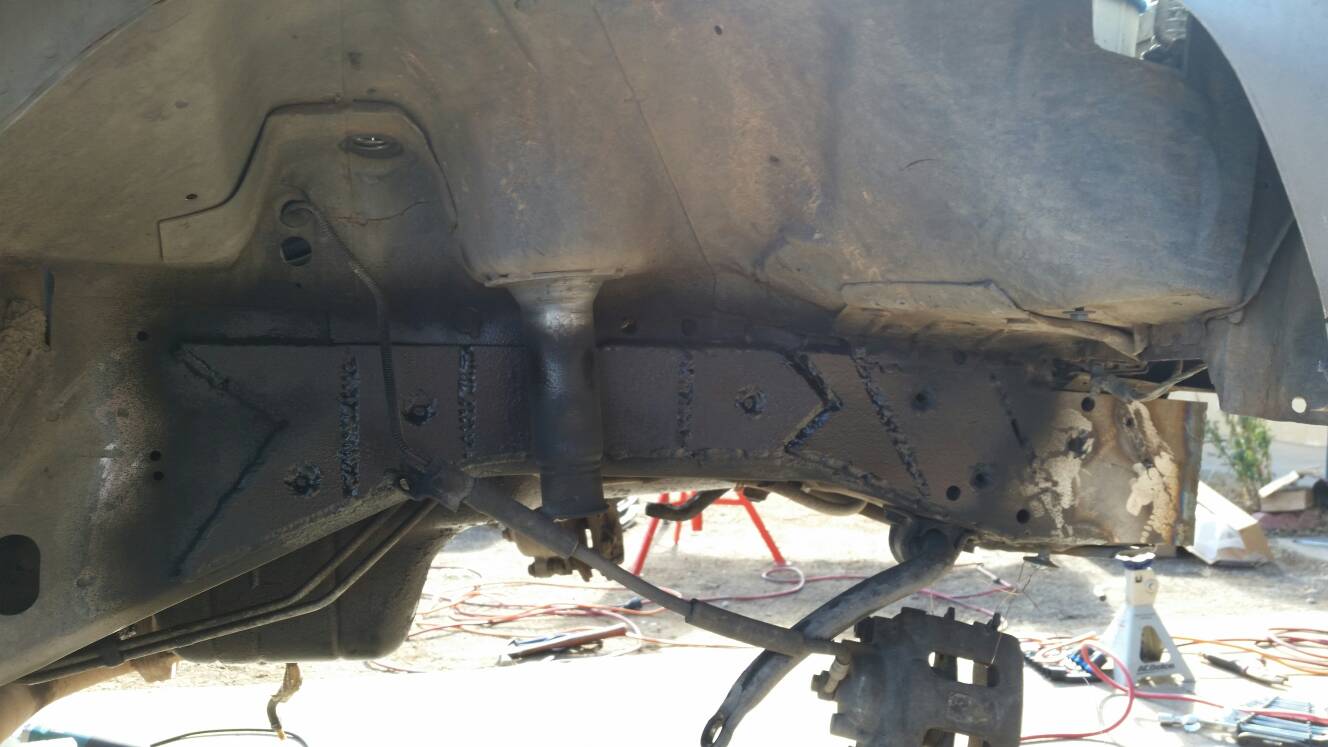
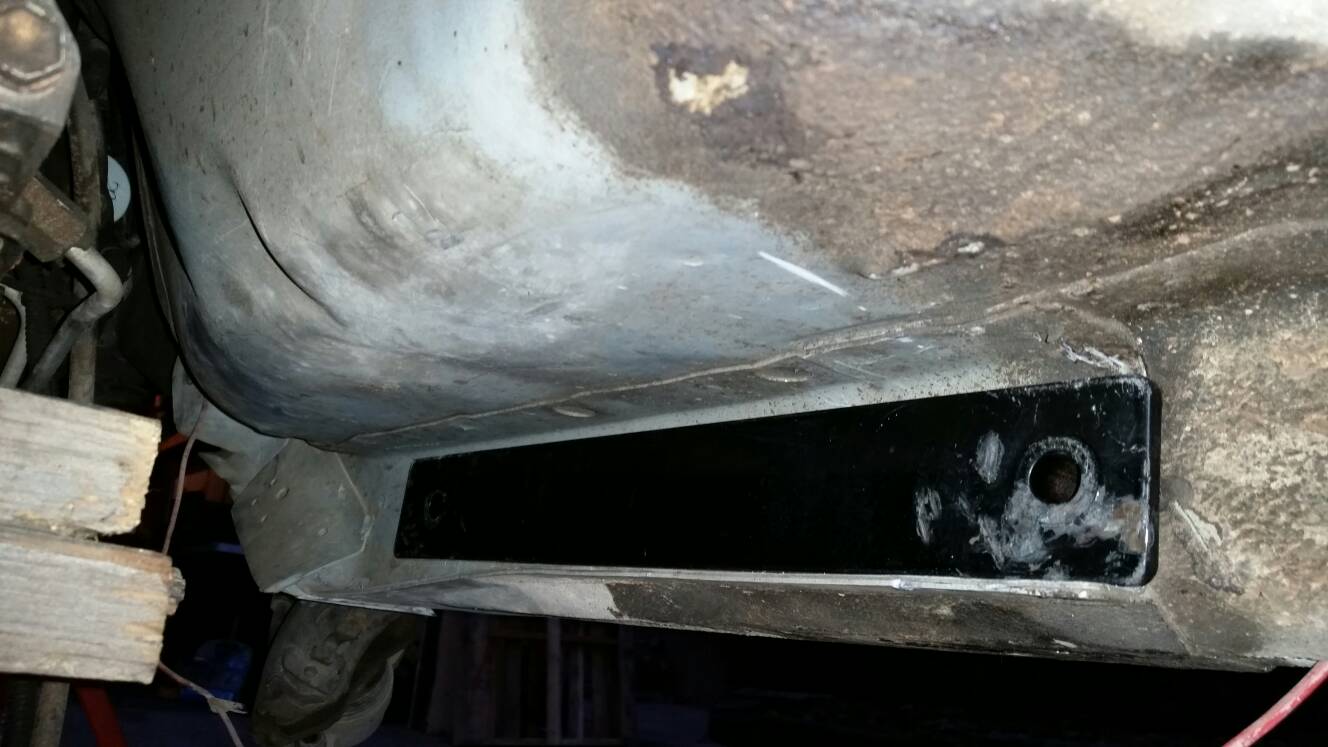
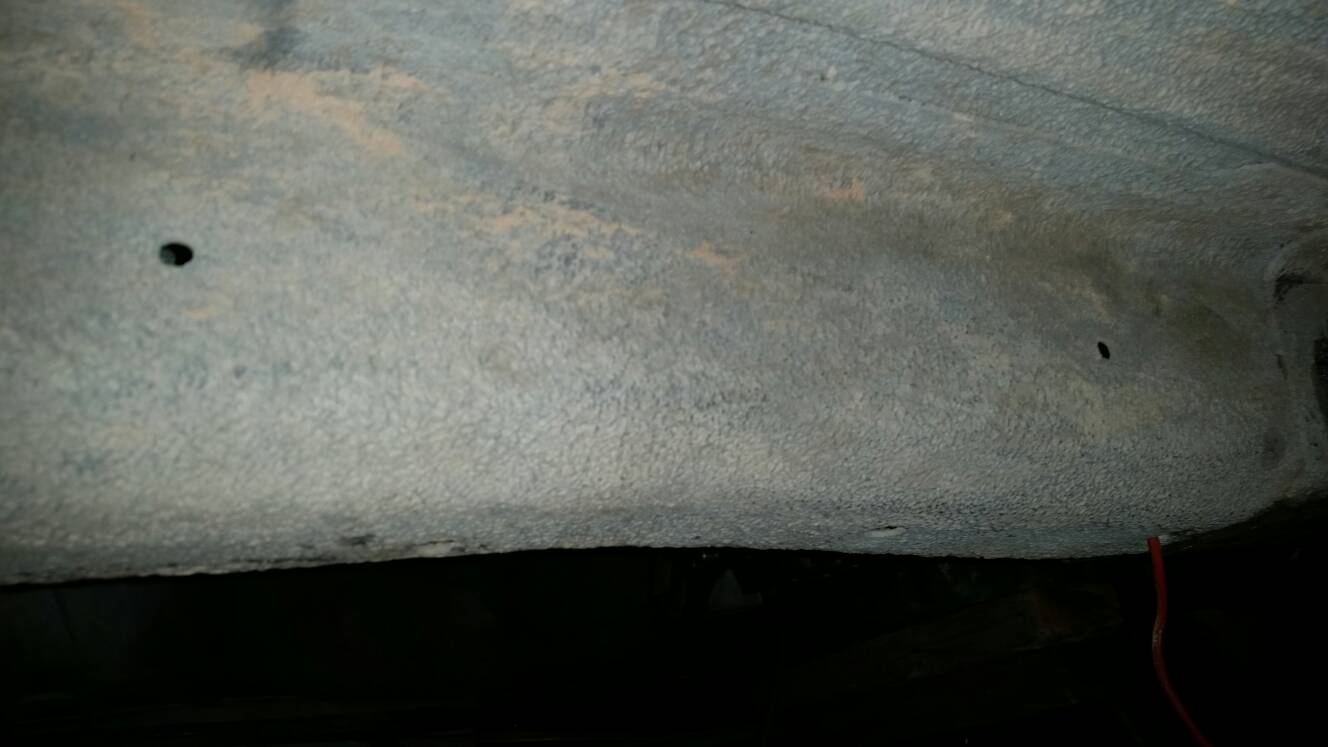
To start with i know that the unibody is weak on these things and that mine still has low miles and a lot of life left in it so i wanted to strengthen it as much as i can before i destroy it. so i picked up rough stuff frame stiffeners, both the main sections and the front section stiffeners. That being said i decided to start with the front section because i wanted to wait to do the rear main section until after i finished my long arm lift knowing it could affect things. So i had picked up a 110 welder and after putting on a few pieces i was unsatisfied with the quality of the welds :doh: i knew they where terrible. I then picked up a 220 welder for a steal of a deal and used a .75" hole saw to drill holes through the stiffeners but not the frame so i could weld that area with the 220 unit. Much better welds where achieved! Once that problem was solved i kept on pushing. so the ruff stuff front section frame stiffeners are 3 pieces. i decided to only install the front 2 at first because the 3rd piece covers the access hole to the upper control arm bolt and knowing that i will being removing my upper control arm i wanted to leave the rear section off until i had removed the upper control arm and the bolt that goes along with it. when putting on the front 2 sections of the stiffeners i learned your going to want several good sized c clamps and that for the 2nd or middle section you need to bend it in at the middle to match the curve of the unibody frame rail. also you will need to remove your shocks, springs, and track bar mount to gain all of the required access to do this. Any how long story half way short the front 2 sections got burned on.
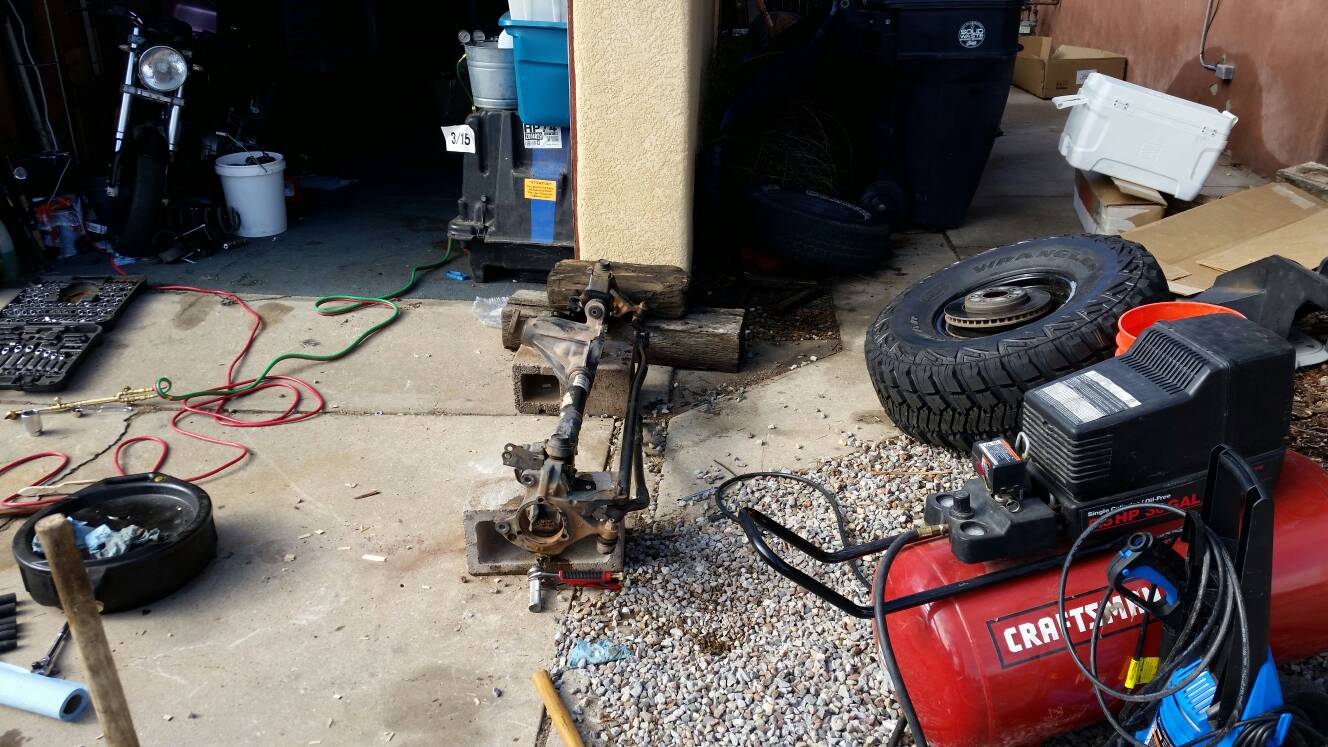
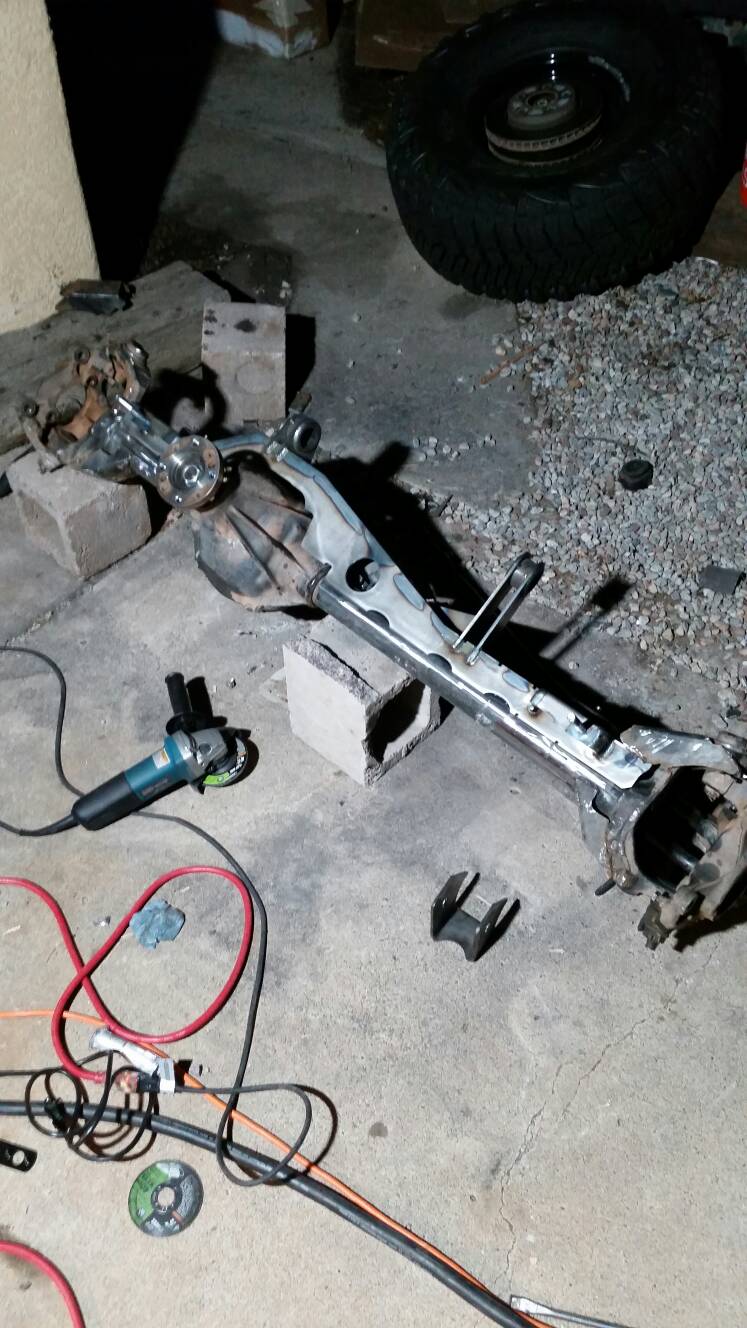
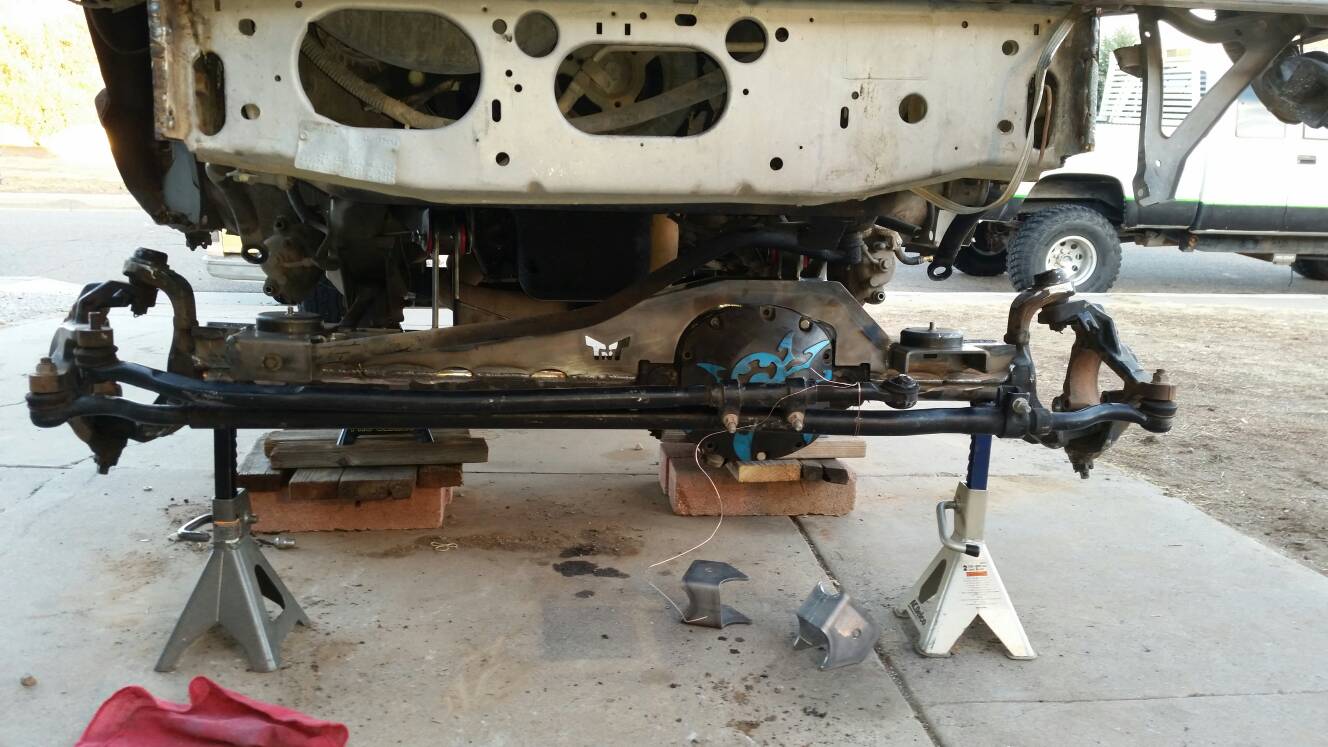
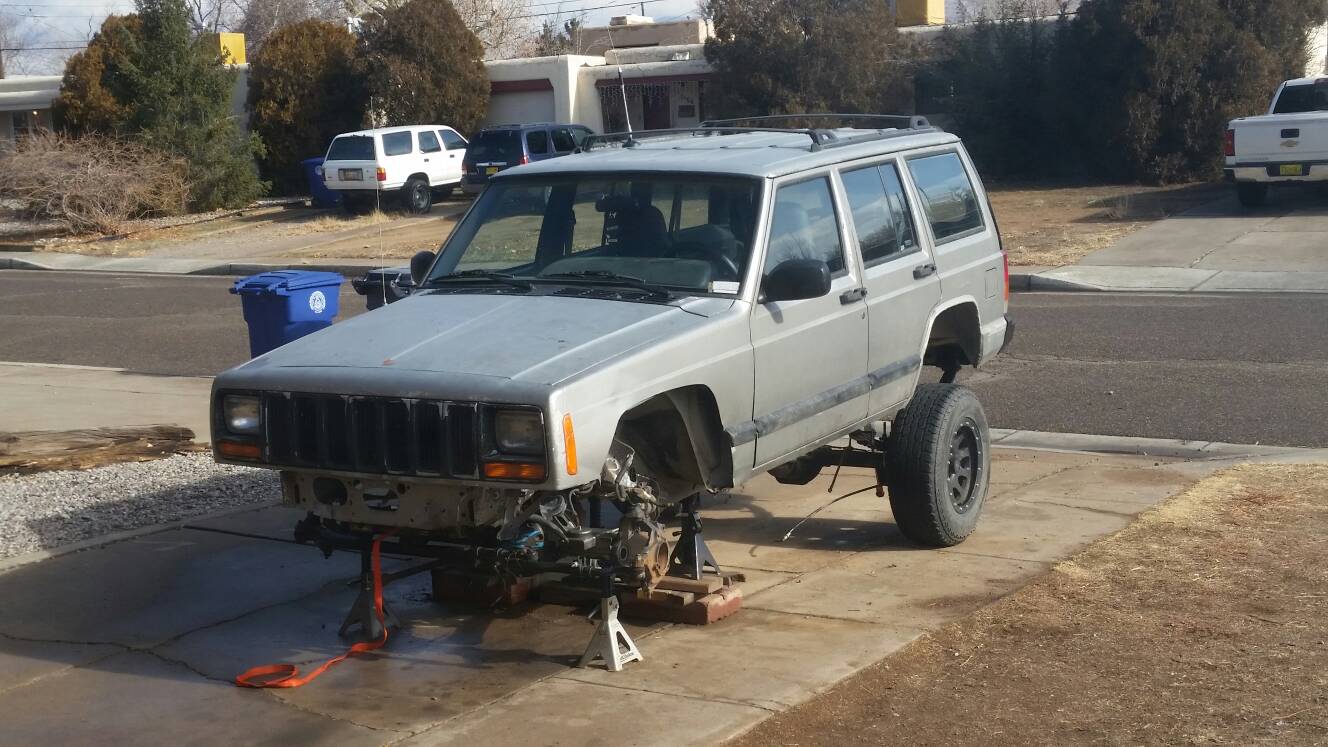
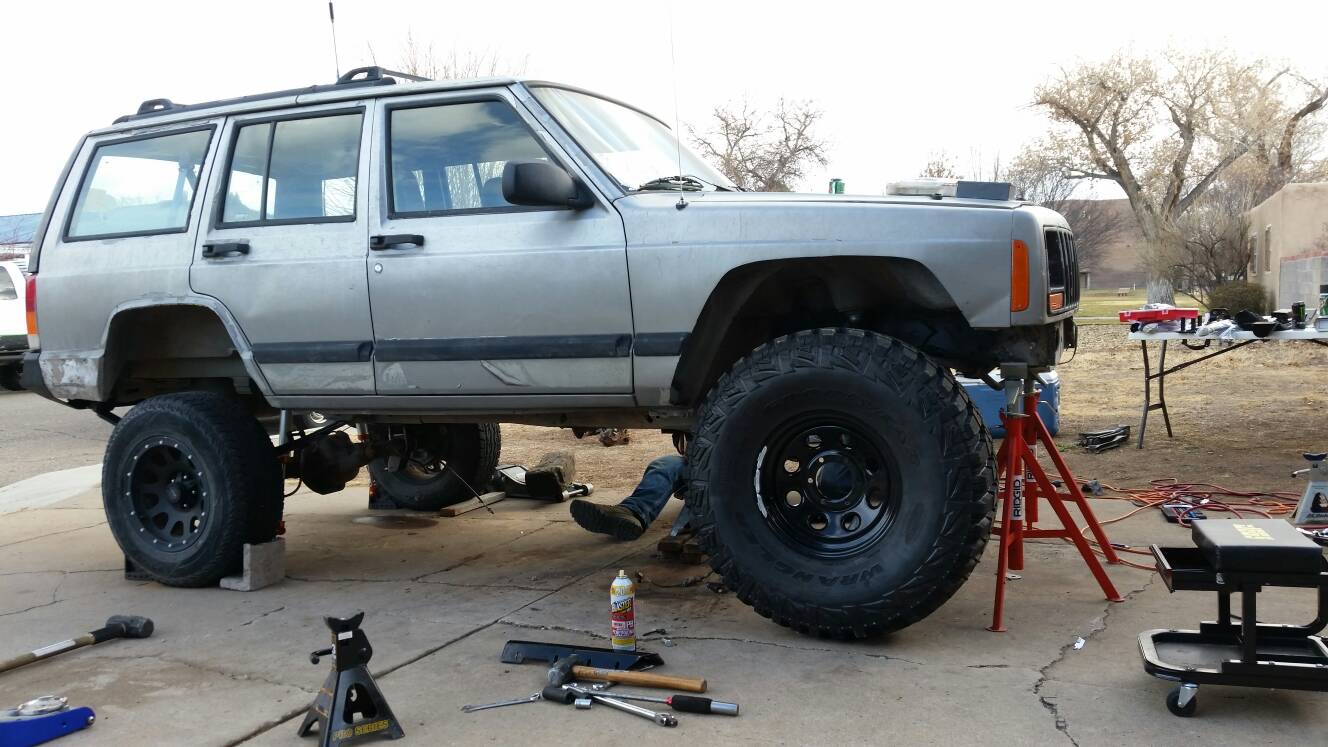
Now for starting to work on my new axles. I picked up axles out of a 2013 JKU. i was at the right place at the right time for the right price and figured sure why not. now yes i researched this a lot and it can go both ways, i know what a lot of people will say about those axles. however for my sake of argument i will be installing a high pinion dana 30 up front that has a larger ring and pinion gear than the stock XJ dana so so in that regards its stronger. Also i decided to install press in Nitro Gear sleeves that almost double the thickness of the axle walls and also install a truss. so in all regards the axle housing will be tons stronger. I also really like that it will make my wheel base 5 inches wider.
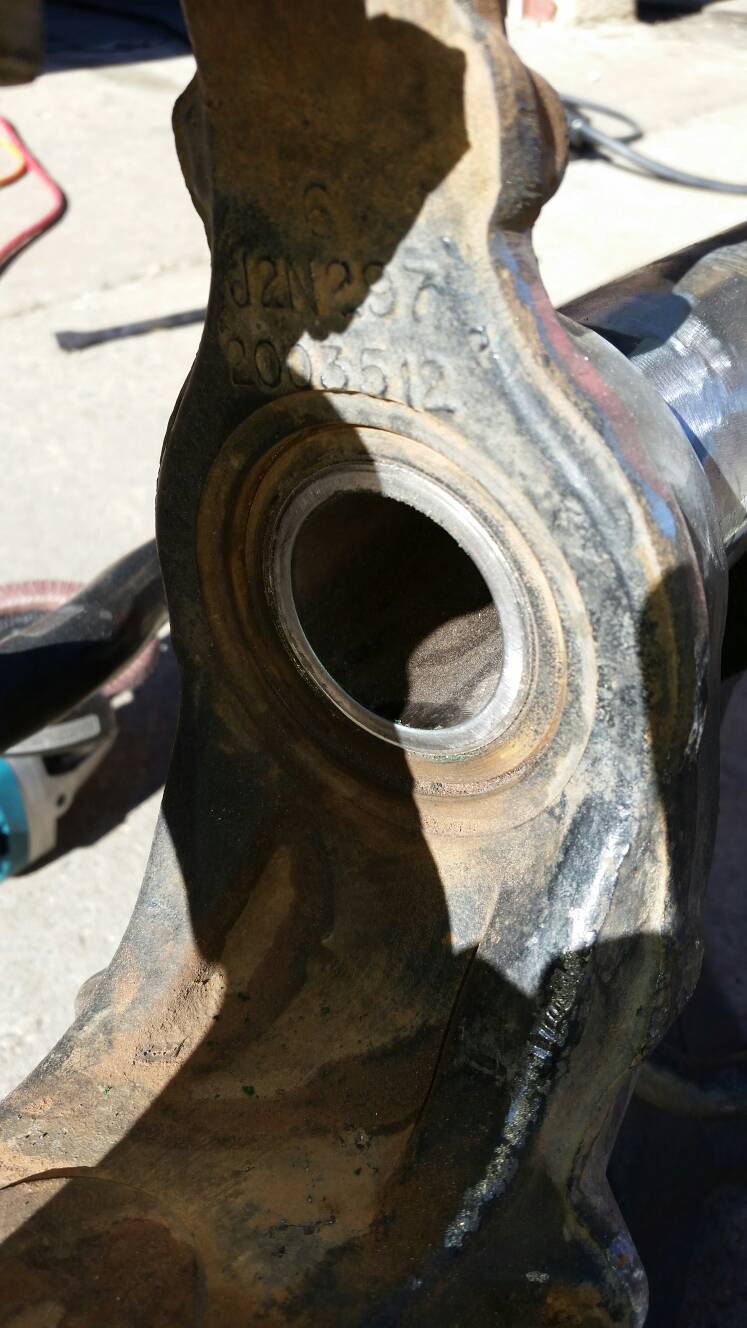
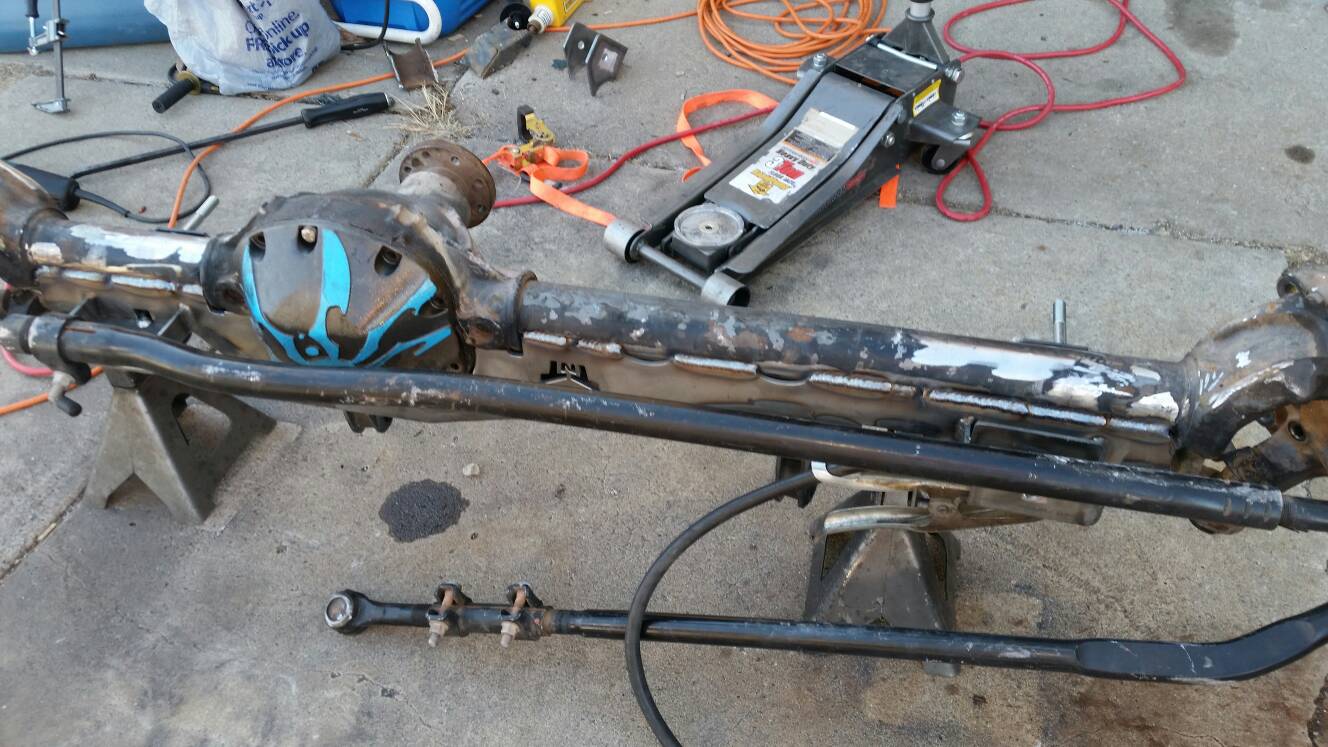
First things first i decided to install the press in sleeves first so that just in case i where to warp the axle tubes while welding the truss on the sleeves would already be in there. and due to the added thickness of the sleeves it would really help to prevent warping of the tubes. to install the sleeves we cooled them in dry ice for several hours while we fully disassembled the axle and center section being careful to keep everything separate and labeled so we would know exactly where it came from. We sprayed a lot of cleaner inside the axle tubes and then used wire to tie a wire brush into the handle of my floor jack and used that to reach all around inside the axle tube and clean it up as best as possible. we followed that up by pushing a much of towels and cleaner through the tubes almost like cleaning a gun. After we where done with that we pulled the first sleeve out of the dry ice and begun to pound it into the axle with a bearing driver and a sledge hammer. While driving in the 2nd sleeve the bearing driver shit the bed. it was completely destroyed and could no longer be used. however i discovered that we where able to flip around my 36mm socket for the axle end in the unit bearing and that the drive end fit perfectly into the sleeve and that it would act as though a bearing driver. i then took a piece of pipe i had laying around and put it in the socket and drove the last sleeve the rest of the way in. we did another complete set of sleeves this way the same day. arty:
arty:
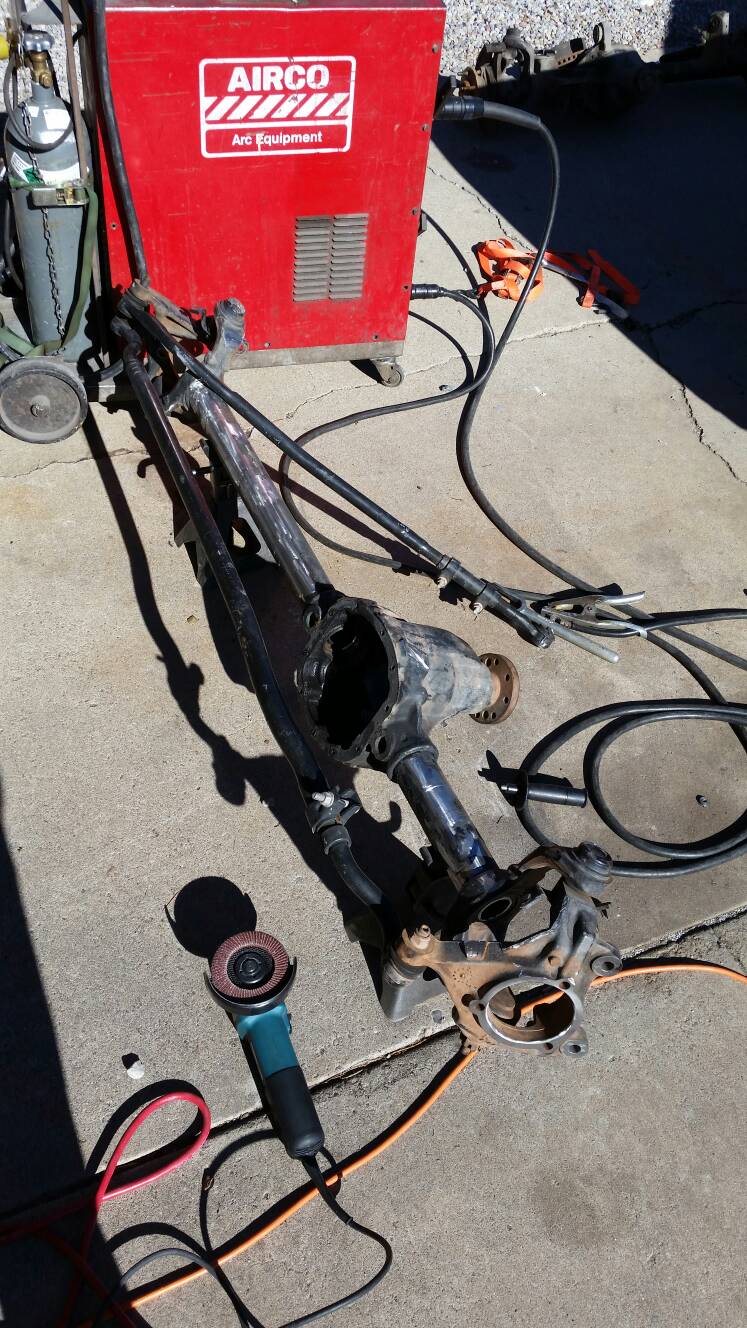
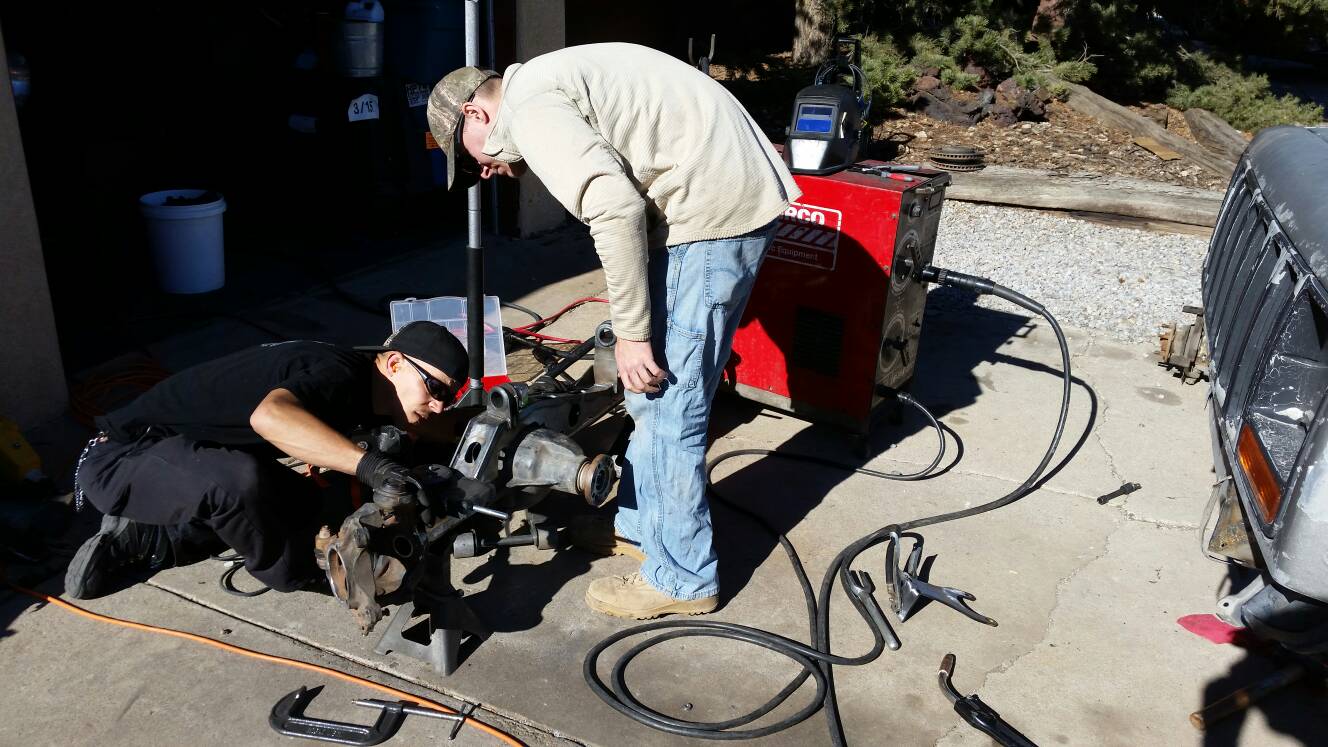
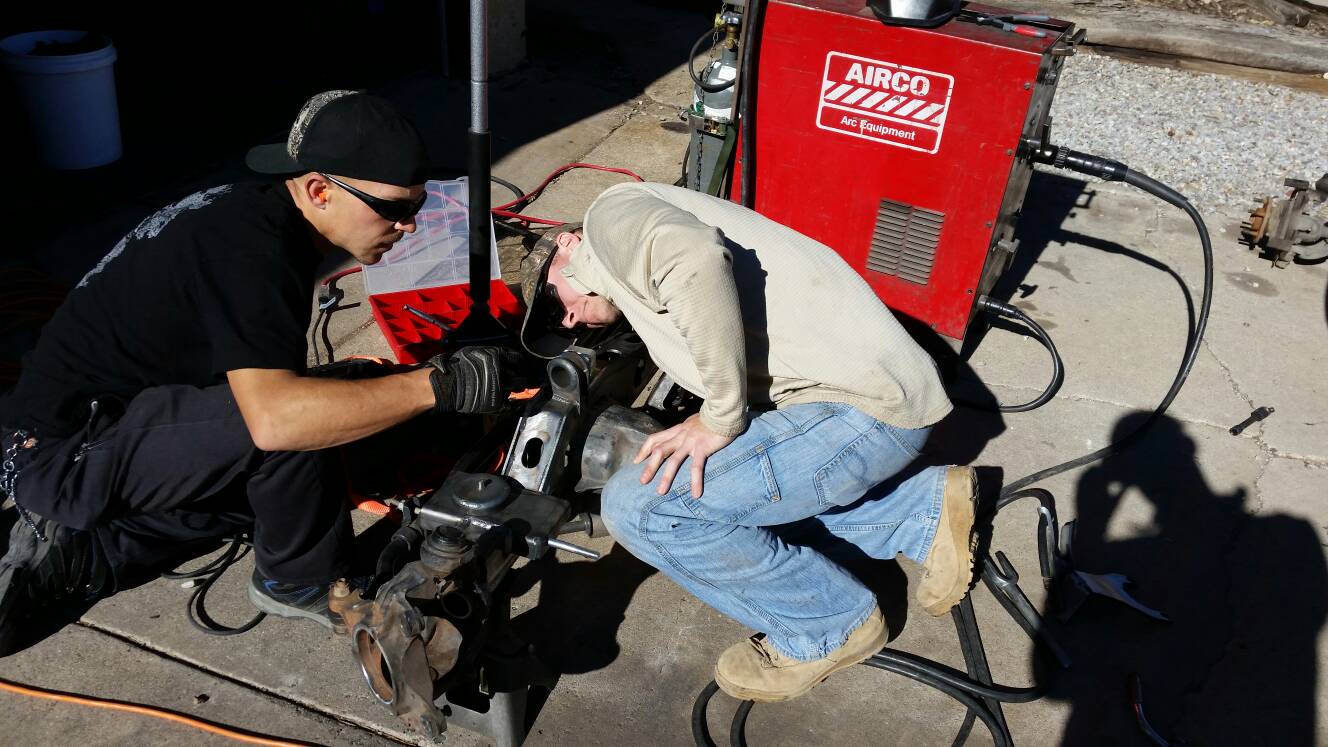
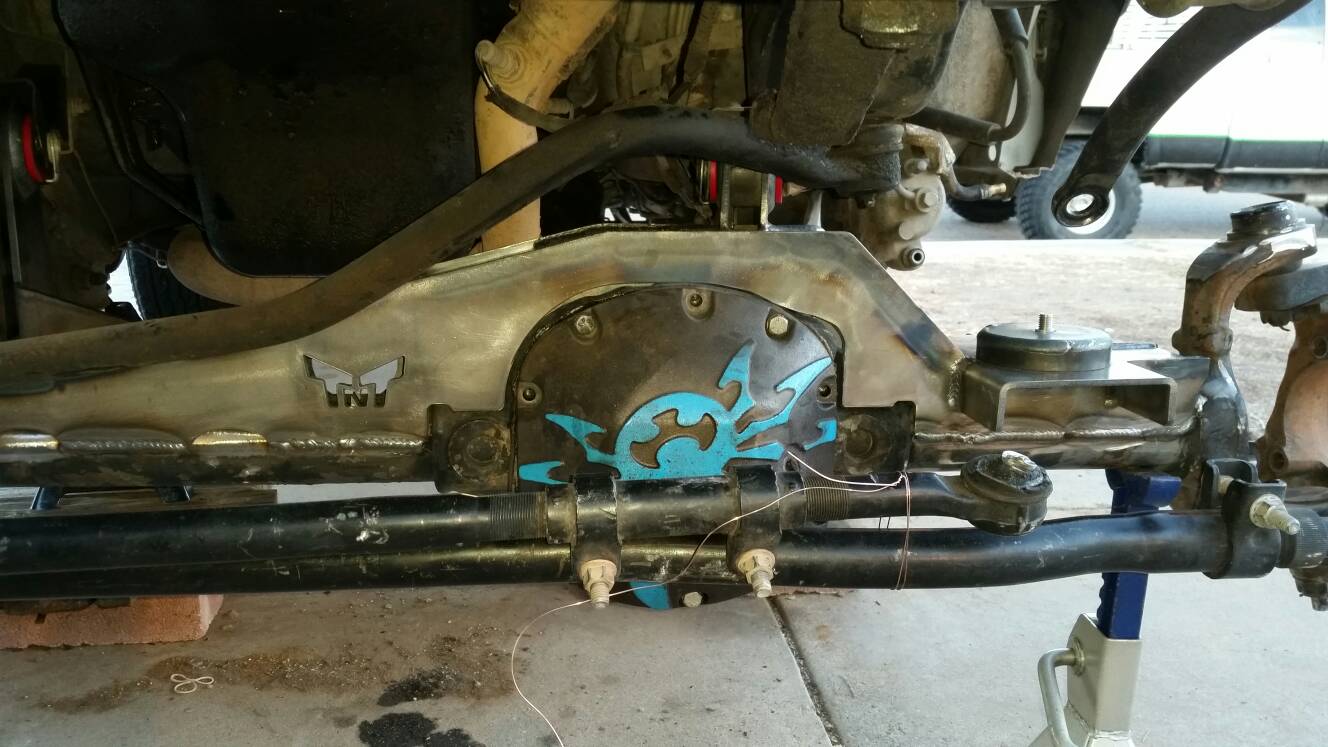
Now about this truss. I bought a TNT customs truss to convert a jk axle into an xj as well as their supper beefy lower control arm mounts and i must say im very impressed with it. it is very beefy. however one thing you will want to know is that to use this truss you need to have adjustable control arms upper and lower. when the truss is installed your upper control arm mounts are raised roughly a few inches. Now to install the truss i followed tnt's instructions. I bought a digital angle finder and put it on top the upper ball joint and you rotate the axle backwards giving it 5 degrees of positive castor. then you set the truss on the axle perfectly level. tnt says that is how you properly locate the truss and the upper control arm mounts attached to the truss. now at this point i had to grind and shave down a few spots on the axle and to truss to make them mate up nicely. In the process of getting the truss onto the axle i had to remove the C gussets that the previous owner of the axles did a beyond terrible job of installing. When the truss is done i will trim the c gussets to work nicely with the truss and reinstall them. The truss still always slightly rocked a bit so we clamped it down nicely with 2 c clamps. The next step was to burn the truss onto the axle taking care to not over heat it in one are to much and warp the truss or axle tube. Only weld about an inch and a half at at time and take care to alternate areas kinda like doing a torque sequence as well as take breaks now and again to allow all of it to cool back down.
If your still with me at this point major cudos to you! I'm sorry this has turned into a book but i really wants to be detailed with this as while planning out my build i wasnt able to find as much information as i would have liked, my only hope is that this all helps someone in the future.
Just a touch more information about the truss. The TNT Customs truss converts all the mounts, axle side track bar mount, shock mounts, sway bar mounts, and coil spring perches to where you need them to be for your xj. Now you will need an adjustable track bar as well. however something i really like about the truss is that the coil spring perches are adjustable. you can move them forward up to 1.5 inches to lengthen your wheel base!
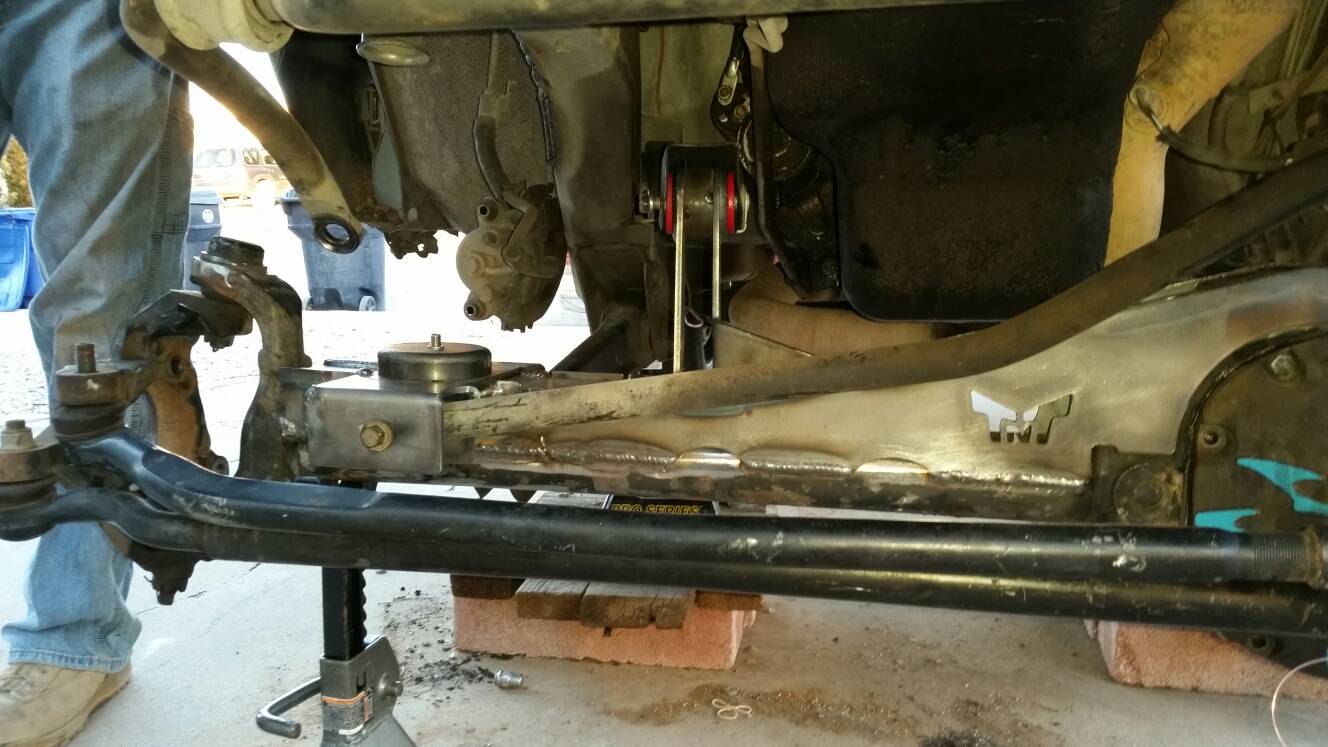
Now here is where i will reveal some of my mistakes... i got to thinking :doh: :doh: :doh: big mistake. lol ok so what i did was with my old axle still bolted to the upper and lower control arms i measured the castor angle as the jeep sat and wrote that down. i then removed the axle and set the new axle under the jeep at the same exact height on the jack stands as the old axle. i then bolted up my upper control arms to the upper control arm mounts on the truss and here is where i figured id be really smart :doh: i set the new axle to the same exact castor angle as the old axle so its sitting in the jeep exactly the same as the old axle. so for not really a bad ideal... Then i figured i would just raise the lower control arms into place to mock up the lower control arm mounts and be sure that i properly located them in the exact correct spot so that everything would be as correct as possible and my castor angle when all said and done wouldnt be far off... :doh: well i was wrong! My stock lower control arms where about an inch to an inch and a half to short. i was majorly confused and spent 2 days trying to figure out what i did wrong :doh: at this point i called tnt customs and they asked me to email them pictures... so i did. while waiting for their response i measured the height of the upper control arm mounts from the center of the axle tube on the old axle and compared that to the measurements on the new axle and found that the upper control arm mounts are now a few inches taller. now everything made sense because with the axle rotating off the upper control arm mounts to get the same castor angle it would push the bottom of the axle out more than normal explaining why my stock arms where now an inch to an inch and a half to short. :doh: thats the last time for a little while that i decide to go off script and start thinking for myself instead of following instructions :doh: at that point tnt called me back and said hey your problem is you need adjustable control arms, this kit doesnt work with stock arms. now knowing that my train of thought and logic was sound, i was just missing important information. anyhow i have sense decided to follow the instructions for the lowers and measure the angle of the truss and install the lower mounts at the same angle. i havent done it yet as ive moved to other areas of the jeep but it looks easy enough and will be getting to it shortly.
If your still fallowing me at this point seriously thank you a lot!
I just became a member right now because i want to share the information ive been learning. I have made more progress than this however im going to stop here for the night and call it quits until tomorrow or the next day. now i have no clue how to attach pictures to here or why i cant upload pictures to my profile but i promise as soon as i can i will flood this thing with pictures so you can see what im talking about!
To start with i know that the unibody is weak on these things and that mine still has low miles and a lot of life left in it so i wanted to strengthen it as much as i can before i destroy it. so i picked up rough stuff frame stiffeners, both the main sections and the front section stiffeners. That being said i decided to start with the front section because i wanted to wait to do the rear main section until after i finished my long arm lift knowing it could affect things. So i had picked up a 110 welder and after putting on a few pieces i was unsatisfied with the quality of the welds :doh: i knew they where terrible. I then picked up a 220 welder for a steal of a deal and used a .75" hole saw to drill holes through the stiffeners but not the frame so i could weld that area with the 220 unit. Much better welds where achieved! Once that problem was solved i kept on pushing. so the ruff stuff front section frame stiffeners are 3 pieces. i decided to only install the front 2 at first because the 3rd piece covers the access hole to the upper control arm bolt and knowing that i will being removing my upper control arm i wanted to leave the rear section off until i had removed the upper control arm and the bolt that goes along with it. when putting on the front 2 sections of the stiffeners i learned your going to want several good sized c clamps and that for the 2nd or middle section you need to bend it in at the middle to match the curve of the unibody frame rail. also you will need to remove your shocks, springs, and track bar mount to gain all of the required access to do this. Any how long story half way short the front 2 sections got burned on.
Now for starting to work on my new axles. I picked up axles out of a 2013 JKU. i was at the right place at the right time for the right price and figured sure why not. now yes i researched this a lot and it can go both ways, i know what a lot of people will say about those axles. however for my sake of argument i will be installing a high pinion dana 30 up front that has a larger ring and pinion gear than the stock XJ dana so so in that regards its stronger. Also i decided to install press in Nitro Gear sleeves that almost double the thickness of the axle walls and also install a truss. so in all regards the axle housing will be tons stronger. I also really like that it will make my wheel base 5 inches wider.
First things first i decided to install the press in sleeves first so that just in case i where to warp the axle tubes while welding the truss on the sleeves would already be in there. and due to the added thickness of the sleeves it would really help to prevent warping of the tubes. to install the sleeves we cooled them in dry ice for several hours while we fully disassembled the axle and center section being careful to keep everything separate and labeled so we would know exactly where it came from. We sprayed a lot of cleaner inside the axle tubes and then used wire to tie a wire brush into the handle of my floor jack and used that to reach all around inside the axle tube and clean it up as best as possible. we followed that up by pushing a much of towels and cleaner through the tubes almost like cleaning a gun. After we where done with that we pulled the first sleeve out of the dry ice and begun to pound it into the axle with a bearing driver and a sledge hammer. While driving in the 2nd sleeve the bearing driver shit the bed. it was completely destroyed and could no longer be used. however i discovered that we where able to flip around my 36mm socket for the axle end in the unit bearing and that the drive end fit perfectly into the sleeve and that it would act as though a bearing driver. i then took a piece of pipe i had laying around and put it in the socket and drove the last sleeve the rest of the way in. we did another complete set of sleeves this way the same day.
arty:Now about this truss. I bought a TNT customs truss to convert a jk axle into an xj as well as their supper beefy lower control arm mounts and i must say im very impressed with it. it is very beefy. however one thing you will want to know is that to use this truss you need to have adjustable control arms upper and lower. when the truss is installed your upper control arm mounts are raised roughly a few inches. Now to install the truss i followed tnt's instructions. I bought a digital angle finder and put it on top the upper ball joint and you rotate the axle backwards giving it 5 degrees of positive castor. then you set the truss on the axle perfectly level. tnt says that is how you properly locate the truss and the upper control arm mounts attached to the truss. now at this point i had to grind and shave down a few spots on the axle and to truss to make them mate up nicely. In the process of getting the truss onto the axle i had to remove the C gussets that the previous owner of the axles did a beyond terrible job of installing. When the truss is done i will trim the c gussets to work nicely with the truss and reinstall them. The truss still always slightly rocked a bit so we clamped it down nicely with 2 c clamps. The next step was to burn the truss onto the axle taking care to not over heat it in one are to much and warp the truss or axle tube. Only weld about an inch and a half at at time and take care to alternate areas kinda like doing a torque sequence as well as take breaks now and again to allow all of it to cool back down.
If your still with me at this point major cudos to you! I'm sorry this has turned into a book but i really wants to be detailed with this as while planning out my build i wasnt able to find as much information as i would have liked, my only hope is that this all helps someone in the future.
Just a touch more information about the truss. The TNT Customs truss converts all the mounts, axle side track bar mount, shock mounts, sway bar mounts, and coil spring perches to where you need them to be for your xj. Now you will need an adjustable track bar as well. however something i really like about the truss is that the coil spring perches are adjustable. you can move them forward up to 1.5 inches to lengthen your wheel base!
Now here is where i will reveal some of my mistakes... i got to thinking :doh: :doh: :doh: big mistake. lol ok so what i did was with my old axle still bolted to the upper and lower control arms i measured the castor angle as the jeep sat and wrote that down. i then removed the axle and set the new axle under the jeep at the same exact height on the jack stands as the old axle. i then bolted up my upper control arms to the upper control arm mounts on the truss and here is where i figured id be really smart :doh: i set the new axle to the same exact castor angle as the old axle so its sitting in the jeep exactly the same as the old axle. so for not really a bad ideal... Then i figured i would just raise the lower control arms into place to mock up the lower control arm mounts and be sure that i properly located them in the exact correct spot so that everything would be as correct as possible and my castor angle when all said and done wouldnt be far off... :doh: well i was wrong! My stock lower control arms where about an inch to an inch and a half to short. i was majorly confused and spent 2 days trying to figure out what i did wrong :doh: at this point i called tnt customs and they asked me to email them pictures... so i did. while waiting for their response i measured the height of the upper control arm mounts from the center of the axle tube on the old axle and compared that to the measurements on the new axle and found that the upper control arm mounts are now a few inches taller. now everything made sense because with the axle rotating off the upper control arm mounts to get the same castor angle it would push the bottom of the axle out more than normal explaining why my stock arms where now an inch to an inch and a half to short. :doh: thats the last time for a little while that i decide to go off script and start thinking for myself instead of following instructions :doh: at that point tnt called me back and said hey your problem is you need adjustable control arms, this kit doesnt work with stock arms. now knowing that my train of thought and logic was sound, i was just missing important information. anyhow i have sense decided to follow the instructions for the lowers and measure the angle of the truss and install the lower mounts at the same angle. i havent done it yet as ive moved to other areas of the jeep but it looks easy enough and will be getting to it shortly.
If your still fallowing me at this point seriously thank you a lot!
I just became a member right now because i want to share the information ive been learning. I have made more progress than this however im going to stop here for the night and call it quits until tomorrow or the next day. now i have no clue how to attach pictures to here or why i cant upload pictures to my profile but i promise as soon as i can i will flood this thing with pictures so you can see what im talking about!