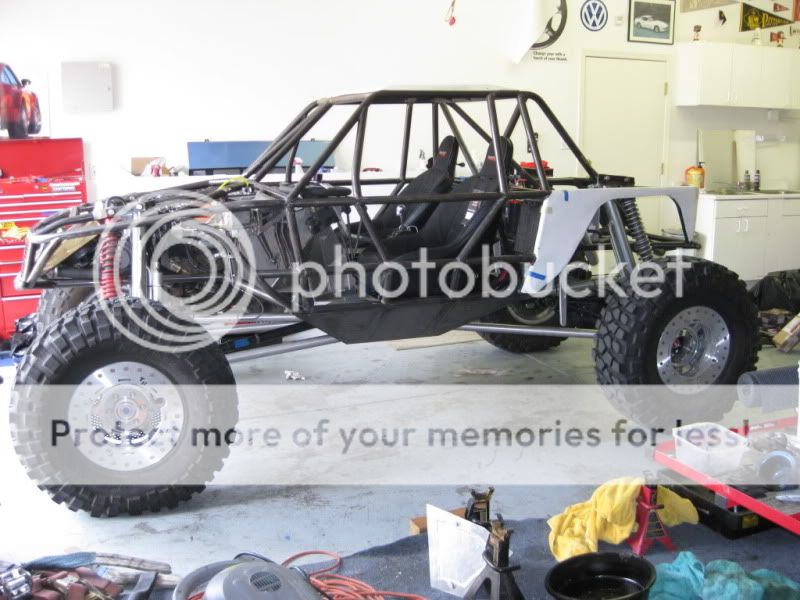
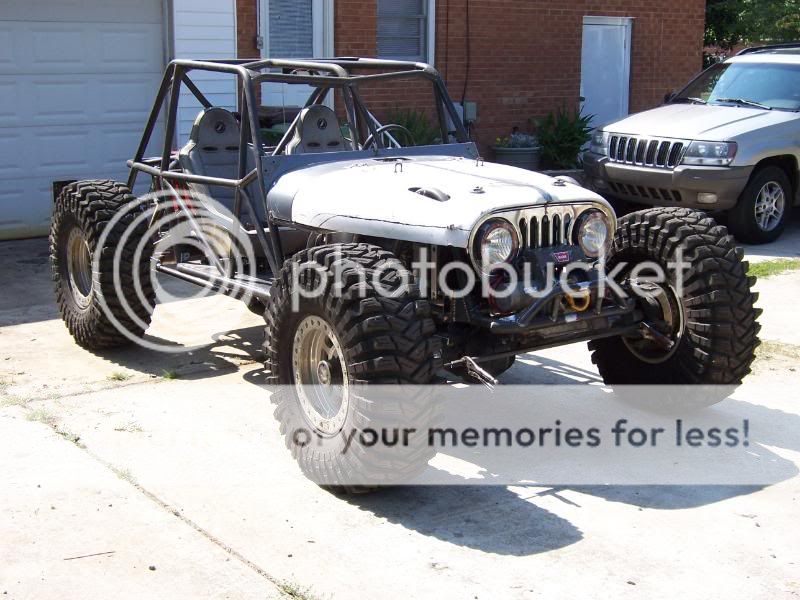
Just Another XJ on tons, coilovers, 42's, etc. Build

Thanks!

What I do to make money...I'm a tire tech for Discount Tire in Fort Collins. Put it this way...I will have mucho dinero into this build...but it also took me 2+ year to gather parts, of which I'm still doing. I live, eat, and breath this sport...so its where all my extra money tends to go :D I have a harder time justifying spending $60 on a new pair of shoes i've needed for six months since my old ones have holes in the bottom...than spending it on the buggy. Yes...its that bad :roflmao:

Don't feel bad, I get the "you need shoes" speech any time I go to my parents house. Money is being pooled together, unfortunately I don't have the skills you do so I will be waiting a few more years. Amazing build...
 
Matt, you're a bad influence.
After doing my cage, and having to do so many compromises with the strength of the cage versus working around body panels, especially the roof Ive come to the conclusion that the roof is useless and to build a truly strong buggy cage the roof becomes a problem.

I think freerider has some very good ideas about how to make a XJ buggy while keeping body panels and also making a extremely strong cage. Im excited to see what this thing turns out to look like.


One thing that makes me happy is how much wire he has to deal with .!.:D.!.
20100507191809.jpg

That wiring is gonna be the death of me :banghead:
 
I have to say man, your fab skills are truly amazing. I wish I had the tools and the skills to do something like that. You should consider sending some of those peices off to a manufacturer and reselling them.
 

Where did this pic come from? Unless I am going crazy, that's Jason's of BNS fab's buggy. Those guys build some cool stuff in small garages.

-Alex
 
Ok, so only a little over a month later and UPDATES!!! (Lots of pics to follow)

Starting the boatsides:
d466.jpg

d469.jpg


But then...well..I decided toooo


Cut the rest of the roof off and rip the rest of the dash out :D

Yeah, in the end I know I'll be a LOT happier. It was going to be far easier to start with a clean slate than try and get the tube to contour to a pretty beat up roof.

For the most part I'll let the pictures speak for themselves. There is still quite a bit of tubing to add (obviously).

Overall I'm happy with how its turned out, especially for my first time even remotely touching tube. All my welds aren't as good as I would like them to be (at least cosmetically), but they'll hold and I'll live with it.

Starting the A-pillar:
d471.jpg


B-Pillar (a lot of masking tape was used in this as you'll see in pics for viewing discretion :D) Couldn't decide how I wanted to run the tie in back...

d474.jpg

d475.jpg

d478.jpg

d487.jpg

d490.jpg
 
Last edited:
This pic makes this look like it sit really far back, but it doesn't really look as dramatic in person:
d502.jpg

d503.jpg

d504.jpg

d505.jpg


Seat mounted:
d508.jpg


The tubes that took much longer than I care to divulge (well the notching not so much the shape of a 3 plane bend). I had to start/stop a couple times on this one since my gloves wanted to nearly catch fire :rolleyes:

d512.jpg

d512.jpg


So that's where it current;y sits after about a months worth of on/off work. I'm only able to crank on it a few hours a night since my internship has me getting up at 5AM and not getting home till 5:30PM.

Going to try to CHUG on this thing after memorial day weekend since I will be getting a call from one of the ORI Vendors asking me for specs for the ORI's to be built to :firedevil:
 
Last edited:
You and your stupid fab skills......... you suck.

:D


I'm kinda with Kittrell on this too...... I'd have like to have seen more of the body kept so that it more closely resembled it's XJ roots........

But I gotta say, I can totally see why you ended up removing it all. What you've got going Justin is just crazy cool brutha! It will be one bad-ass buggy...... with an XJ heart - um, and grille, uh, sorta maybe?..... :D

Jealousy runs thick in my veins right now Justin......... she's a beaut!
 
Last edited:
It's George Washington's ax(j)e... :roflmao: I love it.

I think it'd look awesome if you cut the roof off a fairly clean, non tweaked rig and attached it to the top of the tube frame somehow. Heck, weld tabs onto the roof+upper rails and bolt it on so you can put another one on if you roll the thing and cave the sheetmetal roof in too badly.
 
To all those that who think I should have still kept the roof...couldn't be happier I ditched it :D

DJ, STFU :D

I think it'd look awesome if you cut the roof off a fairly clean, non tweaked rig and attached it to the top of the tube frame somehow. Heck, weld tabs onto the roof+upper rails and bolt it on so you can put another one on if you roll the thing and cave the sheetmetal roof in too badly.

About 10 steps ahead of ya :D


Well right now I'm trying to decide what to do on the front tube wise. I'm thinking either something along the lines of this:

Simple front tube right past the grill, enough the protect the winch.

100_6870.jpg


Or...

Something along the lines of these, a small stinger with headlight hoops...

attachment.php


attachment.php
 
Back
Top