CanMan
NAXJA Forum User
- Location
- Lake Tapps, WA
I ordered my Aussie locker a week ago, and the brown suited Santa showed up at the door today. So, I tore into the heep. This writeup is for people who have no clue on what to do when installing one. The directions that Aussie sends with the locker work great, but lack some pics. My rig is a 1991 for reference.
Tools you will need.
BFH, MFH.
3/8" ratchet (hand or air powered)
1/2" air gun or breaker bar, 1/2" ratchet
3/4" deep socket, 1/2" drive
1/2", 3/8" drive shallow socket, 12 point or 13mm 12 pt in the same variety
16mm or 5/8" deep socket, 3/8" or 1/2" drive
11/16" shallow, 6 pt socket
Punches:Steel, Aluminum, Brass
Torque wrench, in ft. lbs.
Long screw driver or prybar
Small pocket screwdriver
A few pliers
Scraper
Wire brush
Here are the tools I used.

Opened the package, and there were all the parts needed.

Start off by moving your junk into a place that it can be worked on. Perferably where there is some music and a fridge with a few beers close by.

Support the axle with some good jackstands. Remove both front tires, and find a good place to store them for the time being.

Remove the caliper, removing the caliper slide bolts, using the 1/2" or 13mm socket. Remove rotor. Remove the coter pin, then the castle nut, 3/4" socket will do. Strike the knuckle around the tie rod end, to loosen it up.

Thier are 3 hub bolts on the back side of the knuckle. They are 13mm, 12pt bolts. I choose to use a 1/2" socket, 12pt to remove them. The 1/2"socket fit tighter, allowing it not to strip out as easily. Remove the hub and axle assembly as one.

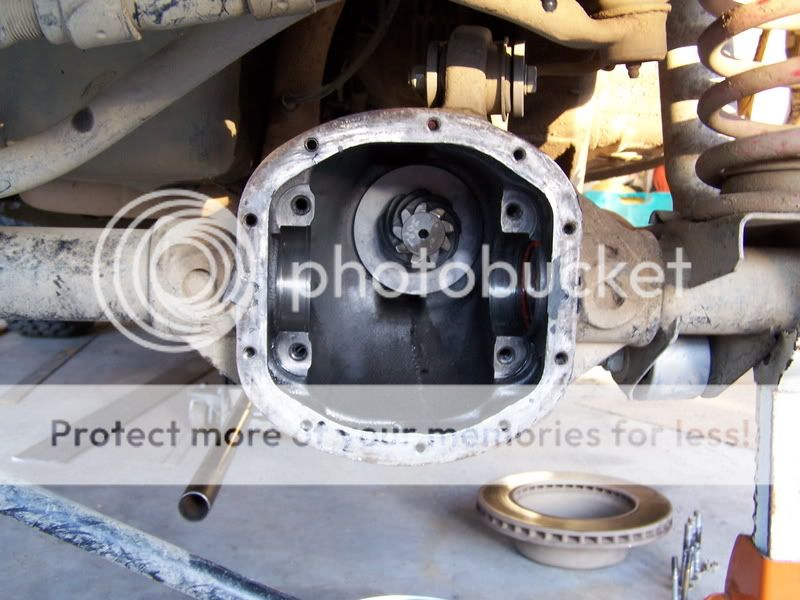
Next, remove the cover bolts, which are 13mm bolt heads, and drain fluid into a pan of some sort.

Remove the main caps, using your 16mm or 5/8" deep socket. Make sure you keep the races and bearing caps on the same side as they came off as. Clean out the inside of the housing. If the carrier is tight, gently use the prybar to free it. A case spreader works good as well.
Once you remove the carrier, remove the ring gear bolts. They are 11/16". So use a 11/16" shallow, 6 pt socket. If the ring gear does not come off, use a brass or aluminum punch on the sides, to free it.

Remove the tension pin. I used a steel punch, that fit the hole. Tap out from the backside of where the ring gear mounts. I reccomend using a new one, but its up to you.
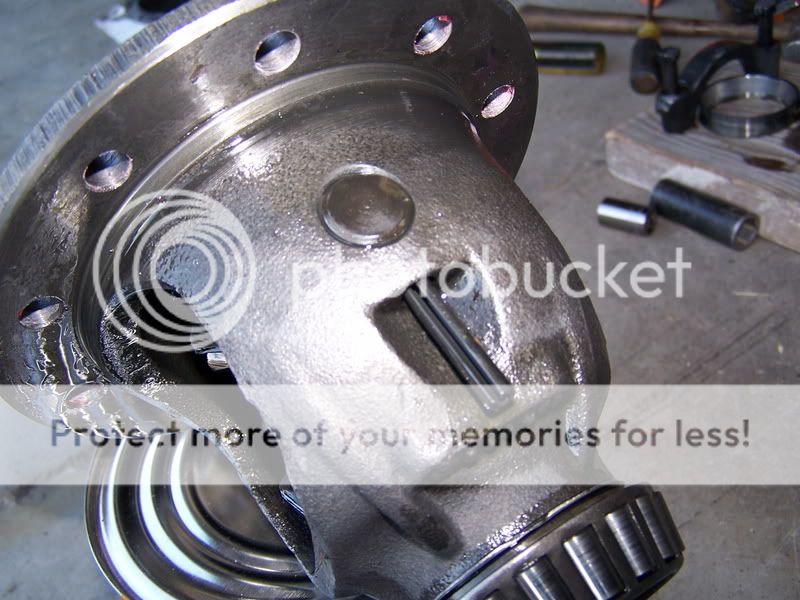
Once the bar pin is out, remove the spider gears and side gears. Make sure that the thrust washers are also removed.

You will need to reuse your side gear thrust washers, or buy new ones. I reused mine, that came in the master install when I regeared about 2 months ago.

You can discard these washers and gears, as well as the old side gears.

Tools you will need.
BFH, MFH.
3/8" ratchet (hand or air powered)
1/2" air gun or breaker bar, 1/2" ratchet
3/4" deep socket, 1/2" drive
1/2", 3/8" drive shallow socket, 12 point or 13mm 12 pt in the same variety
16mm or 5/8" deep socket, 3/8" or 1/2" drive
11/16" shallow, 6 pt socket
Punches:Steel, Aluminum, Brass
Torque wrench, in ft. lbs.
Long screw driver or prybar
Small pocket screwdriver
A few pliers
Scraper
Wire brush
Here are the tools I used.
Opened the package, and there were all the parts needed.
Start off by moving your junk into a place that it can be worked on. Perferably where there is some music and a fridge with a few beers close by.
Support the axle with some good jackstands. Remove both front tires, and find a good place to store them for the time being.
Remove the caliper, removing the caliper slide bolts, using the 1/2" or 13mm socket. Remove rotor. Remove the coter pin, then the castle nut, 3/4" socket will do. Strike the knuckle around the tie rod end, to loosen it up.
Thier are 3 hub bolts on the back side of the knuckle. They are 13mm, 12pt bolts. I choose to use a 1/2" socket, 12pt to remove them. The 1/2"socket fit tighter, allowing it not to strip out as easily. Remove the hub and axle assembly as one.
Next, remove the cover bolts, which are 13mm bolt heads, and drain fluid into a pan of some sort.
Remove the main caps, using your 16mm or 5/8" deep socket. Make sure you keep the races and bearing caps on the same side as they came off as. Clean out the inside of the housing. If the carrier is tight, gently use the prybar to free it. A case spreader works good as well.
Once you remove the carrier, remove the ring gear bolts. They are 11/16". So use a 11/16" shallow, 6 pt socket. If the ring gear does not come off, use a brass or aluminum punch on the sides, to free it.
Remove the tension pin. I used a steel punch, that fit the hole. Tap out from the backside of where the ring gear mounts. I reccomend using a new one, but its up to you.
Once the bar pin is out, remove the spider gears and side gears. Make sure that the thrust washers are also removed.
You will need to reuse your side gear thrust washers, or buy new ones. I reused mine, that came in the master install when I regeared about 2 months ago.
You can discard these washers and gears, as well as the old side gears.
Last edited:


 Let the sealant setup before adding oil.


")

