Mighty.Mighty_XJ
NAXJA Forum User
- Location
- VA ... in the dark
There was a leak in my XJ rear compartment for a very long time & I pretty much buried my head in the sand & hoped for the best. Even told myself that the moisture was from condensation at the Jersey Shore. Some years ago I had attempted a repair job and had even had a couple small areas welded in with new metal. I scraped, sanded, primed & painted the entire floor of the compartment; I think I also used a rust neutralizer type product. My mistake? Not troubleshooting the leak :dunce:. So of course all that work eventually went down the toilet & when I finally realized that my hatch seal was bad, this is what I found after peeling back the carpet/liner. That was just the beginning! (I forgot to take pictures until after the grinding was already in progress.)
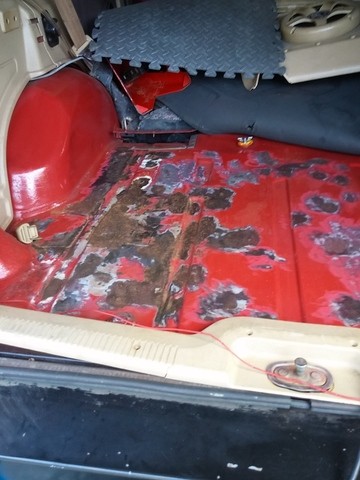
Rusted thru

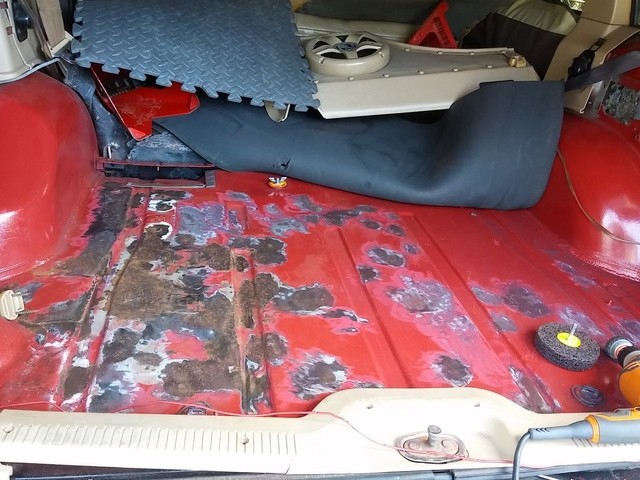
I can't afford a floorpan replacement neither can I weld, so I got to work a different way. There were dozens of tiny bubbles that I had to wear glasses to identify, and the more I scraped, sanded, wheeled, the more rust spots I revealed. Almost every factory spot weld had rusted to some degree. You see the drill ... I used a wire wheel & different grinding stones to reveal all rust areas. Then I power-sanded the areas that still had paint. Though I didn't intend it, lots of small areas were showing bare metal when I got done.
(Forgot to take pics before the next step below ...)
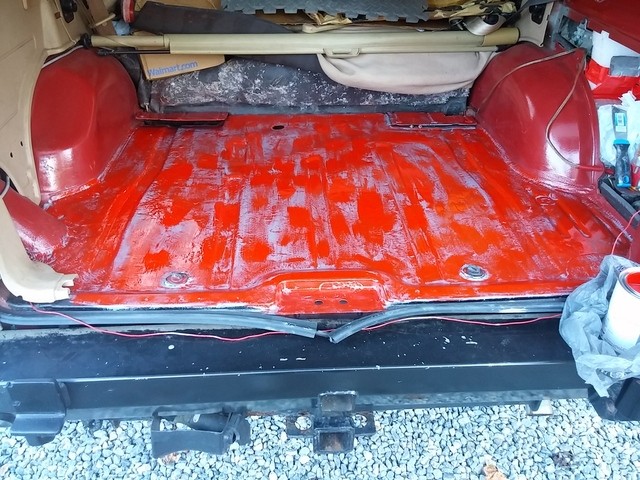
Patched the hole with a metal replacement epoxy that you have to knead, & coated everything with Chassis Saver from Monstaliner - 2 coats
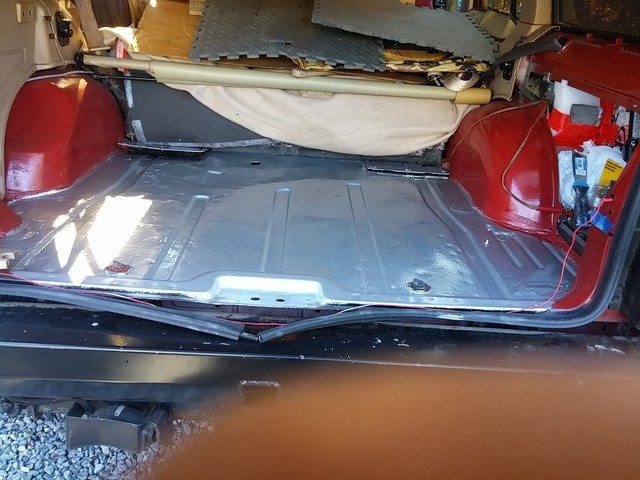
Primed with Zinsser oil based primer - 1 coat (halfway completed in pic)
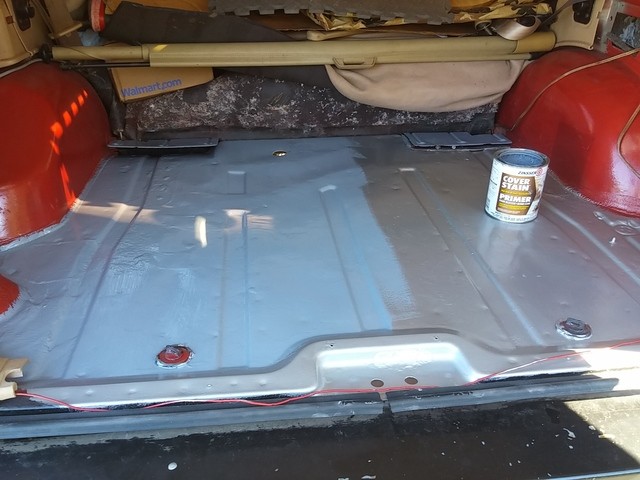
Top coated with an oil-based red - 3 coats (I'm hoping oil based paints offer better water repellence). First coat shown. BTW everything is brush painted instead of spraying. I wanted thicker coats.
All done! In spite of the multiple coats, I'm putting all my money on the Chassis Saver to seal out moisture.
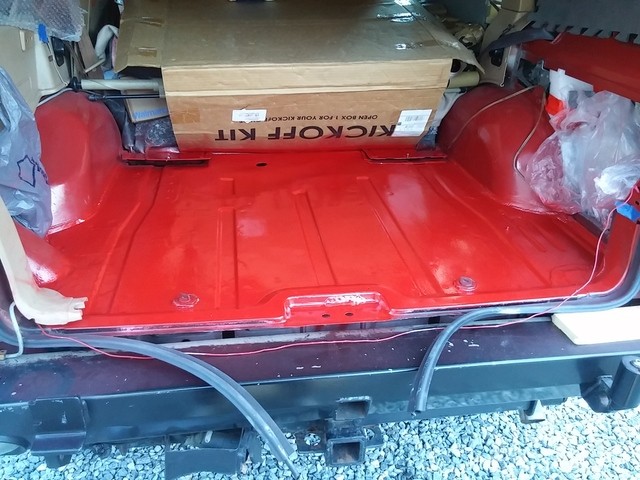
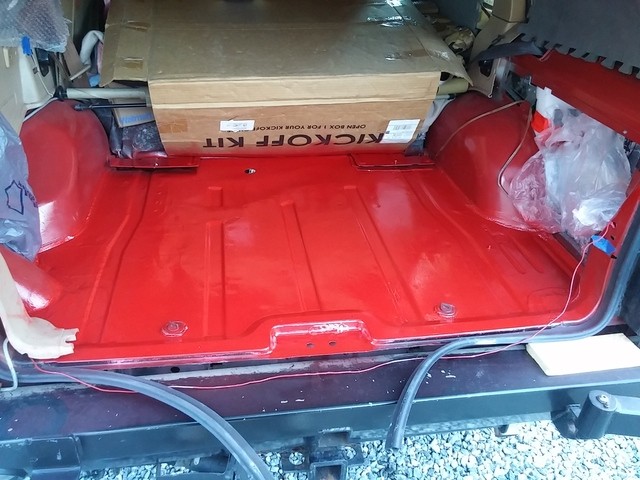
Sprayed a thin coat of (oil based) color to make it closer to the factory tint. Overall coats brushed on: Chassis Saver - 2; Primer - 1; oil based color - 3; Latex color (for matching) 2; oil based spray color-match - 1. Nine coats over the metal & original paint. Let's see how long this repair lasts. I do have concerns about my handling of the hole by the latch. Wondering if I should have put the Chassis Saver on before the patch. Too late now, but anyone care to comment on that? Or anything else?
Oh yeah ... and I did replace the bad hatch seal before painting ... :gee:
Rusted thru
I can't afford a floorpan replacement neither can I weld, so I got to work a different way. There were dozens of tiny bubbles that I had to wear glasses to identify, and the more I scraped, sanded, wheeled, the more rust spots I revealed. Almost every factory spot weld had rusted to some degree. You see the drill ... I used a wire wheel & different grinding stones to reveal all rust areas. Then I power-sanded the areas that still had paint. Though I didn't intend it, lots of small areas were showing bare metal when I got done.
(Forgot to take pics before the next step below ...)
Patched the hole with a metal replacement epoxy that you have to knead, & coated everything with Chassis Saver from Monstaliner - 2 coats
Primed with Zinsser oil based primer - 1 coat (halfway completed in pic)
Top coated with an oil-based red - 3 coats (I'm hoping oil based paints offer better water repellence). First coat shown. BTW everything is brush painted instead of spraying. I wanted thicker coats.
All done! In spite of the multiple coats, I'm putting all my money on the Chassis Saver to seal out moisture.
Sprayed a thin coat of (oil based) color to make it closer to the factory tint. Overall coats brushed on: Chassis Saver - 2; Primer - 1; oil based color - 3; Latex color (for matching) 2; oil based spray color-match - 1. Nine coats over the metal & original paint. Let's see how long this repair lasts. I do have concerns about my handling of the hole by the latch. Wondering if I should have put the Chassis Saver on before the patch. Too late now, but anyone care to comment on that? Or anything else?
Oh yeah ... and I did replace the bad hatch seal before painting ... :gee: