• Welcome to the new NAXJA Forum! If your password does not work, please use "Forgot your password?" link on the log-in page. Please feel free to reach out to [email protected] if we can provide any assistance.

The Nail Salon

If you set things up right your fine scott. I hear the same questions all the time, and 90% of air locker issues are from rushed piss poor installs.

Use the steel braided hose for starters, and think about line placement. My buddy that I wheel rocks with has a LJ that's had the same arb setup f&r since 07 or 08 and never once had ANY issues. The tj buggy that I wheel with him has a front arb that's been there god knows how long, but I've never had an issue with it in 5 years he's owned it. Except for a fried relay once, I just 'hot wired' the locker..... Fixed that and some shotty plumbing and its been good since.

Looking good Dustin! As always
 
Last edited:
Scott... rwkhause has them on sale for 700 shipped with everything you need to insall and plumb it... damn good deal
 
Still working on tieing up the loose ends of the build. My new shocks for the front were waiting for me when I got back from the Thanksgiving Run. Finally got around to getting them mounted today.

I built my three link for ~12" of travel, 5" up and 7" down. It'll droop way more than 7", but my coils will drop out so it's not really worth it. Looking at the 12" travel shocks available and their sizes, I decided the Bilstein 7100 short bodies would work best for my application. I read a lot on the different valving options available, and chose to go with the 275/78 with my PAC coils. These are rebuildable, tuneable, and just flat sexy.
2595D80A-F33F-48AB-8260-F9149CDA37CB.jpg


Transferred my TORXfab shock adapters over to the 7100's. With the heim spacers the shocks have a mounting width of 1.25". I originally built my adapters to 1.5". Rather than making a new adapter I added a spacer to one side (hole saw cutouts FTW).
C863D15D-BB27-4A2F-97E3-1A5A9FAE4D06.jpg


The axle side mounts wouldn't work with the 7100's heim joints, so I hacked away creating a clean slate to work off of.
68E25F3A-317A-42EB-B6EE-7D5CD24BADB1.jpg


Did a little measuring, and some calculating, and found to achieve my 5" of uptravel I'd need to raise the mounting point up 1.25". Made some new shock tabs out of .188", and cut a 1.25" spacer to hold them square while welding.
FCCEB6A7-2ED8-4CC9-98D4-4E72537F810D.jpg


With the shock mounts burned on, I moved onto my next project, coil spring retainers. I've been procrastinating on building them because I couldn't think of a clean way to secure the springs to the axle. That was until I was driving to work one morning, and had the light bulb go off. Tube!

Using a scrap piece of 1x.120" DOM, I cut a one inch piece for each side. I slotted the bottom so the coil could sit flush on the bucket, and by removing some material the .750" ID reduced to better fit the PAC .625" diameter. This would take care of the springs lifting off the axle under droop, but I also wanted to lock in their orientation and prevent them from rotating. With not enough meat on the tubing to tap it, I drilled a hole and welded a nut for a 5/16-18 "set screw" to lock the coils in place.
BDDA89DB-E9EA-4FA4-BE76-E39C12715FD2.jpg


Welded the retainers on, through some paint at it, and then mounted the coils and shocks.
E35BC5B5-CF7A-41F3-96EB-1360BED58EBA.jpg


All that's left is adding some bump-stops and limit straps, and then the front end should be good to go.
 
Damn you do nice work!!!!
Like the shocks! Looking at those for my brothers xj....

What are you going to use for bump stops? Are you making something or ????
 
Damn you do nice work!!!!
Like the shocks! Looking at those for my brothers xj....

What are you going to use for bump stops? Are you making something or ????
Thanks, the buckets are already tapped for a 3/8" bolt. I just need to add a lower bump stop extension. I have a sheet of 1/2 plastic I'll just take the hole saw too. This is what I ran on the last setup, and it worked fine.

I am intrigued by the "prothane coil inserts". Seems like they would be a bit more progressive. If I find I'm on the bumps a lot, I may end up giving them a try.

Prothane Coil Inserts

I am stealing your idea for the coil spring hold downs. Just to let you know! Nice shocks, you will not be on the bumps a lot. I love my 7100's
 
Awesome build dustin, you have some great fab skills that I think everyone in the next would like to have.
 
Time to tackle the front bump stop situation. I had roughly 10" of space from the bottom of the coil bucket to the factory upper bump stop. I needed to limit this down to ~4.5". I'm set up for 5" of uptravel, but I want to be on the bumps 1/2" before the shocks bottom out to account for "squish." This meant I'd need to extend the bump stops by 5.5".

Rather than running a gigantic lower bump stop extension I chose to pick up some Daystar #KJ09114BK extended bump stops for the top. These would help even out the spacing between the top and bottom. The Daystar bumps are 2" longer than OEM.
FF246E25-ACD2-495A-B602-7E8AE94409EC.jpg


For the bottom I'll be using stacks of 1/2" plastic pucks. I have a sheet of 1/2" plastic (I think it was a cutting board), I took a 3" hole saw to. The hole saw left an edge on all the pucks, so I chucked each puck up on the lathe to turn them down and chamfer the edges.
A9D7D883-9575-424E-A7D8-6A8713DF7BAB.jpg


All turned down and ready to go. I bored two pucks out for the bolt head to sit flush in.
12D0CC31-EFAC-45CC-B566-3C4A9E6D9A82.jpg


Installed.
76BEB58D-E291-4085-A1AA-F40377C066CD.jpg


With the bump stops taken care of, I wanted to prevent the shocks from over extending. Hanging a tire on the trail is a pretty common occurrence. I took advantage of RuffStuff's Christmas sale, and ordered up some 18" limit straps. Ass Vault!
665795DA-9462-4AAB-A35E-EA792D9B92C8.jpg


Made some mounting tabs. I debated on mounting them in double shear, but for a trail rig like the Nail Salon is, 1/4" single shear should be plenty.
AE40CD72-EDDC-48D6-B929-1B9602BA38DE.jpg


Welded the tabs on top of the LCA mount, and to the bottom of the frame plumb with each other. The rule I've been told for limit straps is to allow for 1" of stretch in the strap. Mine sit 12" eye to eye at ride height, and will allow for 6" of down travel plus stretch. Should be golden.
188AB48C-630A-46DB-BFDF-E4B25D92E6CC.jpg
 
Last time I posted I was slowly dialing in the little things, and trying to get the Nail Salon ready for some winter snow runs. We did get the NWC crew together at the end of December for a "Noob Snow Run", and even then the snow was pretty pathetic. I left the Jeep packed, ready for the next snow fall, only for it never to come. Worst winter, ever!

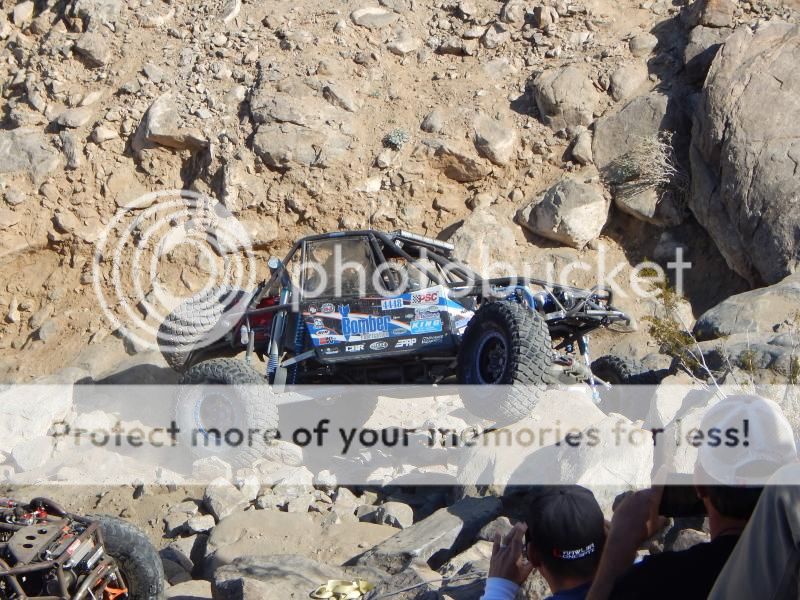
BPB and I took a little road trip down to King of the Hammers year. It was a total blast, and really gave me the itch to race. Didn't help motivate me to work on my junk though, so most of my time has been spent nerding out on the 4500 MJ.

DSCN0264.jpg


DSCN0651.jpg


DSCN0715.jpg


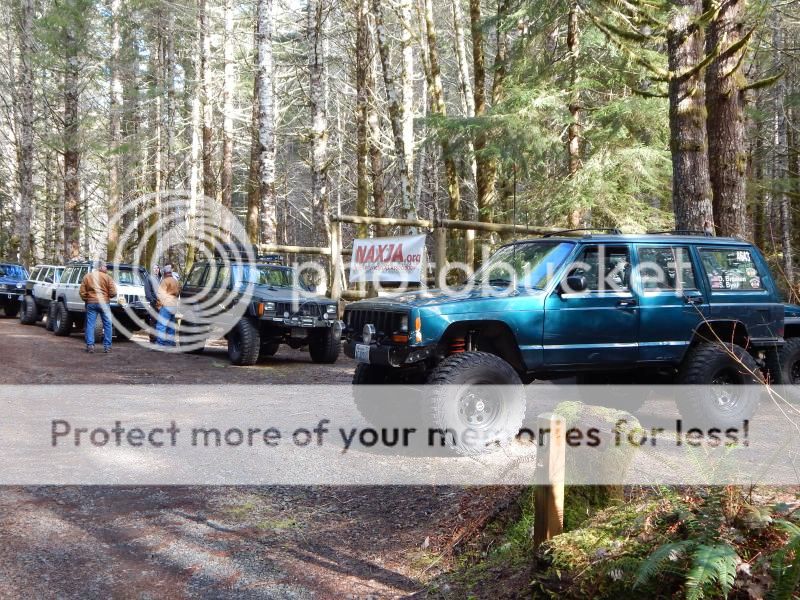
However, an NWC tradition TORXfest was just around the corner, which meant I had to jump the Jeep and retrieve it out of the weeds to get it prepped for some wheeling!

TORXfest at TSF was really enjoyable. Great weather, wheeling, and people. The Nail Salon did great all day, no wrenches turned. Still getting use to how it feels as this was only the third trip out, but I'm really liking it.
DSCN0821.jpg


I did hit the scales on the way home just out of curiosity. This is with a half tank, but also loaded with camping gear so I'd say it's pretty close to it's current trail weight. I'm pretty okay with the weight as it's still under 5K. I still have a fair bit of metal to add though.
DSCN0895.jpg


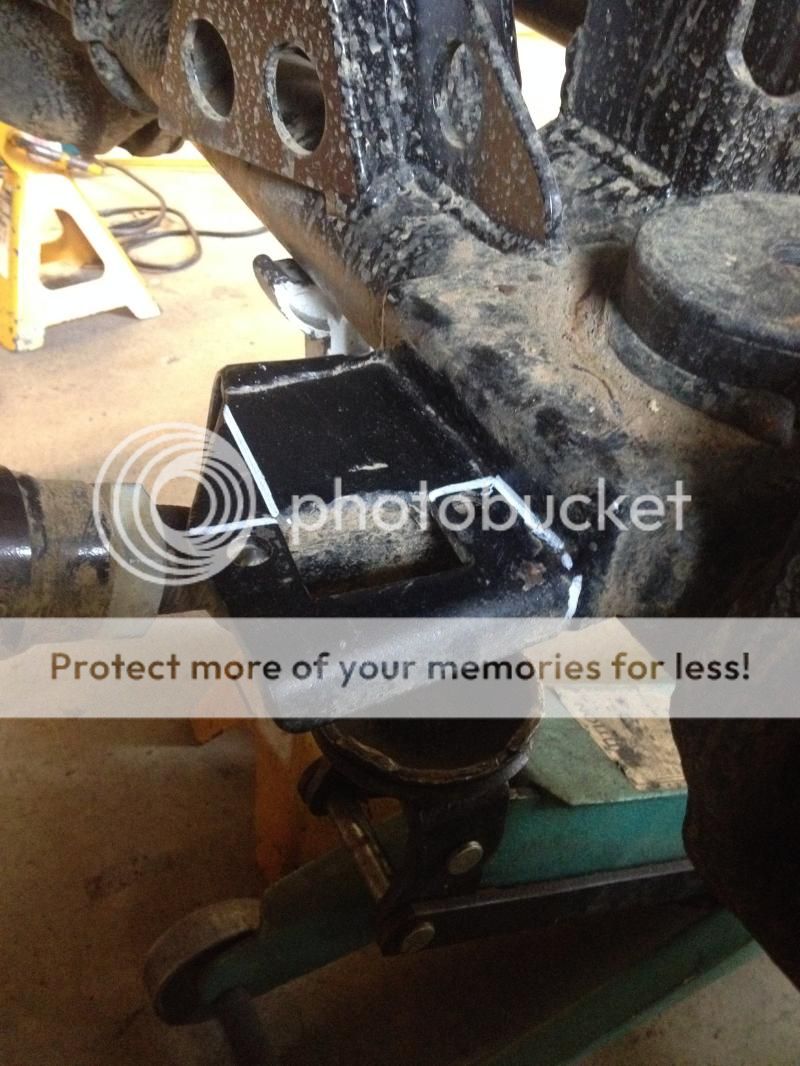
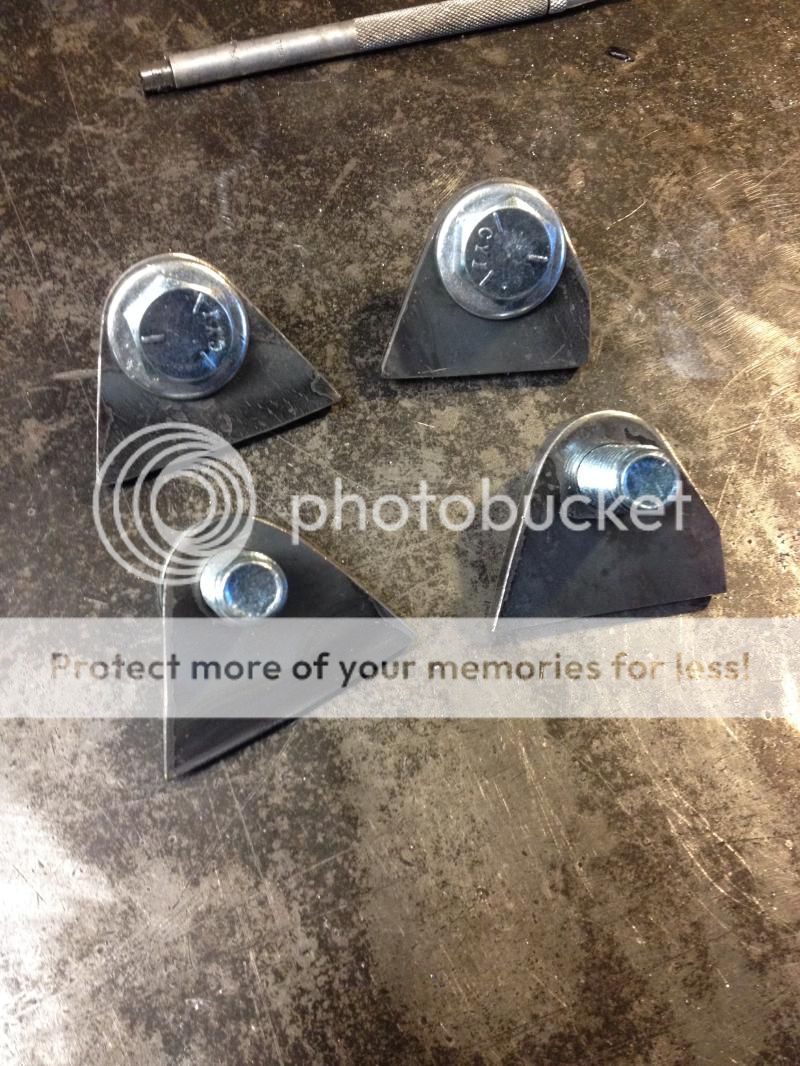
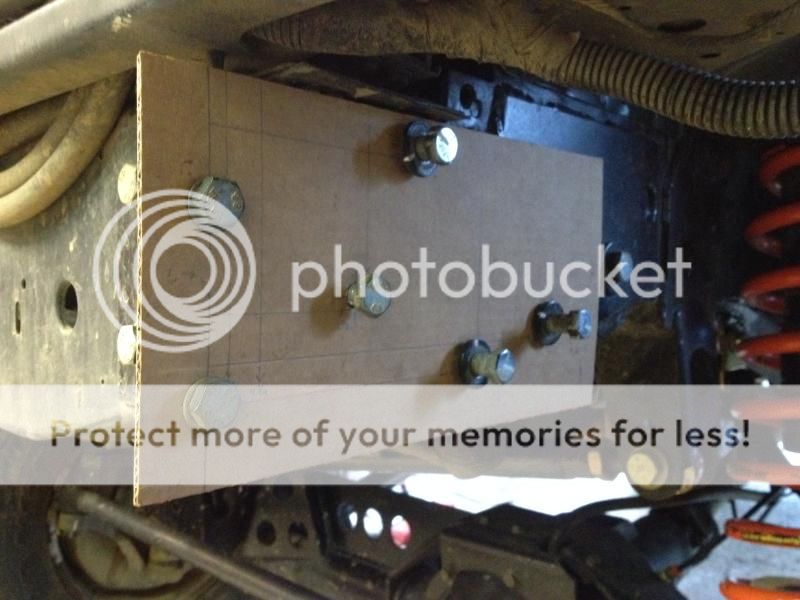
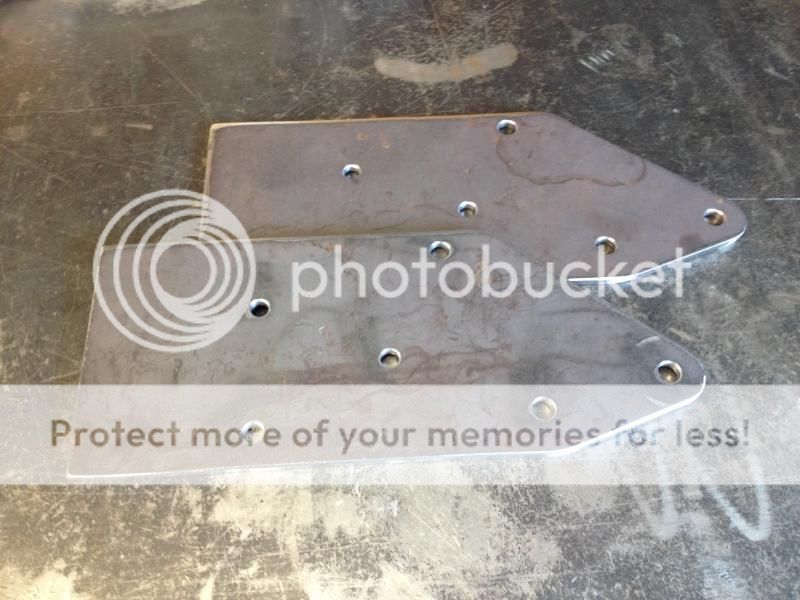
Feeling motivated after a good trip out, I decided to move forward with getting my winch mounted back up. I ditched my old winch bumper after I added the front stiffeners, which meant we were starting from scratch.

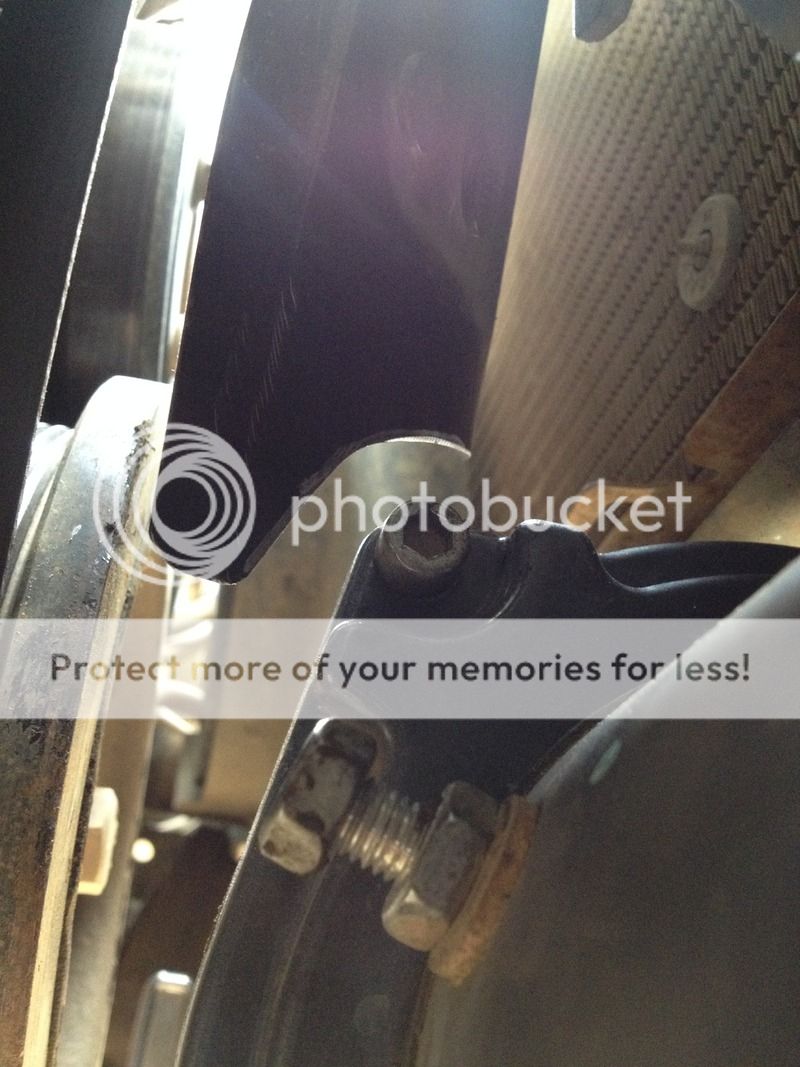
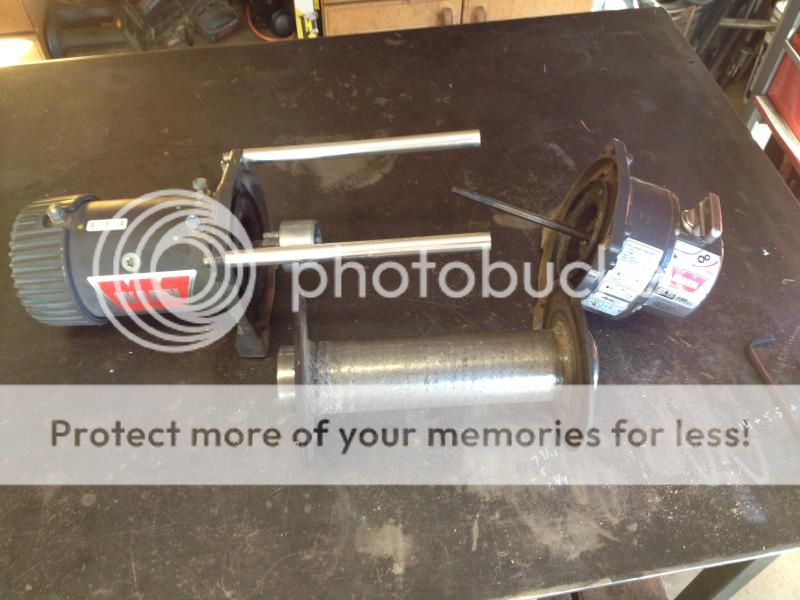
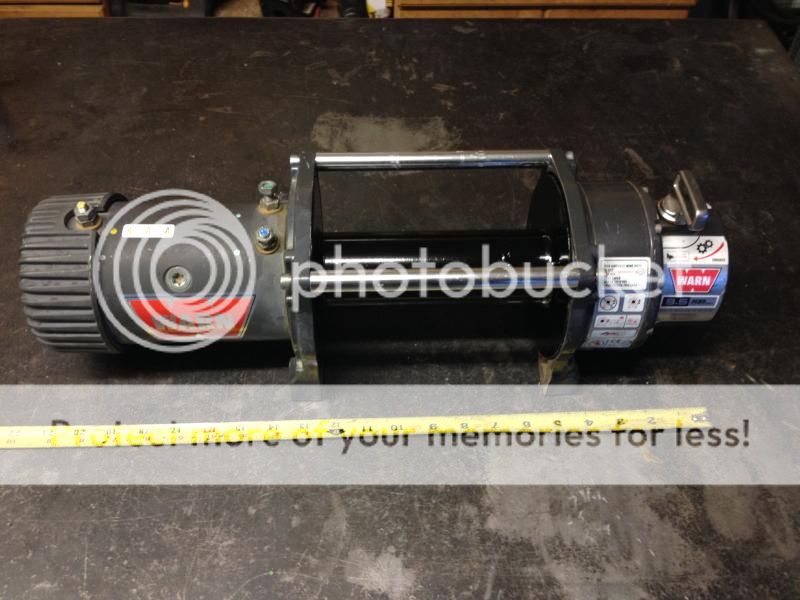
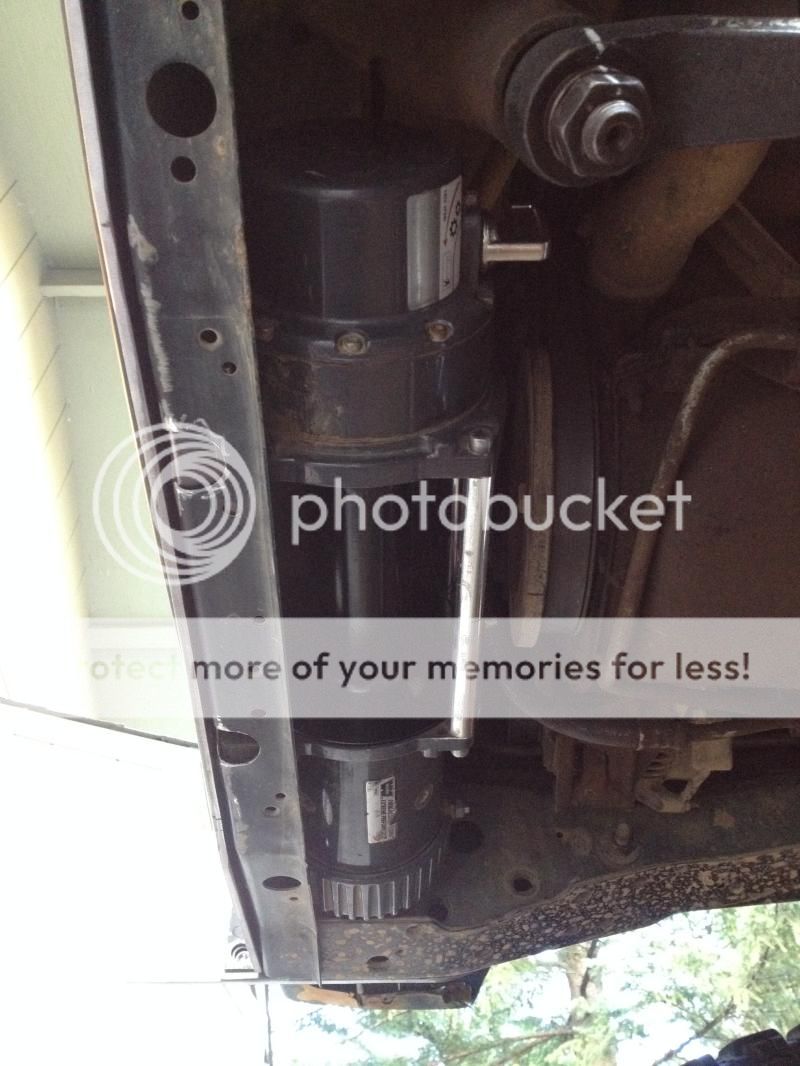
After making a few traditional winch bumpers in the past, I wanted to try a new design for a better approach angle. This would involve mounting the winch behind the front cross-member. I tried mocking up my Warn 9.5XP, only to find out it's too wide to fit between the steering box and frame due to the larger motor used. This is a case where bigger is not necessarily better.

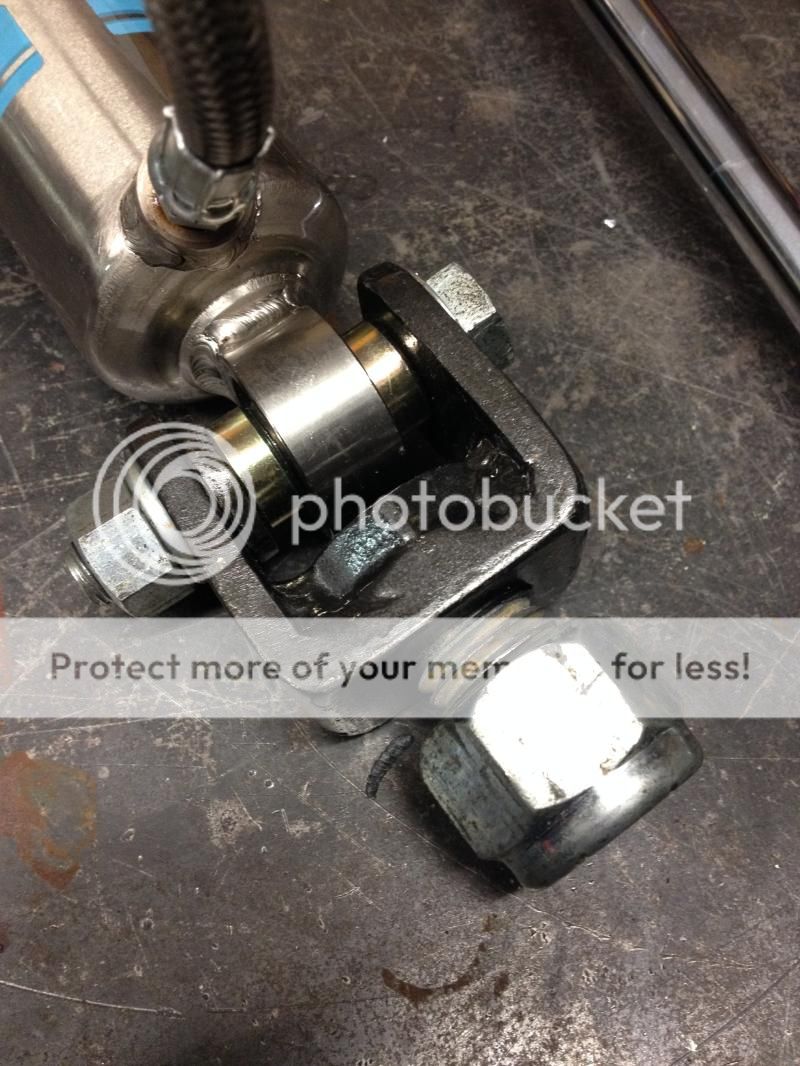
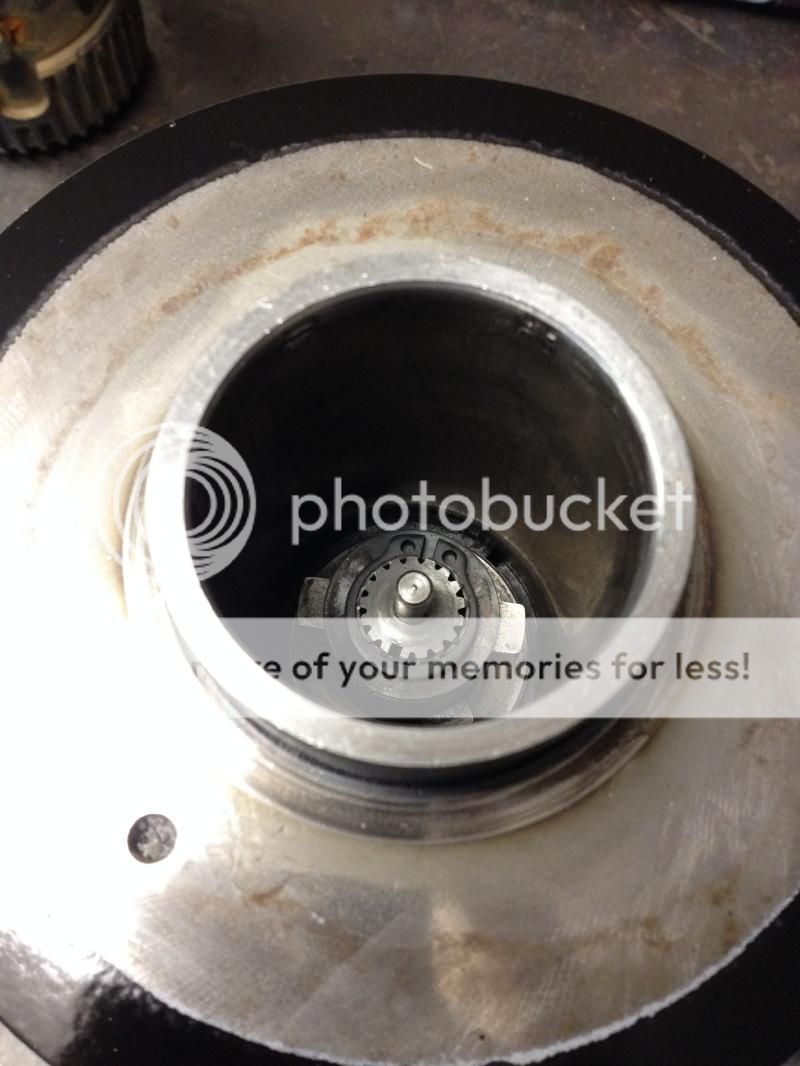
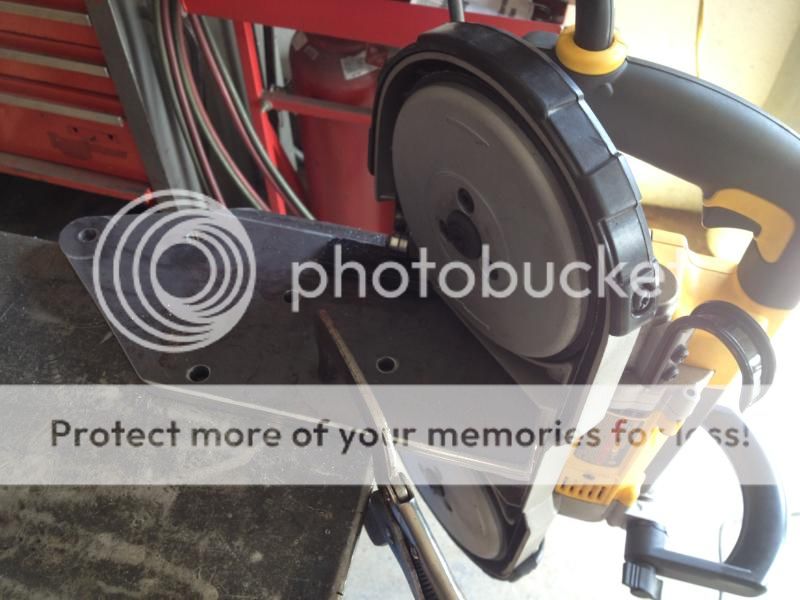
I decided to take my winch apart to see what could be done. Remove the two allen bolts from the aluminum tie-rods, and the winch will come apart.
75BBE144-D8F0-4E1F-B00F-9C61D54AEDE8.jpg


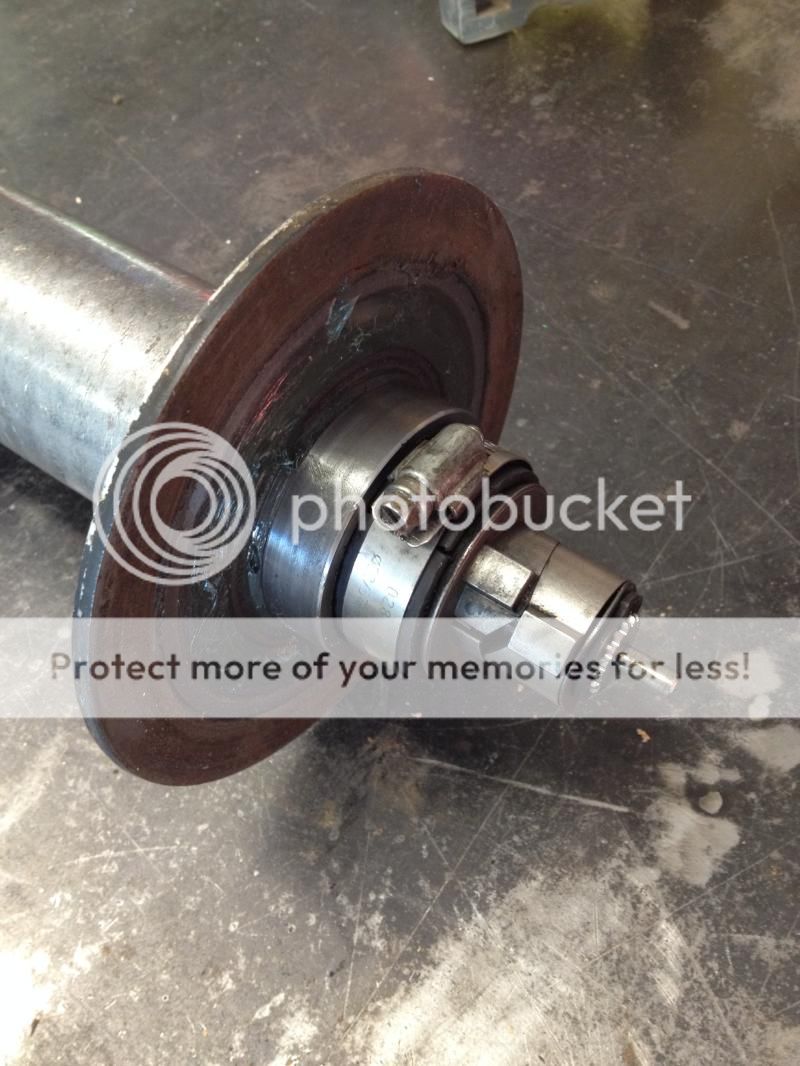
To remove the drum brake, push it out from the hub side. When it emerges from the drum, place a hose clamp around the brake to prevent the internal spring from unraveling. Once the clamp is on, you can remove it the rest of the way.
E924F057-3273-4DDB-8243-051B4D3EF1C2.jpg


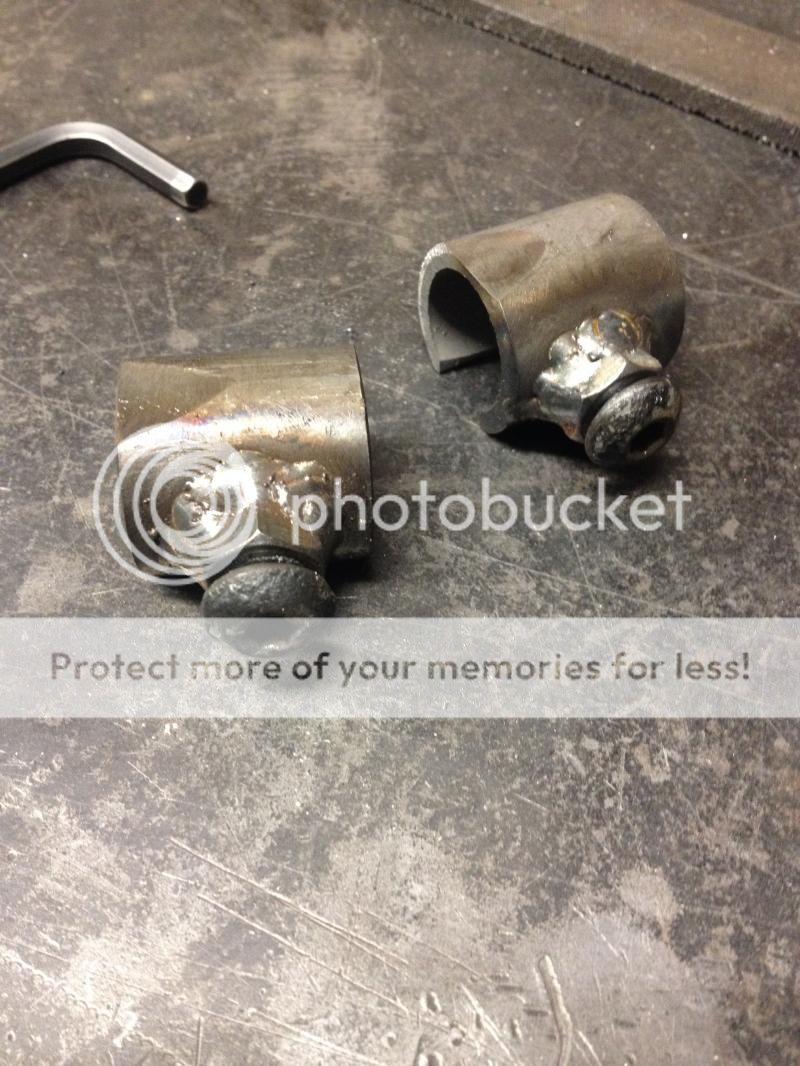
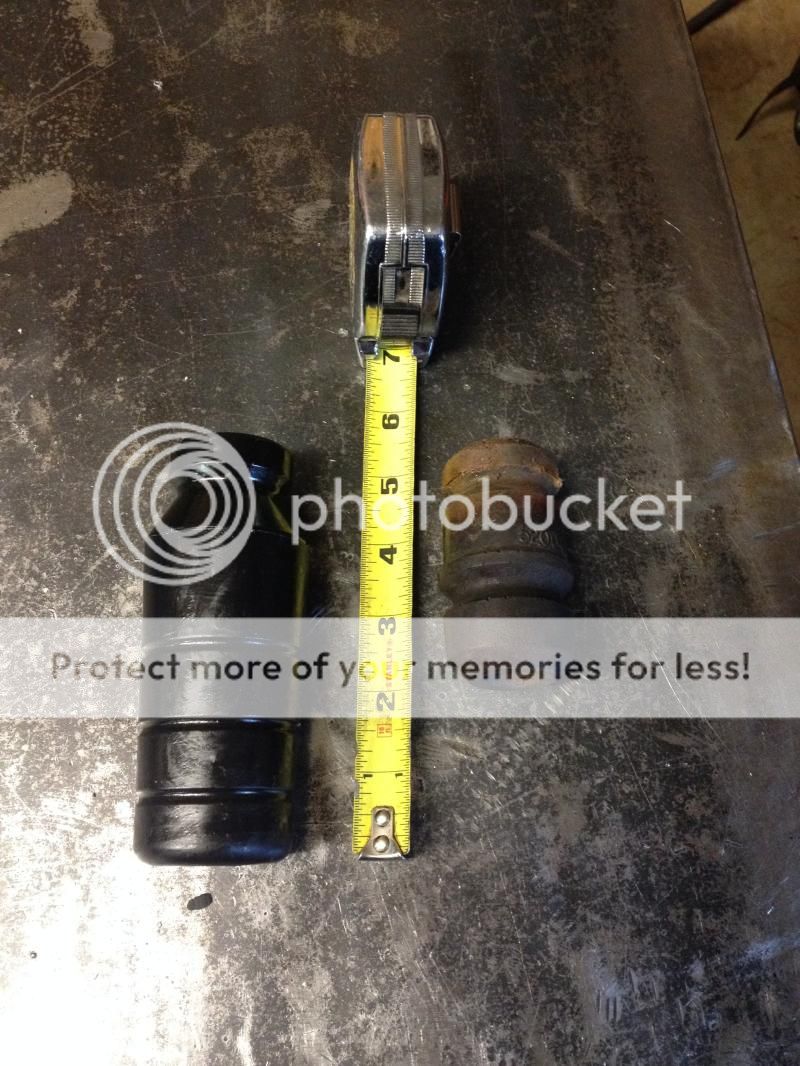
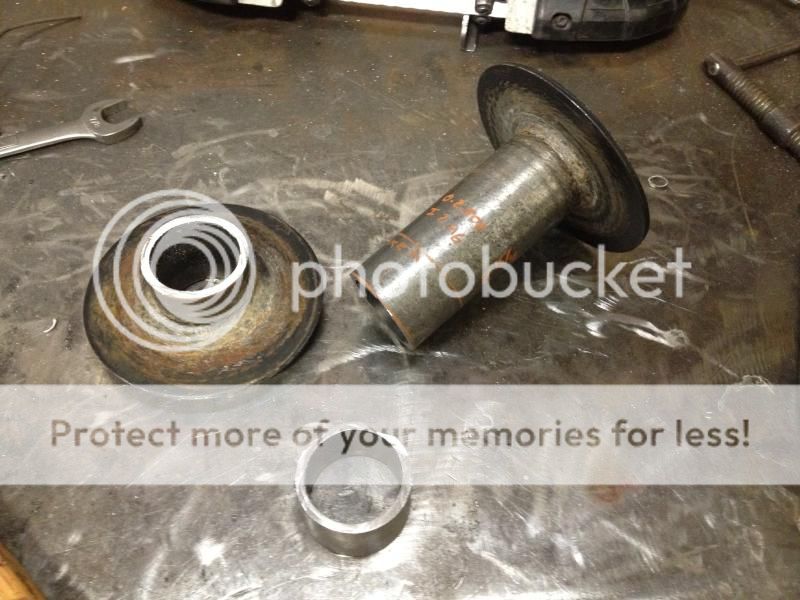
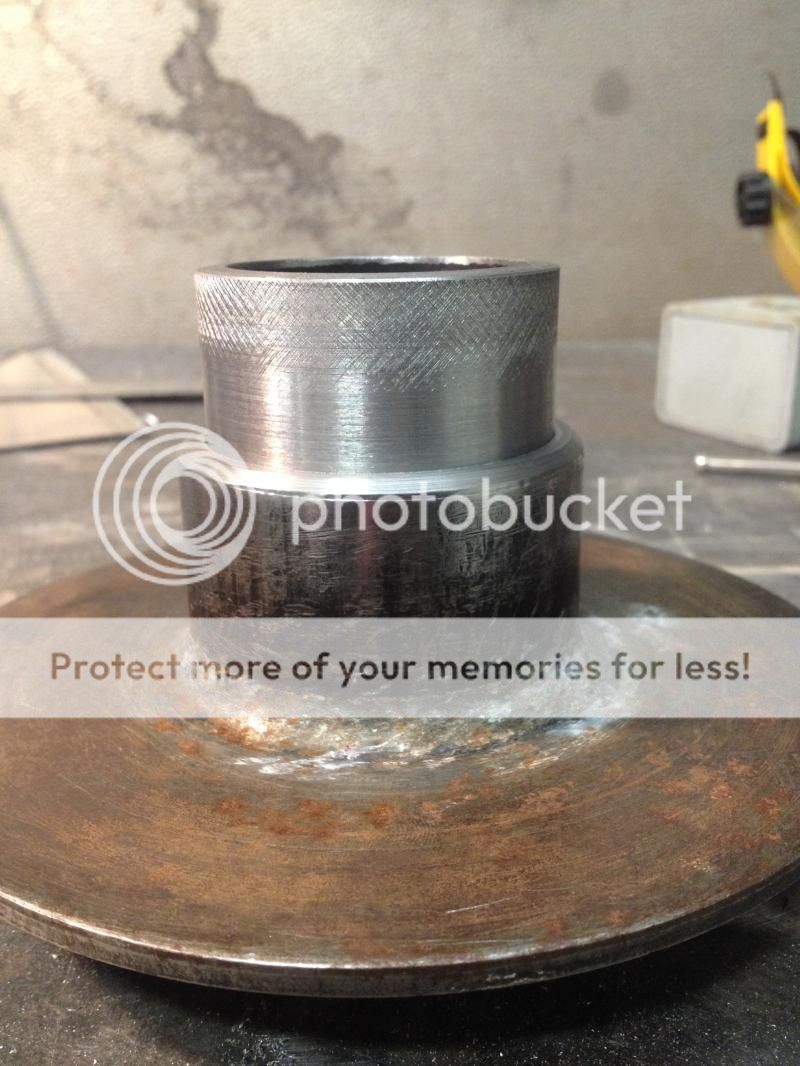
After a lot of pondering and brain storming, I decided to cut a section out of my perfectly good winch drum, rendering my winch useless. To be more clear I cut out 1.5" off the gear side* of the drum to bring my 9.5XP down to the more traditional M8000 width (I'll have a shorter drum though). At this point I was committed.
FF4C34A7-AF41-4803-BFB7-B1FD221F3E93.jpg


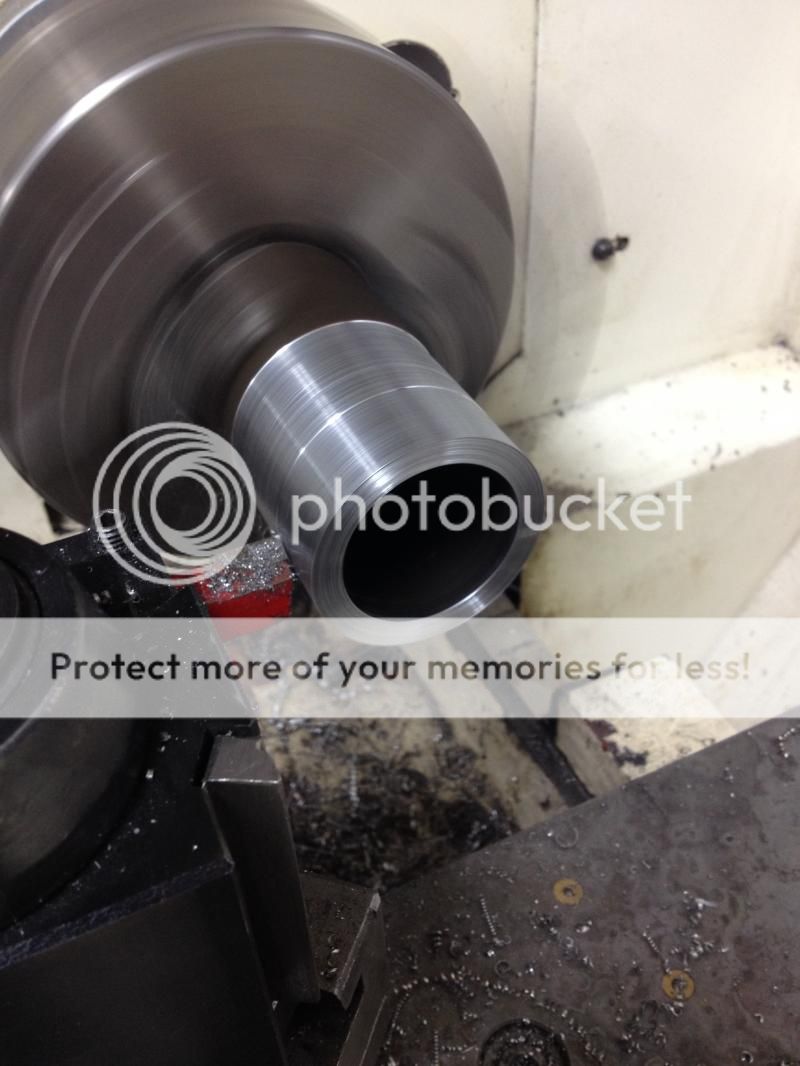
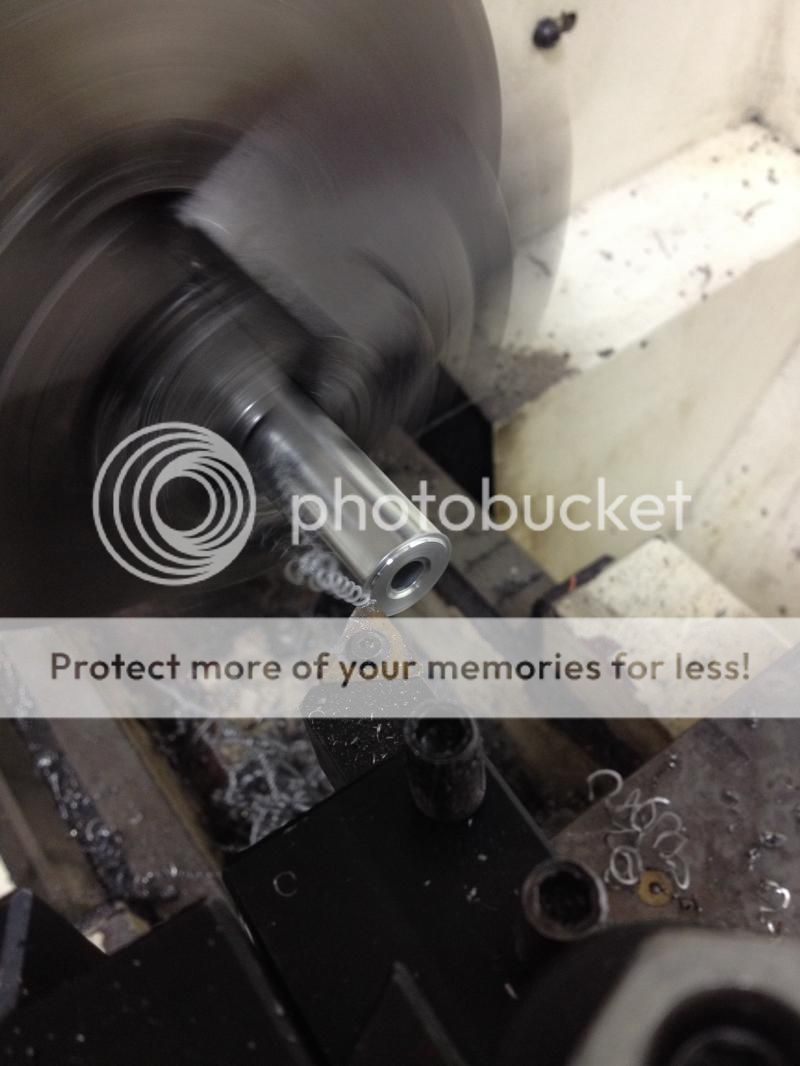
I chucked up each end on the lathe, faced up the cuts, and beveled the outside edge.
B364E478-24D0-4551-A9A7-1DD342A7FF51.jpg


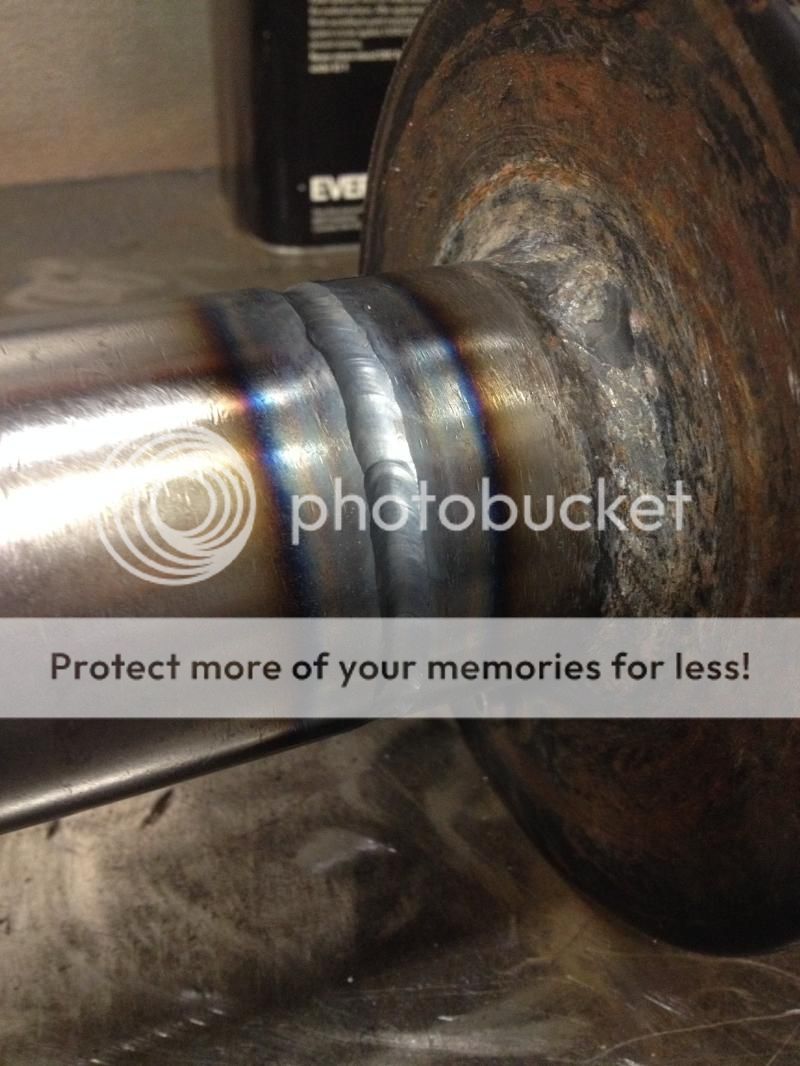
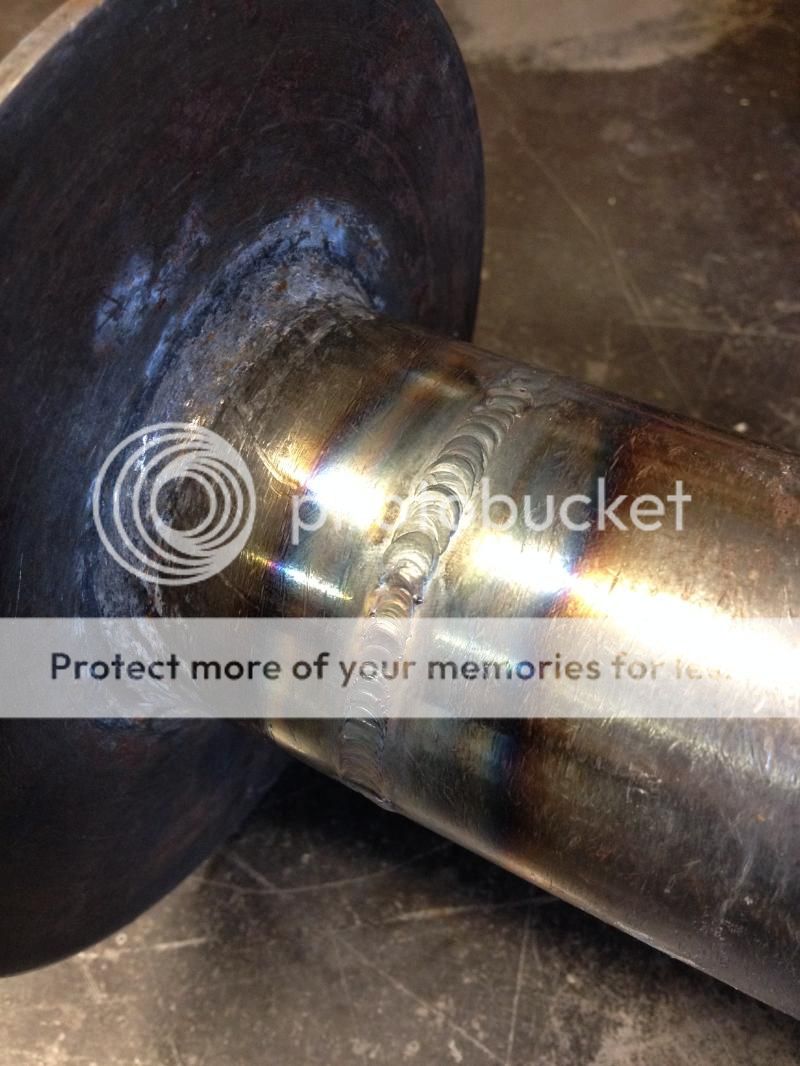
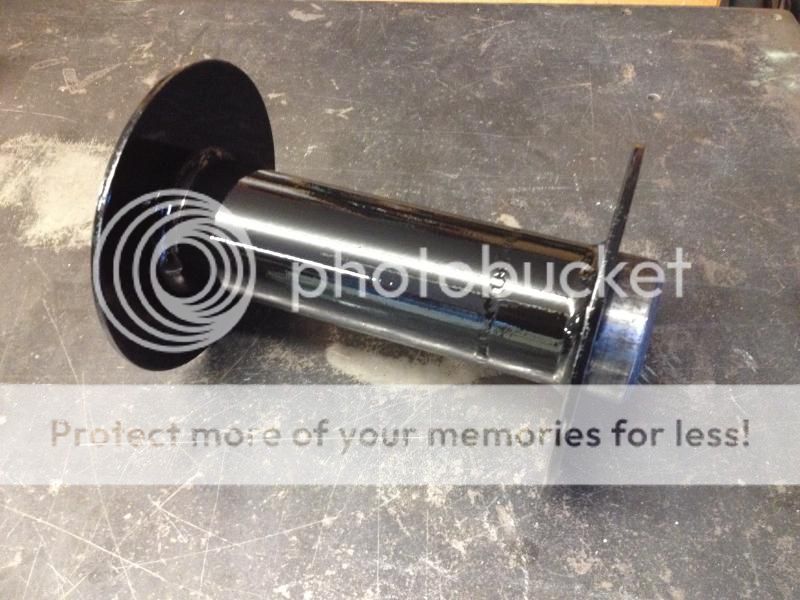
With the ends ready to be welded back together, I then worked on maching an internal splice connection. This would ensure both sides went back together square, and provide extra strength at the splice. I picked up some 2.5x.250" DOM to machine down to the ID of the winch drum.
A76C782B-E1A9-47B2-9AE0-949E8F4B0D0A.jpg
 
One side assembled with the splice having a nice tight press on fit.
1F78EF7E-2B0F-4758-83AB-ED2F96537CE7.jpg


At this point I pressed on the other side, and bribed Winton at the 4500 MJ shop to give it the TIG treatment. First pass laid in like butter.
D59328AF-F14F-4080-B2DF-49CFBE93AA6A.jpg


After the second pass.
5B66E39B-F778-4869-98E2-B670EC7D2AF3.jpg


Shot some paint at it.
6657E885-F12D-45FF-BB63-1E5B5F98F536.jpg


Slipped the brake back in, released the clamp, and pushed it the rest of the way in. It rides in the same spot, since material was removed from the gear side.
2FAC4F71-50F1-41F8-85D0-1B0E48C5CD99_1.jpg


To reassemble the winch, I also had to remove 1.5" from the aluminum tie-rods, as well as the hex shaft leading to the brake.
F60977B0-3F5E-422E-ADF0-9C93BA1883CB.jpg


My now shorter Warn 9.5XP. My drum length went from ~8.875", down to ~6.375". If I was to keep my cable I estimate I'd lose around 15 feet of cable as Warn wraps 11' per inch of drum. Overall my winch went from 22.75" down to 21.25". I now should be able to shoe horn it behind the cross-member.
C9EA0549-E6D0-4DBB-985F-44236A905981.jpg


* Now to be honest when I initially laid out my cut lines, I planned to take 1.5" off the gear side of the drum so the sleeve wouldn't interfere with the brake. I'm ruh-tarded and didn't pay attention to the orientation of the drum while laying out my cut lines, and ended up putting the sleeve exactly where the brake rides. Lucky for me, Nick hooked me up with an old Warn winch drum so I could do all this over and correct my brain fart. :dunce:

As always the first step in building a bumper is to make the mounting brackets. A little bit of time spent measuring the bolt lay out pattern, and I had a template made.
9E7336F5-BDB9-4A52-94C1-9D0A0A24AC6A.jpg


.250" plate will be used on the brackets. I used the sparkler wrench to rough cut them, and the porta-band to fine tune them.
69993F60-5235-475C-9FE5-A3A29AC0F9EF.jpg


Both sides ready to go, with the front dimension still left wild as I'm still deciding how the rest of the bumper is going come together.
563577F1-F4BF-4526-91DD-FD60DE5DE150.jpg


Goal is to have the winch on for Kingsley this month. We'll see...
 
Well much to my surprise, it fits. Still need to clock the clutch lever, reroute some trans lines, butcher my fan shroud, and massage the mechanical fan.
4E6A80F6-F01B-449F-9E25-27E05C784660.jpg


Picked up some .250" plate for the front winch plate. After some layout work, debating on what size speed holes to use, and some time spent on the drill press, it's mostly complete. The winch drum is centered with the motor, which is oddly a 1/2" off set to the passenger side.
F4370CB3-051C-4F31-A692-7B0C77A463B7.jpg


Have a few more tie-in pieces to add, and then it's onto making the outer shell. ;)
 
Don't you think you should leave a little more room for the engine? I mean they do bounce forward and flex under torque?

Looks like its super tight! Might just be the picture.
 
Don't you think you should leave a little more room for the engine? I mean they do bounce forward and flex under torque?

Looks like its super tight! Might just be the picture.

I do not know exactly what he is planning on doing, but I would guess that the stock crossmember piece will be cut out. Hence, the good-sized flat plate being mounted. With that stock crossmember out of the way, that should give the clearance necessary?
 
Some of you may remember at NWF last year, my rig all the sudden shut off enroute up the ridge to Bald Mountain. Little tap on the CPS and it fired right up. Well I procrastinate sometimes, and never got around to replacing the CPS.

Since then that same issue happened again at Trophy Challenge, and more recently on my last TSF trip. Luckily it's always started back up, but enough was enough. I really didn't want to end up being "that guy" with a dead rig on the trail.

The consensus I gathered when it comes to CPS' is that OEM is the way to go for reliability. After having the local dealer quote me at $141, I took that part number and ordered one up from Mopar Parts Overstock for $80.

Onto the chore of replacing the little bastard. The sensor itself is located at the 11:00 position on the bell housing.
C99BFB6F-468C-45F5-9042-6DD344CB6327.jpg


There's two 11mm bolts holding the sensor onto the bell housing. I grabbed every possible 3/8" extension I had and still came up short. Supposedly it's a straight shot to the sensor bolts from behind the transfer case, but you'll need about 4' of extension. Instead I used a 3/8" universal, amalgamation of extensions, and a lot of profanity.
7E7DB217-4101-4FB7-9D6A-797B1A8F2848.jpg


New Mopar CPS #56027866AC. Warning, there are some vendors selling this same part number CPS, but it's not a OEM part, it's a Crown aftermarket.
F3B2C1AB-8BB7-4AA2-9FBA-C226B9FA3AB2.jpg


Install is in reverse order. Jeep fired right up, and the old one will be the new trail spare. :thumbup:
 
Don't you think you should leave a little more room for the engine? I mean they do bounce forward and flex under torque?

Looks like its super tight! Might just be the picture.
Oh, it's tight. ;)

I have around 3/4" between the winch housing and the crank pulley, 1/4" on either of the winch between the frame and steering box, and the fan actually did contact the winch.

I run all poly mounts, and my drivetrain is very solid. I'm not worried about the motor clearance at all. If the motor deflects more than 3/4" in it's mounts I likely will have bigger issues going on. The steering box should never move, and the same goes for the winch, so those clearances are irrelevant.

As for the fan... well I really didn't want to convert over to electric. I think the stock mechanical fan is great for reliability, and wanted to keep it. The winch tie-rod bolt contacted the blades ever so slightly on the inner radius. So I simply clearanced part of the blades...
2D4BE13C-AE74-485B-BDBE-2E5BE2583D1B.jpg


Now I have around a 1/2" between the winch and fan. I really don't think the amount of material I removed will effect cooling performance, but we'll see. Also, I had to butcher about an inch off the bottom of my fan shroud as well.
028FA573-55BC-4BE7-A006-E3DF46E002BB.jpg


I honestly have no idea if this will work out in the long run, but I know a few others have shoe horned their winches behind the stock cross-member with great success and reviews.

My whole reasoning for going this route is for maximum approach angle. With most traditional winch bumpers they stick out 10" in front of the grill. When trying to climb a steep ledge, you end up snow plowing your bumper into the rocks before your tires can get there. With a low profile bumper, and winch behind the cross-member, I think it'll be the best of both worlds, and climb like a goat.

I got some more work done on the bumper brackets, and winch mount tonight. At this point I'm just waiting to bend some tube for the outer skeleton, which I can hopefully tackle next week before, Kingsley.
 
With a shortened drum, my old 100ft of cable would no longer fit. After years of use the cable was pretty kinked up, and frayed. I figured this was the perfect opportunity to step into the world of synthetic.

Now I will say I've always been a fan of cable for it's durability, and I'm still leery of switching over to "rope." However, the weight savings, and ease of handling (no sliced up fingers) while rigging were two big factors in switching to synthetic.

While there are a ton of brands of winch line out there (Viking, ASR, Custom Splice, Olympus, etc), I chose to look more local. I swung by VanPort Rigging in Vancouver one day and chatted with the owners, Ken and Alice about what type of rope they would recommend for a winch line. Needless to say they answered all my questions, and showed me the different options for rope and hardware.

We chose to go with the standard Dyneema rope, which when compared to the equivalent size wire rope (cable), the Dyneema rope is actually stronger. While Warn supplies their winches with 5/16" wire rope, I chose to upgrade to 3/8" Dyneema just for a little extra durability. Ken and I then picked out a stainless thimble, and hook combo. I picked up my new line today, and am very impressed with the quality. Can't wait to try it out!
654691BF-267E-45C4-9AD2-9694E347EC55.jpg


With my shortened drum, and larger rope size I chose to go with 70 feet of line. I feel like this will be plenty for most PNW pulls, but do plan on picking up a 50 foot extension for the more fun recoveries and challenges (Trophy Challenge).

If any of you guys are looking to switch over to synthetic, or have any rigging needs (new cable, clevis', straps, hooks, etc) support a local company.

Van-Port Rigging
360-574-1300
6000 NE 88th St, Bldg C, Suite 106
Vancouver, WA 98665
 
Back
Top