• Welcome to the new NAXJA Forum! If your password does not work, please use "Forgot your password?" link on the log-in page. Please feel free to reach out to [email protected] if we can provide any assistance.

Project: HID Retrofit

DanMan2k06

NAXJA Forum User
Location
Damascus, MD
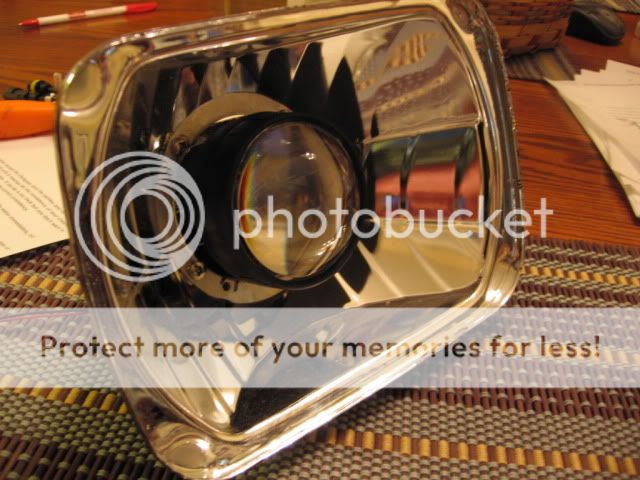
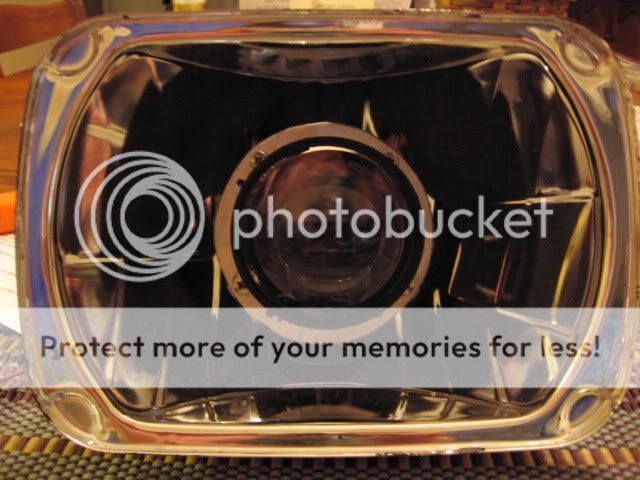
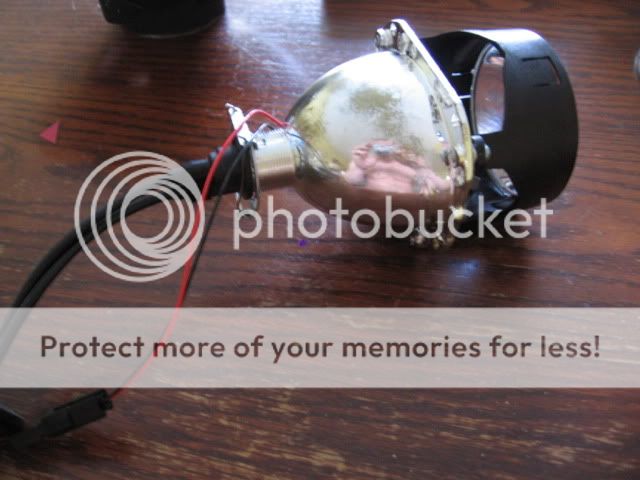
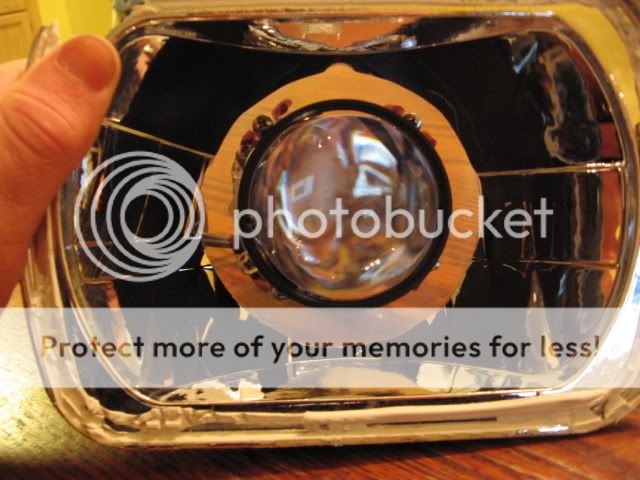
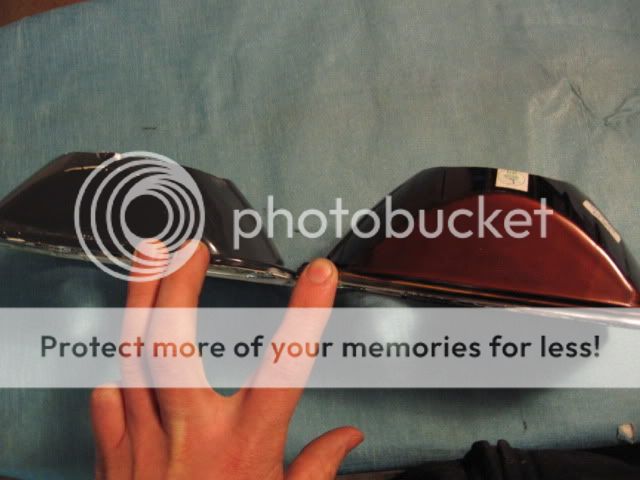
After literally years of contemplating, researching, sourcing, and gathering parts, I'm finally ready to start this project. I received all my parts in the mail, and will be tearing into things this weekend.

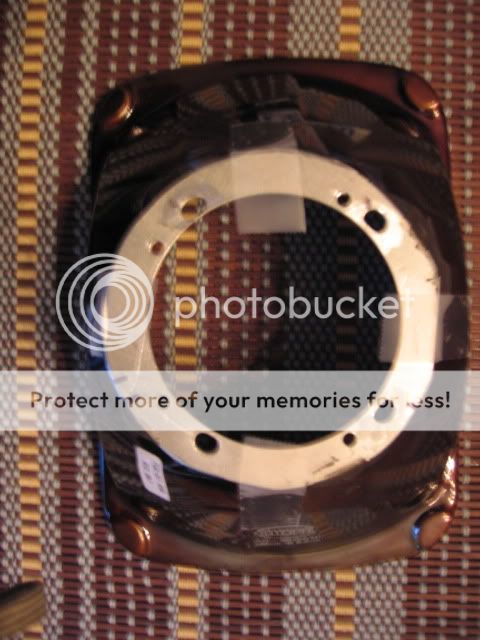
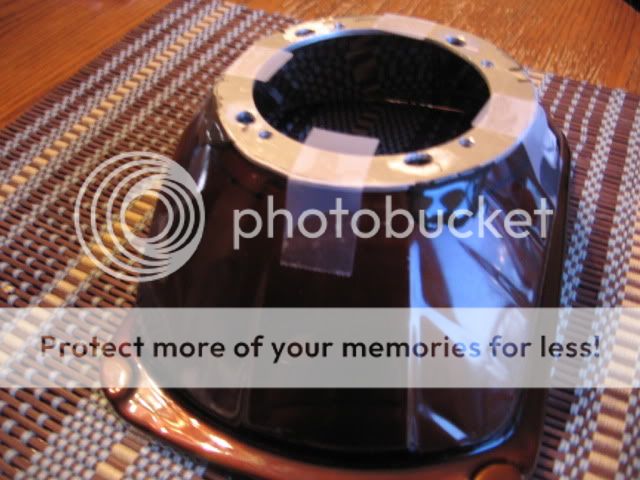
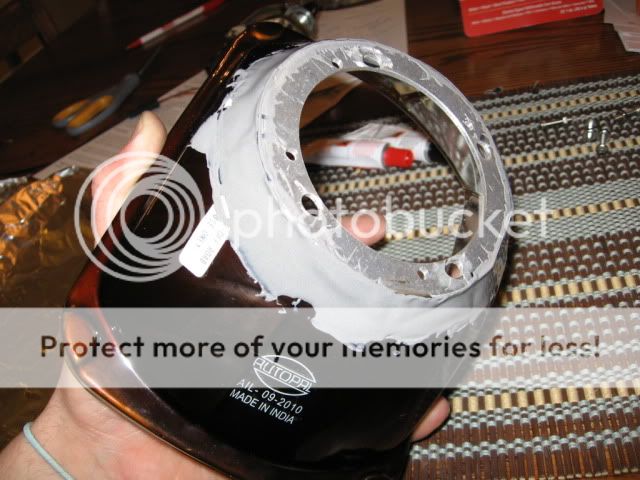
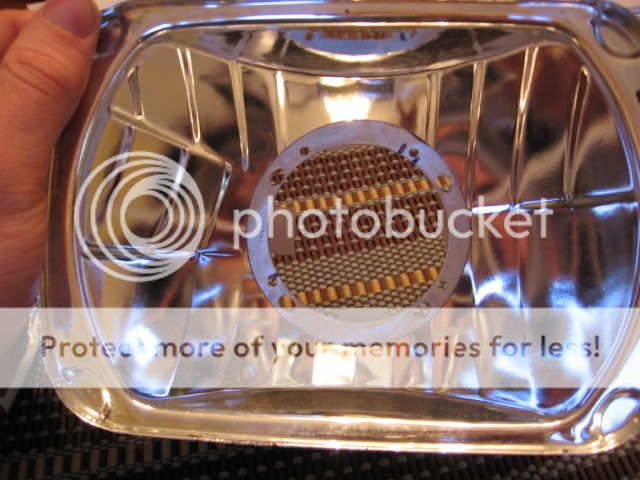
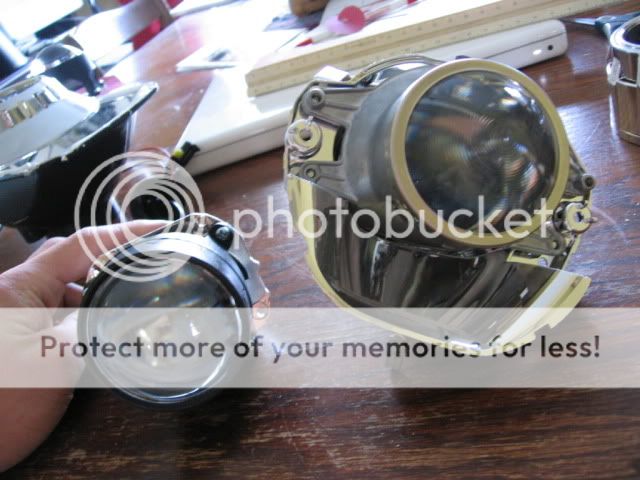
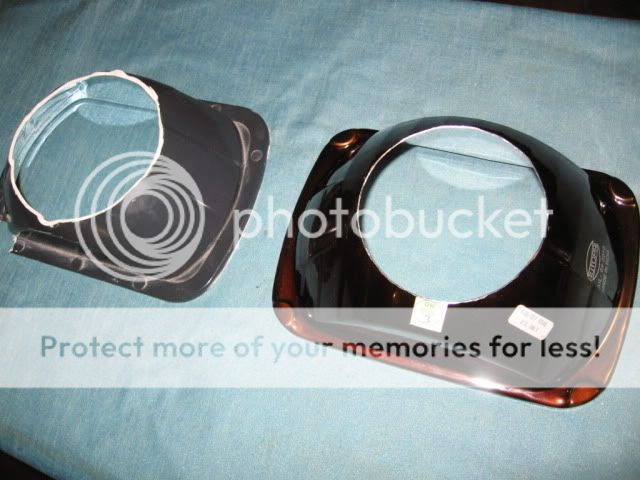
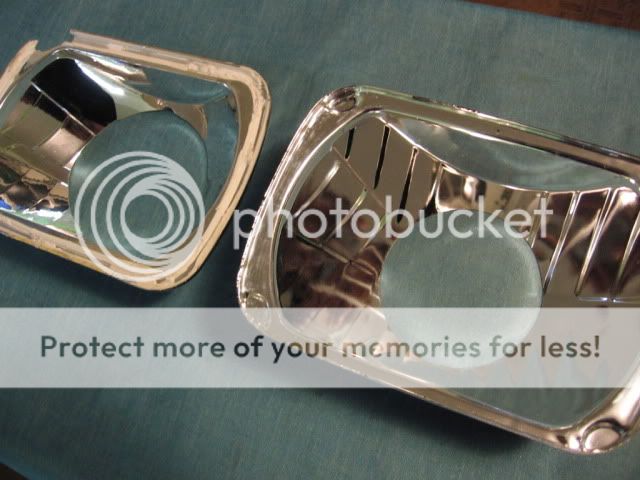
My original plan was to find a set of LS430 projectors (single xenon) and stuff them into some 7x6 housings. Then I actually DID score a set, and sonofabitch they were WAYYY too big. I would have to do some serious cutting not only to the header panels/rad support, but the projector as well. These have the AFS options, so there's a lot of moldings for the motor and such in the projector. It just wasn't going to happen.

Then I started looking for a cheap way out. Cibie housings with a kit? Or maybe some pre-made suvlight style housings? The pre-made housings were out of control expensive, and I just couldn't get myself to stick a kit inside a halogen housing... I'd be going against so many posts where I've bashed/flamed/laughed at other with it, or preached projectors are the way to go. I also REALLY wanted to keep my high beams. Bi-xenon projectors would be ideal, but I wasn't a huge fan of the FX's or e46's, and most others are just too damn big.

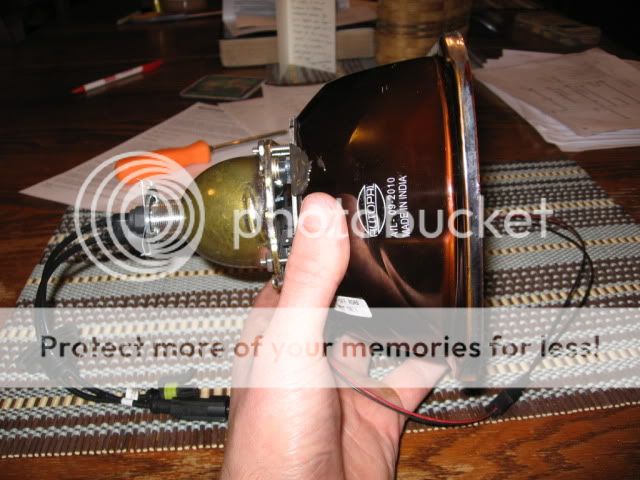
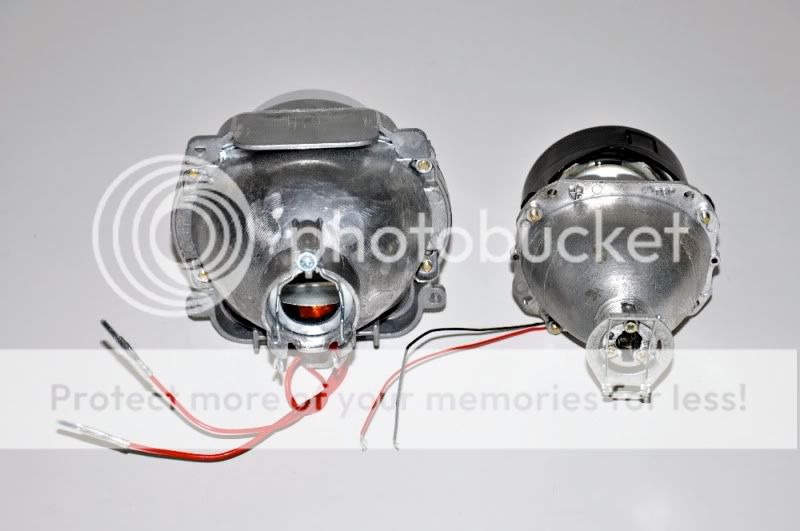
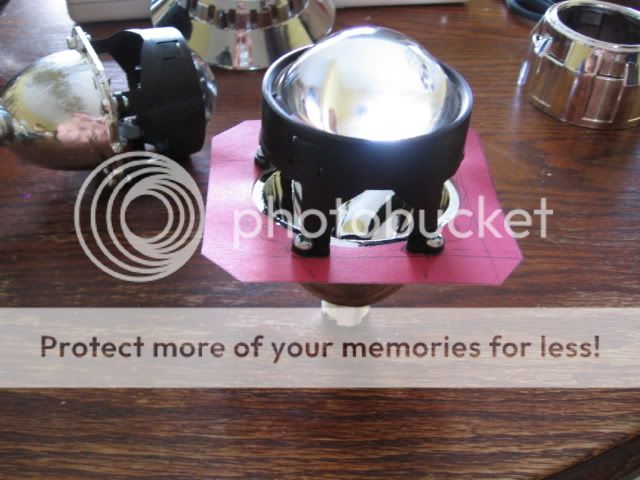
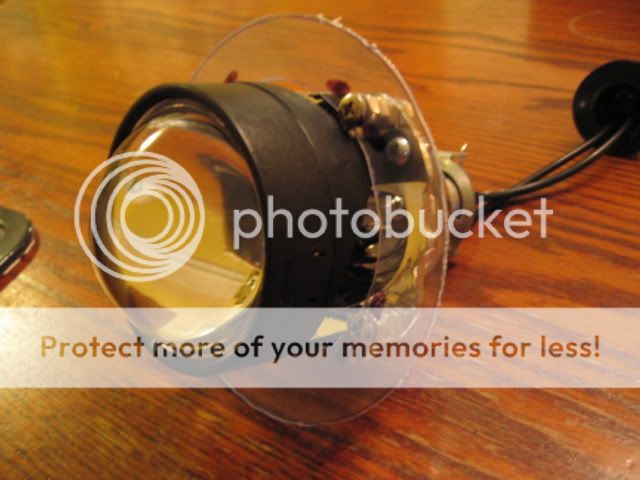
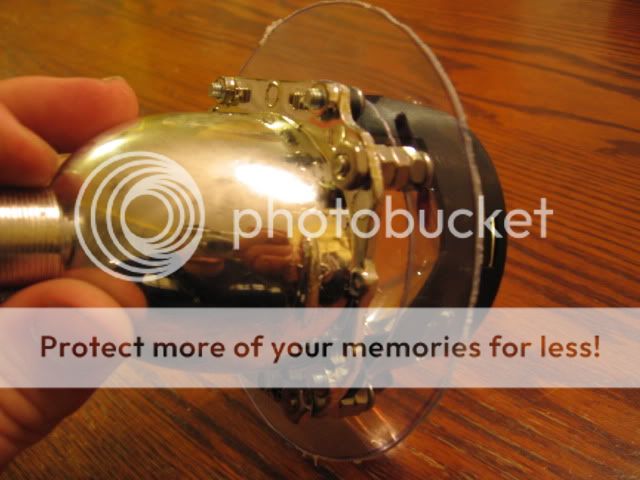
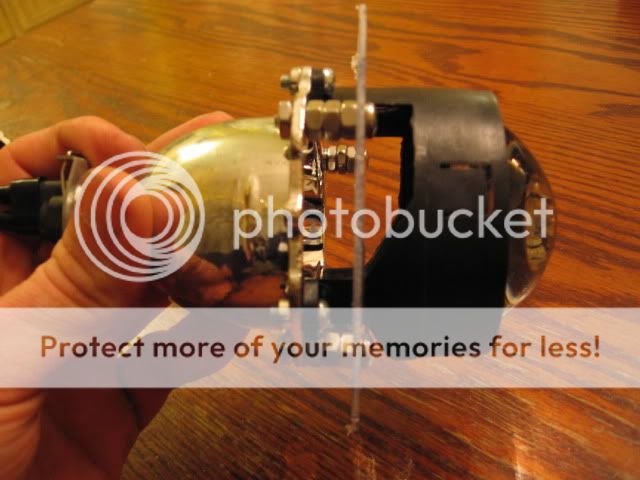
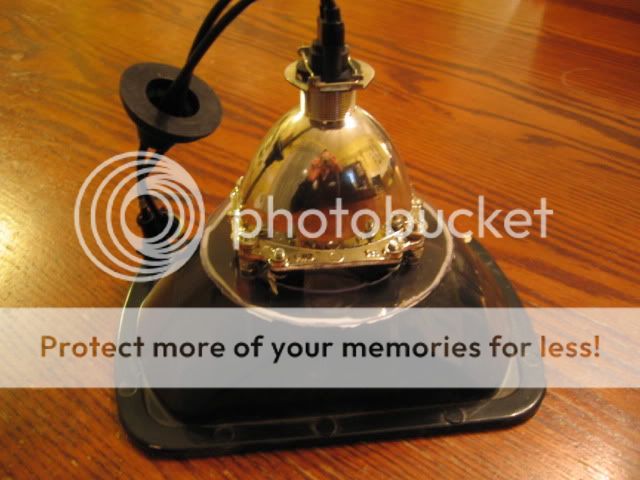
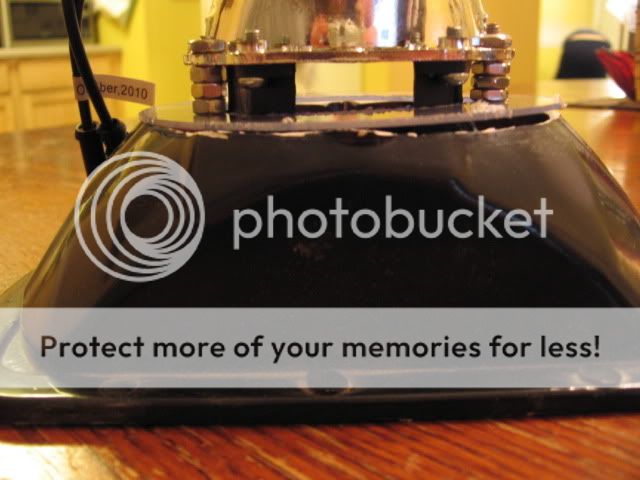
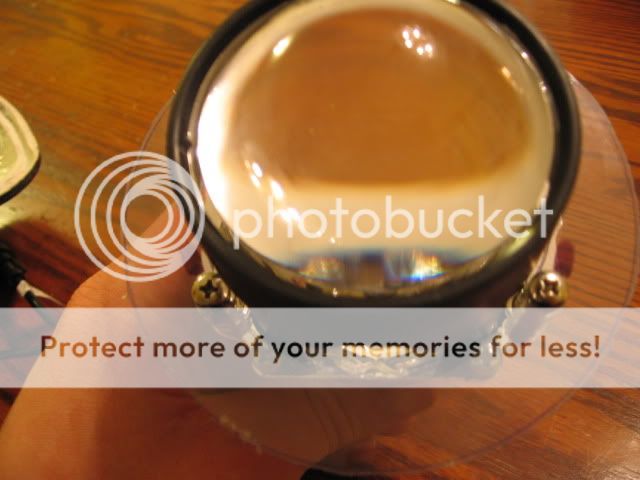
Finally, I found a solution. This wasn't around when I first started looking into a retrofit, and I'm glad someone started making something decent. They're made by a company called Morimoto (japanese I presume), and simply called the "Mini's". They are hands down the smallest bi-xenon projector on the market, and are realatively cheap and readily available.

My parts list is as follows:

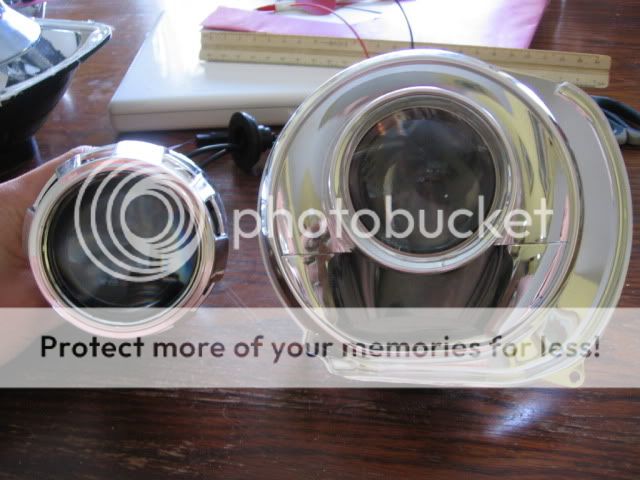
-Morimoto Mini's $120 from TRS retrofitsource.com
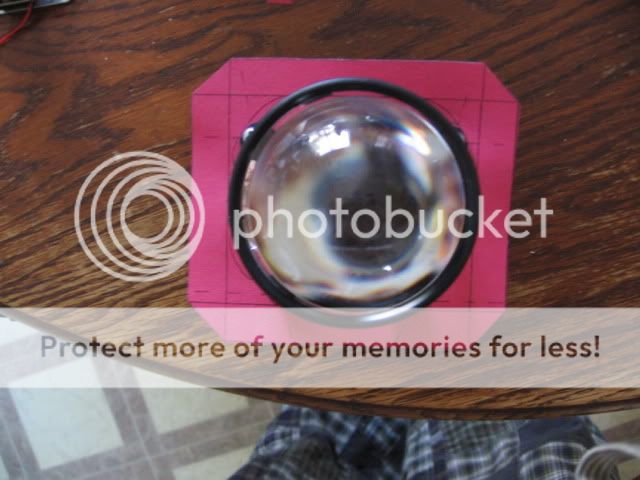
-Gattling gun shrouds $25 same as above
-E46 extended shrouds $15 'economy' option, same source
-Toyota Denso Ballasts free from work
-Philips Ultinon HID H1 bulbs $150 from ebay
-DDM chiwanese H1 HID kit $35 from ddmtuning.com

The phillips bulbs haven't arrived yet, so I ordered the ddm kit to help me with installation until the new ones come in. On TRS's website they distinclty say 'warranty is void if used with ddm style or other cheap aftermarket kits'. So I'm certainly not trying to use the DDM kit for anything but setup. I also ordered two sets of shrouds to play around with, not knowing which would look better on the Jeep.

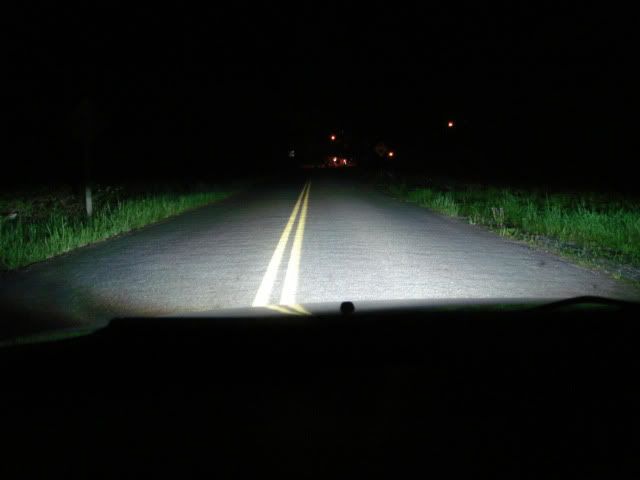
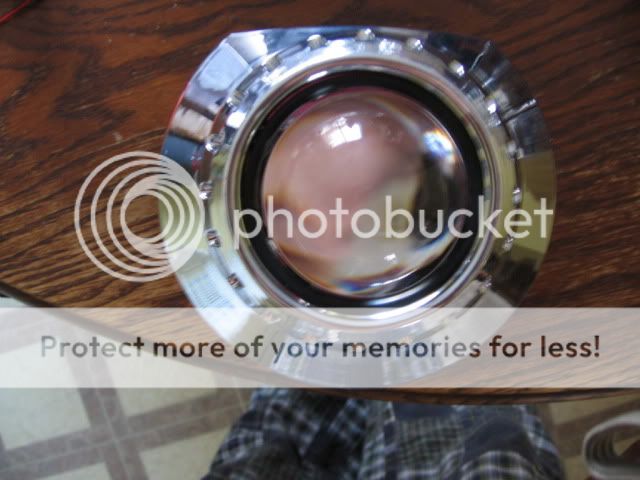
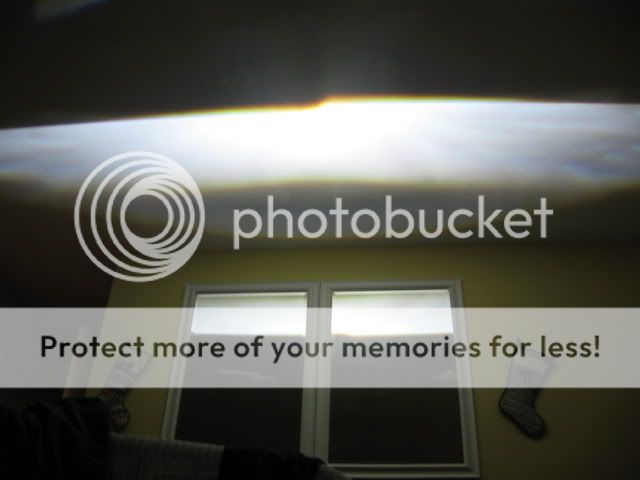
I fired up the projectors tonight to check out the output, and was totally blown away. The cutoff is immaculate, the light spread evenly, and they have excellent width. One thing I did notice, is there is a noticable "hot spot" right in the middle of the beam, directly under the cutoff step. This isn't a problem or negative aspect, but I'm curious to see how it looks when driving.

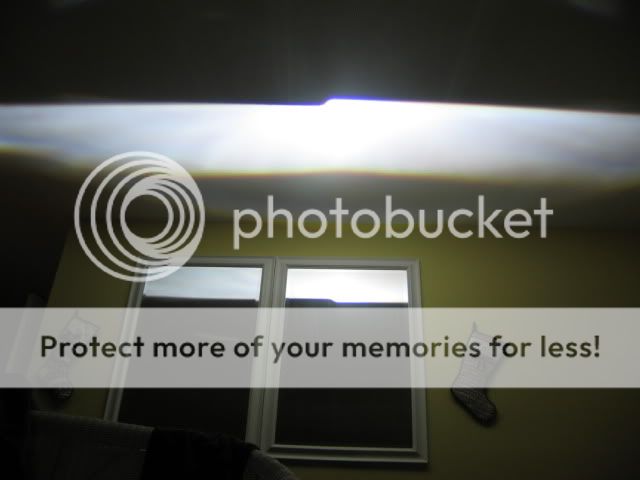
Here are a few output pics and randoms I've found online until I can get some real pics tomorrow. All of these are the same projectors.

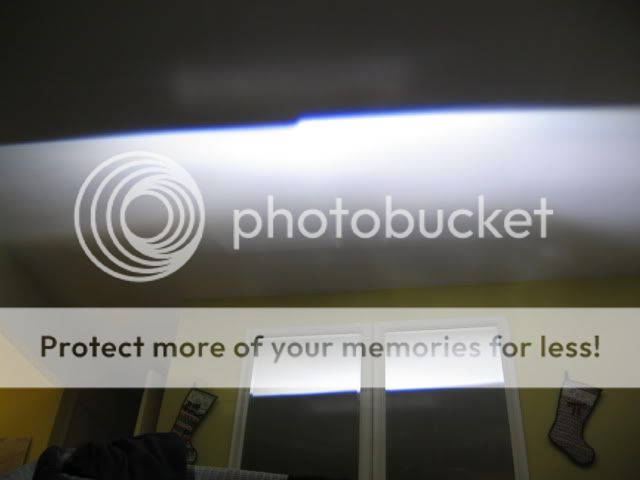
High beams. This looks like a cheap camera, but you can see the hot spots here.
guest_welcome.gif


Comparison to the FXr projector. I think SBXJ has these retro'd.
DSC_0020.jpg


30' wall shot, this is one projector.
DSC_3757h.jpg


Someone's output pics. First is lowbeam, second is high beam.
DSC05051.jpg

DSC05086.jpg


Stay tuned...
 
A few reasons, mostly being the size. I'd like to leave cutting to a minimum. Other than that, they have a more even beam pattern, and a lot more foreground lighting. The FXr's do have a little more width, but as seen in this comparison, the light scatters towards the edges and would have less output directly in front of the car.

FX replicas
DSC_1540h.jpg

Mini's
DSC_3677h.jpg


However, I do like the FX's cutoff better. It seems to not 'frown' as much as the Mini's. But I think with a little shield tweaking this could be improved.
 
Did a little more R&D tonight. Came to a pretty solid conclusion, Morimoto must have put in their time when putting these projectors together. I messed around with almost every possibly lens/spacer/shield combination and couldn't find one that was better than the stock configuration. Some of them were so bad I didn't even bother documenting. Here are a couple progress pics...


The main attraction. VERY small, very light, very simple design. A combination I like.
IMG_8969.jpg


Got the mounting bracket templates made. This will be bolted to the back of the projector, and allow much greater mounting freedom as well as complete beam adjustment on every axis once installed in the housing. It will be CNC cut out of some thin gauge stainless steel. 16 should be plenty strong.
IMG_8973.jpg

IMG_8970.jpg


Here are the projectors compared to the Lexus LS430 single xenons. Still pretty sad they won't work. No. Possible. Way.

Without shrouds
IMG_8971.jpg


With shrouds. Absolutely huge.
IMG_8972.jpg


Here is the template, placed behind the projector, with the E46r shroud installed. Hides it completely.
IMG_8974.jpg


Sorry for the extremely close pics. This was all on the gound in my living room, pounting up at the ceiling.

The stock output.
stock2.jpg


With the stock spacers removed. Seemed to have increased the foreground lighting and width slightly, but added a disgusting yellow colored cutoff, and blurred the output.
nospacers1.jpg


With 2x the stock spacers added. Did put a little more blue color at the cutoff, but distorted the line slightly, and REALLY killed the width. Hard to tell in the pic, but when I was looking at it on the ceiling it seemed to have taken about a foot off of each side. at 8' away that, nothing, but at 100 feet you would definitely notice a huge difference. Also took away a lot from the foreground lighting.
spacer1.jpg


With no cutoff shield, and no lens. Pretty crazy how scattered the light is from just the reflector bowl.
nolens.jpg


With no cutoff shield, but lens added back on. I think this might actually make a decently wide roof or offroad driving light, who knows.
noshield.jpg


And here are the famed LS430 projectors. In the previous Morimoto pics, I could aaaaalmost squeeze the whole output in the picture. Maybe missing a foot or so on each side out of frame. With the LS's, it was probably a good 3' out of frame on each side. The output is also MUCH more evenly spread, whereas the Morimoto's seem to have a lot concentrated in the center, just below the cutoff. I love how the color extends through almost the entire cutoff too.
ls1.jpg


And just for kicks, I threw in some output pics of my Hella 500 fog beams converted to HID. I was really surprised how the output literally didn't change at all. Just more intense and different color with the HID's. I like.
Stock 55w h3 bulb
fog2.jpg


3000k HID's
fog1.jpg
 
Did you get any other shrouds beside the E46's? They don't fit in a cherokee housing that well, I pretty much cut away all of the shroud. I wished I had a couple different shrouds when I did the retrofit
CIMG1086.jpg
 
Yea I got the gatling gun ones as well. They're a fraction of the size of the e46's, but my lens will also be much closer to the glass. We'll have to see how it all works out.
 
I like where this is going......keep it up man. Maybe one day I will do a retrofit in my jeep, for now the ddm kit and autopals work for me.
 
Alright finally had some time for a little more R&D. I like how things are coming along. I got the housing cut for the projectors to be inserted, and mocked up the mounting trim ring. I made it out of some clear plastic so I could easily see exactly what was going on and get the perfect shape finalized. Here's some pics...

Housings cut open. Good thing this is only the prototype stage. These things were a pain in the a$$ to get opened up. I ended up just shattering the glass and picking the pieces out. When I get the new one's I'm not even gonna bother backing them, just break and remove. Also cut the back open for the projector.
IMG_9031.jpg

I used some mini sawblades from harbor freight to cut them open, in conjunction with my dremel. I think these housings are made out of a combination of fiberglass and plastic. The dust is unbearable...
IMG_9032.jpg


Here is the mounting ring that will e used to center the projector, and also provide a means for rotational adjustment. Vertical/horizontal can be done through the stock adjustment screws on the jeep.
IMG_9033.jpg

When I make the final setup, these will be CNC cut out of some aluminum or stainless, and then JBwelded to the back of the cut open housing.
IMG_9035.jpg


I had to put some spacers (nuts for now) in between the projector and the ring to get the correct depth within the housing. This worked perfect with the Morimoto's shroud screw holes. I won't be using the stock shrouds anyway... When the finals are made, I'll get some sleeves made the correct length for spacers.
IMG_9034.jpg


Here are a couple shots of the ring sitting on the housing. I'd like to get some pvc pipe or maybe a metal funnel of some sort, and cover the entire thing when it's finished to provide weather and moisture protection.
IMG_9037.jpg

Another shot of the spacers. The lens of the projector is about 1/4" shy of being flush with the lens (where it would be) of the housing. I'm going to have a custom cut piece of lexan on the front of the housings, so this added a little more depth to the overall design. The stock glass lens actually sticks out about 3/4" from the plastic of the housing, but glass has a funny way of distorting optics. Especially cheap glass...
IMG_9038.jpg

IMG_9039.jpg


A shot from head on. I think this overall design will be much sturdier and much cleaner than some of the others that I've seen, With bolts drilled through the plastic housing and studs epoxied all over the place. This will also make it MUCH easier to adjust, see below.
IMG_9040.jpg


Here's how it will eventually be adjusted. On the mounting ring, I will have slots machined right near the edge, so the entire projector can rotate. Once it's in the exact spot all I have to do is snug down the machine screws. the slors are represented here by the sharpie marks to the left and right of the bolts. Before the final seal-up of the front lexan, I'll epoxy ro glue the bolts into the projector holes so they stay put. That way I can still adjust everything without needing to get inside the housing. Just loosen up the bolts on the back and rotate as desired.
IMG_9041.jpg
 
What housings are you using for the retrofit?
 
Those were some cheapass "diamond cut" ones from ebay. When I get all the design flaws straightened out I might buy some Autopal diamond cut housings or find a better set. Not positive, but I think the Autopal's are metal? I certainly don't remember them feeling so cheasy and light like these ones did. If I dropped these, I'm pretty sure they would crulmble into a thousand pieces. You can already see the snapped corner from trying to get the lens off. That was after the light was in the oven at 300 degrees for 15 minutes.
 
Those were some cheapass "diamond cut" ones from ebay. When I get all the design flaws straightened out I might buy some Autopal diamond cut housings or find a better set. Not positive, but I think the Autopal's are metal? I certainly don't remember them feeling so cheasy and light like these ones did. If I dropped these, I'm pretty sure they would crulmble into a thousand pieces. You can already see the snapped corner from trying to get the lens off. That was after the light was in the oven at 300 degrees for 15 minutes.

Yeah you're right the autopals are metal, build quality on them is actually not bad for them being cheap. I would think the metal on the autopals would be easier to work with than whatever those are made from.
 
So you actually got those things to pull apart? I bought the black "projector" set to modify. I just gave up on trying to separate the lens from the housing. Ended up taking a big chip out of the glass. After modifying a set the way I wanted, I will probably buy another set this summer to build it a little better, as I'm not completely happy with how I chopped up my current headlights.

You have a great idea on mounting. How are you going to seal it up?
 
Nope, didn't get them to pull apart. I ended up taking a sharp punch, a hammer, and shattering the middle. Then pulled out all the pieces. I've gotten a set of Autopal's opened before with 'relative' ease, so I think I'll use them again for the final set.

I've heard mixed reviews about using a glass lens. Some people say it distorts the cutoff and messes with the optics. For this reason I'll be using lexan for the front lens, and sealing it with 3m's window weld. The back, I'm still debating how to enclose everything. I might cut an aluminum funnel to fit, and make a cap for the back.
 
Updates!!

Well I tossed out the cheap ebay housings and threw out the bread for some Autopals. Honestly, I would have paid twice what I did for them. They are EXTREMELY easy to work with compared to the cheap ones. They lens' came right off, with only 3 minutes in the oven at 275 degrees. With a butter knife. I was in awe of how easy they popped off.

The excess glue cleaned up just as easily. I was able to get every spot of glue off of the housing with absolutely no peeling to the visible chrome bowl. I also re-designed the trim ring some. Making it smaller, allowing me to retain more of the reflector bowl for better strength and overall balance. I can now use a smaller shroud if I want, too.

Another difference between the two is the actual chrome material used in the bowl. The original cheapies had a very reflective finish with lots of waves and ripples in the chrome. Made them look even more cheap. If you touched the chrome, is would dent, and if you hit it hard enough it would chip/peel off of the fiberglass. The Autopals have a more textured finish, which makes them appear a little dull when compared to the cheap ones. But the finish is strong, and the reflector pattern has more ridges which I think blends with the shroud a little better. The Autopals were MUCH easier to cut as well. The metal was not as thick as the fibertrash, which allowed me to get a perfectly even hole all the way around, and no stupid dust or fumes. Here are some pics.

The backs of the housings. Autopals obviously on the right. Smaller, more even hole. No city light. No broken edges or cracks from PRYING the lens out.
IMG_9048.jpg


The fronts of the bowls. No glue stuck in the lens groove, and again no broken corners. You can kind of see how it's a tad duller as well.
IMG_9050.jpg


Depth comparison. I was able to leave a lot more material on the Autopals.

IMG_9051.jpg


The streamlined mounting ring. Much smaller, with rotational adjusting slots cut. Still prototyped, the final will be cut out of aluminum.

IMG_9054.jpg


How it will be epoxied to the back of the housing.

IMG_9055.jpg


And finally how it will all look once it's sealed up. I put the projectors behind the Autopal's glass lens to check out the optics, and they totally destroyed the output. I'll be sticking with a polycarb custom cut lens like originally planned.

IMG_9056.jpg

IMG_9057.jpg


Wow, those are looking sharp, can't wait to see how this works out for you. I may be interested in doing this eventually. I'm just in the process of getting the jeep to a good point before I buy a house. So not too much money will be spent on anything that doesn't have to do with axles, maintenance or frame stiffening.
 
I'm very interested in your work. I have a pair of Hella single beams I have wanted to retro.

Your Autopal job looks much better. The rough sketch was, rough.

Is the Autopal glass e-code or dot? My concern with a polycarb front is loosing that precious space, instead of the glass protruding out a bit.
 
Yea I'm really blown about the extra inch or so that I'm loosing with the flat lense. I've been thinking about how I could make some sort of spacer? Or maybe vacuum molding a custom plastic lens? I know there are a few mfg's that use a plastic lens but they are usually cheap and crack/fade very quickly. Of course all ideas are welcome :)

The Autopals are not DOT approved. It says right on the back (of both the diamond cut and e-codes) "for offroad use only".
 
One way I saw to gain some of the space back is to use EDPM to adhere the poly carb on. It seems to fill a decent amount of space while giving a water-tight seal.
retrofit%20%2813a%29.jpg

retrofit%20%283a%29.jpg


I like the idea of a spacer as well.

I haven't looked far into vacuum forming, but it seems awfully expensive for a lens solution. I did look into heat-forming lexan by drooping it over a mold (extra projector lens) in the oven. Unfortunately it seems that temperature control is difficult either with an oven or heat gun. My direction with the molding would be to obtain a lens similar to urbanyan's, just not stick out quite that far.
 
Well I've made a ton of progress here. The aluminum bracket/trim ring/holder took a lot more effort to make than I was anticipating. I had a friend with a CNC router, but it's used for bigger things so the tolerance is set at 1/16" max. Not good enough for this project. I had to make the entire thing by hand. Started with a 2-3/4" hole saw, and hand sanded until it was a perfect fit over the projector. Then had to drill some holes so I could get it aligned right. Then drilled some more holes. Then elongated some holes for rational adjustment. Then JB welded the whole thing to my cut open housing. While I'm waiting for it to dry I'll try and upload some pics. I'm VERY pleased so far with how it's turning out.
 
Here we go...

Taped on the trim ring so I could quick epoxy it into place.
IMG_9106.jpg


Used some 5 minute JBweld to hold it in place, followed by regular JBweld.
IMG_9108.jpg


IMG_9118.jpg


Here you can see the slots that give me rotational adjustment.
IMG_9115.jpg


IMG_9109.jpg


IMG_9110.jpg


IMG_9111.jpg


IMG_9112.jpg


IMG_9116.jpg
 
Back
Top