• Welcome to the new NAXJA Forum! If your password does not work, please use "Forgot your password?" link on the log-in page. Please feel free to reach out to [email protected] if we can provide any assistance.

1987 Comanche build...The War Machine

Good job man. Any plans for the black buckets ?

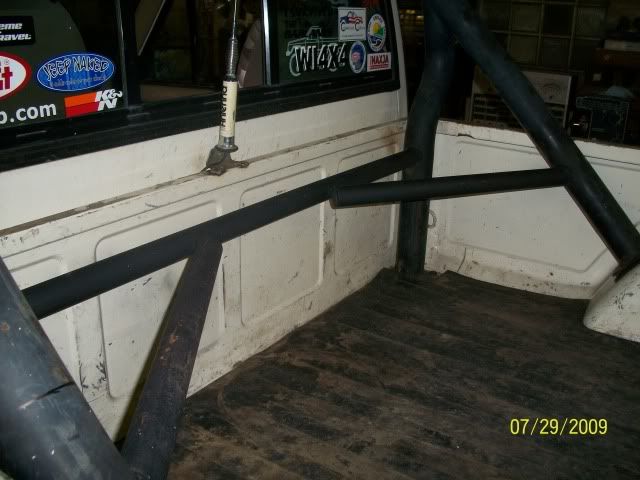
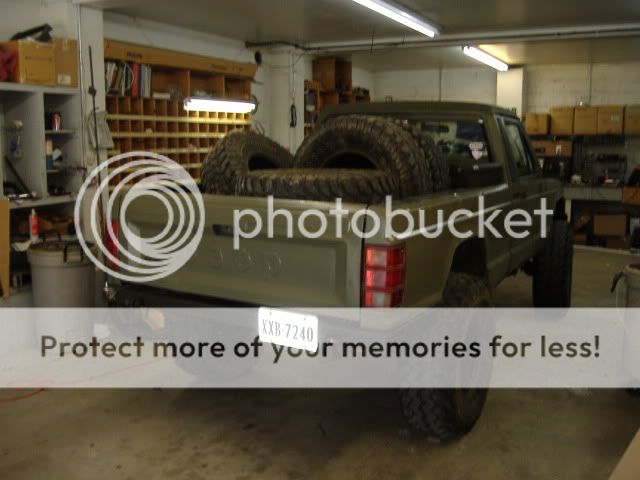
yeah. the black buckets are currently just borrowed from the 86 comanche....it has an OEM black bucket interior (took me YEARS to piece together) and I just needed buckets to get this thing back together. I'll be doing an interior swap on a buddy's xj from tan to green in the near future, so I'll be getting his nice tan wing back buckets to put in this truck.

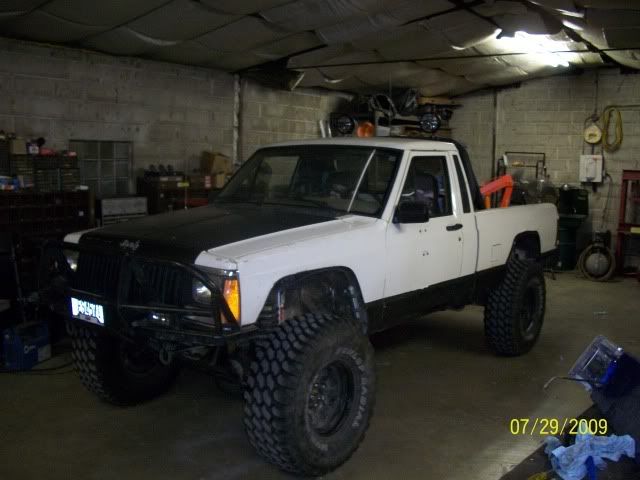
the 86 (a.k.a. 3800) will be getting rebuilt very soon now...and I am debating on whether or not I want to leave it the traditional body style, convert it to just a 97+ front clip, fenders, flares, and mirrors,...or if I want to do a full on 97+ conversion. the only thing stopping me from doing the full on conversion is that then I would have the added cost of needing all aftermarket gauges, as I cannot adapt the 97+ gauge cluster to function w/o the 4.0 ECU....and since I'm not using the 4.0 (the buick 3800 I put in the truck is BUILT and much faster than a 4.0, not to mention the 24 to 29mpg I got with it)....I can't make it all work together.

IF I do a full on 97+ conversion, I will probably keep the black interior and store it until I get a nice clean short bed 4.0 to put it in. I might be convinced to sell it though.
 
wow....


ya, wow.

nicely done.

lol, thanks.

haven't rendered anyone speachless since I broke up with my ex at her sister's wedding:laugh:
 
oh....

exact specs on the truck right now:

Electrical/Cooling:
complete 4.0 H.O. conversion from a 1995 xj. includes interior and engine bay.

Engine:
4.0 H.O. is mopar reman with 6k miles on it now.
it's bored .030
2001 TJ intake. good for 15hp/30ft/lb torque
62mm bored TB
19lb injectors
borla header, downpipe, fake cat (hollow and tube sleeved through it), and borla muffler with stock tail pipe (which is being reworked soon)

Tranny and axles:
aw4, 99 xj floor shifter
np231 with SYE
dana 44 rear 4.09 gears
dana 30 disconnect front. welded, 4.11 gears. I need to install the SPICER 260 ujoints which I modified with grease zerks on each end for longer life. pretty much stronger than a 297 ujoint, but with the added bonus of not stretching the ears
manual disconnect air switch from a semi truck to control the front axle CAD

Driveshafts:
double cardan front and rear drive shaft

Lift:
RC 6.5" front coils
RC 4.5"-6.5" adj. control arms (old style before the new ones with johnny joints/superflex joints)
RE HEIM track bar and some other track bar bracket...will be replaced with custom track bar when I pull the axle in 2 weeks to truss it and relocate control arm mounts
potentially 35x12.50 dunlop radial mud terrains on cragar soft 8's, if my brother will sell them to me. otherwise another set of 35's will end up on it.
Edelbrock Extreme Travel IAC Remote Reservoir 6.5" lift shocks...11.25" travel per shock

Bumpers:
custom (home made) front and rear. 4 clevis mounts etc.

Interior:
XJ swivel bucket seat pedistals, 2dr buckets (black but switching to tan). 3" higher than stock MJ buckets....which I like even though I'm 6'2" because of the extra visual
YJ tuffy lock box center console with radio relocated to lock box
CB mounted where radio used to be (perfect fit too)
camo headliner
woodgrain trim
"sectioned" carpet for easy cleaning.
factory sliding rear window

Accessories/Options:
power windows
power locks
power mirrors
cruise control
a/c (need to hook up)
OBA (half built needs installed)
vanity mirrors
OHC (needs covered and installed)

Exterior:
trimmed wheel wells for more tire clearance

Body Protection:
factory front skdi plate, modified to be easier to take off
factory t-case skid
factory gas tank skid
aftermarket front diff skid (krusty's....welded in his name to add strength and remove stupidity)
unknown aftermarket rear diff skid

Stereo:
basic pioneer deck, 6" pioneer speakers in doors
10 disc CD changer (forgot which brand) with seperate controller for it
factory 4x6 rear speakers and brackets


things I need to do:
truss front axle between UCA mounts. truss outer C's. raise LCA and UCA mounts 2.5" to decrease control arm angle. redesign shock mounts.
bedline bed and floors
finish mounting plates for roll bar and install. install OBA tank and relocate both batteries to rear.
redesign factory air filter box and flip intake to the back of it then route it to suck from inside the cowl
build cowl hood
cut out the old front inner fender wells and smooth out for more tire clearance.
build rock rails...design allows them to tie into the frame at 6 places each side, as well as having the roll bar tie into them
modify rear bumper to "boatside" the rear
plate front fenders and rear bedsides then build tube flares
build "belly skid" as well as custom cross member that uses mounting points inside the frame rail instead of on the bottom.
make a bracket to delete the body side bracket of the 4x4 shifter
add more lights...rock lights etc.
swap out seats for tan seats.
make half doors. current ones are removable
paint truck military green with black accessories
eventually regear to 4.88's
eventually install selectable lockers
finish OBA setup using York compressor

luckily, I have everything I will need to to all of that, save the painting material and new gear sets and lockers
 
Last edited:
Awesome work! Very nice indeed. :05of5:
 
thanks guys. and yeah, this is probably the most through thread I've done on that truck...there are TONS more pics but I tried to limit it down.
 
haven't rendered anyone speachless since I broke up with my ex at her sister's wedding:laugh:[/QUOTE]


NOW THATS MESSED UP:roflmao::gee:

Awesome build!
 
you need more wheeling pics
l_b16114280c4d42c081792fe93d386e81.jpg
 
I want the old SkiDoo!
 
I can't remember what kind of leaf perches they are....I'll find out
 
Very Cool... I like the stance and what you did with the interior.

I didn't read every caption. Are you planning on painting it?? Color?? Also, how long has it taken you so far??

Keep it up the work..

E
 
Thanks. I'll post up how the interior is now within the next few days

I plan on painting it a military (olive drab) green. hoping to do that within the next week or so. a buddy has a case of some OD green spray cans that I'm gonna trade him an np231 output housing and shaft for.

the original build took me 2 weeks. that was it running and driving.

within 6 weeks of the project, I had the front bumper and the RC control arms in it.

within 5 months, I had blown the old 4.0 and did the H.O. conversion (which took one weekend to get it running, and the following saturday to finish).

the rear bumper took a weekend.

and the interior is just an upgrade-as-i-go kinda thing.

but basically it's been a year since I originally built it, and I finally worked up the guts to chop the wheel wells and (eek) rust free box to fit my needs.

pretty much the main things now are to re-do the rear bumper, and get the roll bar and rock rails finished and installed.

another 4 months or so and the truck should be as done as it will get.

-Pat
 
here's the slow progress. thanks (again) to my friends Aaron, Zach, Steph, and Kelly for their help (or moral support in the case of the girls lol).
I've mounted up my roll bar. will need to cut out the bottom 7-8" of the rear tubes, as they're rusted out and the mounting plates are virtually gone
100_0598.jpg

also made some non-structural (SCH40 tube) additions to the roll bar to be used as supports for the on board air tank and Hi-lift. the welder ran out of gas right when I finished tac-welding it, so I'll finish when I finish the rear tubes out.
100_0605.jpg

mounted up the KC lights. I stole the 100watt bulbs out of them to upgrade my bosch driving lights when the driving lights burnt out....will replace with a set of bulbs from a chrome pair of KC's that I have laying around (I don't generally go for shiny)
100_0592.jpg

100_0593.jpg

100_0594.jpg

100_0596.jpg

then I polished up the old peterbuilt air tank (don't like to paint aluminum, and I even tho shiny isn't exactly my thing, this seems to be a nice touch), and mocked it and the Hi-lift up
100_0591.jpg

then I mocked up the in and out side of the tank with the pressure switch and check valve on the input side, and the regulator and blowoff valve on the output side. may need to put the blowoff valve on the input side...still thinking about that, which is why it's just mocked up
100_0587.jpg


100_0588.jpg


100_0589.jpg


100_0590.jpg

and this is the girl's addition to the project
100_0599.jpg

100_0602.jpg

the spare tire will slide in under the mounting platform for the tanks, and have a retainer and a lock to keep people from stealing it. now I need to figure out where to put my tools.
also, the batteries will sit in the front corners of the bed...gonna have to make boxes for them.
turning out decent. I won't be working on it much for a few days as I'm volunteering at the Racine county fair this week as I always do
 
Last edited:
oh....
Interior:
XJ swivel bucket seat pedistals, 2dr buckets (black but switching to tan). 3" higher than stock MJ buckets....which I like even though I'm 6'2" because of the extra visual

I have those same seats (also 6'2") and I like them for the same reason, also they give me better leg room which I need more than head room anyways. I do hit my head getting in/out sometimes though.

Did you have to space them out (closer to doors) from the original mounting points in order to fit the center console in? Mine seem too close together.

Sweet looking MJ and nice build thread. :thumbup:
 
I plan on painting it a military (olive drab) green. hoping to do that within the next week or so. a buddy has a case of some OD green spray cans that I'm gonna trade him an np231 output housing and shaft for.

Nicely done MJ and great write-up!

not to hijack at all but here's a couple pics of mine with the OD green for inspiration...i guess...lol. It's sitting at about the same height on 35s as well.
DSCF2953.jpg

DSCF3156.jpg
 
Back
Top