- Location
- Lakeside, CA
XJ Dana 44 Ford Explorer Disc Conversion Howto
Ok, I've been doing some research on converting my XJ rear Dana 44 over to rear discs. Here's what I found during research and what made me go this route, it's unbelievably cheap and easy to do also. The other thing is that lots of guys use crown Vic backing plates/calipers, which are the same rotor as the Explorer, but the calipers face opposite directions. Plus once you have them facing the same way, you have to pull a caliper to bleed them. So anyway onto the Explorer stuff. I used brakes off a 95 explorer.
First were the measurements. I got these out of the 2008 Teraflex Catalog pages 91 and 92.
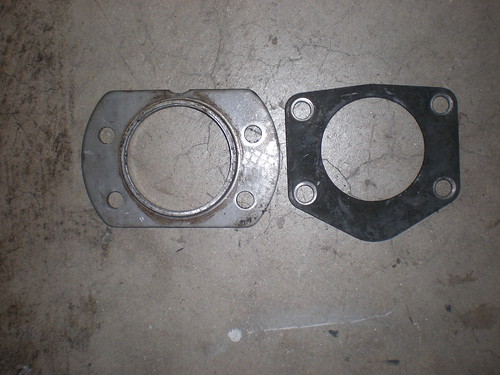
There are basically 2 patterns for the retaining plates/backing plates on the Jeep D44. The new style which matches the TJ and ZJ backing plates, and the old style which is closer to the Ford backing plates.
The new style Jeep backing plates aren't even close as evidenced by the shiny 03+ rubicon retainer plate next to the XJ D44 retainer plate. The rubicon plate is off both horizontally and vertically, yet most guys modify this plate for disc brakes.
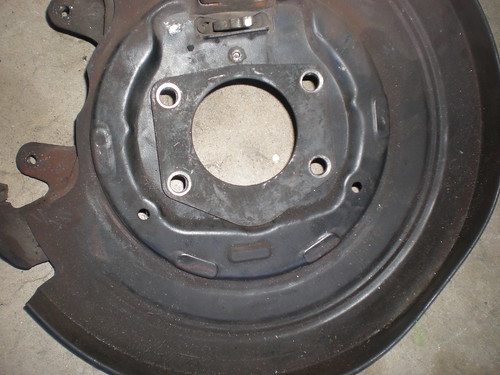
I chose the Ford explorer rear discs for this conversion because of the spacing of the backing plate bolt holes. Very easy to modify the backing plate to fit with a die grinder, and here's why.
The 8.8" 95-01 Explorer rear disc backing plate has a 2" by 3 9/16" bolt pattern.
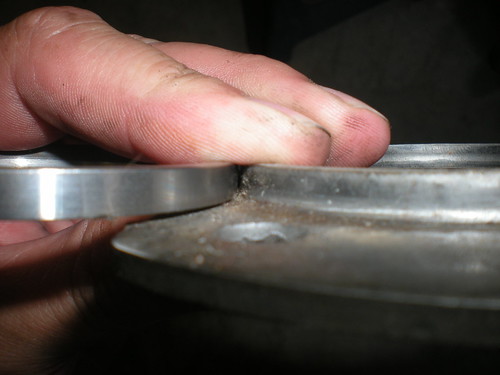
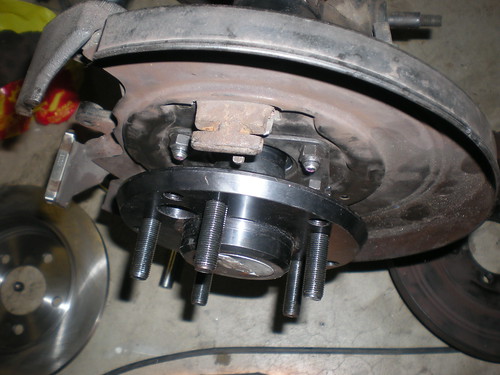
The 86-90 XJ D44 has a 2" by 3 11/32" pattern, which gives a horizontal difference of 7/32". So the holes in the explorer backing plates need to be elongated to the inside and it will bolt right up to the XJ housing.
Here's the XJ retainer plate over the explorer backing plate after elongating the holes with my die grinder. This is a stock XJ retainer plate.
Next problem, hat height. The TJ and XJ use the same rear D44 axle shafts, and the TJ has disc brakes on the rubicon. So, I looked up hat height for the two rotors. The Explorer rotor is a 2.275 height and the rubi has a 2.295 height for a difference of .020" which is fairly negligible considering the explorer caliper is floating over the disc. So this really isn't a problem.
Third problem is the center hole of the rotor, I'm lucky, I've got a neighbor whose an active gear head with a lathe. I think he said he removed about .015" from each rotor. It was fairly negligible, and could probably be done with a flapper wheel and a few minutes worth of work with a die grinder. I prefer the neighbor with the lathe resource though as that centers the hole. Or you can have a machine shop do it.
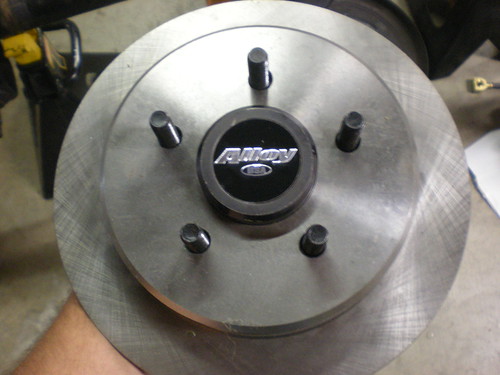
Here's the rotor installed on the axle shaft.
Fourth and final problem. How to make up the for the difference in thickness between the Explorer backing plate and the drum backing plate. First some dimensions of these two parts.
The Ford Explorer backing plate is .350" thick.
The drum backing plate is .125" thick for a difference of .225".
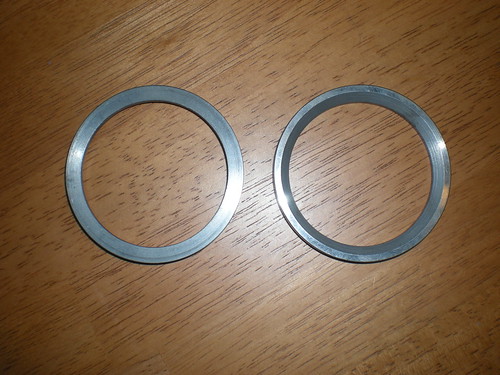
One meet and greet later, I had the answer. Mike aka Willy51 mentioned that Currie sold the Teraflex kits and they used a spacer. So a call to Teraflex had the answer. For $6.95 each, I got the spacers for the Teraflex kit. I ordered 4 spacers. The teraflex preload spacers are PN 86261 and you just need to call and ask for the preload spacers for the early jeep/dana 44 disc brake kit.
Here's the Teraflex preload spacer. Notice that it's tapered on one side, the tapered side goes towards the axle shaft seal. The spacers themselves are .226" thick, by 2.850" diameter and has a .250 wall diameter. It looks like it was turned from 2 7/8"x.250" DOM or chromoly tubing as I see no evidence of a seam.
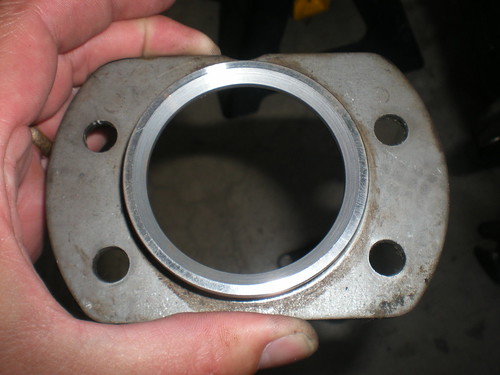
Here's the spacer thickness compared to the Rubicon retainer plate.
And in diameter:
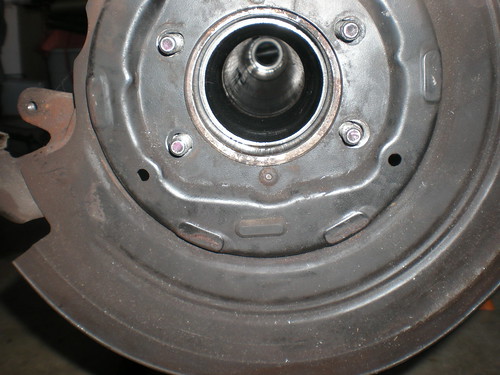
Finally with the backing plates modified they're test fit to the housing. One thing I did do was to drill out the bottom rivet that holds the dust shield in place so the retainer will fit flat. It's still shown in this picture, but has been removed for final assembly.
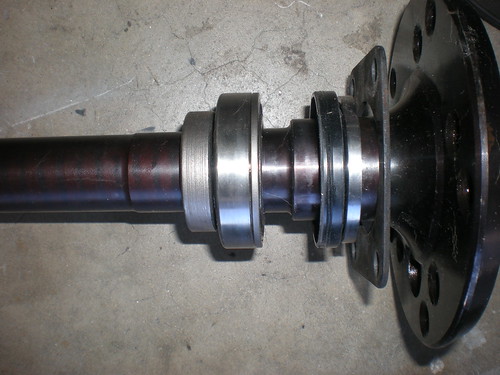
With that out of the way, it was time to press bearings onto the shafts. Here's how the stack went from inside to outside, or left to right in this picture. Bearing retainer, bearing, axle seal, preload spacer with taper towards seal, retainer plate.
Now to install the axle and bolt down the retainer plate. Here's a fun part that I think I'm going to fix with the welder. The preload spacer wants to drop down against the axle. There's plenty of room so I'll put a couple tack welds to hold it centered on the retainer plate.
Here's the disc installed before putting on the caliper.
Finally the caliper with brake pads.
This axle was just used to mock things up. The backing plates are coming back off and everything is getting cleaned up.
For brake lines, I'll be welding some 8mm x16mm bolts onto the housing, and using 2 explorer passenger side lines, and modifying or replacing the drum hard lines. I'll post more pictures as we finish routing the brake lines and install the other axle.
The cost breakdown for this conversion is:
$45 backing plates/calipers. Or if you get lucky like Tom did, they charge you $20.
About $200 at napa for rotors, brake pads, caliper kit, ebrake shoes.
If you're lazy, you can buy this kit from Teraflex or Currie for around 500 bucks and it doesn't come with the brake lines or ebrake cables, but it does use all new parts.
This still leaves the question of ebrake cables.
There are three ways to do this.
One: is to cut the spring off the stock cable, fold it over and use cable clamps and a thimble to keep the ebrake arm from cutting into it.
Two: Use the Lokar clevis kits and modify them for the drum cable end.
Three: Use the Lokar universal ebrake cable kit and build your own cables.
Four: Liberty cables... Thanks to the 8.8 ebrake thread and xjohnnyc PN 52128510AG. Also mentioned is grand cherokee cables. Check the length. I'm running 2 passenger side YJ cables with an extended rod on the ebrake handle.
Being the cheap bastard that I am, I'll probably opt for #2, but look seriously at #1.
So to sum up what's happened so far. 95-01 explorer brakes, elongate the mounting holes to the inside. Give neighbor a beer and have him machine the center of the explorer rotors to fit over D44 axle shafts. Get spacers from Tera, or machine your own. Use two passenger side explorer brake lines and weld a bolt to the axle housing to mount them, then rebend/redo hardlines into the explorer lines.
Oh for proportioning valves, I picked up a disc brake prop valve and will use the guts from it in my XJ valve. I've already got the dual booster master cylinder from a 95 XJ.
I'll post the brakeline pictures later this weekend or next week sometime.
Ok, I've been doing some research on converting my XJ rear Dana 44 over to rear discs. Here's what I found during research and what made me go this route, it's unbelievably cheap and easy to do also. The other thing is that lots of guys use crown Vic backing plates/calipers, which are the same rotor as the Explorer, but the calipers face opposite directions. Plus once you have them facing the same way, you have to pull a caliper to bleed them. So anyway onto the Explorer stuff. I used brakes off a 95 explorer.
First were the measurements. I got these out of the 2008 Teraflex Catalog pages 91 and 92.
There are basically 2 patterns for the retaining plates/backing plates on the Jeep D44. The new style which matches the TJ and ZJ backing plates, and the old style which is closer to the Ford backing plates.
The new style Jeep backing plates aren't even close as evidenced by the shiny 03+ rubicon retainer plate next to the XJ D44 retainer plate. The rubicon plate is off both horizontally and vertically, yet most guys modify this plate for disc brakes.
I chose the Ford explorer rear discs for this conversion because of the spacing of the backing plate bolt holes. Very easy to modify the backing plate to fit with a die grinder, and here's why.
The 8.8" 95-01 Explorer rear disc backing plate has a 2" by 3 9/16" bolt pattern.
The 86-90 XJ D44 has a 2" by 3 11/32" pattern, which gives a horizontal difference of 7/32". So the holes in the explorer backing plates need to be elongated to the inside and it will bolt right up to the XJ housing.
Here's the XJ retainer plate over the explorer backing plate after elongating the holes with my die grinder. This is a stock XJ retainer plate.
Next problem, hat height. The TJ and XJ use the same rear D44 axle shafts, and the TJ has disc brakes on the rubicon. So, I looked up hat height for the two rotors. The Explorer rotor is a 2.275 height and the rubi has a 2.295 height for a difference of .020" which is fairly negligible considering the explorer caliper is floating over the disc. So this really isn't a problem.
Third problem is the center hole of the rotor, I'm lucky, I've got a neighbor whose an active gear head with a lathe. I think he said he removed about .015" from each rotor. It was fairly negligible, and could probably be done with a flapper wheel and a few minutes worth of work with a die grinder. I prefer the neighbor with the lathe resource though as that centers the hole. Or you can have a machine shop do it.
Here's the rotor installed on the axle shaft.
Fourth and final problem. How to make up the for the difference in thickness between the Explorer backing plate and the drum backing plate. First some dimensions of these two parts.
The Ford Explorer backing plate is .350" thick.
The drum backing plate is .125" thick for a difference of .225".
One meet and greet later, I had the answer. Mike aka Willy51 mentioned that Currie sold the Teraflex kits and they used a spacer. So a call to Teraflex had the answer. For $6.95 each, I got the spacers for the Teraflex kit. I ordered 4 spacers. The teraflex preload spacers are PN 86261 and you just need to call and ask for the preload spacers for the early jeep/dana 44 disc brake kit.
Here's the Teraflex preload spacer. Notice that it's tapered on one side, the tapered side goes towards the axle shaft seal. The spacers themselves are .226" thick, by 2.850" diameter and has a .250 wall diameter. It looks like it was turned from 2 7/8"x.250" DOM or chromoly tubing as I see no evidence of a seam.
Here's the spacer thickness compared to the Rubicon retainer plate.
And in diameter:
Finally with the backing plates modified they're test fit to the housing. One thing I did do was to drill out the bottom rivet that holds the dust shield in place so the retainer will fit flat. It's still shown in this picture, but has been removed for final assembly.
With that out of the way, it was time to press bearings onto the shafts. Here's how the stack went from inside to outside, or left to right in this picture. Bearing retainer, bearing, axle seal, preload spacer with taper towards seal, retainer plate.
Now to install the axle and bolt down the retainer plate. Here's a fun part that I think I'm going to fix with the welder. The preload spacer wants to drop down against the axle. There's plenty of room so I'll put a couple tack welds to hold it centered on the retainer plate.
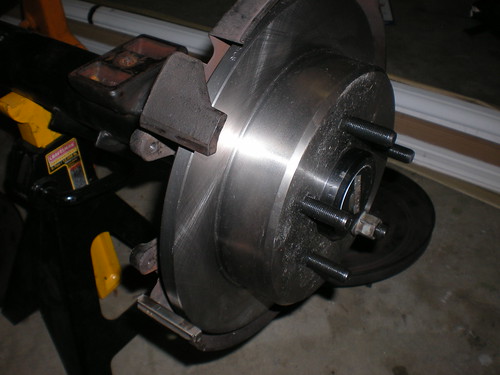
Here's the disc installed before putting on the caliper.
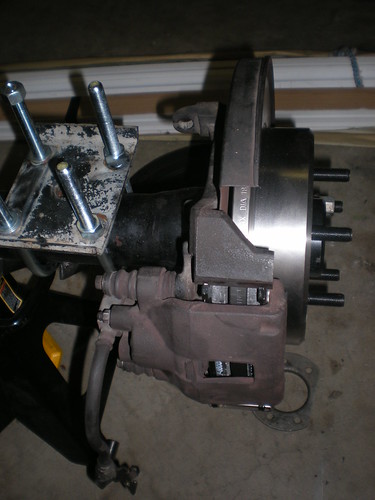
Finally the caliper with brake pads.
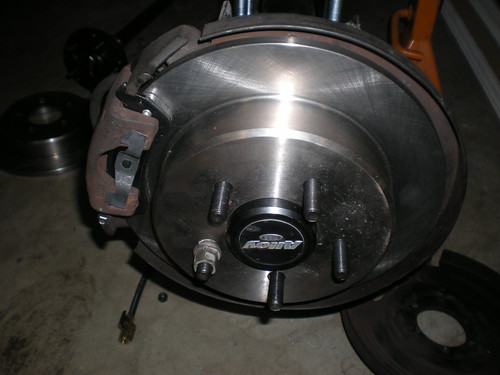
This axle was just used to mock things up. The backing plates are coming back off and everything is getting cleaned up.
For brake lines, I'll be welding some 8mm x16mm bolts onto the housing, and using 2 explorer passenger side lines, and modifying or replacing the drum hard lines. I'll post more pictures as we finish routing the brake lines and install the other axle.
The cost breakdown for this conversion is:
$45 backing plates/calipers. Or if you get lucky like Tom did, they charge you $20.
About $200 at napa for rotors, brake pads, caliper kit, ebrake shoes.
If you're lazy, you can buy this kit from Teraflex or Currie for around 500 bucks and it doesn't come with the brake lines or ebrake cables, but it does use all new parts.
This still leaves the question of ebrake cables.
There are three ways to do this.
One: is to cut the spring off the stock cable, fold it over and use cable clamps and a thimble to keep the ebrake arm from cutting into it.
Two: Use the Lokar clevis kits and modify them for the drum cable end.
Three: Use the Lokar universal ebrake cable kit and build your own cables.
Four: Liberty cables... Thanks to the 8.8 ebrake thread and xjohnnyc PN 52128510AG. Also mentioned is grand cherokee cables. Check the length. I'm running 2 passenger side YJ cables with an extended rod on the ebrake handle.
Being the cheap bastard that I am, I'll probably opt for #2, but look seriously at #1.
So to sum up what's happened so far. 95-01 explorer brakes, elongate the mounting holes to the inside. Give neighbor a beer and have him machine the center of the explorer rotors to fit over D44 axle shafts. Get spacers from Tera, or machine your own. Use two passenger side explorer brake lines and weld a bolt to the axle housing to mount them, then rebend/redo hardlines into the explorer lines.
Oh for proportioning valves, I picked up a disc brake prop valve and will use the guts from it in my XJ valve. I've already got the dual booster master cylinder from a 95 XJ.
I'll post the brakeline pictures later this weekend or next week sometime.
Last edited:
")
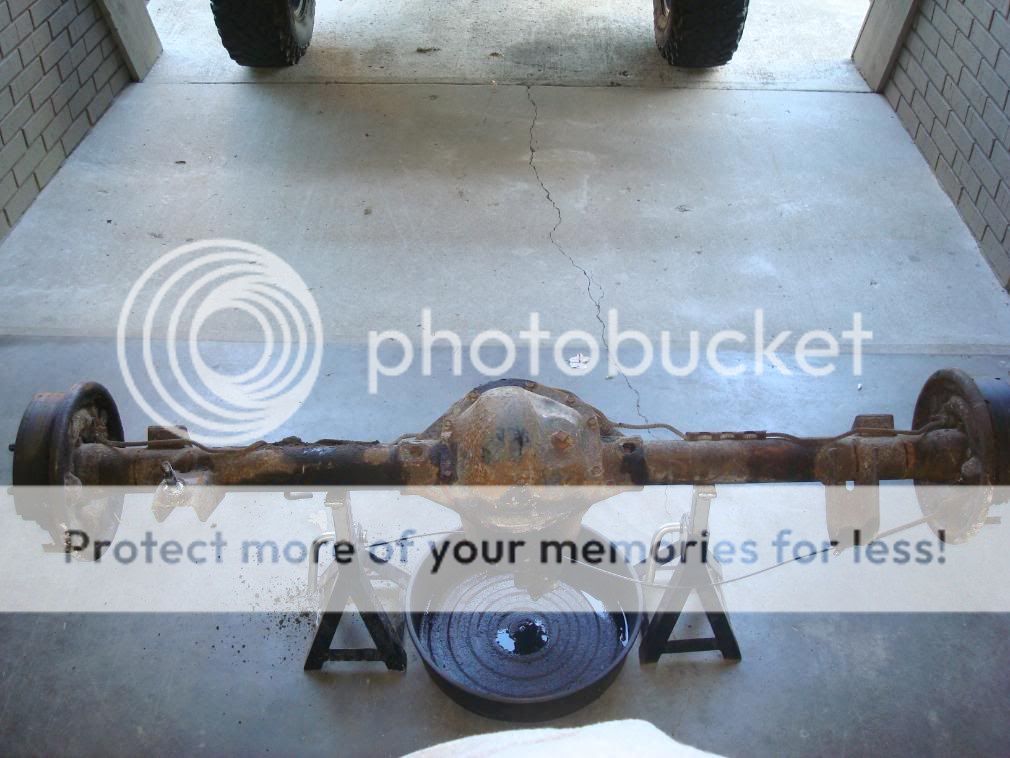

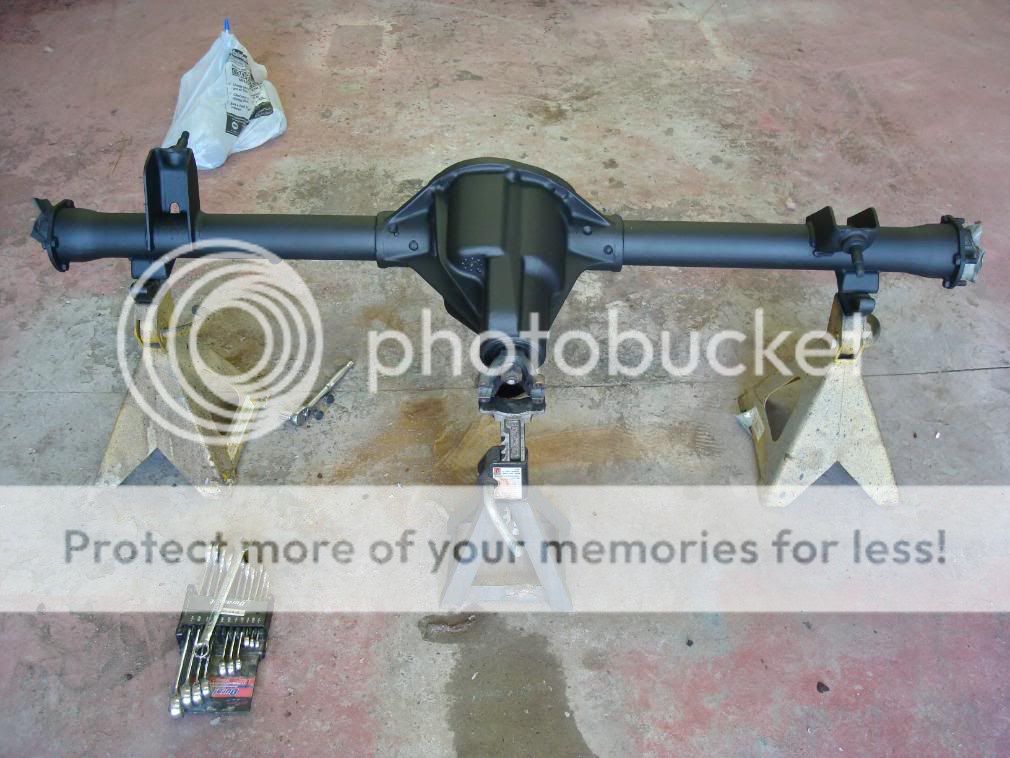
 . But basically, mine looked like the above when I got it home from the junkyard, and when it was finished it looked shiny, but not as shiny as the above!! Here are the pics of the install. This was two years ago and this one went under my 96XJ, which at the time was on 31" ATs. It's currently on 32" MTs....and may be getting sold. I also installed an aussie at the same time, which I highly recommend!


