- Location
- Wasatch Range
Sounds like my BB build, what CR did he set it up for?
IIRC, 10:1
Sounds like my BB build, what CR did he set it up for?
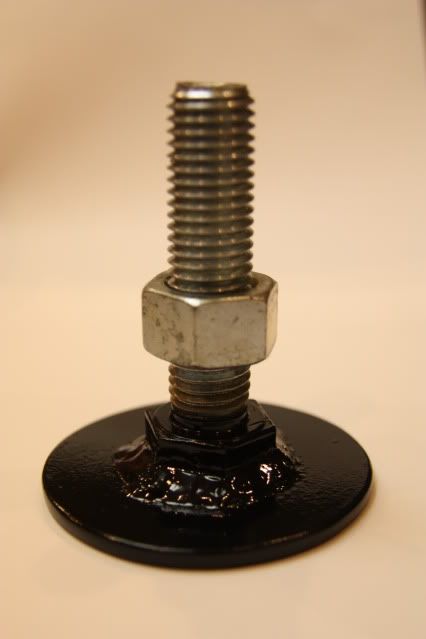
Here's what I did on my 2000:
Unlike the early XJ models, the factory bumpstop cup is welded on instead of screwed on so using my sawzall I cut right above the weld. This left me with 5" of bumpstop tower, which is hollow.
I grabbed 2- 3/4" bolts-2" long and 4 nuts from HD.
Cut out two 2.75" diameter circles from some scrap 1/4" plate. This is slightly larger than the flat on the end of the Prothane bumps.
I welded the 3/4" bolt head to the center of each 2.75" plate.

The inside of the stock bump tower is approx 1.75" ID and I had some tube scraps laying around that had a 1.5" OD and the 3/4" nut would slip inside with a little grinding of the ears.
I cut 2-2" lengths of tube which I used with the 3/4" nut to create a threaded sleeve to insert into the bump tower.
Leaving the nut protruding about .25" from this sleeve, I welded it to the 1.5" OD tube. I then ran a bead around the circumference of the sleeve on each end to tighten up the gap between the OD of the sleeve and the ID of the tower. Some minor grinding resulted in a snug, centered fit.

I then welded the sleeve into the stock bump tower, with the sleeve about 1/4" out of the tower, then buffed it clean and painted it along with the 3" bump plate.
I threaded the 2nd nut onto the bolt on the bump plate and dropped it inside the Prothane bump, shoved the bump inside the coil spring and installed the spring.
I then reached inside the coil, grabbing my fabbed bump plate and flipped it over so the bolt was pointing up and then threaded it into the bump tower. This needs to be done with coil uncompressed.
Once threaded in completely, I snugged the nut with a wrench, then seated the coil and lowered the weight of the Jeep onto the coil.
The 2.75" plates contact the top of the Prothanes upon compression and don't hang up on the coils while flexing. With a 6" lift, I ended up trimming 2 rings from the 10" Prothane bumps, which seems to work perfectly with my setup.
There is just over 1" of adjustability with my plate setup, so I can thread the plate out to reduce the airgap if needed to limit uptravel.


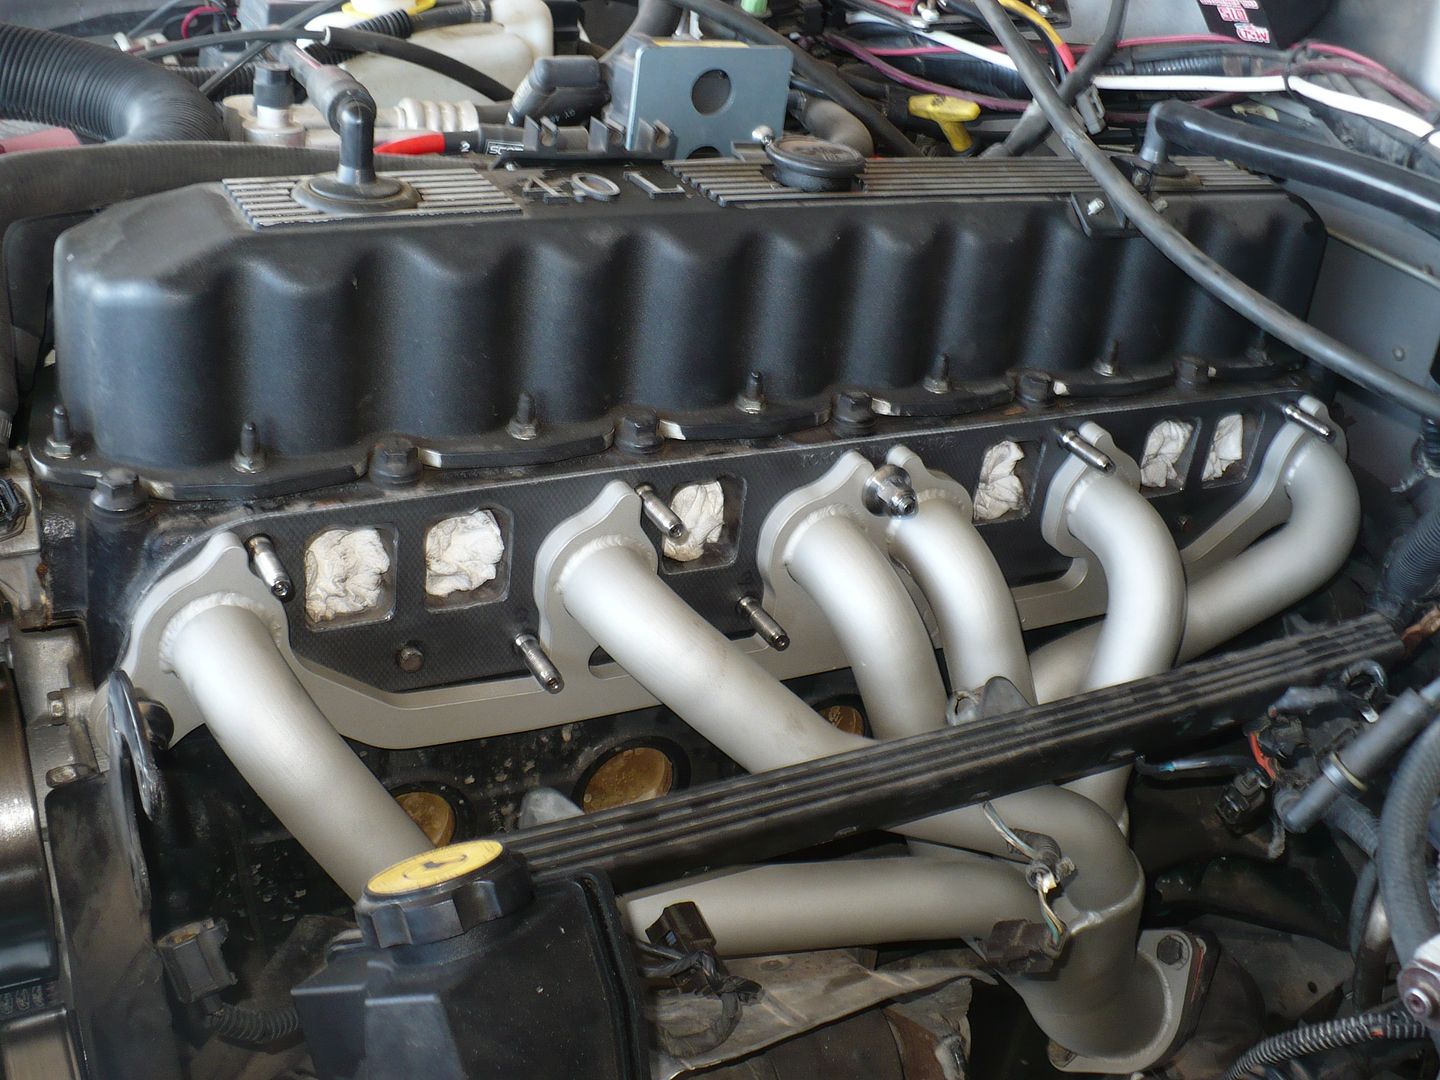
Those may look blingy but they are 110% function!I decided to spring for the bling, Boostwerks Titanium 2.0 manifold mounting kit
View attachment 11119
Glad that you've found the info that I've share valuable. Sand Hollow is a fun place to play, I make it down there a few times a year.I just binged all 18 pages of this build in one sitting. I can’t believe the similarities between what you have already done and what I am building up to do to mine. I’ve got a 98 that had been my wife’s daily for the last two years that I am starting to go through. Thanks for sharing all the projects over the years. I will definitely be referring back to most of them when the time comes. Side note, I am also in Utah, about 30ish minutes from sand hollow state park.


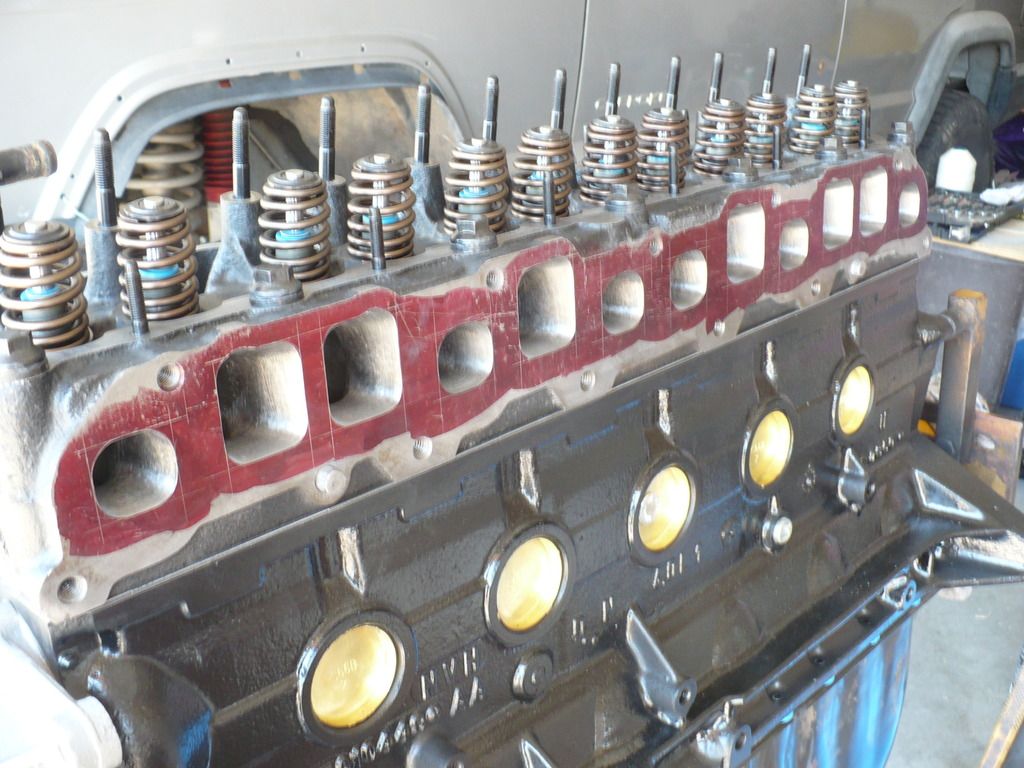
Gotta love it!I've done things.....time to plug some holes with things.
View attachment 12114View attachment 12117
Custom AutoTec 4032 high silicon aluminum alloy forged pistons
Custom forged steel Scat connecting rods with upgraded 927 Chevy wrist pins
Hastings ring set
ARP rod bolts

OOOOooooH shiny!!!! very niceI've done things.....time to plug some holes with things.
View attachment 12114View attachment 12117
Custom AutoTec 4032 high silicon aluminum alloy forged pistons
Custom forged steel Scat connecting rods with upgraded 927 Chevy wrist pins
Hastings ring set
ARP rod bolts