Dana 60 Spindle Boring for 35-spline axles.
So you’ve got a full floater rear Dana 60, sure its 30 spline axles are strong, but who wants those when you can have stronger 35 spline axles? Being that I was completely tearing mine down for a rebuild for my XJ buildup; and I will be replacing the carrier with a spool I figured that I would purchase parts only once and go big. Yet that’s where those of us without the seemingly ‘rare’ stock large bore D60 spindles are without luck. The purpose of this thread is to point out that things can be done of the cheap.
Disclaimer: I’m not the first to do this, and I’m not claiming to be. I just thought I condense all of the information I have as well as part numbers I used to one place to make it easier for the next.
Quick Reference Measurements:
Dana 60 Spindle ID (as I measured from my Ford D60): 1.410”
Dana 70 Spindle ID (according to BillaVista’s Tech article): 1.630”
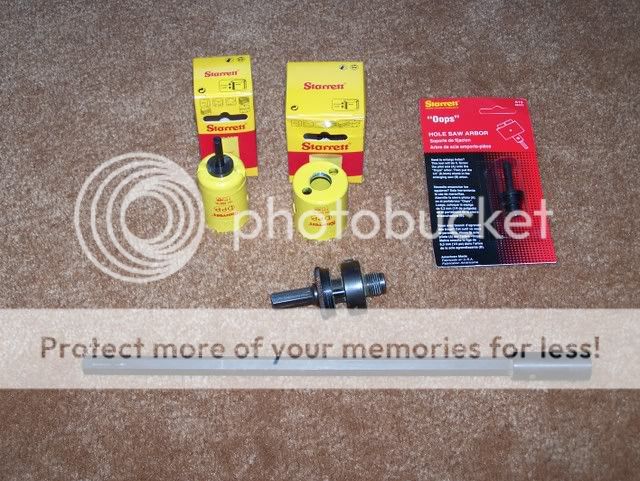
Tools Used/Required:
(3) 1-9/16" Starrett Hole Saws [Part # 55094]
(1) 1-3/8" Starrett Hole Saw [Part # 55091]
(1) Starrett ‘OOPS’ Arbor A19 [Part # 66078]
(1) Starrett 1/2" Chuck Arbor A2 [Part # 55142]
(1) 12" Starrett A5 Arbor Extension [Part # 55145]
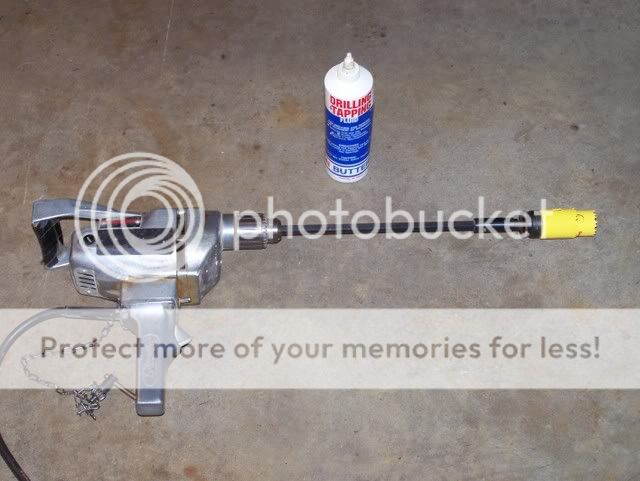
(1) 16oz (6-7oz approx used) Union Butterfield Drilling/Tapping fluid [Part# 1930502] or equivalent
(1) Milwaukee Super Hole Shooter 1/2-Inch Drill or equivalent
(1) 6in level
(1) Painter’s stirring stick (optional)
(1) Chip brush (optional)
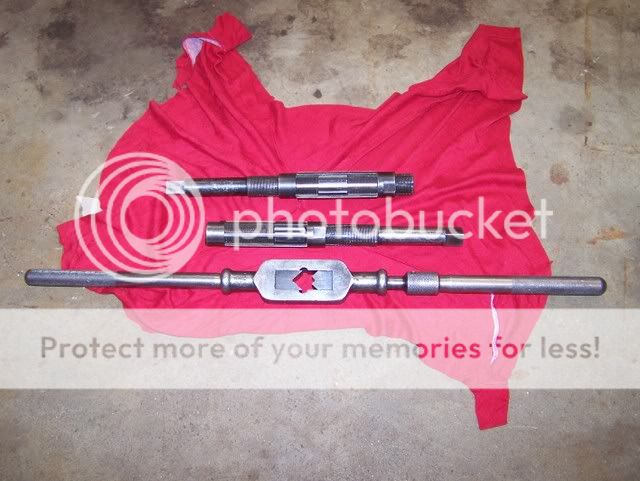
(1) Set of expansion reamers (optional)
To get to the larger internal diameter I came up with four options:
1) Buy the expensive ($400+) dollar tool to do it
2) Chalk it up in a big lathe (which I don’t have).
3) Cut spindles off and weld on larger bore versions.
4) Hole saw and a lot of time.
Being that my project is supposed to be on a budget, I chose option #4. Yet something I was worried about was the fact that hole saws are generally not regarded as “high tolerance tooling”. I was worried that I’d never get the bore in the spindle straight or even. This is where the level and a steady arm come into play. Being that my axle wasn’t underneath a vehicle I was able to set it up on a pair of jack stands and shim it level. This allowed me to use the level to ensure I was straight in the vertical direction. For the horizontal direction I used eyesight and the edge of the level to ensure I had the center found.
Starting off was the hardest part. If you can have a buddy (or your father in my case) watch your start to ensure a good beginning. Once started the 1-3/8” hole saw pretty much guides itself perfectly into the bore. However, I still stopped every approx 30-45 seconds to check with the level to keep myself on track and to clear chips away.
I’d recommend using the slowest and highest torque drill you have and it’ll make life easier. Also use a generous amount of cutting fluid. This not only lengthens the life of your hole saw teeth, but it also makes it easier cutting, as well as keeping the spindle itself cool. Be sure to clear the chips/shavings when your check your progress as it keeps the saws cutting evenly and makes cleaning up the inside of the axle tube easier later on, a paint stirring stick and a chip brush work great for this.
It’s going to take several sittings of drilling to get through both spindles. Don’t kid yourself it takes a lot of effort to push the drill through the spindles. I spent about a week of nights after work in the garage before mine were done.
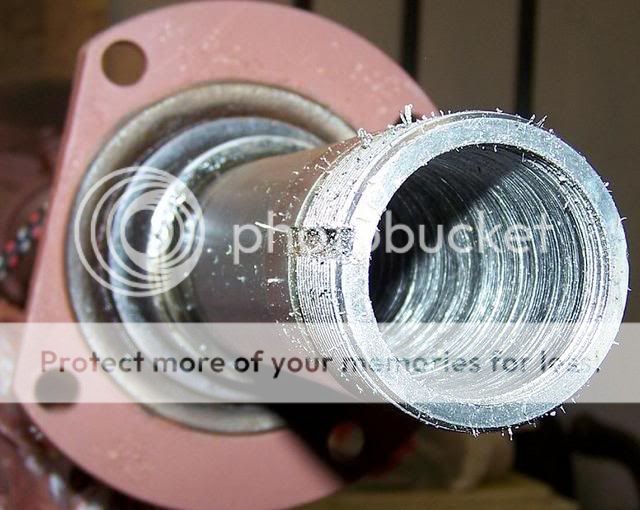
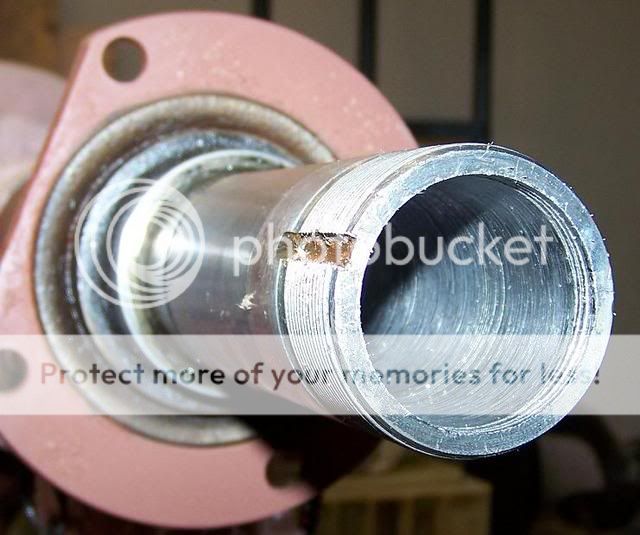
After the passes with the hole saw I had opened the spindles up to 1.592 inches. I could have left them at that, but I’m picky about my work and I wanted a smooth finish on the inside of the bore like the stock units. I ran a few passes with a pair of expansion reamers; taking off only a few thousands each pass. The pictures don’t do them any justice but the difference was dramatic and my final bore diameter was 1.628 inches. Awesome, I'm now ready for 35-spline shafts!
Tools Used
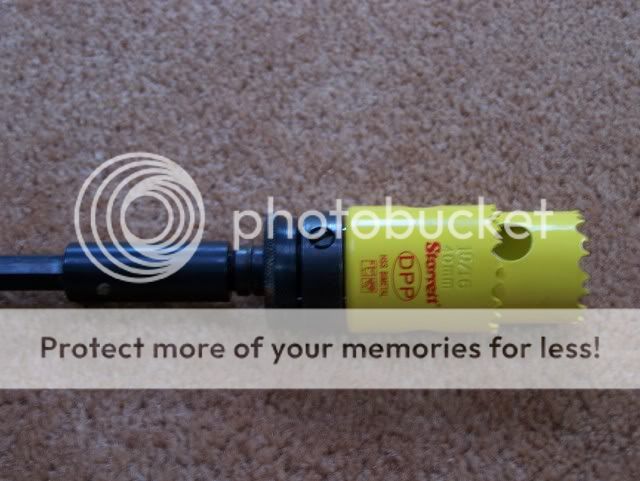
Close up of the end setup on the drill. The Starrett Oops arbor works perfect for this allowing you to run one hole saw inside another.
Complete Drill Setup
Expansion Reamer Setup
After completing with the hole saw
After several passes with the expansion reamers. Picture does not do it justice.
So you’ve got a full floater rear Dana 60, sure its 30 spline axles are strong, but who wants those when you can have stronger 35 spline axles? Being that I was completely tearing mine down for a rebuild for my XJ buildup; and I will be replacing the carrier with a spool I figured that I would purchase parts only once and go big. Yet that’s where those of us without the seemingly ‘rare’ stock large bore D60 spindles are without luck. The purpose of this thread is to point out that things can be done of the cheap.
Disclaimer: I’m not the first to do this, and I’m not claiming to be. I just thought I condense all of the information I have as well as part numbers I used to one place to make it easier for the next.
Quick Reference Measurements:
Dana 60 Spindle ID (as I measured from my Ford D60): 1.410”
Dana 70 Spindle ID (according to BillaVista’s Tech article): 1.630”
Tools Used/Required:
(3) 1-9/16" Starrett Hole Saws [Part # 55094]
(1) 1-3/8" Starrett Hole Saw [Part # 55091]
(1) Starrett ‘OOPS’ Arbor A19 [Part # 66078]
(1) Starrett 1/2" Chuck Arbor A2 [Part # 55142]
(1) 12" Starrett A5 Arbor Extension [Part # 55145]
(1) 16oz (6-7oz approx used) Union Butterfield Drilling/Tapping fluid [Part# 1930502] or equivalent
(1) Milwaukee Super Hole Shooter 1/2-Inch Drill or equivalent
(1) 6in level
(1) Painter’s stirring stick (optional)
(1) Chip brush (optional)
(1) Set of expansion reamers (optional)
To get to the larger internal diameter I came up with four options:
1) Buy the expensive ($400+) dollar tool to do it
2) Chalk it up in a big lathe (which I don’t have).
3) Cut spindles off and weld on larger bore versions.
4) Hole saw and a lot of time.
Being that my project is supposed to be on a budget, I chose option #4. Yet something I was worried about was the fact that hole saws are generally not regarded as “high tolerance tooling”. I was worried that I’d never get the bore in the spindle straight or even. This is where the level and a steady arm come into play. Being that my axle wasn’t underneath a vehicle I was able to set it up on a pair of jack stands and shim it level. This allowed me to use the level to ensure I was straight in the vertical direction. For the horizontal direction I used eyesight and the edge of the level to ensure I had the center found.
Starting off was the hardest part. If you can have a buddy (or your father in my case) watch your start to ensure a good beginning. Once started the 1-3/8” hole saw pretty much guides itself perfectly into the bore. However, I still stopped every approx 30-45 seconds to check with the level to keep myself on track and to clear chips away.
I’d recommend using the slowest and highest torque drill you have and it’ll make life easier. Also use a generous amount of cutting fluid. This not only lengthens the life of your hole saw teeth, but it also makes it easier cutting, as well as keeping the spindle itself cool. Be sure to clear the chips/shavings when your check your progress as it keeps the saws cutting evenly and makes cleaning up the inside of the axle tube easier later on, a paint stirring stick and a chip brush work great for this.
It’s going to take several sittings of drilling to get through both spindles. Don’t kid yourself it takes a lot of effort to push the drill through the spindles. I spent about a week of nights after work in the garage before mine were done.
After the passes with the hole saw I had opened the spindles up to 1.592 inches. I could have left them at that, but I’m picky about my work and I wanted a smooth finish on the inside of the bore like the stock units. I ran a few passes with a pair of expansion reamers; taking off only a few thousands each pass. The pictures don’t do them any justice but the difference was dramatic and my final bore diameter was 1.628 inches. Awesome, I'm now ready for 35-spline shafts!
Tools Used
Close up of the end setup on the drill. The Starrett Oops arbor works perfect for this allowing you to run one hole saw inside another.
Complete Drill Setup
Expansion Reamer Setup
After completing with the hole saw
After several passes with the expansion reamers. Picture does not do it justice.
Last edited:

")