The Frog Blog

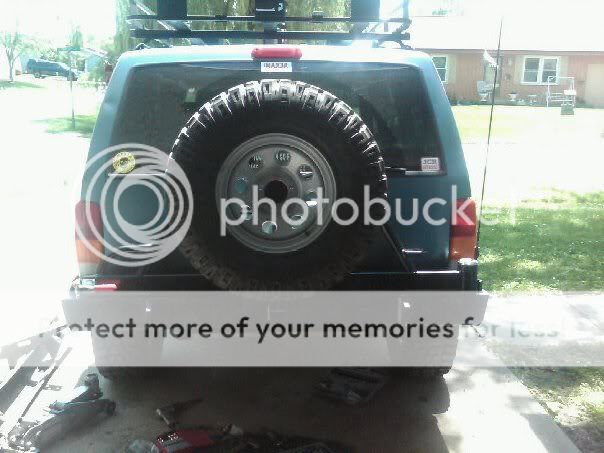
rearbumper.jpg


I like it! :D
 
It was a decent day for the Frog. The kid and I drove to Ruff Stuff in Loomis and Dan sold me a stainless battery boxy for my Optima, and the kid got a beefy cover for his rear 8.25 differential. Great prices.

On top of that, I finally found a new 5" drop hitch for my trailer. I'll be using that next weekend during the Sonoma camp trip. Pics to come.
 
Yeah, FlexdXJ, that looks great. Is there a place to mount the Hi Lift?
Yeah there are two tabs there for it on has 2 holes so you can put a lock on it.

Here are a couple better shots.

DSCF0150.jpg


DSCF0151.jpg
 
That's a good looking Jeep, and I think I'm going to steal your front fender trimming idea.


Thanks man, the frog ain't so hard on the eyes either! Go for it, I bought it that way. Wasn't my idea. :D Funny thing is that the fenders line up perfectly with the bumper.
 
As mentioned in a post or two above, I picked up a new Optima battery box from Dan at Ruff Stuff Specialties. I figured this would be an easy job and I knock this out in no time. I was a tad wrong. The box is installed, but it turned out to be a bigger pain in the rear than I expected. Here is what I did to get that box installed.

Photo 1: I started this project by priming the box while hanging it from my favorite parts tree. I applied a couple coats of Krylon primer after washing off the oil with warm water and TSP.

232323232%7Ffp5383%3B%3Enu%3D3367%3E234%3E5%3A3%3EWSNRCG%3D347%3B774692336nu0mrj


Photo 2: A little while later and I had a couple coats of satin black on the batter box, on my hands, the courtyard concrete, and the parts tree. Hey, there's the Frog in the background. Hey, Frog!

232323232%7Ffp53837%3Enu%3D3367%3E234%3E5%3A3%3EWSNRCG%3D347%3B774696336nu0mrj


Photo 3: I actually left the box to cure overnight, and we went fishing in the morning. No fish, but it was nice to get out and do some mild wheeling and throw in the line. Here is the stock battery box, sans battery. This is where the job got tricky.

232323232%7Ffp53837%3Enu%3D3367%3E234%3E5%3A3%3EWSNRCG%3D347%3B774697336nu0mrj


Photo 4: You see, in the photo below, you can tell that there is no easy way to mount the battery box. If you take out the plastic tray, you have nothing flat to set the box on. If you leave it in, the radiator hose and cruise control unit are in the way. Some modding has to be done...

232323232%7Ffp537%3C9%3Enu%3D3367%3E234%3E5%3A3%3EWSNRCG%3D347%3B774698336nu0mrj


Photo 5: Here is a close up of the radiator hose contacting the box. I was not about to mount the battery box like this.

232323232%7Ffp53834%3Enu%3D3367%3E234%3E5%3A3%3EWSNRCG%3D347%3B774699336nu0mrj


Photo 6: Removing the plastic box is easy. Just three bolts hold it on place. Here you can see the original box and the new box designed for the Optima battery.

232323232%7Ffp53839%3Enu%3D3367%3E234%3E5%3A3%3EWSNRCG%3D347%3B7746%3A2336nu0mrj


Photo 7: I decided to take my dremel and cut away the plastic edge opposite from the radiator hose. This would enable me to scoot the Optima an inch to the left while still maintaining a strong battery box.

232323232%7Ffp537%3C%3A%3Enu%3D3367%3E234%3E5%3A3%3EWSNRCG%3D347%3B7746%3A6336nu0mrj
 
<Continued from previous>

Photo 8: Next, I drilled three holes in strategic locations in the metal box and original plastic tray. If you look at the underside of your Optima box, you will notice open spots between each battery cell. This is the best location for bolt heads as they won't interfere with the bottom of the battery or overall height, once mounted.

I added some black RTV I had on hand for extra strength. I did not want the metal battery box coming loose from the plastic tray, regardless of added bolts.

232323232%7Ffp537%3C9%3Enu%3D3367%3E234%3E5%3A3%3EWSNRCG%3D347%3B7746%3A7336nu0mrj


Photo 9: Here is the modded battery box with bolts and RTV. I recommend adding RTV to the bottom of the metal battery box, and NOT the plastic tray. Yeah, I forgot there were holes in the metal box...Too much RTV for sure.

232323232%7Ffp537%3C6%3Enu%3D3367%3E234%3E5%3A3%3EWSNRCG%3D347%3B7746%3A8336nu0mrj


Photo 10: Here is a shot of the box installed prior to battery installation.

232323232%7Ffp537%3B%3B%3Enu%3D3367%3E234%3E5%3A3%3EWSNRCG%3D347%3B7746%3A9336nu0mrj


Photo 11: And to finish up the project, here is a photo with the battery installed and securely strapped down. I'm digging the new battery hold down. Much cleaner than stock.

232323232%7Ffp537%3B4%3Enu%3D3367%3E234%3E5%3A3%3EWSNRCG%3D347%3B774687336nu0mrj
 
We did a little fishing today at Camp Far West. No fish, but it was a good day, regardless.

232323232%7Ffp537%3B5%3Enu%3D3367%3E234%3E5%3A3%3EWSNRCG%3D347%3B773859336nu0mrj


232323232%7Ffp537%3C4%3Enu%3D3367%3E234%3E5%3A3%3EWSNRCG%3D347%3B77385%3B336nu0mrj


Damn, that's a sexy beast.

232323232%7Ffp537%3C4%3Enu%3D3367%3E234%3E5%3A3%3EWSNRCG%3D347%3B773862336nu0mrj


See, there's proof of my wife fishing. You thought I was just taking poser shots.

232323232%7Ffp537%3B%3A%3Enu%3D3367%3E234%3E5%3A3%3EWSNRCG%3D347%3B773863336nu0mrj


I never knew there were Bald Eagles at Camp Far West. Too cool!

232323232%7Ffp53833%3Enu%3D3367%3E234%3E5%3A3%3EWSNRCG%3D347%3B773868336nu0mrj


232323232%7Ffp537%3C9%3Enu%3D3367%3E234%3E5%3A3%3EWSNRCG%3D347%3B773866336nu0mrj
 
Back
Top