• Welcome to the new NAXJA Forum! If your password does not work, please use "Forgot your password?" link on the log-in page. Please feel free to reach out to [email protected] if we can provide any assistance.

TALOS. The second Comanche project

98REDXJ2

NAXJA Member
NAXJA Member
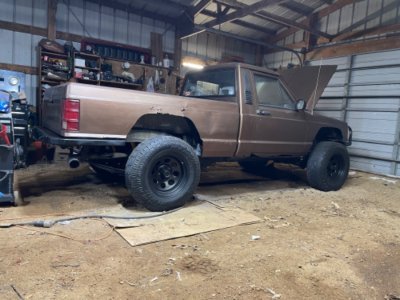
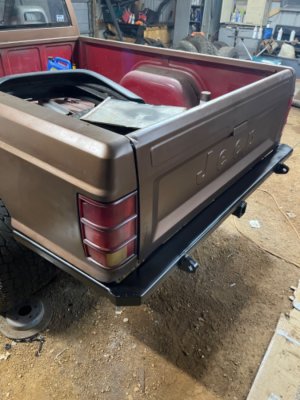
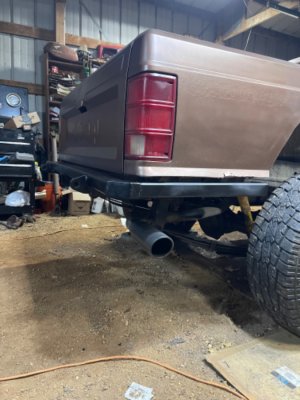
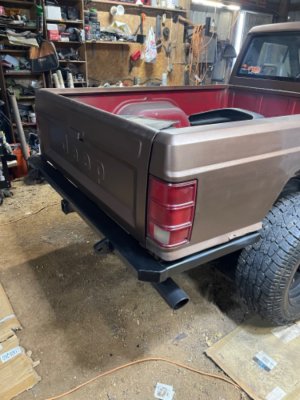
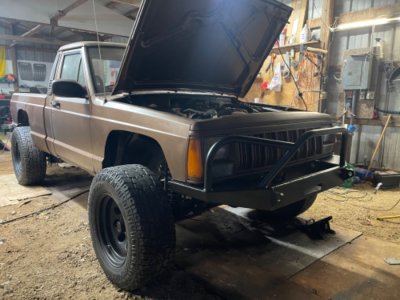
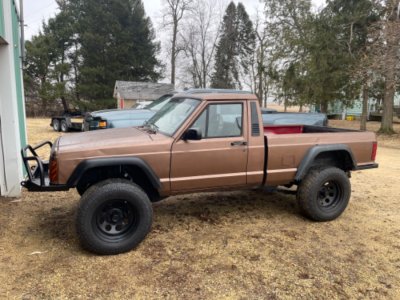
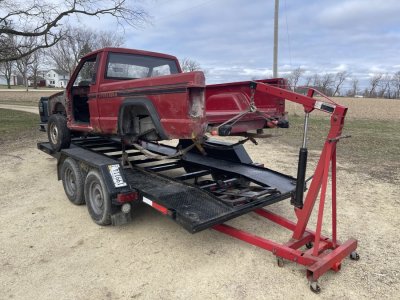
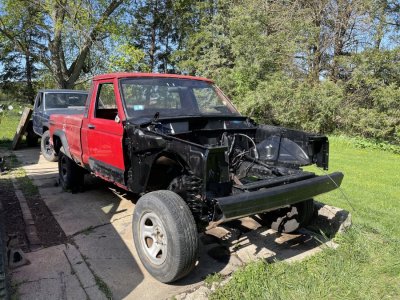
This year I bought another 1987 Comanche.
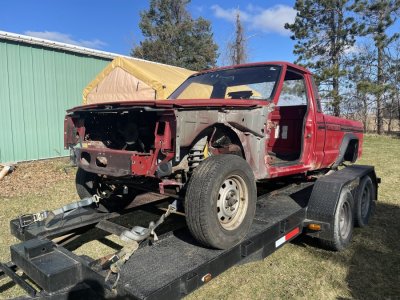
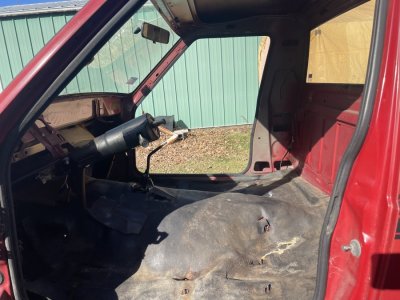
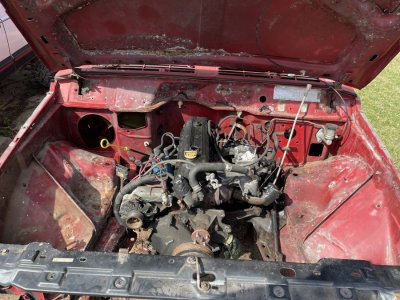
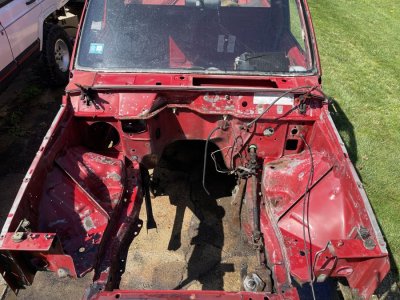
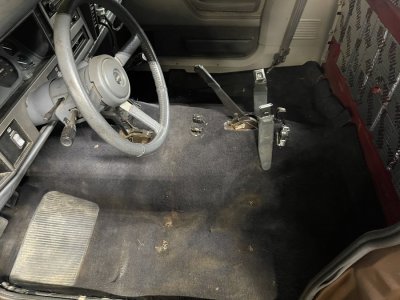
Catch is it was a gutter stripped down shell with no rear axle and a blown up 2.5 in it with a title and vin tag.
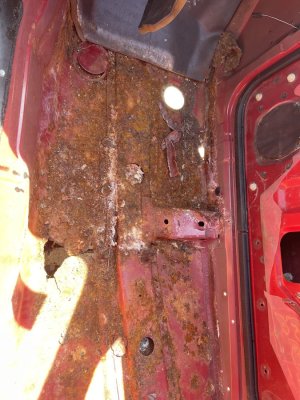
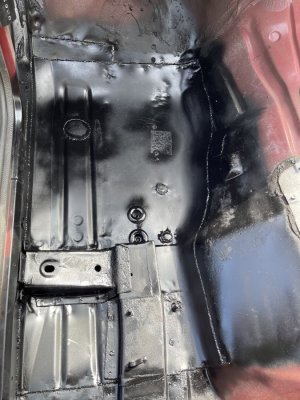
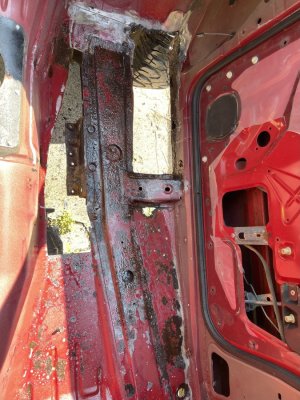
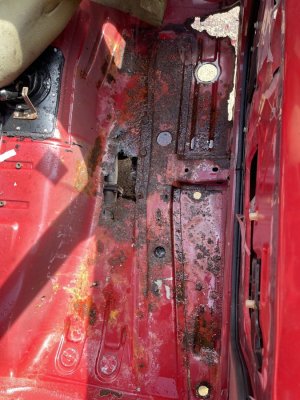
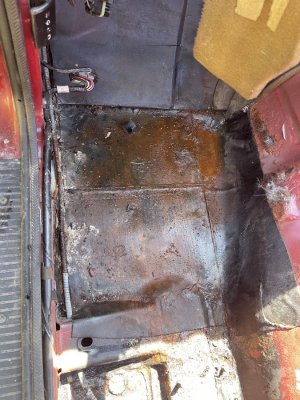
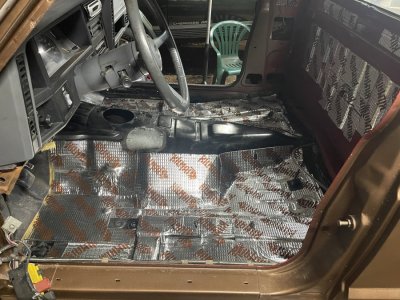
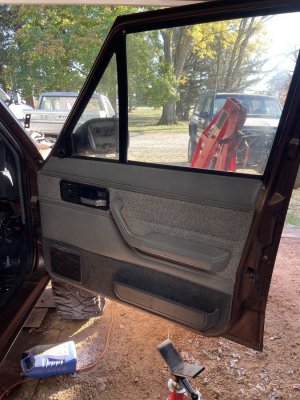
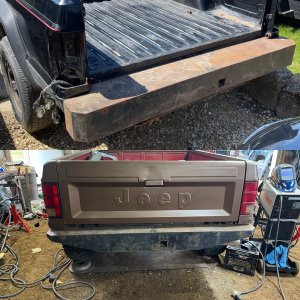
It needed front floor pans, rocker repairs, bed repairs plus every missing part.
I’ve been slowly working towards my end goal to make this my winter daily and yard truck/work horse, taking over the roles of my other 1998 xj I sold.

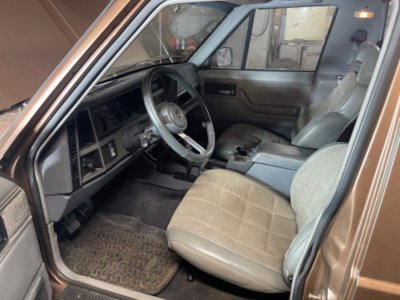
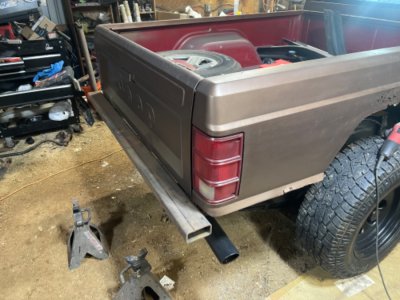
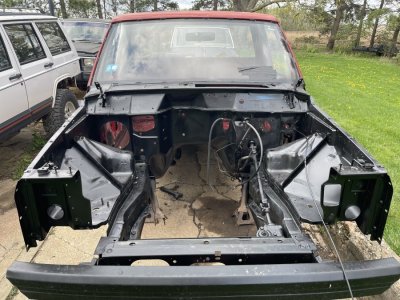
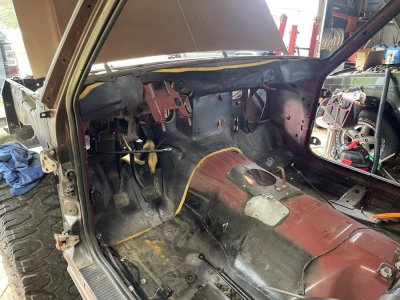
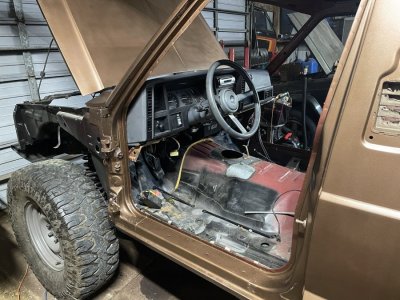
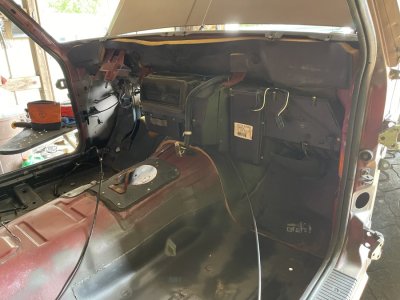
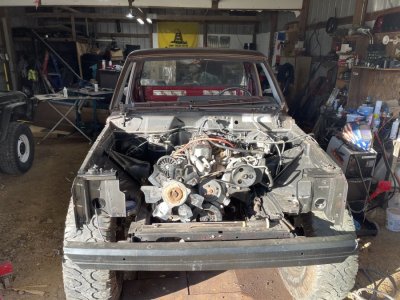
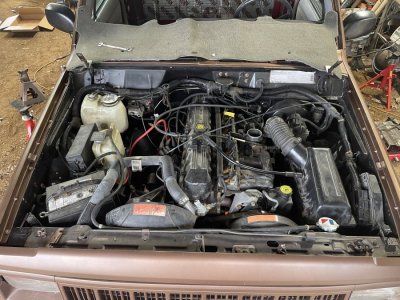
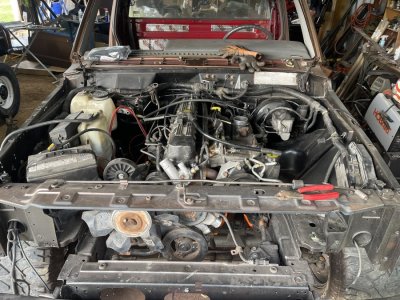
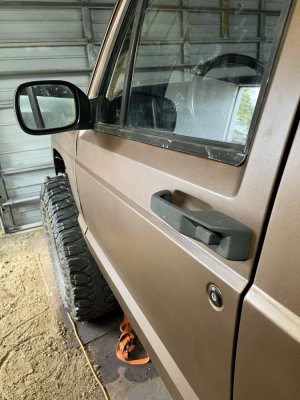
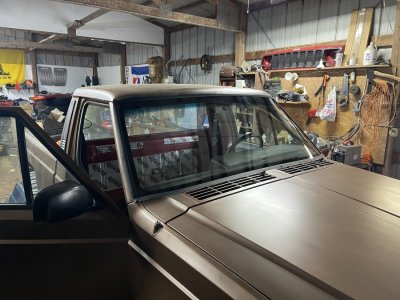
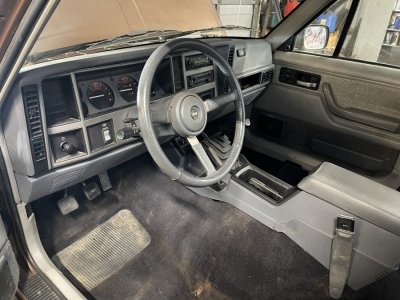
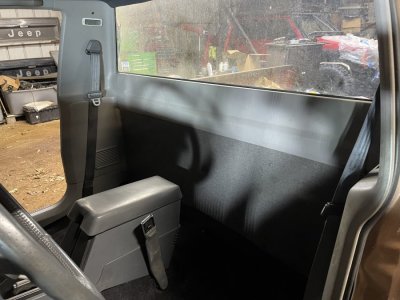
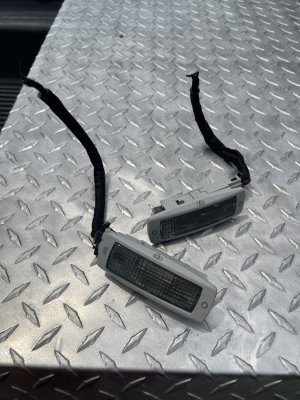
So I have taken a rotted out 1994 4.0 ax15 231 xj and swapped every part possible essentially into this 87 Comanche plus bought all the Comanche specific gray interior parts.

Here comes the photos…
 

Attachments

  • D5F77705-752C-4DE5-A15B-3D143C8692D3.jpeg
    D5F77705-752C-4DE5-A15B-3D143C8692D3.jpeg
    201.6 KB · Views: 13
  • ACA7B3BA-7CB1-40F5-A8C5-1107C00ABDE1.jpeg
    ACA7B3BA-7CB1-40F5-A8C5-1107C00ABDE1.jpeg
    121.3 KB · Views: 9
  • 69066362-15FF-435D-BE44-E6CF9E2CABDB.jpeg
    69066362-15FF-435D-BE44-E6CF9E2CABDB.jpeg
    184.6 KB · Views: 8
  • AFFFC64A-25BC-418B-BE15-EE3EA0D3335E.jpeg
    AFFFC64A-25BC-418B-BE15-EE3EA0D3335E.jpeg
    163.9 KB · Views: 7
  • 4FA4251A-68BE-4E61-93B8-7E04699BB4E5.jpeg
    4FA4251A-68BE-4E61-93B8-7E04699BB4E5.jpeg
    211.3 KB · Views: 7
I threw some junk panels on it temporarily to feel a little better about it lol.
I think I started with just gutting the rest of what was left in it mainly the blown 2.5l and ax4 as well as the trashed vinyl flooring.
Unfortunately there was someone’s weird floor patch job on the driver side, that was not find to removed. I don’t know what kind of material it was.
I used xj front floor pans to patch up both sides.
 

Attachments

  • E5BD0A6E-8F1A-4780-94EA-C379A6DCFE7D.jpeg
    E5BD0A6E-8F1A-4780-94EA-C379A6DCFE7D.jpeg
    158.5 KB · Views: 6
  • ECFCF76A-3AC6-454E-AAC4-2EDDC983813C.jpeg
    ECFCF76A-3AC6-454E-AAC4-2EDDC983813C.jpeg
    148.8 KB · Views: 6
  • 0044E820-BEAE-4AF7-A976-19A6505DC29D.jpeg
    0044E820-BEAE-4AF7-A976-19A6505DC29D.jpeg
    177.4 KB · Views: 6
  • 9ADC9448-4DFC-46C9-BCB0-0394B9AADB44.jpeg
    9ADC9448-4DFC-46C9-BCB0-0394B9AADB44.jpeg
    171.9 KB · Views: 6
  • 11DB114E-9951-42A3-AB30-3266C6C1975D.jpeg
    11DB114E-9951-42A3-AB30-3266C6C1975D.jpeg
    169.2 KB · Views: 6
  • DE1384C4-B265-48D4-A7B4-49F7E6A6D310.jpeg
    DE1384C4-B265-48D4-A7B4-49F7E6A6D310.jpeg
    188.6 KB · Views: 6
  • 6C50D8BE-74A9-4658-A09A-94C445B18518.jpeg
    6C50D8BE-74A9-4658-A09A-94C445B18518.jpeg
    131.8 KB · Views: 6
I pulled the blown drivetrain and cleaned, degreased, and painted the engine bay and front end.
 

Attachments

  • 25B6EC14-50CE-4554-A4AC-81576780F3A6.jpeg
    25B6EC14-50CE-4554-A4AC-81576780F3A6.jpeg
    171.1 KB · Views: 6
  • 3EEA893C-1746-4AE6-B628-22938A9AE2FF.jpeg
    3EEA893C-1746-4AE6-B628-22938A9AE2FF.jpeg
    193.8 KB · Views: 6
  • 07A237DC-7F3D-47FF-A89A-F196CD0B7BBC.jpeg
    07A237DC-7F3D-47FF-A89A-F196CD0B7BBC.jpeg
    173.6 KB · Views: 6
  • BDA6AB40-DE02-48CE-92E2-910D604C1177.jpeg
    BDA6AB40-DE02-48CE-92E2-910D604C1177.jpeg
    252.9 KB · Views: 6
Stages of swapping the xj parts over
 

Attachments

  • C9DF502E-9535-4DBE-9278-E73E696ABCE5.jpeg
    C9DF502E-9535-4DBE-9278-E73E696ABCE5.jpeg
    157.2 KB · Views: 5
  • 8B5078AA-2AE1-4CF1-935A-1DB2FFB38E33.jpeg
    8B5078AA-2AE1-4CF1-935A-1DB2FFB38E33.jpeg
    160.7 KB · Views: 5
  • 624D0EB4-91D5-4150-B280-9C5973122D07.jpeg
    624D0EB4-91D5-4150-B280-9C5973122D07.jpeg
    104.7 KB · Views: 5
  • FC785055-7EBA-4153-B622-51ADB02F1F5C.jpeg
    FC785055-7EBA-4153-B622-51ADB02F1F5C.jpeg
    169.7 KB · Views: 5
  • 08823E3B-8799-4DEB-AF56-C00B5A3829DB.jpeg
    08823E3B-8799-4DEB-AF56-C00B5A3829DB.jpeg
    165.7 KB · Views: 4
  • 95A755CB-A6A0-44FF-AC24-109AA2C460BD.jpeg
    95A755CB-A6A0-44FF-AC24-109AA2C460BD.jpeg
    188.1 KB · Views: 4
  • E9B80179-2000-4AE8-928B-14C3A1401270.jpeg
    E9B80179-2000-4AE8-928B-14C3A1401270.jpeg
    192.4 KB · Views: 3
After trying many colors I landed on dark metallic copper for paint.
Swapped doors over. Installed 97+ mirrors and door handles and some Laredo door cards
 

Attachments

  • 1FC368F7-7D8A-4DC3-A759-46186B4702E8.jpeg
    1FC368F7-7D8A-4DC3-A759-46186B4702E8.jpeg
    170.3 KB · Views: 3
  • 8E0E5BFB-1E6E-450D-A527-C72A571C480B.jpeg
    8E0E5BFB-1E6E-450D-A527-C72A571C480B.jpeg
    145.3 KB · Views: 4
  • E06CF5C2-65B0-4D29-A154-394126383A54.jpeg
    E06CF5C2-65B0-4D29-A154-394126383A54.jpeg
    125.3 KB · Views: 7
Got a brand new windshield installed with the rubber gasket.
I made a adapter harness for 94xj dash to 87 mj body/fuel pump/tail harness. I fit an xj ebrake lever into the tunnel then started to assemble the interior. Picked up a silver dash bezel from a friend and installed a new used radio as well as some azzy gauge faces. Picked up some rear speaker brackets and installed some new kicker speakers. The interior is now almost complete minus seats as I’m still waiting on my seat sliders to arrive before I can mount them to my Scarborough floor brackets.
 

Attachments

  • F1A54615-4510-4080-B85E-526518066CF7.jpeg
    F1A54615-4510-4080-B85E-526518066CF7.jpeg
    135.4 KB · Views: 7
  • 66765582-95F1-41F0-AC00-F9D2CDDF71DD.jpeg
    66765582-95F1-41F0-AC00-F9D2CDDF71DD.jpeg
    192.6 KB · Views: 8
  • A91A1EFD-5738-408B-A04F-98B637973C8F.jpeg
    A91A1EFD-5738-408B-A04F-98B637973C8F.jpeg
    203 KB · Views: 8
  • 5A57862B-5B0A-4E39-962F-003966966906.jpeg
    5A57862B-5B0A-4E39-962F-003966966906.jpeg
    120.2 KB · Views: 8
  • C78A7B2A-AD86-458F-ABB2-71C636AC4F46.jpeg
    C78A7B2A-AD86-458F-ABB2-71C636AC4F46.jpeg
    149.9 KB · Views: 8
  • C37E23CF-2E24-415C-B0F6-7EDF231D7B38.jpeg
    C37E23CF-2E24-415C-B0F6-7EDF231D7B38.jpeg
    110.7 KB · Views: 8
  • 6E23B830-0174-4546-A8CF-9E56E00D4FF0.jpeg
    6E23B830-0174-4546-A8CF-9E56E00D4FF0.jpeg
    101.6 KB · Views: 9
I’m working on modifying a free bumper and my rear axle.
I meant to mention I installed the VW beetle dome lights into the b pillar locations.

This is basically where I’m at with it now.
My list of to do’s is
Seats
Fuel lines
Clean up and swap a 3.55 d30 in
Finish cleaning up and swap in a 3.55 8.25
Finish brake lines and brakes
Install shocks
Finish modifying and welding front and rear bumpers
Make some bed armor as well as do some patching on the bed
Repair the rocker panels
Install front driveshaft
Build a rear driveshaft
Install add a leaf
Install tubular lower control arms
 

Attachments

  • E2BB2AAD-F3D1-4AD3-B3F4-1F238669A408.jpeg
    E2BB2AAD-F3D1-4AD3-B3F4-1F238669A408.jpeg
    237.6 KB · Views: 10
  • E94B5DD7-5E31-435A-9C2E-9C8D6762955A.jpeg
    E94B5DD7-5E31-435A-9C2E-9C8D6762955A.jpeg
    140.4 KB · Views: 10
  • CD2100C9-2BD9-4BA9-8C5D-70DE44910A42.jpeg
    CD2100C9-2BD9-4BA9-8C5D-70DE44910A42.jpeg
    198.5 KB · Views: 11
I’ve repaired the d30 I’m swapping in. Had rotted passenger coil bucket and bend passenger control arm bracket. Got those patched and bent back then welded Barnes control arm skids on the LCA mounts. Replaced both uca bushings and made my own passenger uca mount stiffener. Now the axle is ready to swap in when I have time.
Still trying to solve a fuel issue. It will run off starting fluid but doesn’t seem to be building enough pressure in the rail to run so I’ll be pulling the fuel sender out soon to inspect and put an xj pump in.
 

Attachments

  • CD0C0CCB-2BC9-4DE5-817E-6CC57402FC0F.jpeg
    CD0C0CCB-2BC9-4DE5-817E-6CC57402FC0F.jpeg
    160.6 KB · Views: 5
  • 937C812A-89FC-4DCA-A296-498D265AC1BF.jpeg
    937C812A-89FC-4DCA-A296-498D265AC1BF.jpeg
    146.9 KB · Views: 4
  • 889565DE-E910-4348-A907-991DE1596913.jpeg
    889565DE-E910-4348-A907-991DE1596913.jpeg
    151 KB · Views: 4
I got my 3.55 Dana 30 swapped in last week. I added some bump stock extensions to the coil buckets. I also got my seat sliders repaired with Scarborough’s mounts.
 

Attachments

  • EF4762A8-F801-4FE6-AF89-889B289291F3.jpeg
    EF4762A8-F801-4FE6-AF89-889B289291F3.jpeg
    240.8 KB · Views: 6
  • 89145EDA-B3F9-4490-9593-6E0279FE9064.jpeg
    89145EDA-B3F9-4490-9593-6E0279FE9064.jpeg
    124.1 KB · Views: 6
  • B5BB598F-6F08-496A-95C1-7AD52A52968A.jpeg
    B5BB598F-6F08-496A-95C1-7AD52A52968A.jpeg
    217.1 KB · Views: 5
  • 0DFA1CDC-0867-45CE-A965-F8651A22BC60.jpeg
    0DFA1CDC-0867-45CE-A965-F8651A22BC60.jpeg
    154 KB · Views: 5
Solved fuel issues. It now has all new fuel lines, filter, tank, and a 94 sending unit in the tank. Running good.
Started 8.25 swap. Cut all old brackets off.
mocked it up under the truck after having to modify the incorrect spring perches I had ordered 🙃 
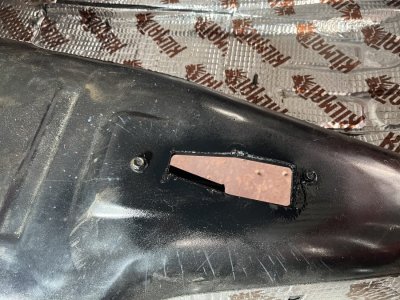
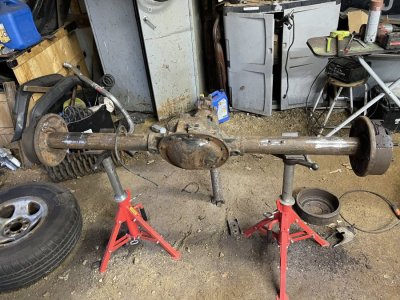
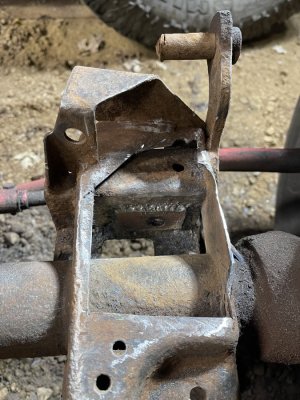
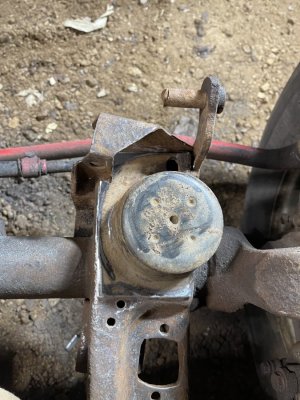
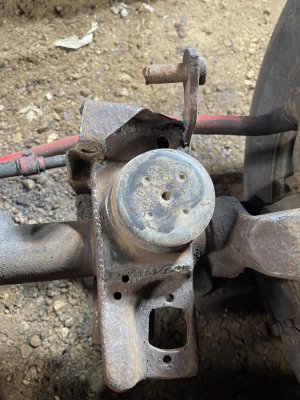
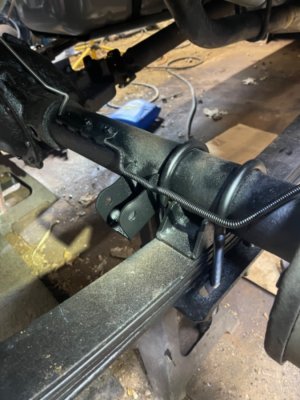
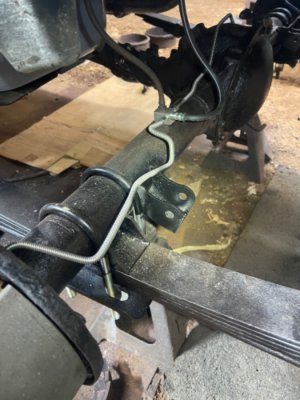
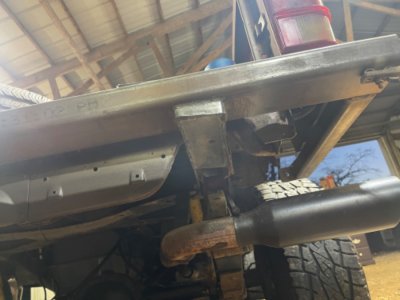
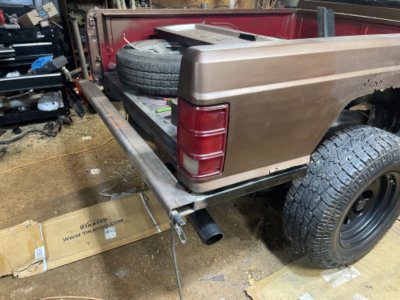
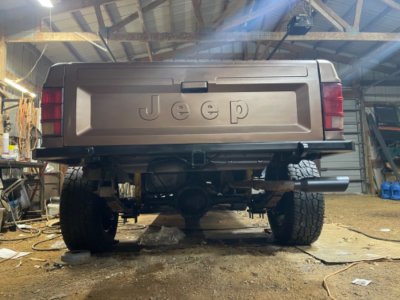
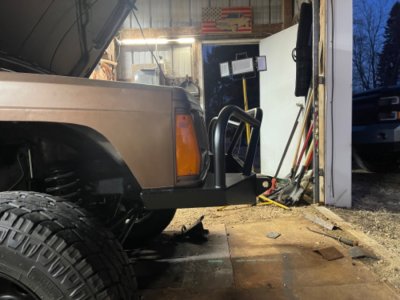
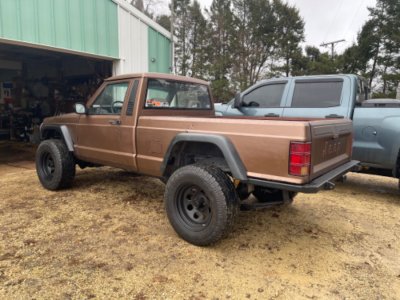
I did the ubolt strap mod on the pinion. I welded shock mounts to the axle as I didn’t have any mj ubolt plates to use and figured this way I can get away with running stock shocks on 3” of lift. I replaced every single rear axle brake part and lines.
 

Attachments

  • 503FBC4A-E194-4693-A75E-D811D8F787FD.jpeg
    503FBC4A-E194-4693-A75E-D811D8F787FD.jpeg
    184 KB · Views: 3
  • 93B1F230-2F65-4FB5-B669-BB0FA4F5A8CE.jpeg
    93B1F230-2F65-4FB5-B669-BB0FA4F5A8CE.jpeg
    186.6 KB · Views: 4
Interior is complete for now. I bolted my seats intended for my 2door build in until I get some good skins for the seats that will be permanent in the MJ.
 

Attachments

  • 9FC43C92-D77A-408E-9856-9C60C23E6DF7.jpeg
    9FC43C92-D77A-408E-9856-9C60C23E6DF7.jpeg
    176.8 KB · Views: 4
Back
Top