- Location
- Duck River
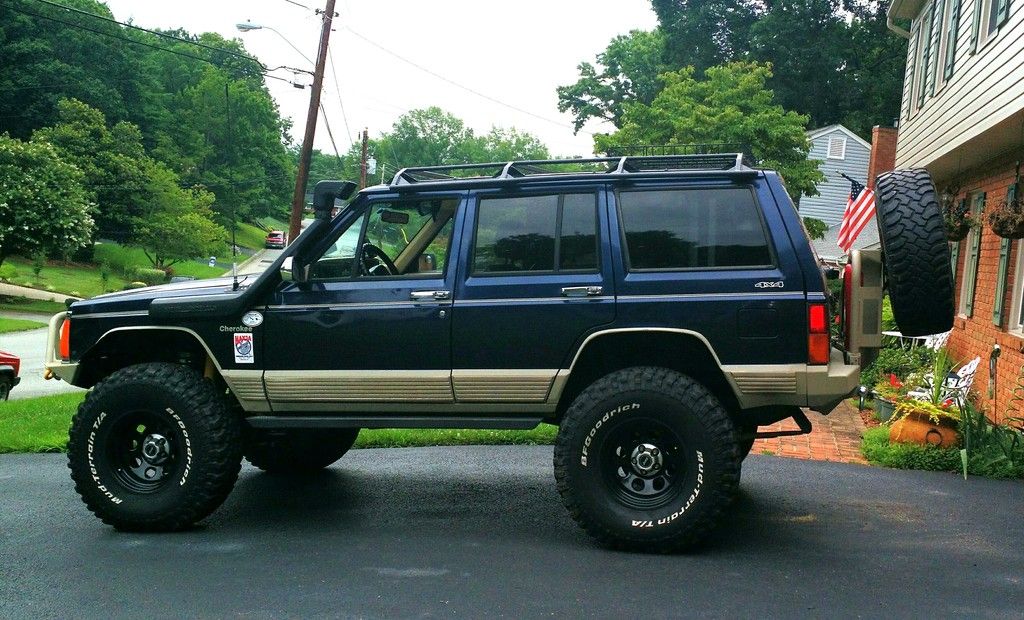
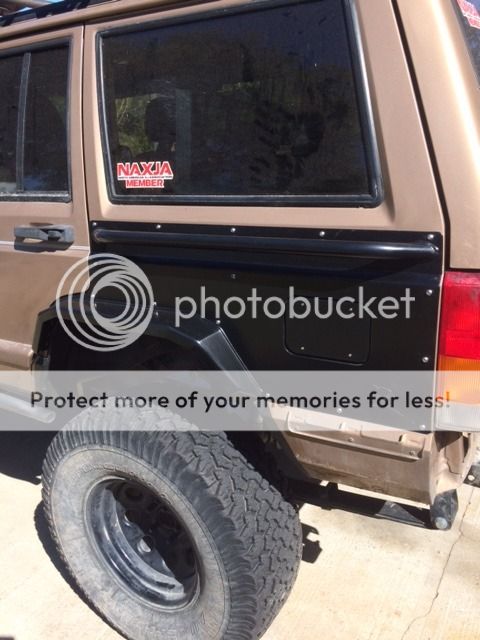
There is already a pretty good writeup of the installation process for the Rusty’s Steel Fender Flares here. I’m not going to repeat what’s been said before. But I did just finish installing a set of these flares on my rig and thought I’d post up some observations and suggestions based on my own experience with the hope that someone may find it helpful some day. First though . . . some pictures of the finished project!
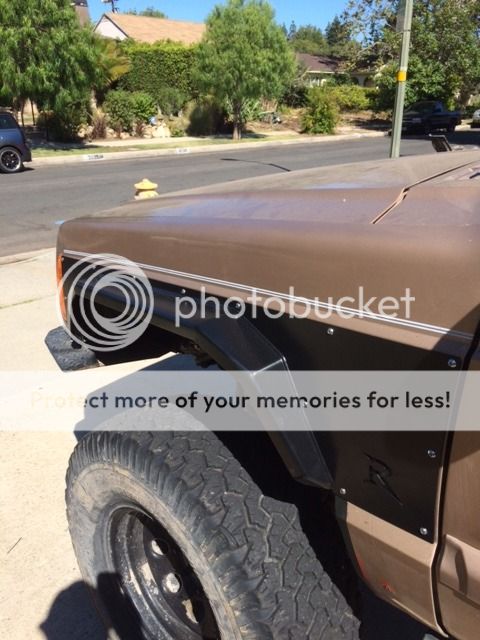
You'll notice that I painted the fender black under the Rusty's "R" logo on each fender in order to tone the logo down. I think it looks better than having a contrasting color showing though. I also painted the area around the gas fill door and I think that idea worked well. It doesn't exactly hide the door, but I think it looks better than having door framed with a contrasting rectangle.
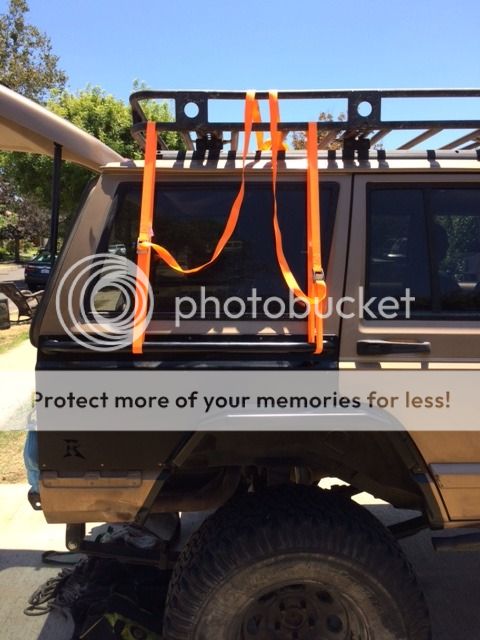
The rear flares are fairly heavy. Holding them in position while marking hole locations would be tough, even with someone else helping to hold them. I was working alone at that stage of the project and found it very helpful to hang the flares by straps from my roof rack. I used straps with non-ratcheting cam-type buckles, which allowed me to make very fine adjustments and put the flares exactly where I wanted them before doing any marking or drilling. Here's a picture.
Below is a diagram copied from Rusty's installation instructions for the rears.
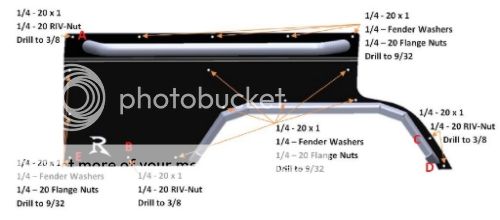
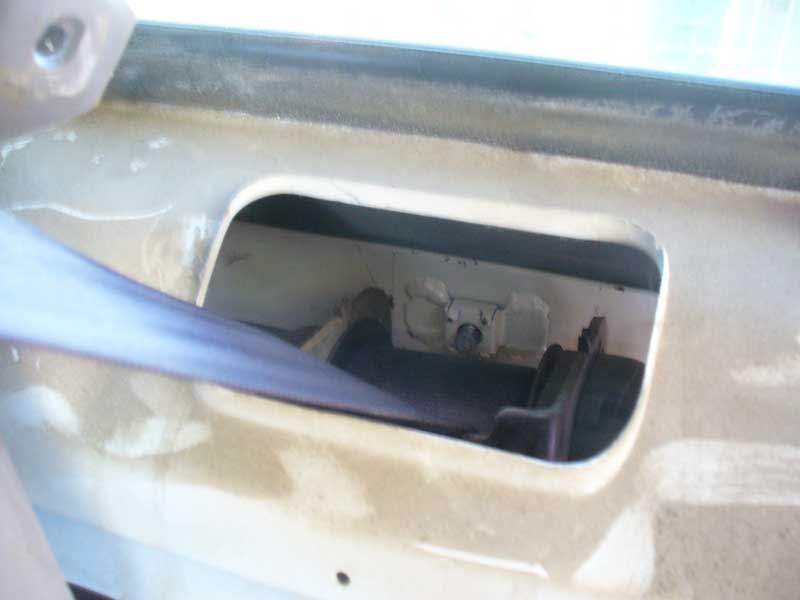
Note that the instructions call for the use of RIV-Nuts at the locations I've marked A, B, C and D. On the passenger side, the area behind the fender is wide open and all of the bolts are easily accessible from inside the cargo compartment, except for locations C and D. So on the passenger side, I used washers and nuts without any issue at all at locations A and B. (Its a good thing I figured that out before drilling RIV-Nut sized holes.)
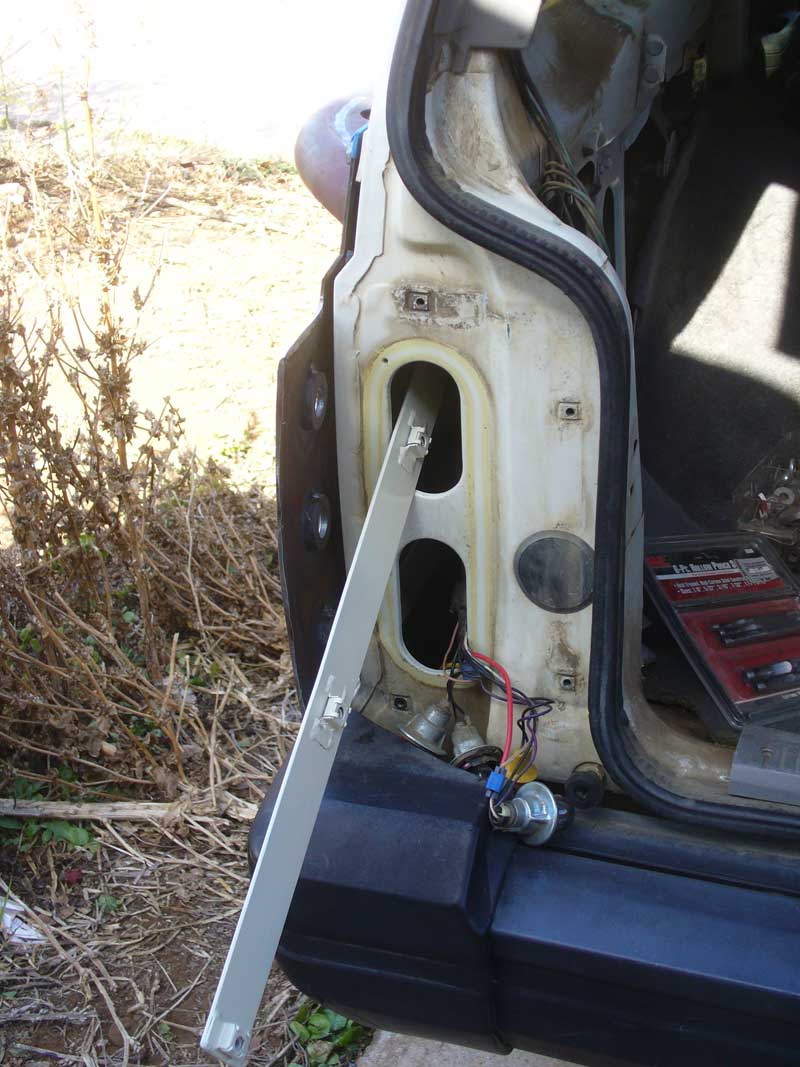
Access is a tiny bit more difficult on the driver's side. I removed the spare tire support, which takes just a minute to do, and that helped give better access. With the support removed, my girlfriend had no problem at all reaching locations A and B from the inside. So I used washers and nuts on locations A and B on the driver's side too. But, even with her dainty girl hands, the GF could not get a nut started on the bolt at location E. So, on the driver's side, I ended up using one of the RIV-Nuts at location E.
In sum, for the rear fenders, instead of using eight RIV-Nuts as called for in the instructions, I used only five. This left me three flange nuts short. So, if you don't have any stainless 1/4-20 nuts laying around, you may want to pick some extras up before starting this project. But don't pick up any fender washers: you'll have several extras left over from the front fenders.
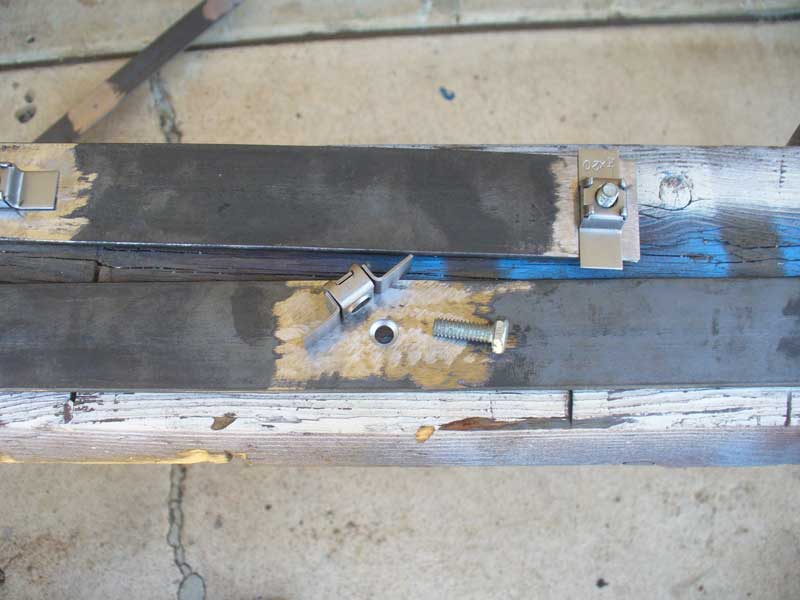
The RIV-Nuts at location D were problematic on both sides of the rig. The problem is that the sheet metal is bent at an acute angle to form the inner wall of the wheel well. Drilling though the first layer of sheet metal did not give me sufficient access to fully insert the RIV-Nut. After much futzing around, I ended up drilling through the inner wheel well wall, which allowed me to fully insert the RIV-Nut and then tighten it up, but left holes in the wheel well. If I had a welder, I'd use it to patch up those holes. Since I don't have a welder, I'll patch the holes with Bondo . . . some day.
Here is a diagram of the front, from the instructions.

Several of the mounting holes are drilled in locations where there isn't room for the fender washers that are supplied. I just went ahead and used the flange nuts in those locations without washers. I didn't bother to mark those locations on the diagram because its just really obvious once you start installing the nuts and bolts where the washers do and don't fit. The location I marked with the A was a real problem though.
The hole drilled at location A is tight up against the edge of the door opening where the sheet metal is formed into an acute angle leaving a space so tight that the supplied 3/4" bolts could not be fully inserted and, more problematically, there wasn't even room for the nut to slip into position to meet up with the bolt. What I ended up doing was, first, I shortened the bolt by about a 1/4 inch to get it to fit. Then I took a steel rod that I had lying around, inserted it into the space from the wheel well opening, and whacked on it with a BFH until I had deformed the sheet metal by the door opening enough to get a nut to slide into position. It would have been easier with a really long cold chisel or something like that, but I had to make due with what I had on hand. Anyway, it worked, and I am really pleased with how the project came out.
Now I need bigger tires!
You'll notice that I painted the fender black under the Rusty's "R" logo on each fender in order to tone the logo down. I think it looks better than having a contrasting color showing though. I also painted the area around the gas fill door and I think that idea worked well. It doesn't exactly hide the door, but I think it looks better than having door framed with a contrasting rectangle.
The rear flares are fairly heavy. Holding them in position while marking hole locations would be tough, even with someone else helping to hold them. I was working alone at that stage of the project and found it very helpful to hang the flares by straps from my roof rack. I used straps with non-ratcheting cam-type buckles, which allowed me to make very fine adjustments and put the flares exactly where I wanted them before doing any marking or drilling. Here's a picture.
Below is a diagram copied from Rusty's installation instructions for the rears.
Note that the instructions call for the use of RIV-Nuts at the locations I've marked A, B, C and D. On the passenger side, the area behind the fender is wide open and all of the bolts are easily accessible from inside the cargo compartment, except for locations C and D. So on the passenger side, I used washers and nuts without any issue at all at locations A and B. (Its a good thing I figured that out before drilling RIV-Nut sized holes.)
Access is a tiny bit more difficult on the driver's side. I removed the spare tire support, which takes just a minute to do, and that helped give better access. With the support removed, my girlfriend had no problem at all reaching locations A and B from the inside. So I used washers and nuts on locations A and B on the driver's side too. But, even with her dainty girl hands, the GF could not get a nut started on the bolt at location E. So, on the driver's side, I ended up using one of the RIV-Nuts at location E.
In sum, for the rear fenders, instead of using eight RIV-Nuts as called for in the instructions, I used only five. This left me three flange nuts short. So, if you don't have any stainless 1/4-20 nuts laying around, you may want to pick some extras up before starting this project. But don't pick up any fender washers: you'll have several extras left over from the front fenders.
The RIV-Nuts at location D were problematic on both sides of the rig. The problem is that the sheet metal is bent at an acute angle to form the inner wall of the wheel well. Drilling though the first layer of sheet metal did not give me sufficient access to fully insert the RIV-Nut. After much futzing around, I ended up drilling through the inner wheel well wall, which allowed me to fully insert the RIV-Nut and then tighten it up, but left holes in the wheel well. If I had a welder, I'd use it to patch up those holes. Since I don't have a welder, I'll patch the holes with Bondo . . . some day.
Here is a diagram of the front, from the instructions.
Several of the mounting holes are drilled in locations where there isn't room for the fender washers that are supplied. I just went ahead and used the flange nuts in those locations without washers. I didn't bother to mark those locations on the diagram because its just really obvious once you start installing the nuts and bolts where the washers do and don't fit. The location I marked with the A was a real problem though.
The hole drilled at location A is tight up against the edge of the door opening where the sheet metal is formed into an acute angle leaving a space so tight that the supplied 3/4" bolts could not be fully inserted and, more problematically, there wasn't even room for the nut to slip into position to meet up with the bolt. What I ended up doing was, first, I shortened the bolt by about a 1/4 inch to get it to fit. Then I took a steel rod that I had lying around, inserted it into the space from the wheel well opening, and whacked on it with a BFH until I had deformed the sheet metal by the door opening enough to get a nut to slide into position. It would have been easier with a really long cold chisel or something like that, but I had to make due with what I had on hand. Anyway, it worked, and I am really pleased with how the project came out.
Now I need bigger tires!