XJ&CHZ4ME
NAXJA Forum User
- Location
- Unionville, MO
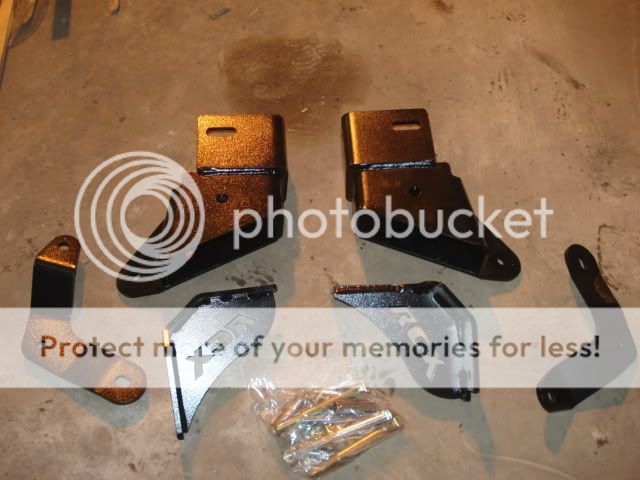
I picked up a set of the new control arm drop brackets from Rough Country the other day and thought I would do a short write up for anyone who is interested in them. To start with I installed these on my 93XJ that had the Rough Country 6.5" X-Series lift on short arms. The short arms have been fine for the type of wheeling that I do, but the road manners were a bit harsh, so getting a set of drop brackets seemed like the logical choice for my rig. To start with, here is a pic of the components that came with the kit.
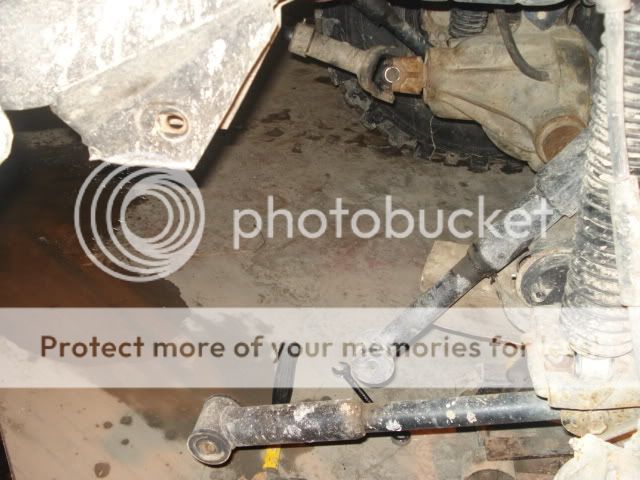
The directions were fairly basic, but needed just slight clairification on a couple of items. I would not suggest a beginner to try this at home with limited tools. Now granted I had the fortune of using an overhead hoist and air tools, it made the install go much smoother and faster then expected. Fisrt I started off by removing the wheel and the control arms from the "frame" side.
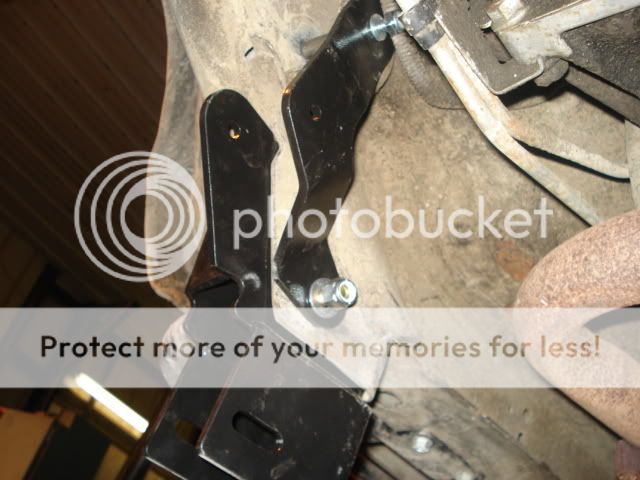
Next we installed the main body of the control arm drop bracket and the "boomerang" shape bracket for the upper control arm to mount in. Now this is a part that the directions were not overly clear on, so the best way I can explain it is that the small "dog eared" tab goes towards the bottom and it runs convex (curved away) from the frame.
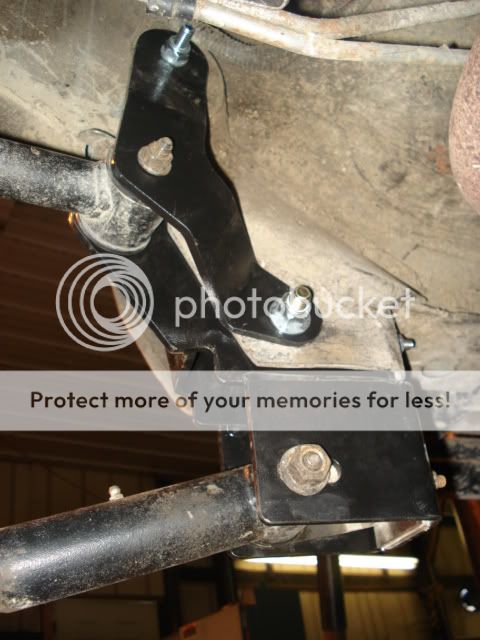
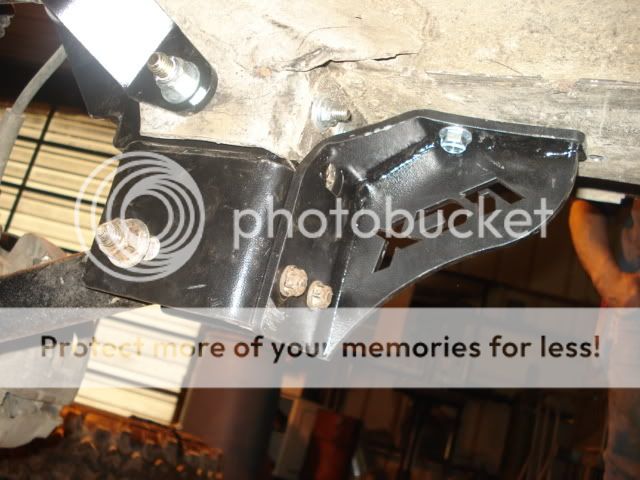
After these items were mocked up, we tightened them down before we had installed the control arms back in them. This is where we got a bit to excited with the airgun and overtightened them causing it to be a hard fit to get the lower control arm back into the bracket with the adjustment shoe installed. We simply corrected this by backing the pressure off of the bolt and the control arm slid easily into place, and we re-torqued everything once the arms were installed. He is what it looks like with the upper and lower installed in the brackets before installation of the back brace.
Next we installed the braces that run on the back of the drop brackets. These installed just like the directions indicated. They are bolted to the back of the brackets by using the 2 bolts that extended out of the alignment shoe and then they have (2) 3/8" self tapping bolts that you have to drill an 11/32" hole for before you can screw them into the frame rail. This was an easy item to do to finish up the install.
The directions were fairly basic, but needed just slight clairification on a couple of items. I would not suggest a beginner to try this at home with limited tools. Now granted I had the fortune of using an overhead hoist and air tools, it made the install go much smoother and faster then expected. Fisrt I started off by removing the wheel and the control arms from the "frame" side.
Next we installed the main body of the control arm drop bracket and the "boomerang" shape bracket for the upper control arm to mount in. Now this is a part that the directions were not overly clear on, so the best way I can explain it is that the small "dog eared" tab goes towards the bottom and it runs convex (curved away) from the frame.
After these items were mocked up, we tightened them down before we had installed the control arms back in them. This is where we got a bit to excited with the airgun and overtightened them causing it to be a hard fit to get the lower control arm back into the bracket with the adjustment shoe installed. We simply corrected this by backing the pressure off of the bolt and the control arm slid easily into place, and we re-torqued everything once the arms were installed. He is what it looks like with the upper and lower installed in the brackets before installation of the back brace.
Next we installed the braces that run on the back of the drop brackets. These installed just like the directions indicated. They are bolted to the back of the brackets by using the 2 bolts that extended out of the alignment shoe and then they have (2) 3/8" self tapping bolts that you have to drill an 11/32" hole for before you can screw them into the frame rail. This was an easy item to do to finish up the install.

 member. Check out the vendors forum and Jason (GRIMUS99XJ) has a pic and price posted over there.
