Narrowed D44/9" Swap

I think I used the same banjo bolts that starboard m had listed in his thread.

They fit through my stock RE lines and threaded into the calipers well enough to seal.
 

Thanks Frank :doh:

I just drilled my lines out, and I haven't had any problems with the two different sets of lines I've done it to, in the 3 years I've had my front installed. The copper washers are sealing the banjo anyways, so.

I thought about this too, it may be an option. I am going to look at a set of stock RWD K5 Blazer hoses today at Advance. They should be the correct size and they look really long.

I think I used the same banjo bolts that starboard m had listed in his thread.

They fit through my stock RE lines and threaded into the calipers well enough to seal.

That's where I started too, but I couldn't get them to work. The ones he listed are 10X1.5, I thought it was weird they would be metric on a 1976 caliper but I tried 3 different ones on the 10X1.5. Then I discovered they are actually 7/16X20. I don't know how you got them tight, mine would just spin with minmum torque applied.
 
The fiasco is officially over! I found that 1976 K5 Blazer RWD brake lines are nearly the same length as my XJ 6" extended lines. They were 21 bucks a piece.

Advance Auto PN H86551 Right, H86550 Left.
NAPA banjo bolt PN 82698

Side-by-side shot of the 6" XJ extended and the K5 RWD OEM length lines.

DSCN4536.jpg
 
Looks good John, you gonna come down to WF and test them out?
 
Could you measure the exact length of the Advanced brake lines, and post up the results?
Thanks
 
Could you measure the exact length of the Advanced brake lines, and post up the results?
Thanks

Sorry, they are already installed so it would be nearly impossible to get a good measurement (they are shaped like an "S" now). I did the measure the braided hoses you see in the pic above which are very close in length. They measured 22" end-to-end. Hope that helps.
 
Made a little progress yesterday before the dog got sick all over the house :(

Stretched the front 1.25" and it made gobs of room. By gobs I mean a little more (there's a 5.3L sitting above the front axle ya know?). I will actually have a little up-travel now. The track bar and steering are in and it's really tight. I know it's still in the garage, but the steering feels effortless as compared to before when it had a giant drop pitman and a huge angle to the bottom of the D30 knuckle. Going to need to trim the back of the bumper, but that should be all. The front drive shaft fits now too!

Finally got the brakes bled. Been so long since I messed with drums and I had them out of adjustment. 3 quarts of brake fluid later I finally figured it out. Even did a bench bleed on the MC while I was wasting time and fluid. Oh well, there's not a drop of old fluid left in the system now.

Waiting on shocks now so I still can't drive it. Probaby going to put it on jack stands and start breaking in the gears while I'm waiting.
 
Last edited:
Ya, I had to stretch mine forward some earlier this year when I lowered it, and found this.

DSC_0985-1.jpg


Your axle seems a little familiar to me.


DSC_2483.jpg

I don't have anything like your first pic after my stretch. That seems to be an issue with lowering it. My hopes of dropping mine were diminished when I started looking at the available space. The 5.3L really uses a lot of available overhead for the axle.

Yeah, looks a little familiar... How do you like it now that it's done?
 
Ya, that only happened with full lock to driver side. I think my issue was that I had the vehicle much higher before, so I really never got compressed or articulated enough during regular driving to notice the interference, and I had checked clearances before with wheels pointed straight.

Once I lowered it and I had my steering issues go away, I love the axle (I too notice that its easy to steer on the street, a friend also noticed it when he moved mine one time). I bash it off rocks and it doesn't even take notice. Only problem I've had with it was a Warn premium that wasn't fully engaged, but I have stock slugs I carry just for such a purpose.
 
Ya, I had to stretch mine forward some earlier this year when I lowered it, and found this.

DSC_0985-1.jpg

I had the exact same issue. And I actually trimmed the lower half of my frame side track bar bracket to allow for clearance when flexing. I still don't like the fix, so I'll probably fab my own bracket once I get the time. This picture was taken at ride height before my "fix". One mild bump driving down the road would be enough articulation for the two to hit. It seems however, that you shouldn't have to worry about it - looking at your custom bracket.

DSC_3093.jpg


I noticed on Cruzin Illusion's setup (which is what I was using as a guide when building mine), his TNT track bar bracket is mirrored backwards towards the rear from that which you can purchase on the website, as well as what I received in the mail. Something I initially overlooked. I contacted TNT about this, and never got a reply. :rolleyes:

100_2665.jpg


My setup is very similar to yours and Begsters. I DD my XJ and have to say, it's not as nice driving on the road as I thought it would be. I have noticeable bump steer that really irritates me. While the steering is much more responsive than what I had with my D30. I attribute it to the length of the track bar, with how short it is. When I can allow my XJ to sit for a lengthened period of time, I plan to remove the truss' track bar mount, and weld another one on further towards the Passenger side of the vehicle. This should lengthen my track bar quite a bit, and will hopefully rid me of my bump steer issues. In addition, I plan to install some sort of sway bar kit too. At the moment, I'm running without one.

DSC_3274s25.jpg


Sweet build though John! Looks real good. :)

Scott
 
I noticed on Cruzin Illusion's setup (which is what I was using as a guide when building mine), his TNT track bar bracket is mirrored backwards towards the rear
100_2665.jpg

Interesting. I have a Rusty's track bar mount and I planned to switch to an RE until I tried to install it. The Rusty's mounted toward the front side and the RE mounted toward the back (like the one in the pic here). I did not have the clearance I needed for the stretch when trying to use the RE because of the different mounting location. I will take a pic tomorrow so I can make my point clearer.
 
I actually pulled it out of the garage and took it down the street today! Started the swap on Thanksgiving weekend and it finally moves again - sorta. The toe in is about an inch or so and the brakes need to be bled one more time. It was interesting to say the least. Just waiting for the wife to get home so she can help me do the alignment.

Finished installing/mounting the OX cable too.

DSCN4609.jpg


DSCN4607.jpg
 
It's been a slow couple weeks with the Jeep. UPS lost my shocks so I had to wait around for another set. Got them installed and put a few miles on it. It really handles great. I was betting there was going to be a bumpsteer issue because of the short track bar, but it seems okay. Hopefully I will get a chance to stretch it out this week and test the trackbar/steering for binding.

While I was waiting for my shocks to come Santa bought my Christmas present. Shiny new 9000# two post lift :guitar: Man I should have got one of these years ago.

DSCF0327.jpg
 
Here’s an update. I finally saved enough pennies to do the hydro-assist steering. Did a bunch of research on it and although a lot of people say they can do it for anywhere from $100 to $300, I just didn’t want to take the time to put it all together and maybe get it right, maybe not.

I started talking to Matt at West Texas Off Road, they sell a “Stage II” kit which includes everything you need and they rebuild your box including tapping the ports on it.

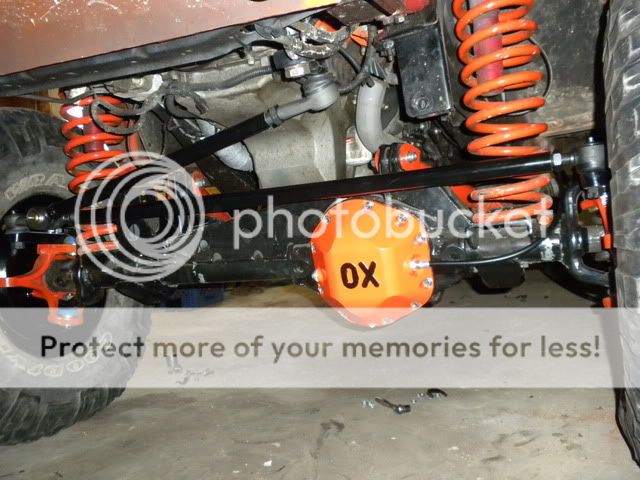
While I was waiting for my box and kit to come back I decided to make my track bar frame mount a little stronger. Seems like every time I go out my steering wheel ends up in a different place because this mount was bending. Should be better now.

DSCN0182.jpg


Here’s what came in the kit.

DSCN0283.jpg


I forgot to take a pic of the box before installing it, oh well.

DSCN0282.jpg


I was trying to think of the best place to mount my ram and I figured since I had the TNT truss there I would try to utilize it.

DSCN0297.jpg

DSCN0296.jpg


It seems like most people weld the tabs to the tube between the tie rods, but I can’t figure out how you would do an alignment afterwards. I know some people don’t care, but I do. My Jeep does a few thousand street miles every summer so I wanted to be able to do an alignment. I decide to use a tube clamp and ordered it Poly Performance. Then welded my mount tabs onto the clamp.

DSCN0285.jpg


With the high steer set-up it was going to leave the ram vulnerable so I knocked out a little skid using 3/16”.

DSCN0313.jpg

DSCN0308.jpg

DSCN0312.jpg


Mounted up the ram and the hoses.

DSCN0314.jpg


Bled all the air manually, started it up, turned right to the stop, turned left to the stop and it blew the seal on the sector shaft.

I was seriously bummed, especially considering I will be driving to Winterfest at the Badlands in one week! I got on the phone with Matt at West Texas right away and we worked through a few things. In the end the decision was made to send a new box to me overnight ($115 their expense) to knock down the time it would take to send my box back and have it re-worked. I thought that was outrageous and told Matt to send it 2 day (only $50 his expense). So I get the new box Tuesday night and I hope everything works good, I won’t have much time for any more incidents.
 
Back
Top