Ok, here's a write up. Its been quite some time since I have installed this mod, so these are not install picts, but are installed picts. Just use your imagination if you want pictures of it being installed.
Parts needed:
-2 Lift gate struts or the like. (it can vary depending on where you can find them or what kind you get, but I chose to use some that had eye holes at both ends for ease of install.)
-4 "L" brackets from a hardware store. I chose to use joist ties (ones used to build decks) because I can get them very easily from the supplies we have around the house. You can find these for around $3 anywhere that sells wood.
-4 grade 5 bolts (lengths and size may vary depending on your lift struts)
-4 nylock nuts for bolts
-4 regular nuts (to be used as jam nuts)
-12 sheet metal screws
*Use your imagination here*
You'll first want to start by removing the stock hood prop and mount and either disposing of it or keeping it in case you don't like the struts. Put a 2x4 or golf club or whatever you can find and prop the hood up at the height or angle that you want. I choose to make my hood open at a greater angle than stock because I hate hitting my head on the hood when working on it. After that, take 1 of the "L" bracktes, 1 strut, 1 bolt, 1 nylock, 1 jam nut and assemble them in this order onto the "L" bracket. Bolt, strut, jam nut, "L" bracket, nylock. You'll want to keep about 1/8" gap on either side of the strut when tightening the nylock and the jam nut togeather to allow for misalignment of the strut and to allow it to rotate. Here is what it should look like when assembled.

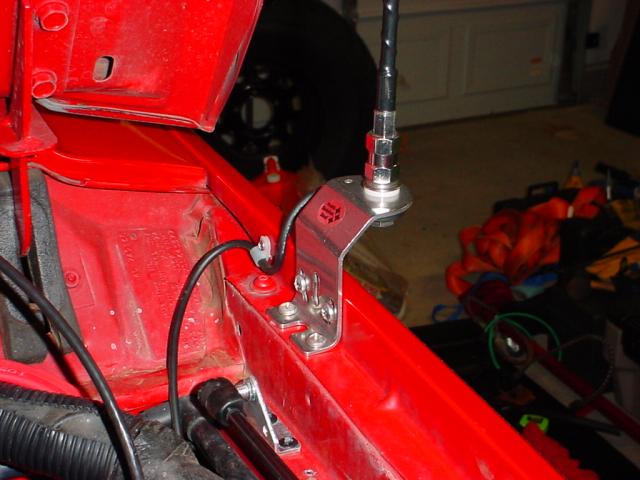
Repeat this again for the other side. At this point you should have two struts with one "L" bracket assembled on each of them (don't do the other side yet, as you'll need the "L" bracket free so you can screw it into the hood. Here is the tricky part. Now its time to mount the struts to the vehicle (not the hood at this time). Place one end of one strut in the engine bay where you plan on attaching the strut to. You'll want to mount it not so far back that the strut wont be able to push the hood up and not too far forward so that the strut will not close. I mounted mine pretty flush whe the fire wall edge. You can see in the picture, kinda hard to explain where.

To find that sweet spot will take a bit of trial and error. I just kinda mimed the arc that the strut would take and put it where I thought it was good. It worked for me, never had to move it. You'll want to measure from that point and make the other side as identical as you can or your hood won't close right. Next step is a bit harder than the previous. You'll want to find the compressed length of the shock. I found it easy enough to press the shock down and have someone else measure it. From the rear most "L" bracket, measure that distance toward the front of the jeep. Mark the spot somewhere on the fender and lower the hood and mark the hood at that same spot. That spot is where you'll want to drill and place your "L" bracket. Once you have your "L" bracket mounted on the hood, go ahead and use the remaining hardware and attach the lift strut to the "L" bracket. I used three screws on the hood "L" bracket because I didn't think 2 was sufficent to hold the bracket on. Just me though. I'm sure you could get away with two. Repeat for the other side. At this point, your hood should be able be supported by the struts alone and should look something like this.

You'll want to test close the hood before you slam it shut and see if your struts will interfere with anything under the hood. my drivers side interferes with a wire harness, but its not that big of a deal and it just pushes the wires away.
The passanger side doesnt hit anything at all.
And thats it. Easy as can be. Here are some other pictures that you might find helpful, but I hope that the write up is sufficent. If not, just fill in the gaps with your imagination and good luck!