Flickr apparently won't give you BBcode or even a URL for a direct link to JUST the image if you're using a mobile device. I had to pull out the laptop to get the BBcodes.
To the pictures:
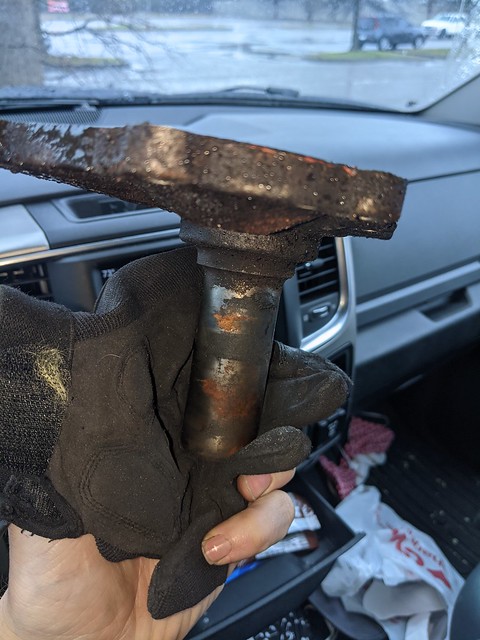
The nasty input bearing retainer I got from Pull-A-Part. Poor guy didn't know how to charge it, so he just rang it up as "trim". A little over $8, so I wasn't complaining.
 PXL_20210131_141905487
 by
Terrence Brunson, on Flickr
I got it all cleaned up and installed on the transmission:
 PXL_20210131_214200497
 by
Terrence Brunson, on Flickr
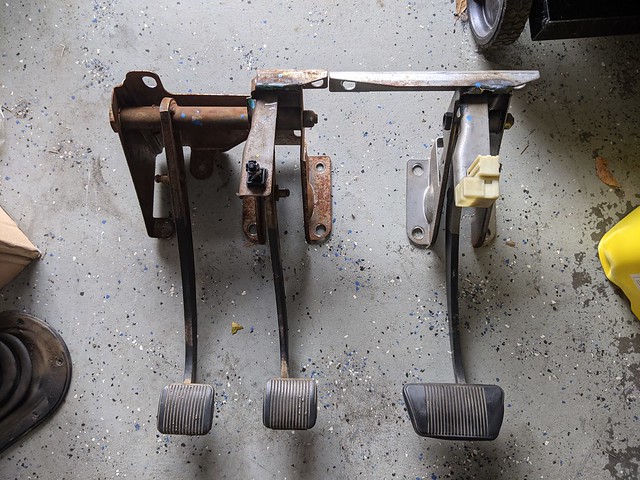
Manual pedal vs. Auto pedal assembly. The mount holes are all the same except for the 2 for where the clutch master cylinder bolts through the firewall.
 PXL_20210201_141607569
 by
Terrence Brunson, on Flickr
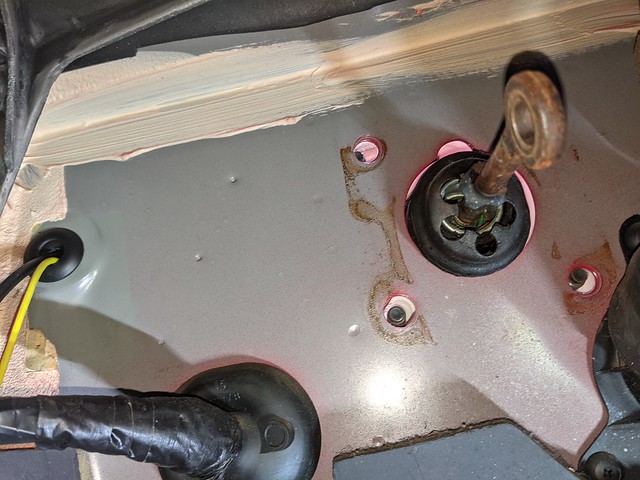
Chrysler was kind enough to dimple the firewall. The 3 dots in a row are where you drill. It's pretty self explanatory:
 PXL_20210201_142007472
 by
Terrence Brunson, on Flickr
 PXL_20210201_145020832
 by
Terrence Brunson, on Flickr
I separated the pedal assembly. To me, it made installation easier.
 PXL_20210201_152959111
 by
Terrence Brunson, on Flickr
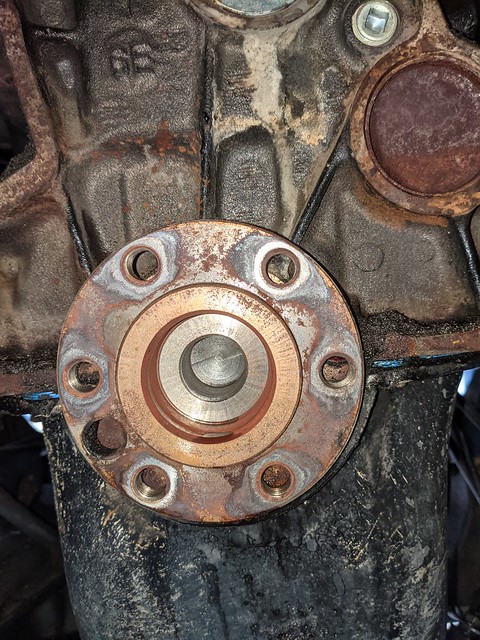
Make sure the pilot bore is clean. I used some rust penetrant and scotchbrite on a drill. I didn't want anything in the 23 year old bore jamming my new pilot bushing from Novak.
 PXL_20210201_200132566
 by
Terrence Brunson, on Flickr
My flywheel holding tool broke the last time I used it, and 105 ft-lbs is more than I could hold. I just used a piece of plastic coated chain to keep it from scratching the flywheel too much. Worked great!
 PXL_20210201_205228514
 by
Terrence Brunson, on Flickr
Sheet metal adapter piece pulled:
 PXL_20210201_213901946
 by
Terrence Brunson, on Flickr
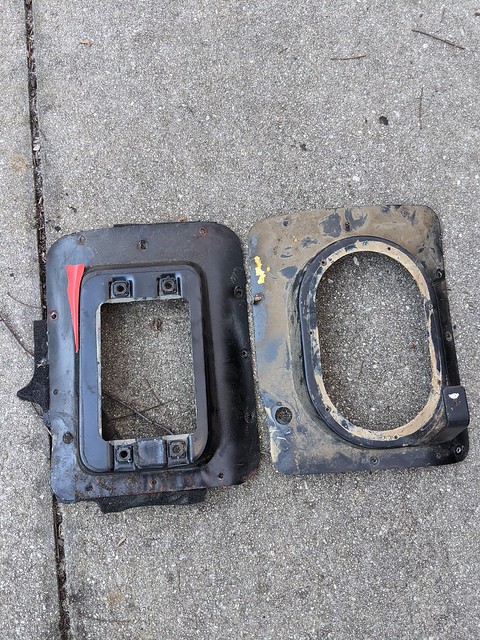
Automatic vs. manual sheet metal adapter pieces. I guess you could use the automatic one if you really wanted to, but I had the manual one available, so I figured why not?
 PXL_20210202_150300254
 by
Terrence Brunson, on Flickr
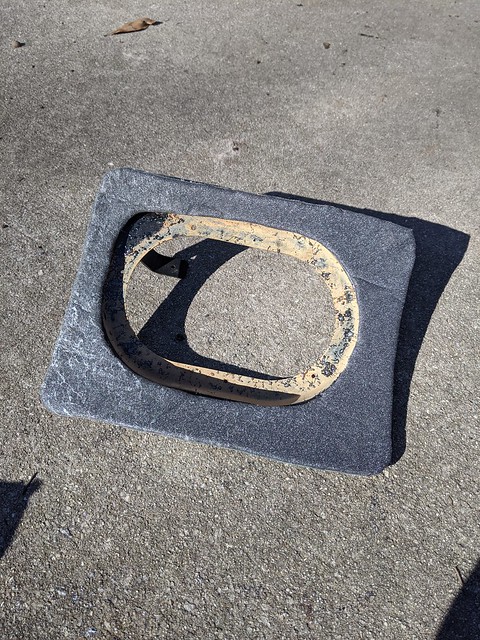
Since the old foam piece was destroyed on both plates, I scraped it all off and used a small piece of leftover headliner material to make a foam gasket. I really hate getting cold or hot air in from outside, so I traced it out and cut it, then glued it on with some 3M spray adhesive. Just like you would use on a headliner.
 PXL_20210202_154953993
 by
Terrence Brunson, on Flickr
 PXL_20210202_155055687
 by
Terrence Brunson, on Flickr
Here's the proof that the manual (top) crossmember is different. It's about 1/2" or 3/4" lower at the mount. I probably could have cut and welded it, but again... it was available to me, so why not?
 PXL_20210202_182202414
 by
Terrence Brunson, on Flickr
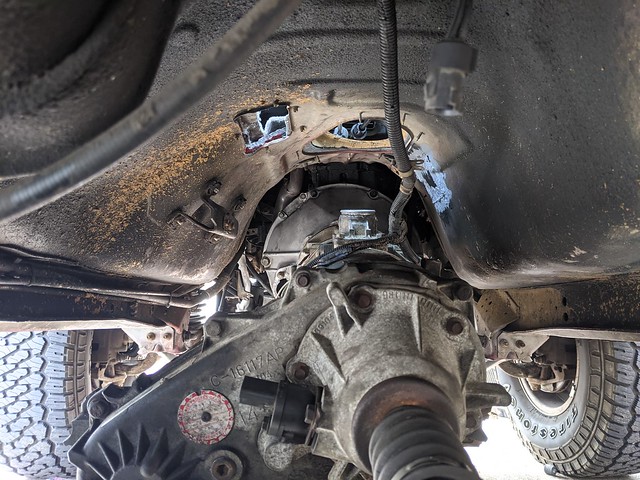
Here's the transmission making its way home:
 PXL_20210202_185321212
 by
Terrence Brunson, on Flickr
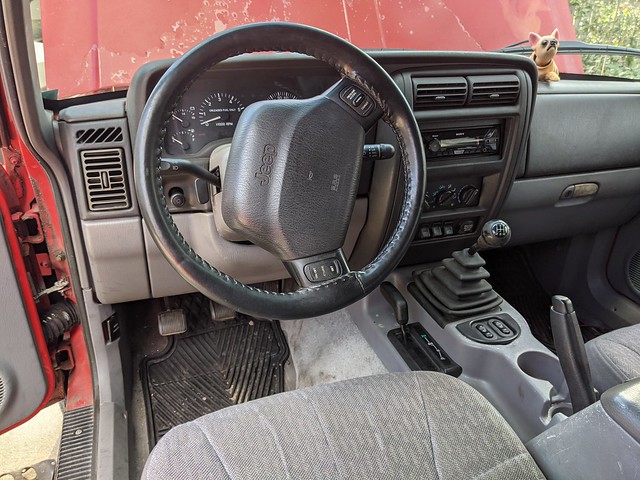
I really should clean the carpet. I work at a Bridgestone tire factory, so my work boots get covered in black crap. But check out that clean OEM install!
 PXL_20210202_205230497
 by
Terrence Brunson, on Flickr
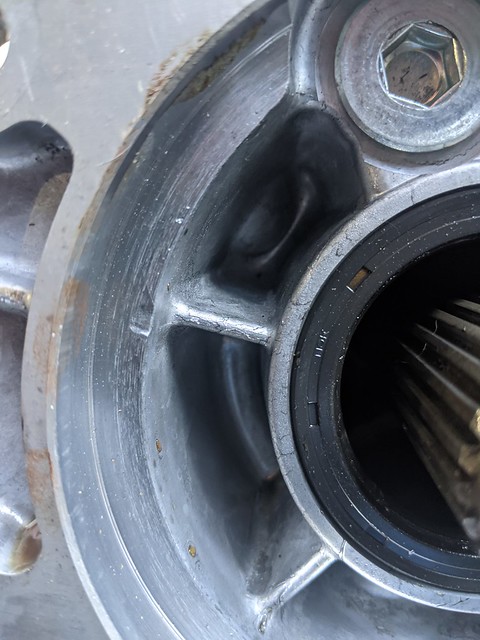
And finally, these little ribs the screwdriver is pointing to were hitting the back of the transmission. You can see the tiny dimples on the transmission side, so I ground a little bit of the ribs away. I put a shop rag over the front of the transfer case to keep metal shavings away from the input seal, but I still hit it with a liberal coating of brake cleaner to blast away any residual shavings...
 PXL_20210129_201707022
 by
Terrence Brunson, on Flickr
 PXL_20210129_201715093
 by
Terrence Brunson, on Flickr
 PXL_20210129_201718899
 by
Terrence Brunson, on Flickr
Ground away:
 PXL_20210129_202437112
 by
Terrence Brunson, on Flickr


