I wanted to post up a big thank you to Cal, Andy C., and a couple of others for helping me out just before Thanksgiving. The SoCal group here at  is pretty impressive with their willingness to help out folks. I've seen it in numerous posts, and have now been a recipient.
A quick background of me - I live in upstate NY, but my XJ lives in the Death Valley area. I don't get to visit it too often, 3-6 times per year. The biggest difficulty is when something breaks, and I need to fix it. I need to have everything ready to go before I get out to So Cal, since getting special parts quickly can be most difficult.
On my last trip, something didn't look right with the ball joints, particularly the driver's side upper. In addition, the front locker had an air problem that was unknown, but internal to the axle housing. Further, the control arms had their bushings expanded such that new bushings would not properly fit.
Since I couldn't easily see specifically what was wrong with the lockers and ball joints, finding an axle to swap in seemed to be the easiest. I had been looking and watching the various boards and auctions, etc., and ended up finding a nice axle here on. Some of you may recognize it as Kyung's old axle. I was very fortunate to have Cal bring it to Bakersfield from the LA basin, and Andy C. bring it to my house in Ridgecrest.
As it turned out, the driver's side upper ball joint press fit into the inner "C" was loose enough to slide up and down and turn by hand! That is fixable, but requires a welder, replacement of the inner "C", or oversize ball joint, none of which would have been easy in Ridgecrest on short notice. I'm still not sure what is the matter with the locker - didn't take it apart to find out yet.
I took the Heep down to my friend's house, and let it mark its territory on
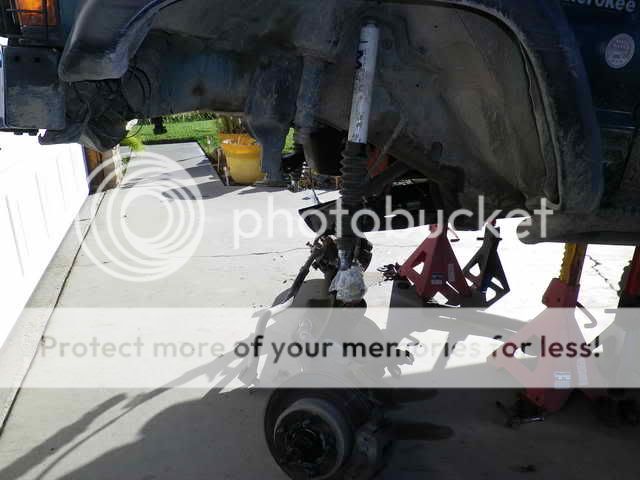
his driveway for a few days this week. First, had to tear the old axle out. It didn't want to come out willingly, but nothing a large hammer didn't solve. Thanks to my buddy Jason who came up and helped me on Sunday and Monday morning with disassembly and getting the new axle in place.
Old Axle and parts mostly torn out
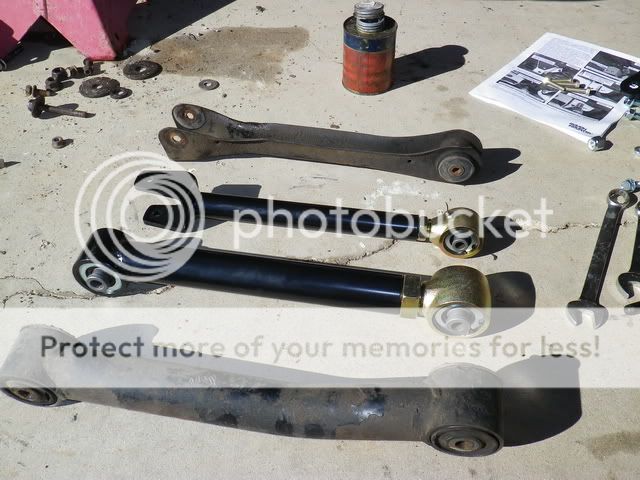
While I was doing all this. I also installed new Rokmen Control Arm drop brackets and adjustable upper and lower control arms. Compare the size and heft of the new vs. old. The old LCAs were maybe 1/8" wall tubing. The new ones are probably at least 1/2" wall tubing. They weigh at least 10 pounds more than the original units.
New control arms vs. old ones
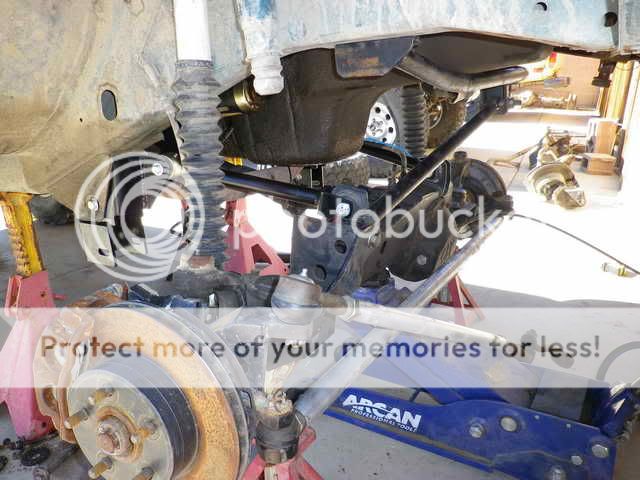
Starting to get the new axle into place. Upper control arms and track bar installed. Note high steer knuckle and massive tie rod and drag link. You can also see the track bar mounting passenger side reinforcement. Yes, it does just barely touch the oil pan. At least, if I break a motor mount, the engine can't fall out!
Putting it back together
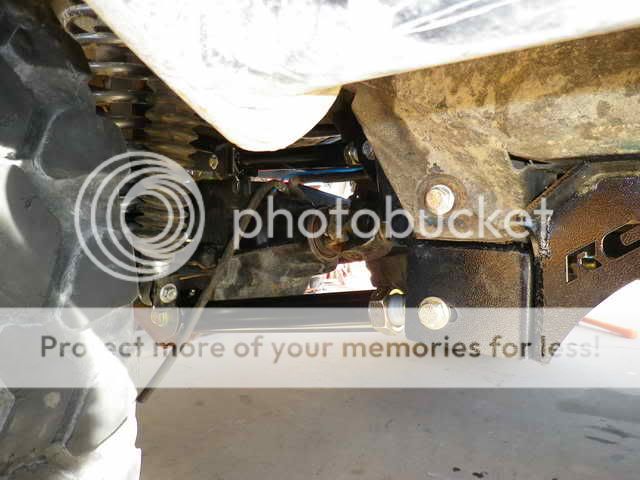
Finally have it back on the ground, just need to tighten up all the mounting bolts, now that it is in normal rest position. Note the control arms have a much more normal angle with the drop brackets installed. I do plan to put a couple of beads of weld on the drop brackets to ensure they stay put.
Ready to Tighten everything back up
Front view of nearly finished. Haven't connected the drag link to the pitman arm yet, but most everything else about done. You can see the new bump stops inside the bottom of the coils, and the truss on the axle.
Almost Complete

All in all, the install went pretty smooth, although taking longer than I hoped. I did run into a problem with brake lines, in that the lines that were in the Jeep are different from stock. I had a locking hub conversion, and it used calipers from a CJ5, and the banjo fittings on the calipers are
different than most later Jeeps. No one in Ridgecrest had stock of long enough brake lines, so I found a set of stock lines. They are working, but I can't install my new shocks until I get replacement lines.
As far as shocks are concerned, the stock shock brackets have been removed on this axle, and standard eyelet mounts fitted 1 1/2 inches lower than stock. In my setup, I'll be able to, and have picked up a set of Bilstein 5150's with 12" of travel. The 12" travel shock is nearly perfect. I hit the bump stops about 1 1/2" before the shock tops out, and 1" before I contact the inside of the fenders. The rubber of the bump stop will probably compress about 1" on a hard hit. Extended, the shock hits its limit just as the spring starts to come off the top of the isolator. The spring won't fall out, since they are positively retained on the bottom, and have 5 inches of bump stop on top. With the new Johnny joints on the control arms, and the drop brackets, there is no binding of the suspension through any of the travel.
The axle is also moved forward about 3/4 of an inch. This centers the axle much better in the wheel well, and prevents tire contact with an ugly seam on the back of the wheel well.
Driving back to the Heep's home, the Jeep's road manners were perfect. No bump steer whatsoever, no wobble or vibration at all in the steering, and tracked perfectly true. I've not aligned it yet; just measured every thing as it went in, and eyeballed for alignment and caster. Once I get tires next tires, I'll go ahead and have it aligned. It drives much steadier and cleaner than before all the changes. I just hope I don't catch too many rocks with the drop brackets.
So, the Jeep is back running. I still have work to do - run an airline extension to the new air activator for the Ox locker; change out the brake lines and shocks, and put on my new hubs, knuckle and brake assemblies to use my locking hubs again. But, it works, rolls, stops and steers correctly, and the 4WD works. Best of all, the ugly clunks coming from the front end, particularly when turning, are gone. Everything is quiet up front for the first time since I've owned it. Yes, we've had more mechanical issues than I'd like. But, the rig is getting better and better.
So, thanks again to Cal and Andy, for all your help. Pretty amazing, consdering I've not even met you in person. But, one of these days, I hope to be able to do that. I also hope to be able to return the favor somehow.
David Bricker / SYR
is pretty impressive with their willingness to help out folks. I've seen it in numerous posts, and have now been a recipient.A quick background of me - I live in upstate NY, but my XJ lives in the Death Valley area. I don't get to visit it too often, 3-6 times per year. The biggest difficulty is when something breaks, and I need to fix it. I need to have everything ready to go before I get out to So Cal, since getting special parts quickly can be most difficult.
On my last trip, something didn't look right with the ball joints, particularly the driver's side upper. In addition, the front locker had an air problem that was unknown, but internal to the axle housing. Further, the control arms had their bushings expanded such that new bushings would not properly fit.
Since I couldn't easily see specifically what was wrong with the lockers and ball joints, finding an axle to swap in seemed to be the easiest. I had been looking and watching the various boards and auctions, etc., and ended up finding a nice axle here on
. Some of you may recognize it as Kyung's old axle. I was very fortunate to have Cal bring it to Bakersfield from the LA basin, and Andy C. bring it to my house in Ridgecrest.As it turned out, the driver's side upper ball joint press fit into the inner "C" was loose enough to slide up and down and turn by hand! That is fixable, but requires a welder, replacement of the inner "C", or oversize ball joint, none of which would have been easy in Ridgecrest on short notice. I'm still not sure what is the matter with the locker - didn't take it apart to find out yet.
I took the Heep down to my friend's house, and let it mark its territory on
his driveway for a few days this week. First, had to tear the old axle out. It didn't want to come out willingly, but nothing a large hammer didn't solve. Thanks to my buddy Jason who came up and helped me on Sunday and Monday morning with disassembly and getting the new axle in place.
Old Axle and parts mostly torn out
While I was doing all this. I also installed new Rokmen Control Arm drop brackets and adjustable upper and lower control arms. Compare the size and heft of the new vs. old. The old LCAs were maybe 1/8" wall tubing. The new ones are probably at least 1/2" wall tubing. They weigh at least 10 pounds more than the original units.
New control arms vs. old ones
Starting to get the new axle into place. Upper control arms and track bar installed. Note high steer knuckle and massive tie rod and drag link. You can also see the track bar mounting passenger side reinforcement. Yes, it does just barely touch the oil pan. At least, if I break a motor mount, the engine can't fall out!
Putting it back together
Finally have it back on the ground, just need to tighten up all the mounting bolts, now that it is in normal rest position. Note the control arms have a much more normal angle with the drop brackets installed. I do plan to put a couple of beads of weld on the drop brackets to ensure they stay put.
Ready to Tighten everything back up
Front view of nearly finished. Haven't connected the drag link to the pitman arm yet, but most everything else about done. You can see the new bump stops inside the bottom of the coils, and the truss on the axle.
Almost Complete
All in all, the install went pretty smooth, although taking longer than I hoped. I did run into a problem with brake lines, in that the lines that were in the Jeep are different from stock. I had a locking hub conversion, and it used calipers from a CJ5, and the banjo fittings on the calipers are
different than most later Jeeps. No one in Ridgecrest had stock of long enough brake lines, so I found a set of stock lines. They are working, but I can't install my new shocks until I get replacement lines.
As far as shocks are concerned, the stock shock brackets have been removed on this axle, and standard eyelet mounts fitted 1 1/2 inches lower than stock. In my setup, I'll be able to, and have picked up a set of Bilstein 5150's with 12" of travel. The 12" travel shock is nearly perfect. I hit the bump stops about 1 1/2" before the shock tops out, and 1" before I contact the inside of the fenders. The rubber of the bump stop will probably compress about 1" on a hard hit. Extended, the shock hits its limit just as the spring starts to come off the top of the isolator. The spring won't fall out, since they are positively retained on the bottom, and have 5 inches of bump stop on top. With the new Johnny joints on the control arms, and the drop brackets, there is no binding of the suspension through any of the travel.
The axle is also moved forward about 3/4 of an inch. This centers the axle much better in the wheel well, and prevents tire contact with an ugly seam on the back of the wheel well.
Driving back to the Heep's home, the Jeep's road manners were perfect. No bump steer whatsoever, no wobble or vibration at all in the steering, and tracked perfectly true. I've not aligned it yet; just measured every thing as it went in, and eyeballed for alignment and caster. Once I get tires next tires, I'll go ahead and have it aligned. It drives much steadier and cleaner than before all the changes. I just hope I don't catch too many rocks with the drop brackets.
So, the Jeep is back running. I still have work to do - run an airline extension to the new air activator for the Ox locker; change out the brake lines and shocks, and put on my new hubs, knuckle and brake assemblies to use my locking hubs again. But, it works, rolls, stops and steers correctly, and the 4WD works. Best of all, the ugly clunks coming from the front end, particularly when turning, are gone. Everything is quiet up front for the first time since I've owned it. Yes, we've had more mechanical issues than I'd like. But, the rig is getting better and better.
So, thanks again to Cal and Andy, for all your help. Pretty amazing, consdering I've not even met you in person. But, one of these days, I hope to be able to do that. I also hope to be able to return the favor somehow.
David Bricker / SYR
")