- Location
- In a strange land
I did this several years ago and never posted it up. A recent inquiry makes it relevant.
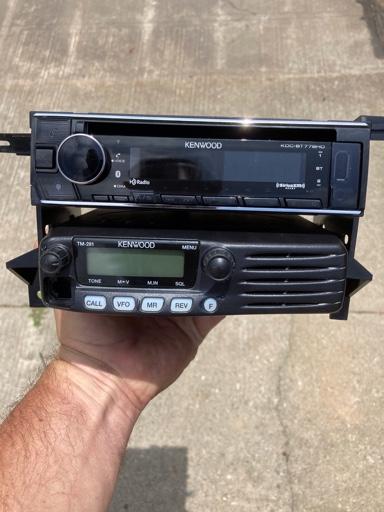
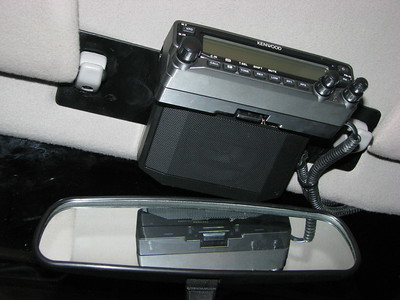
The Kenwood TM-V71A is the radio of choice in a group I wheel with. The true dual band design allows the group to have one channel for chit-chat and a separate channel for instructions from the trail boss. This means important information is not lost in the banter. This radio also happens to be a really convenient fit in an early ('96 & down) XJ. The head unit fits gracefully in the console, solving one of the challenges of where to mount such a radio in the vehicle.
Here is how I have mine set up:
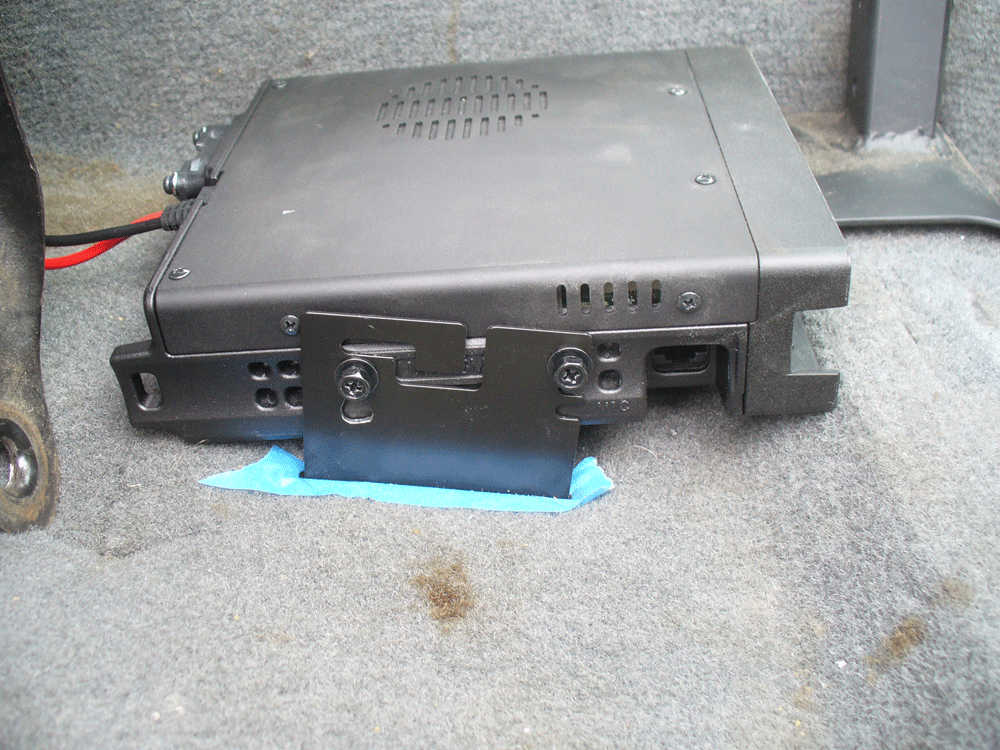
The brain box of the radio is mounted under the passenger seat. I had to play around with the holes in the provided mounting bracket. My initial efforts at a low profile were too low (as you can see from the irregular hole that I made and then didn't use. If I recall correctly I spaced the bracket up through the carpet through the use of rubber isolators such as come with MSD ignition modules. I think also placed a heat shield under that part of the floorboard (underneath the vehicle, above the exhaust) figuring that part of the floor probably gets fairly warm. Here is the mounting of the brain box:
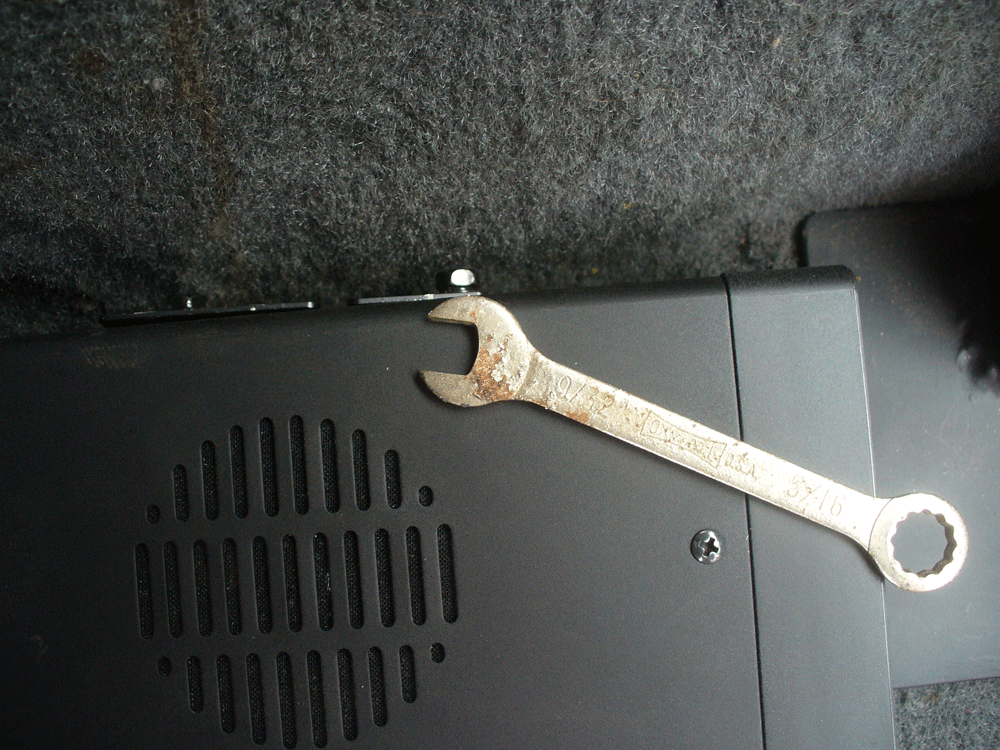
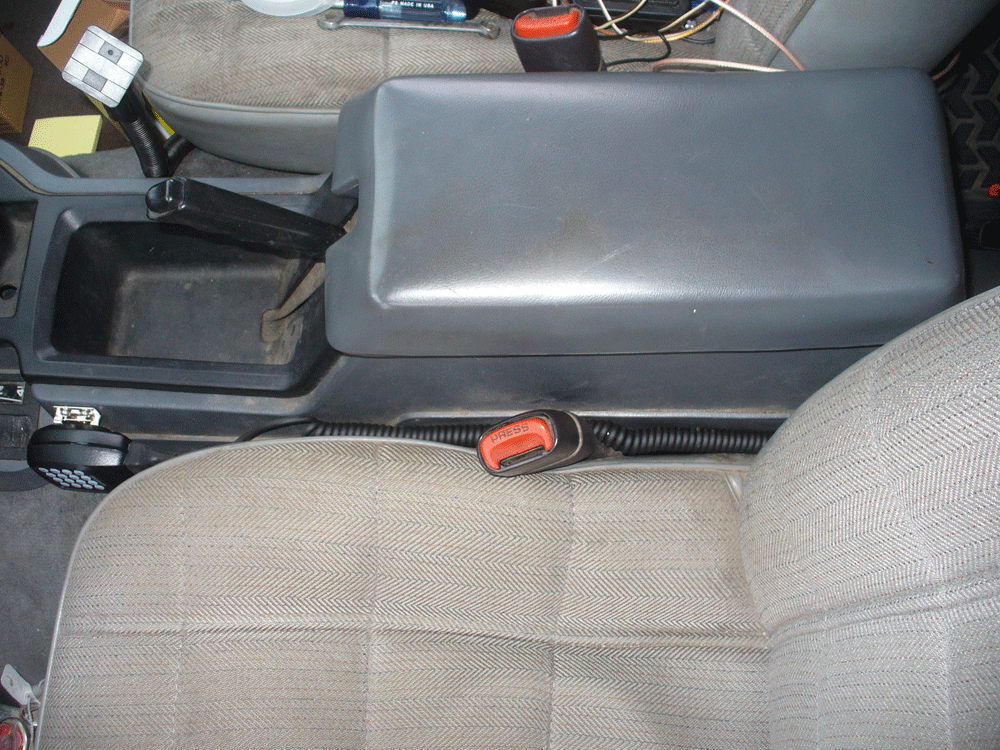
Note that I have this tucked in close to the transmission tunnel too. This required finding a wrench to install the screws for that side of the mount:
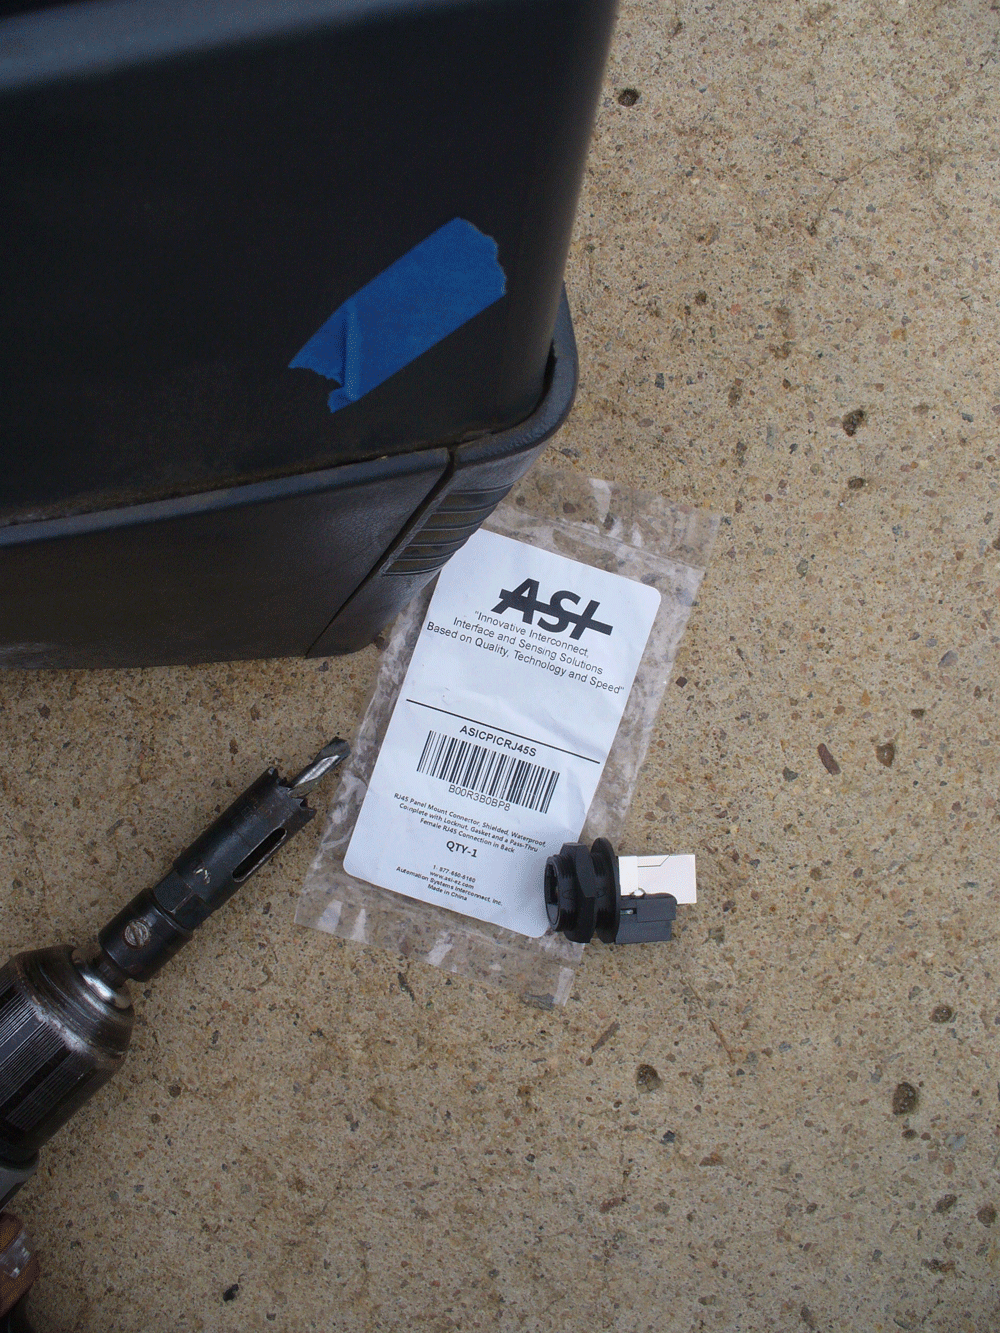
For the mic jack I purchased an RJ45 panel mount connector and a short (I think 36") cable to feed it between the brain box and the connector. I installed the connector in the rear of the center console:
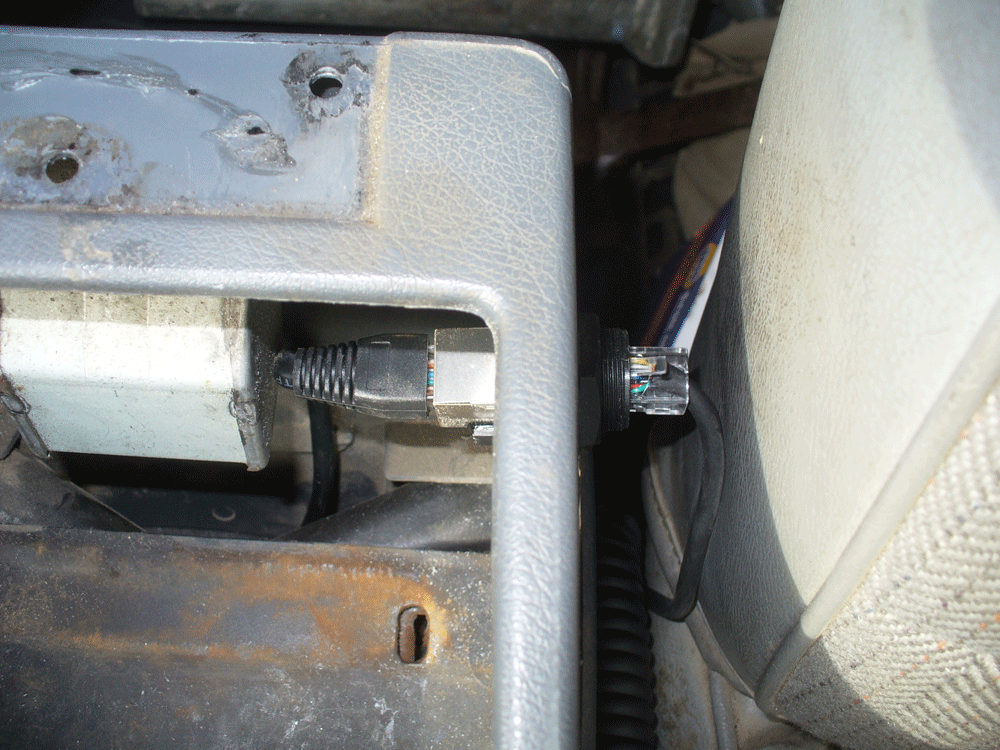
Here is how it looks installed, with the mic plugged in:
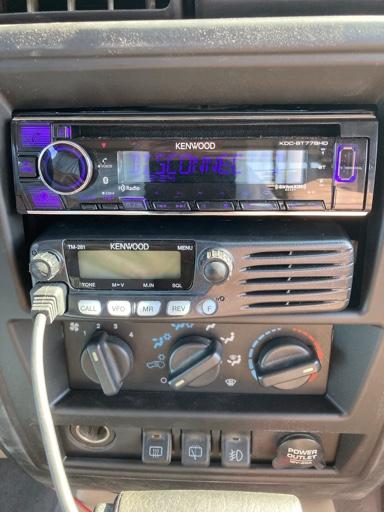
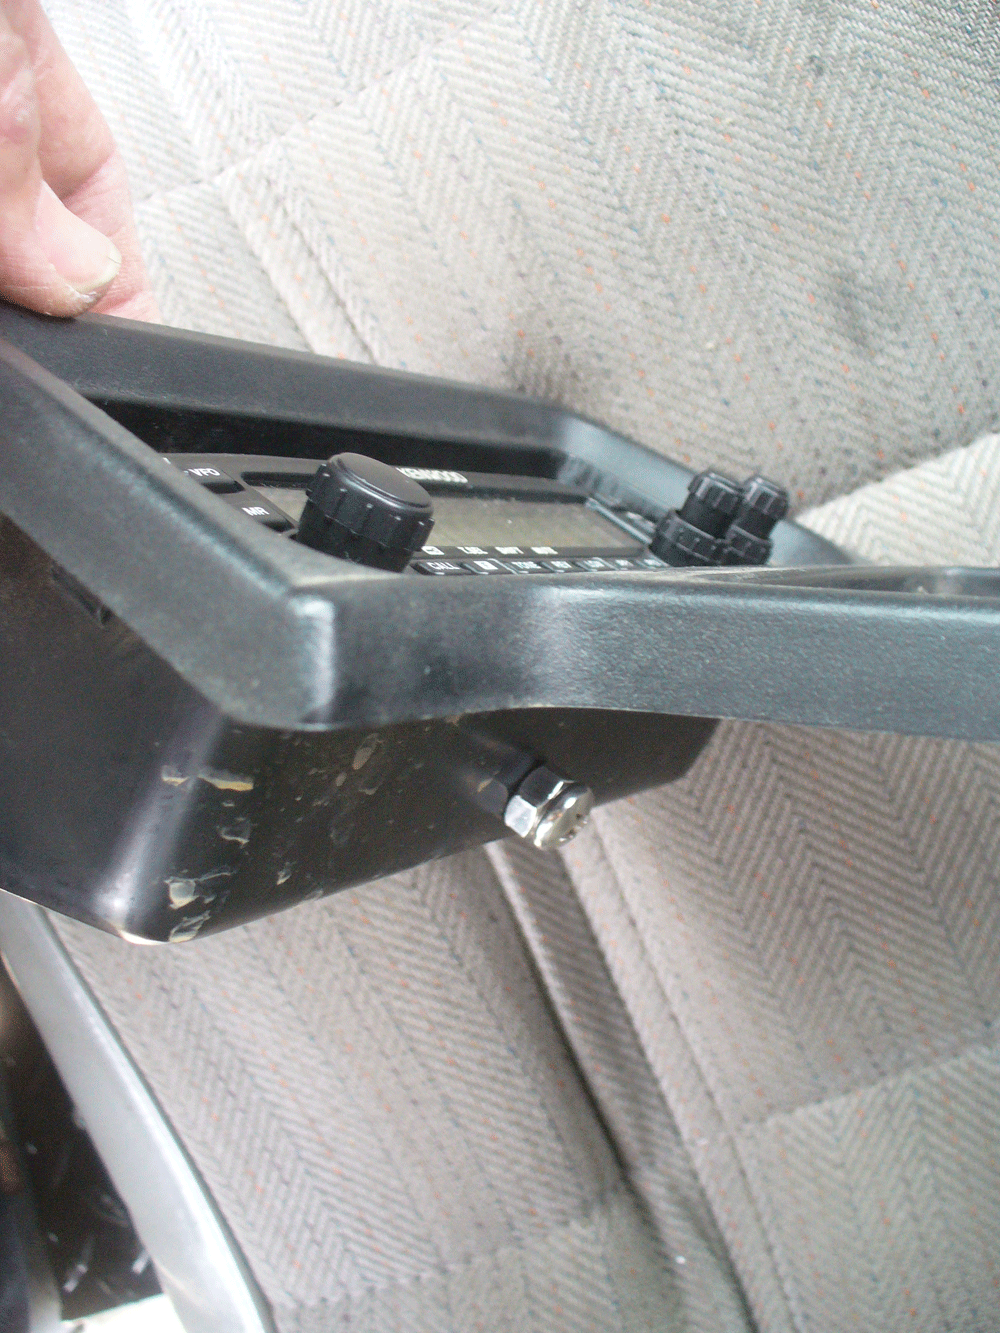
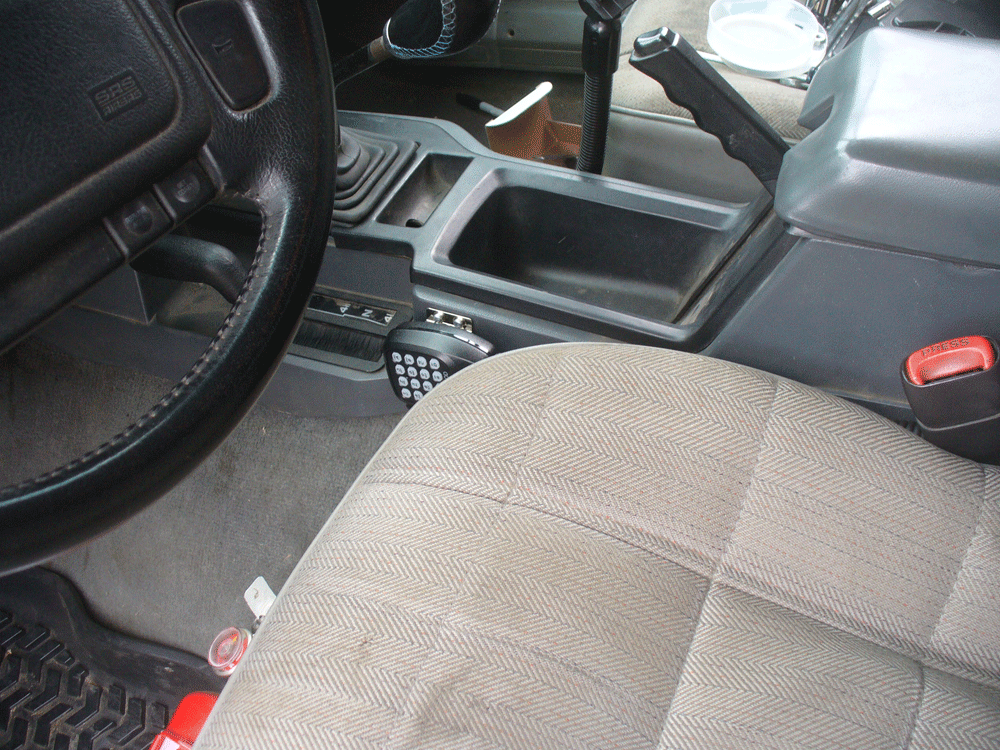
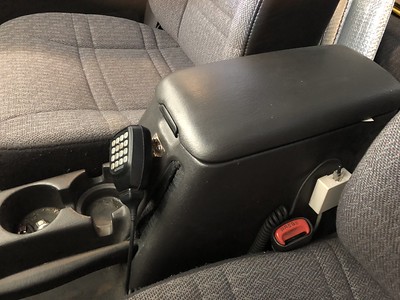
The head itself is mounted in the front of the console. It takes a very short screw. Rather than cut a screw down I put a nut on a screw. This means I am assured of full engagement before I put any tension on the little brass insert in a plastic body:
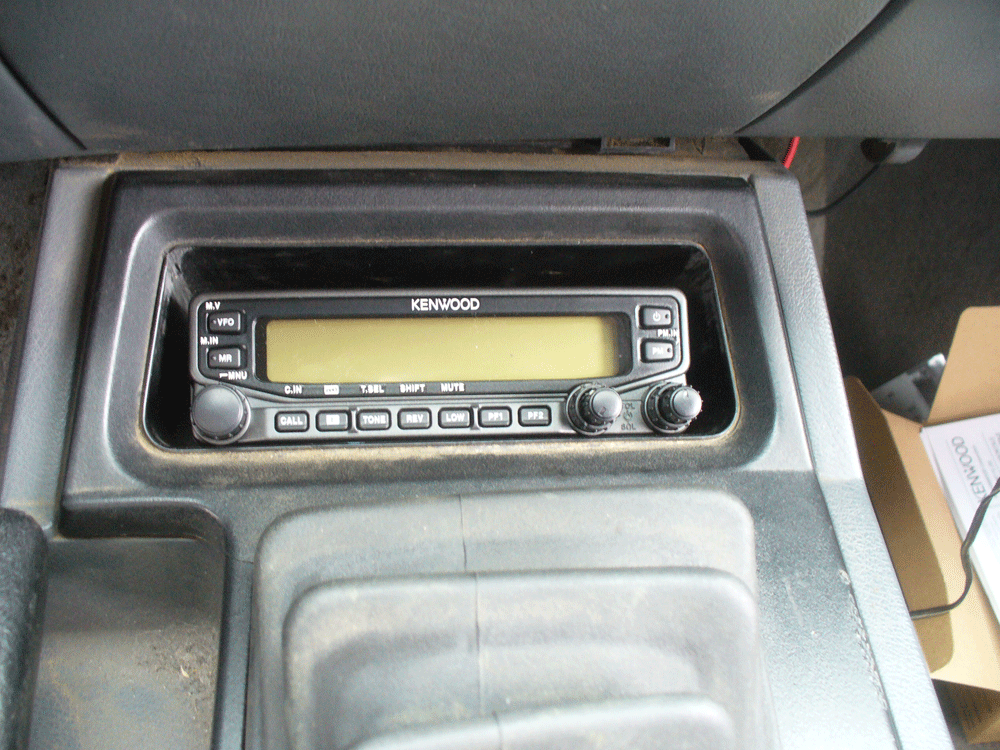
And here is how it looks when buttoned up:
The mic I mounted to the driver's side of the console, just at the front of the seat:
And here is how the cable lays for the mic, making life easy for the driver when it is needed:
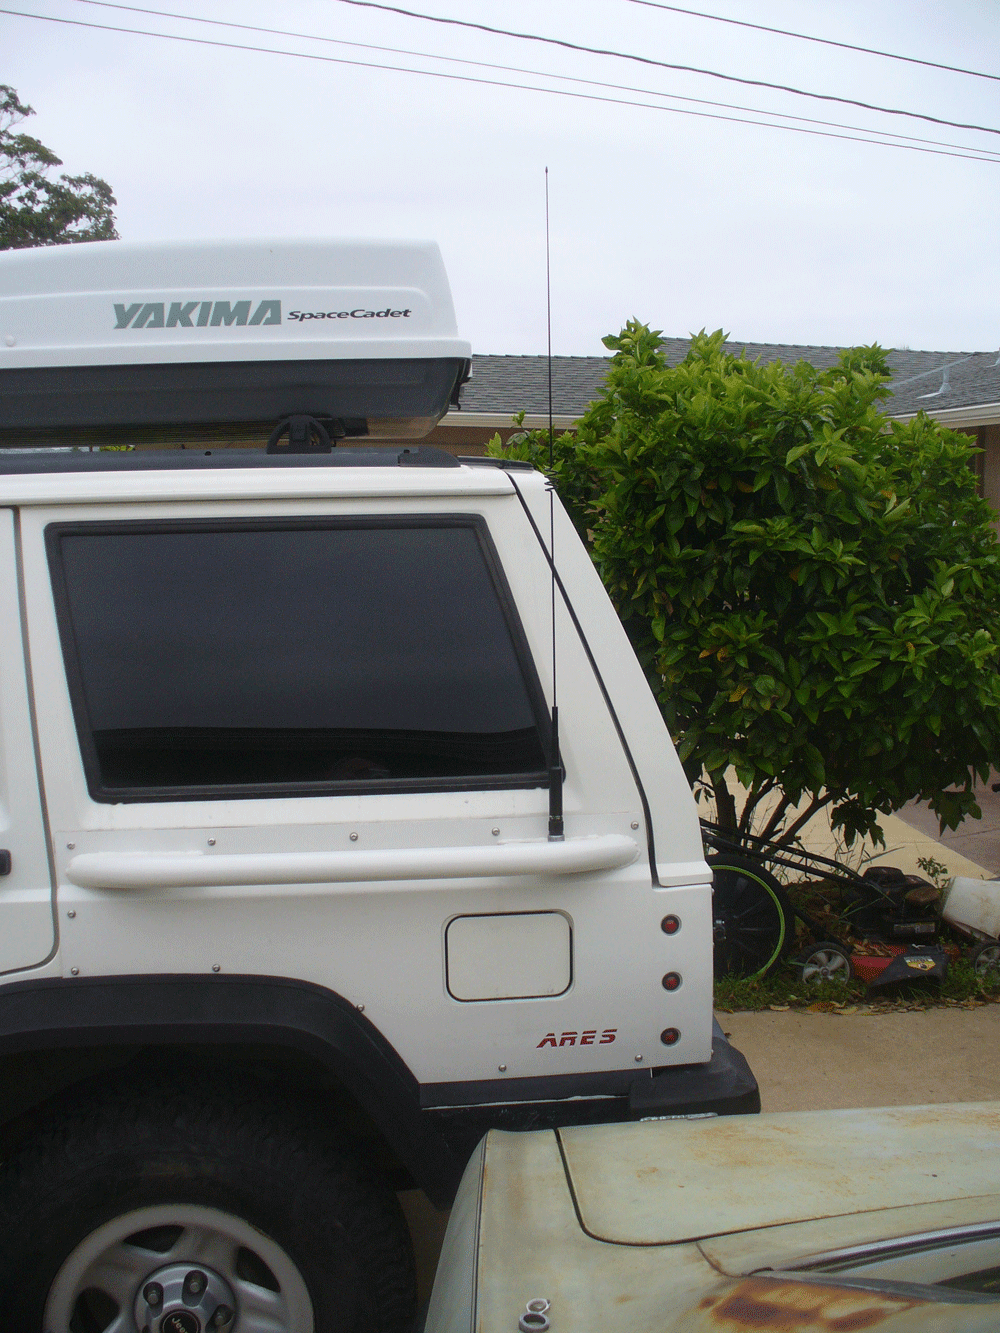
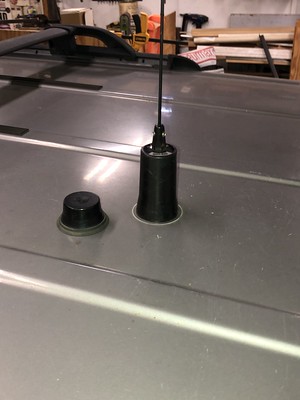
My antenna is a Diamond NR770HB, which is a 2m/70cm dual band which operates well without regard to ground plane. Since I use my roof for transmitter hunting (whole 'nuther subject matter) I decided to mount this antenna to my quarter panel armor:
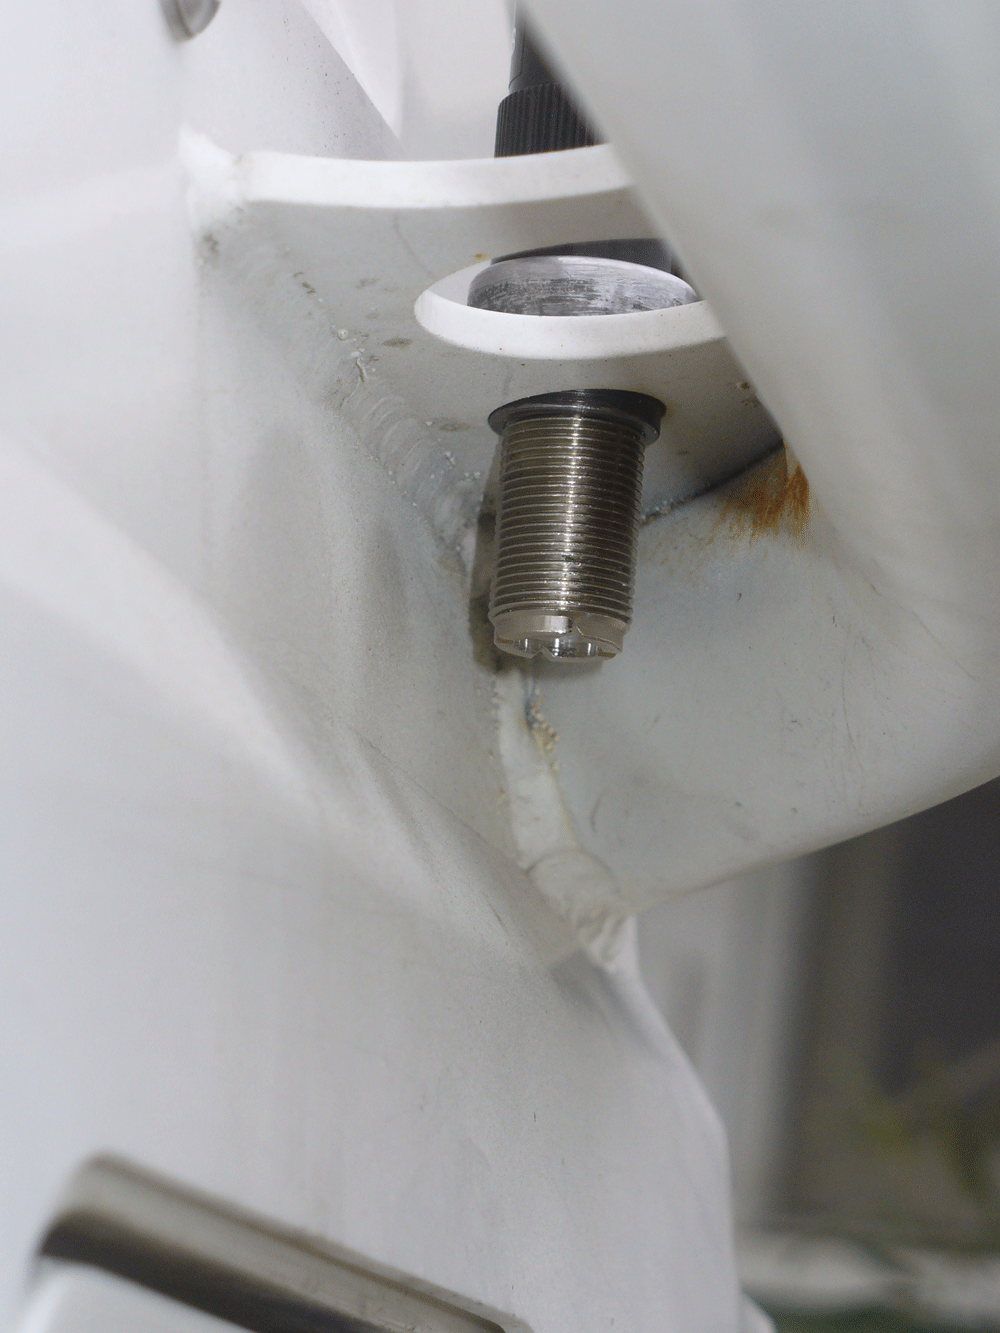
It feeds through a bulkhead connector and an angled spacer I made to deal with the angle on the rub rails:
A roof mount would be just fine for most folks however.
I hope this provides some help to someone else looking to solve some of the same problems.
The Kenwood TM-V71A is the radio of choice in a group I wheel with. The true dual band design allows the group to have one channel for chit-chat and a separate channel for instructions from the trail boss. This means important information is not lost in the banter. This radio also happens to be a really convenient fit in an early ('96 & down) XJ. The head unit fits gracefully in the console, solving one of the challenges of where to mount such a radio in the vehicle.
Here is how I have mine set up:
The brain box of the radio is mounted under the passenger seat. I had to play around with the holes in the provided mounting bracket. My initial efforts at a low profile were too low (as you can see from the irregular hole that I made and then didn't use. If I recall correctly I spaced the bracket up through the carpet through the use of rubber isolators such as come with MSD ignition modules. I think also placed a heat shield under that part of the floorboard (underneath the vehicle, above the exhaust) figuring that part of the floor probably gets fairly warm. Here is the mounting of the brain box:
Note that I have this tucked in close to the transmission tunnel too. This required finding a wrench to install the screws for that side of the mount:
For the mic jack I purchased an RJ45 panel mount connector and a short (I think 36") cable to feed it between the brain box and the connector. I installed the connector in the rear of the center console:
Here is how it looks installed, with the mic plugged in:
The head itself is mounted in the front of the console. It takes a very short screw. Rather than cut a screw down I put a nut on a screw. This means I am assured of full engagement before I put any tension on the little brass insert in a plastic body:
And here is how it looks when buttoned up:
The mic I mounted to the driver's side of the console, just at the front of the seat:
And here is how the cable lays for the mic, making life easy for the driver when it is needed:
My antenna is a Diamond NR770HB, which is a 2m/70cm dual band which operates well without regard to ground plane. Since I use my roof for transmitter hunting (whole 'nuther subject matter) I decided to mount this antenna to my quarter panel armor:
It feeds through a bulkhead connector and an angled spacer I made to deal with the angle on the rub rails:
A roof mount would be just fine for most folks however.
I hope this provides some help to someone else looking to solve some of the same problems.
")