freerider15
NAXJA Forum User
- Location
- FoCo, Crawlorado
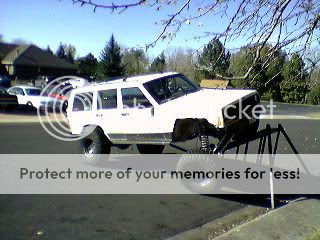
Well as most of us all know, lifting an XJ comes with some unwanted side effects, one of those things typically being a sh*tty rear shackle angle . Well I finally got tired of the limited flex it would allow, seeing how I reallllllly could have used it in the past. We'll start with what my shackle angle originally looked like...

Pretty huh!...Yeah pretty sh*tty
This is turn let the rear flex...well...not much at all. That caused some off camber situations like this to have a little bit more pucker factor than needed...

So I set out to fix the problem. I sketched some things up and ran them by some people to get some input. I decided to build up what I had drawn. Well it took two tries to get it right...but the end result was worth it. Essentially these are what I came up with:

I got them all mounted up (should have measured a couple more times, but they fit )...needless to say the shackles sits at almost exactly 45*. I had to cut the rear most holes off since the shackle at compression was wider than the opening, causing it to stop and the metal to bend. I took it a couple yards down the street to test it on an RTI ramp to see how much difference it made. Well, it certainly did to say the least. I can now droop a HELL of alot better, the tires stuff a little too well...but once great improvement has been to on-road ride. The "final" resting angle...

A few gratuitos flex shots (yeah I know, poser shots...but my front is still broken due to Carnage Boulder where I was gonna test em...so no wheeling shots yet)

Here you can see how it actually droops now (yes my shocks are disconnected...)

So all in all...a very time worthy project! :thumbup:
. Well I finally got tired of the limited flex it would allow, seeing how I reallllllly could have used it in the past. We'll start with what my shackle angle originally looked like...
Pretty huh!...Yeah pretty sh*tty
This is turn let the rear flex...well...not much at all. That caused some off camber situations like this to have a little bit more pucker factor than needed...
So I set out to fix the problem. I sketched some things up and ran them by some people to get some input. I decided to build up what I had drawn. Well it took two tries to get it right...but the end result was worth it. Essentially these are what I came up with:
I got them all mounted up (should have measured a couple more times, but they fit )...needless to say the shackles sits at almost exactly 45*. I had to cut the rear most holes off since the shackle at compression was wider than the opening, causing it to stop and the metal to bend. I took it a couple yards down the street to test it on an RTI ramp to see how much difference it made. Well, it certainly did to say the least. I can now droop a HELL of alot better, the tires stuff a little too well...but once great improvement has been to on-road ride. The "final" resting angle...
A few gratuitos flex shots (yeah I know, poser shots...but my front is still broken due to Carnage Boulder where I was gonna test em...so no wheeling shots yet)
Here you can see how it actually droops now (yes my shocks are disconnected...)
So all in all...a very time worthy project! :thumbup: