• Welcome to the new NAXJA Forum! If your password does not work, please use "Forgot your password?" link on the log-in page. Please feel free to reach out to [email protected] if we can provide any assistance.

beater!

I liked the swaybar disconnect tethers sold by DPG but thought there was some room for improvement. This is what I came up with.

First is an eye bolt with 1/4" machine thread, and two flange nuts. These go in the holes that already exist in the inside front corner of the inner fenders. From there I used a locking ring to secure one end of a rubber strap, and a caribiner to secure the other end. Another option is to use caribiners at both ends but this design gives a little more room. Total for all the hardware needed for both sides was about $12. When you buy the hardware make sure it is the right size to fit over the rubber.

For the rubber strap I used some black tie-down things and cut the oversized end pieces off, then cut the remainder into sections of the desired length, rounded the corners off and drilled 1/4" holes in the ends. Here is a pic showing a couple of 7" pieces, but I eventually ended up using 12" pieces with 11" distance from eye-to-eye.

Swaybar_Tethers.jpg


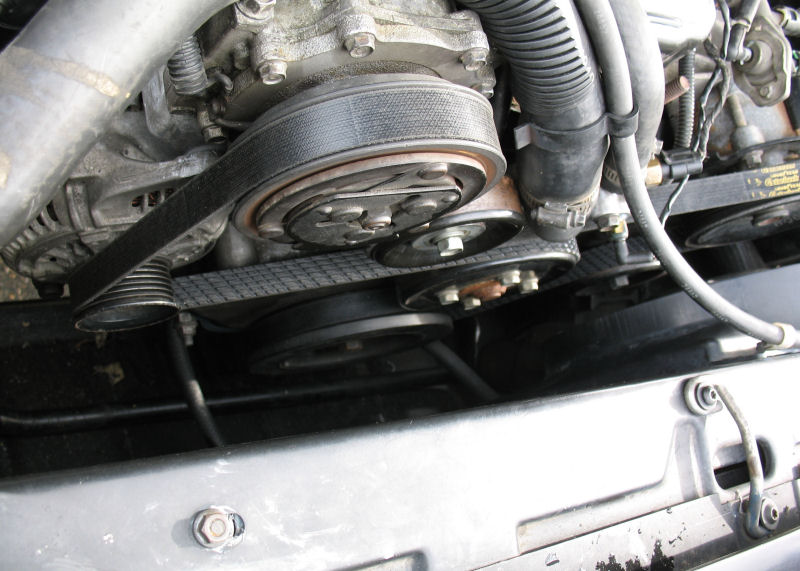
Here's a pic showing the tension on the final pieces. They are stretchy enough for the caribiner to hook onto the eye hook, but the caribiner can be hard to remove and this tension secures them alright. You could cut them longer so that the caribiner would reach the top, however this way gives your hand more room to work. Also this design leaves enough slack so that you can hold only the swaybar itself (minus the disconnects) by lightly stretching up to the eye-hook.

Swaybar_Tethers_Installed.jpg


The distance is also good for when the tethers are hanging loose. They are not so long that they are in the way, but they are long enough that you can hook them around the fender support brackets in the front.

Swaybar_Tethers_Relaxed.jpg


My only real concern is that the rubber may get weathered and brittle, but no way of knowing how bad or how long it will take. I would also like to put grommets in the holes, but I think the rubber is too thick.

Nice trick!! great thread... :D
 
Tires are on. BFG A/T up front

31_Tires_Mounted_1.jpg


Dunlop Radial Rovers in the back

31_Tires_Mounted_2.jpg


Have another (bald) Rover as the spare in the original spot but my rear seat modifications with the Tahoe tie-downs are hitting the tire so the seat back won't go all the way into locked position. I'll have to work up some kind of fix for that.

Couple of things left to do still but almost done with the Phase 1 lift then onto the big money for another couple of inches and 33s
 
Hood strut installed, write-up here

Hood_Strut_Open.jpg


Found some more body plugs at the junkyard... 1" rubber plugs were found on ZJs at the lower A-pillar where the door and fender meet. These fit the openings in the XJ B-pillar, under the passenger seat, and in the rear cargo areas (probably more but I plugged a bunch of holes when I put the Herculiner on the floorboard)

Body_Plugs_1_Inch.jpg


The WJ rubber plugs behind the rear bumper that are slightly oblong but fit the openings behind the XJ taillights perfectly

Body_Plugs_Taillight.jpg


I also figured out that the 1.5" rubber plugs from the Durango fit the XJ's oblong UCA bolt holes. It's not a perfect fit but I could not find anything better in any of the the Chevy, Ford or Dodge trucks and SUVs I looked at.

Body_Plugs_UCA.jpg


The only body holes I still want to plug are in the inner fender. I want to keep the holes in the bottom of the frame rail open to aid with moisture evacuation.
 
OverlandXJ sent me a YJ slip yoke to see if that would kill my vibes--he's gonna own half the damn jeep for all the parts he's supplied.

Here's a pic showing the difference between the extended YJ yoke (left) and the stock XJ yoke (right). The ears are longer which allows for more articulation in the u-joint, and it also pushes the splines deeper into the transfer case which gives more engagement on the yoke and less vibes.

YJ_vs_XJ_Slip_Yokes.jpg


In my limited testing tonight the low vibes at takeoff and with engine braking appear to be gone. There is still some rumble at 1500 RPM but I think that's the engine talking. Before the switch the mirrors would vibrate whenever the drivetrain rumbled and now they are rock steady so I'm gonna guess for right now that it has worked.

The only thing left to 'finish' the initial lift is to measure the wheel travel, and get the appropriate shocks and bumpstops. I'm supposed to have met a guy with a ramp for that already but we have not gotten together yet.
 
Are you sure they're welded?
Mt bumpstop cups unscrewed, I pulled the stock ones out replaced with those RE poly stops.
When I needed more spacer for my 33's I Gorilla glued the stock rubber to the poly spacer and it works great! I have literally bounced off the axle over some tight rollers on trail and was a nice soft bump.

On the door handles, there's a plug below latch (slot by torx bolt in pic) with an allen head for adjusting the plate the door handle button hits.
Right_Rear_Latch_Gap.jpg
 
I found this when I had to change out due to stuck closed latch
I lubed everything with Royal Purple Maxfilm when I replaced the latch and adjusted
now works likely better than new.
 
I looked at the spare latch and this is really simple. It uses a metric hex bit, left-loosey to free up, then slide the clip to adjust the rod length, and righty-tighty to lock back in place.

Right_Rear_Handle_Adjuster.jpg


Once I knew how it worked it was easy to dial in on the door and I didn't have to pop the panel. The well nut makes a nice stopper and the gap was really big, so I am going to keep it in there for now. I might add one to the other doors since it make the thumb action smooth instead of sudden.

I had always wondered what that slot was for... Thanks so much!
 
Even with the longer YJ yoke I was still getting some vibes, and investigation showed that the beater still had a driveshaft for the original 8.25, rather than a driveshaft for the D35 that was swapped in after my dad's fender bender that took out the rear end. Since the 8.25 has a longer pinion the driveshaft was short even before lifting, and way short after lifting. The YJ yoke helped with some of this but it was still coming too far off the shaft sometimes (mostly when engine braking), so I had to get more shaft.

According to the driveline math, I needed about one more inch of shaft if I kept the YJ yoke, or 1.5 inches with the XJ yoke. Then I looked around the local club boards and found a part-out from a 95 AX15-8.25 which would be 1-3/8" longer than the AW4-8.25 driveshaft I already had, bought it yesterday, and got it installed today. I kept the XJ slip yoke on it to check for fit, and it looks to have about 1" of slack on the slip yoke when at rest.

AX15_8_25_Engagement.jpg


I did some test drives and the engine-braking does not produce any discernible vibes anymore, nor does the driveshaft seem to be slamming against anything when I compress the rear (the original suspension setup had a bad thunk on hard braking). I don't think adding the YJ yoke would do any good, and will not reinstall it unless something changes (if I add another bit of lift before I get the NP242 transfer case rebuilt, I may need to)
 
I've been wanting to switch to electric fans ever since the motor swap, but it was pretty low on the priority list, and had some prerequisites (like swapping the A/C and alternator brackets). But once I got the brackets switched, I pretty much had to install an electric fan since the heep would got really hot sitting at long red lights, and that was with outside temps in the 40s. Cruising down the street was no problem, and idling for less than a minute was fine too, but long red lights would get the engine hot enough for the secondary fan to kick on, and that was too much.

I spent a while thinking about the fan to use and eventually settled on the left-side fan from a Taurus 3.0L engine. The primary reason for this is that the main fan shroud is about 14.5" across, which fits in the 15.5" opening in the mechanical shroud pretty well. These fans also have 3-pin setups, and while some of the last 3rd gen fans have two-speed motors, the one I got came from a 4th gen with a single-speed motor (I will explain why if anybody wants to know but not really important for this). The one speed is pretty fast and loud, so I'm not really worried about airflow, and will probably end up toning down one of the pins with either a PWM controller or an inline resistor on one pin. It would have been nice to get dual speed motor and frankly I thought I was getting one, but this is plenty workable.

Here's a pic of the fan resting in the shroud. The extra moldings around the outside needed to be trimmed with a hacksaw, and the fan had to lifted off the shroud a little bit, but otherwise it's a really nice fit.

Test_Fit_1.jpg


What I decided to do was to use some 1/4" carriage bolts with .5" and .75" steel spacers to suspend the fan inside the shroud. The low profile of the carriage bolts allow the fan blades to spin inside the Taurus housing without colliding against bolt heads, and the spacers allowed me to put the fan at the best axis on the shroud. This setup is very stable however I'm not able to put perfect amounts of tension everywhere so there are a couple of places where the fan blades rub against the Taurus housing. I will have to sandpaper those spots assuming the plastic doesn't clearance itself for me.

Here's a close-up pic of the carriage bolt and spacer setup. You can see how close of a fit this is.

Carriage_Bolts.jpg


Here's what the final assembly looks like

Mounted_in_Shroud.jpg


Check for clearance on the "front" of the shroud to make sure the fan won't rub against the radiator. I have about 1/16" of an inch gap here which is close enough considering the radiator fins are 1/4" back from the edge.

Mounted_Front.jpg


And this is the engine side of the assembly. Depth looks good

Mounted_Rear.jpg


View from the drivers side with fan installed

Final_Fit_1.jpg


and view from the passenger side. Close but there is no danger of anything hitting

Final_Fit_2.jpg


Next is the electrical work
 
Keep in mind that the primary purpose of the mech fan is to cool the fluids in the radiators. This seems obvious but it has some ramifications that are overlooked. Specifically the stock mech fan is setup to engage a clutch when the air hitting the spring reaches 140f. This could happen because the jeep is sitting in traffic and building up heat under the hood, or it could mean that the radiator and/or condenser and/or tranny cooler are running hot and need to be cooled, or some combination of all those factors. Therefore the long-term optimal setting for an electric fan would be to mimic this behavior, with a temperature switch monitoring the air around the radiator, and engaging the primary electric fan when the temperature gets to 140f.

For short-term, I am using the Hayden/Imperial 226203 that is sold at Advance Auto. It consists of a temperature probe and an adjustable switch that can be dialed in to any temperature in the range of 32-248f. Since it doesn't include a relay or much of anything else its only about $20.

For this setup I decided to mount the probe clip to one of the carriage bolts, so that the probe would be in front of the radiator but would not be directly in front of the fan. This pic shows the setup but it's a bad and confusing picture. Basically the thing that looks like a long metallic ink pen is the probe, and it's attached with a padded loom clip to the bolt.

Temperature_Probe.jpg


I then ran the probe wire to the fender wall beside the battery, with an inline relay to control the fan itself.

Temperature_Switch.jpg


Basically the switch draws 12v on one pin, and then passes the current through when the temperature probe reaches the set range. In my case I have the wire on the output pin going to a relay, with the other side of the coil circuit going to ground. Meanwhile, the fan motor is constant 12v power on the battery, with the relay's feature circuit passing ground to the fan motor ground wire. This setup allows the fan to keep running after the engine is shut off, so I will need to do some more work to limit that with a timer or the like.

However this is basically a short-term setup, and my long-term plans are to use a full-featured controller like the SPAL. I'm also considering options for where to monitor the air or coolant temperature, since I don't particularly trust this setup.

As of right now, I have the fans coming on before the temperature gauge gets to the middle of the sweep, but I have to do a lot more experimentation before I get it dialed in just right. I did let the jeep idle in the driveway while putting away tools and it didn't come close to overheating, so crisis averted and short term success.
 
I don't like the air temp monitoring. There is a big lag between the fan spinning up and coolant temp dropping so by the time air temp is hot enough to trip the fan when I want the engine is already hot and will stay that way until the pump can get cooler fluids into the head. So what happens is

sit at red light, temp gauge starts creeping up
fan comes on, temp still climbing
fan goes off because cool air is coming through radiator, temp STILL climbing
...
temp starts dropping as coolant finally reaches tstat sender

Very unnerving
 
I know Im really late on this one but...
Your paint issue.

After you put the first coat of paint on and sanded it. You should have sanded it with a courser grit like 800 before puting on your next coat. 2000 grit was way too fine for another coat.
That would have solved your paint adhesion problem.
You are right thought, to solve your problem you will have to sand the last couple coats of paint off.
 
The coats are sticking together but not sticking to the primer. Every so often a corner of the paint will pick up and I can peel a sheet of it away. When this happens, the paint comes off in a single piece and doesn't separate from itself, but instead separates from the primer (which stays on the jeep). The two materials look good and clean when this happens, like the paint was just held to the primer by static electricity.
 
Hmm. What kind of paint was it?
What kind of primer did you use?
What did you sand the primer with before the first coat?
I read over the paint section a couple times and didnt see what you had used.
 
Back
Top