- Location
- In a strange land
This is one of the main reasons for my owning an XJ: To set it up for ham radio transmitter hunting (also known as T-hunting, radio direction finding (RDF) or fox hunting). The Bride wasn’t too keen on the idea of me putting a hole through the roof of the Suburban, and besides, the Suburban is a bit on the large side, particularly when it comes time to make a U-turn (a most important move in T-hunting).
I should probably explain what transmitter hunting is. This is one of the niches of ham radio. The exercises in which I participate are essentially a game of hide and seek, but with radio signals. The purpose of this activity would have traditionally been for the sake of locating a downed airplane or an animal with a tracking collar. Technology has advanced in those arenas to the point that the devices which send out a signal will also send out GPS coordinates, so finding them no longer requires this skill, or at least not most of the time. Anymore it is most likely to be used to find a source of interference on the airwaves. This could be anything from the operator who doesn’t realize his microphone is stuck to someone who is maliciously jamming a repeater. For myself and The Varmints it is done for the fun of it, and it is a great way to learn about ham radio, particularly how to get a signal from one place to another.
In my area there are Saturday evening hunts which are expected to take two hours and then when a fifth Saturday of a month rolls around there are “countywide” hunts which are expected to take pretty much all day. Those are vehicle based hunts. In the spring there will also be an on-foot hunt which should probably take a couple of hours. The on-foot hunts follow an international model and involve five transmitters which sound almost identical, requiring a modicum of understanding of Morse Code in order to distinguish one from another.
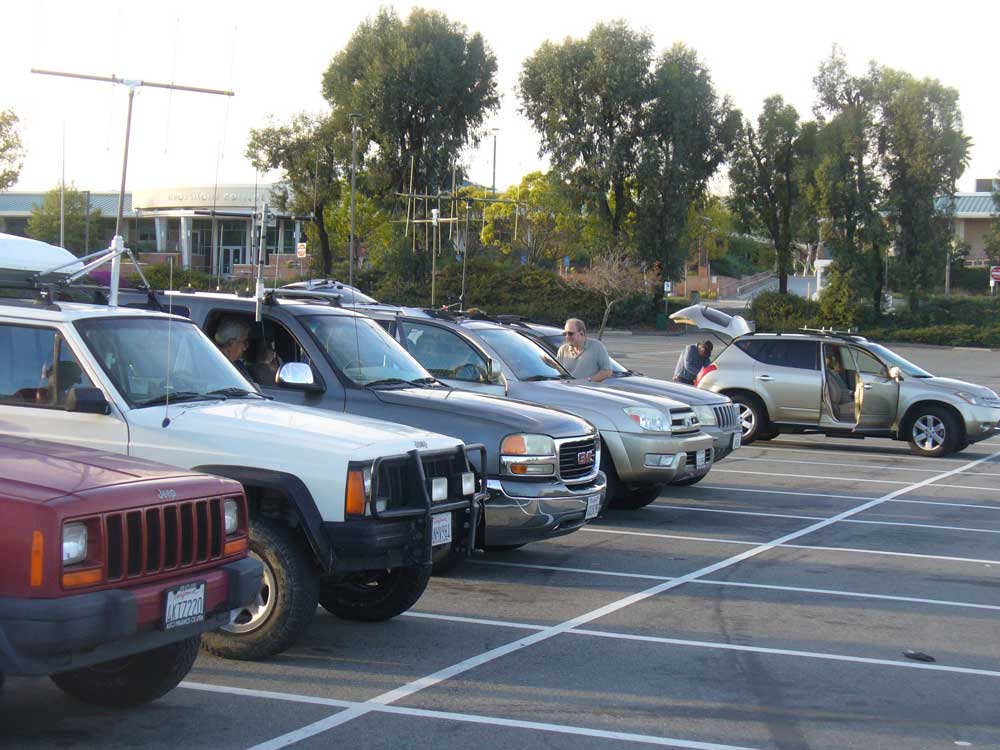
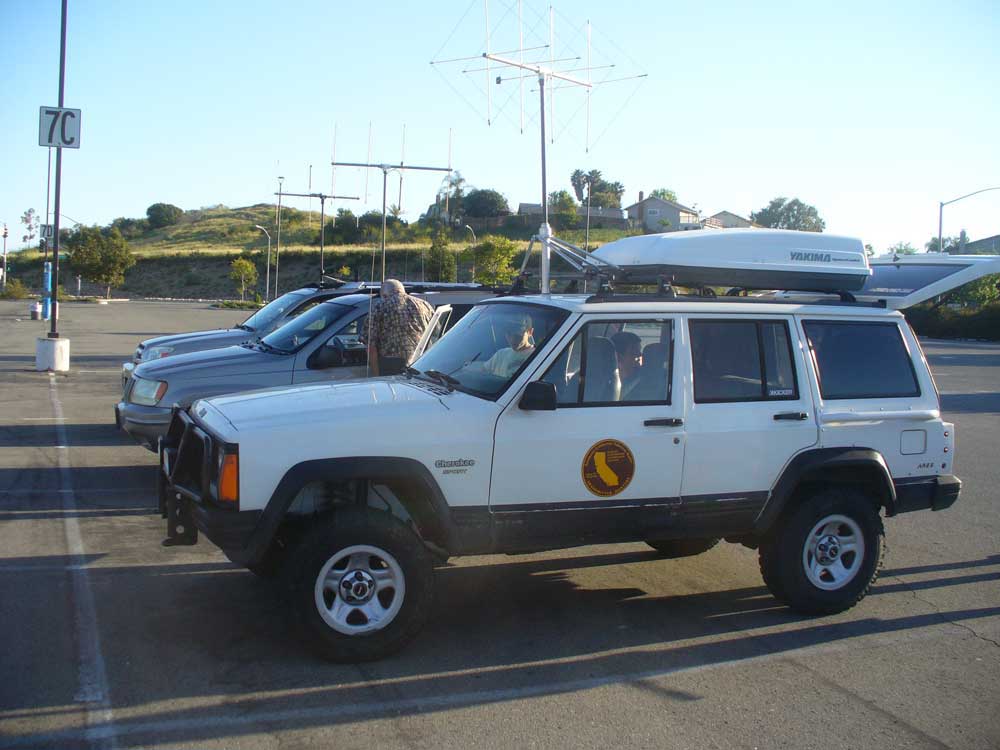
In the Los Angeles area there are occasionally “Meathead” hunts which can be expected to take an entire weekend, starting Friday afternoon and hopefully getting folks back to work by Monday morning. Those can cover multiple counties and require participants to camp out in the mountains or wherever they happen to find themselves. A vehicle with good ground clearance and four wheel drive is a good T-hunt vehicle. An XJ is a good platform.
One of the reasons an XJ is a good platform is because they are still relatively abundant and cheap. I considered an International Scout, but I don’t think I would feel right putting a hole in the roof of a classic. And a hole in the roof is important because a mast with an easily rotated directional antenna is key to this game. It is a competition to see who can find it first, and thus you need to be able to drive and take bearings at the same time. Stopping and getting out to take bearings is not going to cut it. Some folks go to great lengths to work around putting a hole in their roof, but I think it makes more sense to just take the direct route, and to pick a vehicle on which won’t make a great difference.
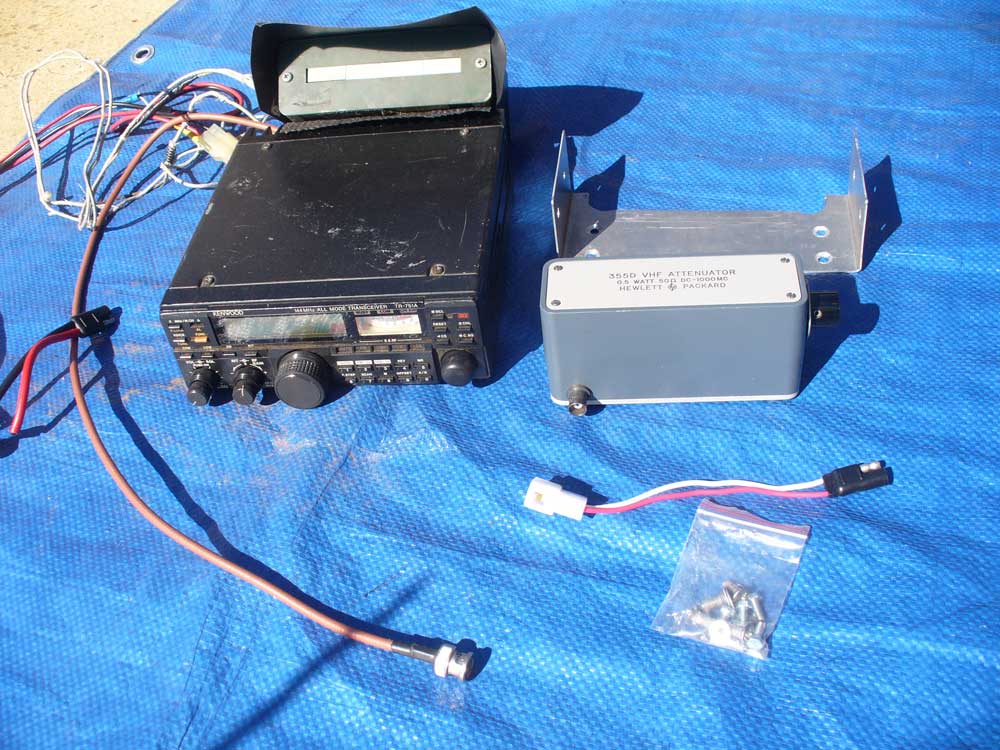
Most of the time I simply operate as “Navigator” for Bruce (CoachBruce here on . He has an ’01. He doesn’t post much though), but this past week he had a family event to attend, so I borrowed his radio and S-meter and set up Scope Creep to go hunting. I took some pictures to give any other interested geeks a sense of what is involved.
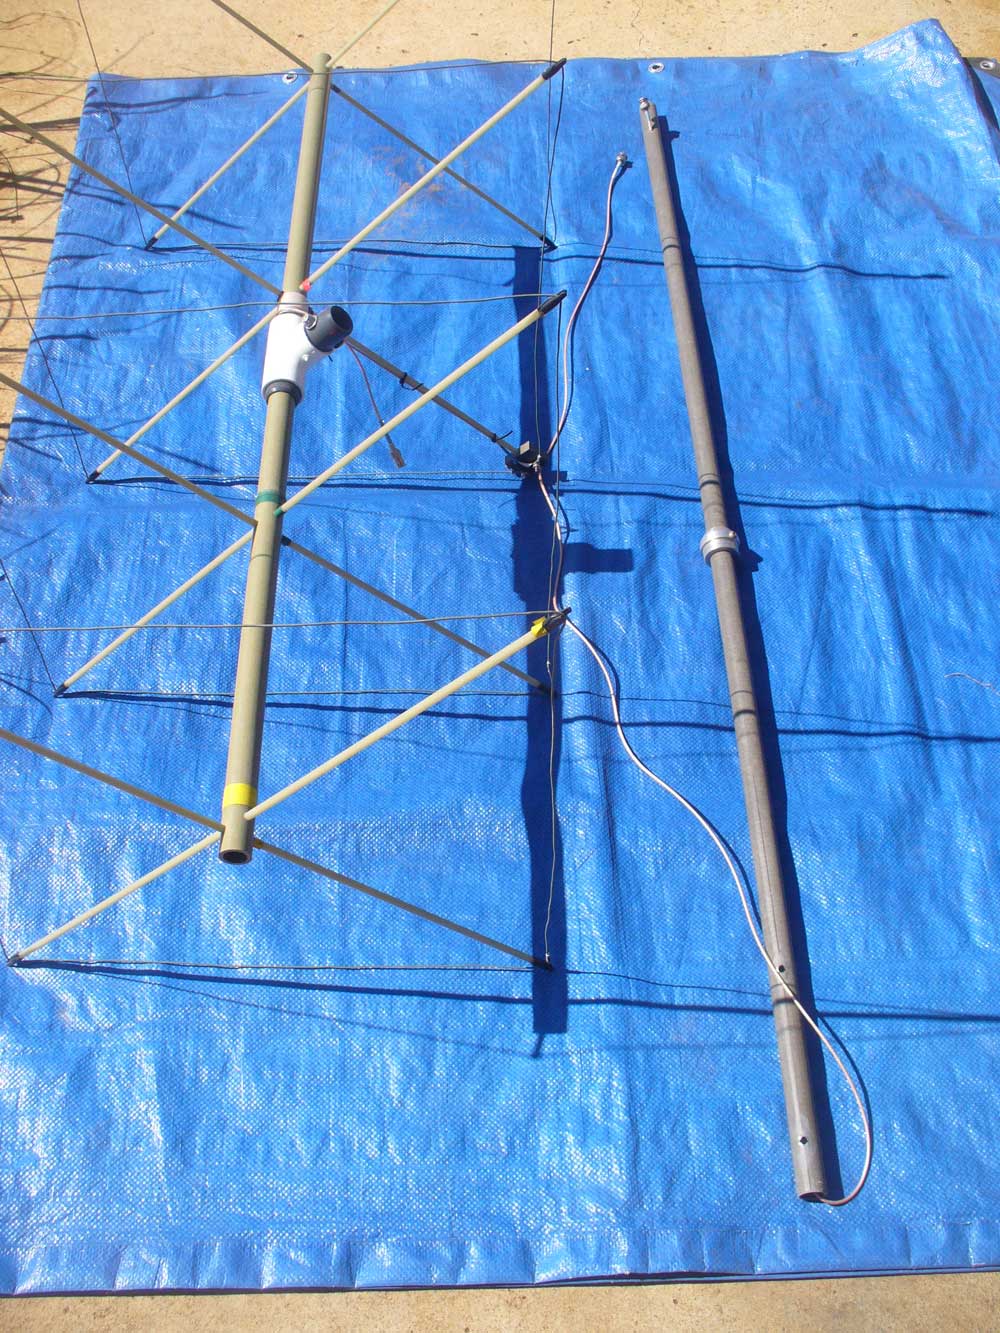
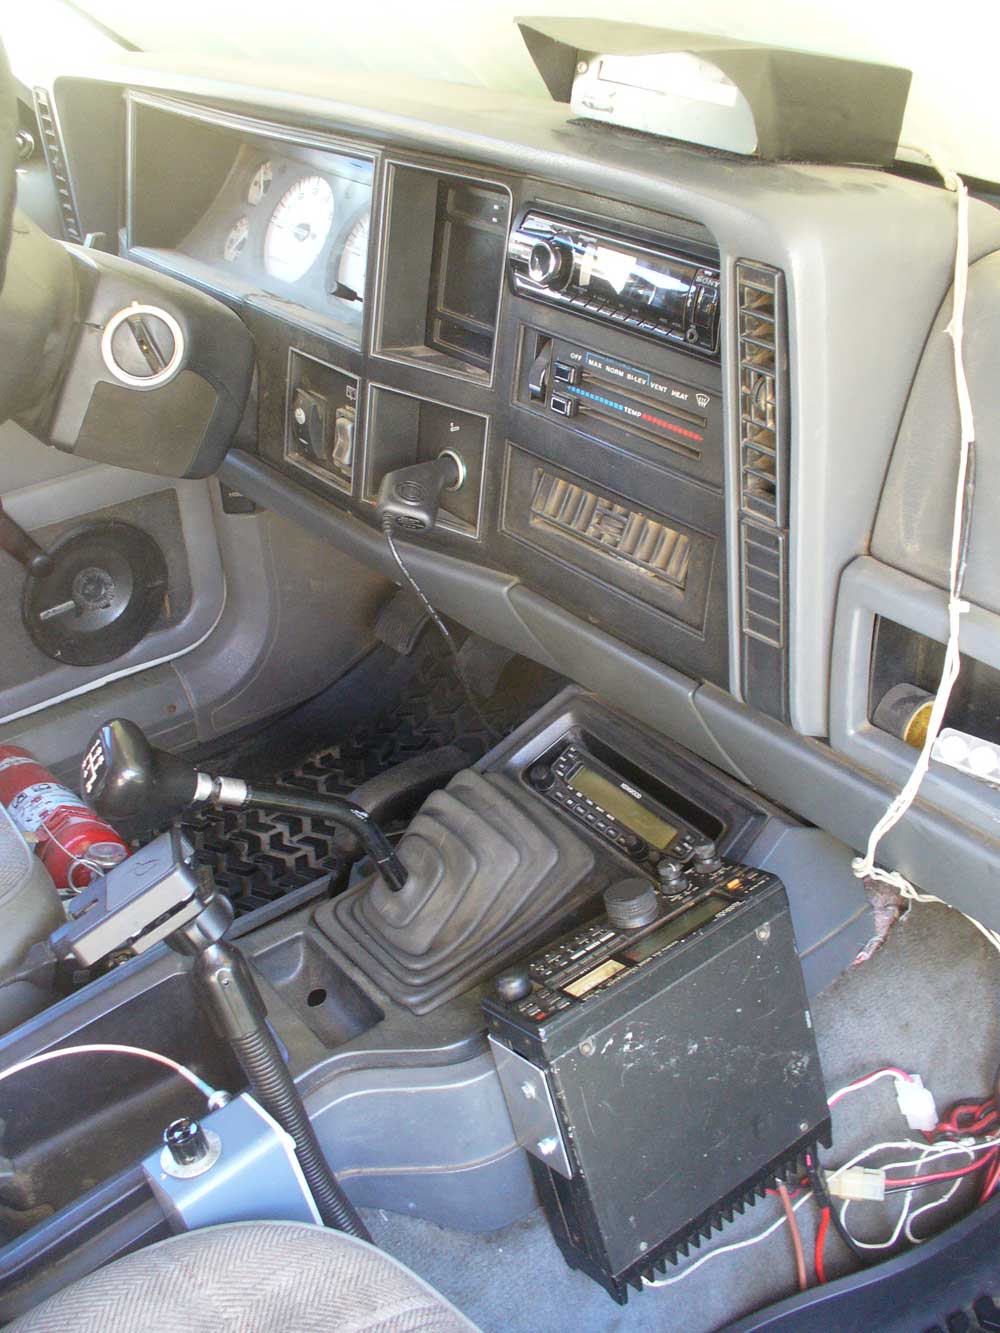
It is probably worth mentioning that my setup is a bit different from most because I run a stick shift. Most folks support their mast between two bearings, one in a console cup holder and another at the roofline. That is fine if all you need to do is put it in drive and then go, but not so great if you need to row through the gears. Besides, ’96-down XJs don’t offer much to speak of in the cup holder department. So my mast is supported by a bearing at the roofline and a second bearing above that, supported by a rack mounted superstructure. A side benefit of this arrangement is that I don’t have to worry about wrapping my coax around my mast. I have plenty of slack to work with during the hunt.
That is probably more explanation than interests most folks, but it should help with understanding why I have done some of the things I have done. Besides those things I can’t even explain to The Bride.
On to the pictures…
First we have the hole in the roof:
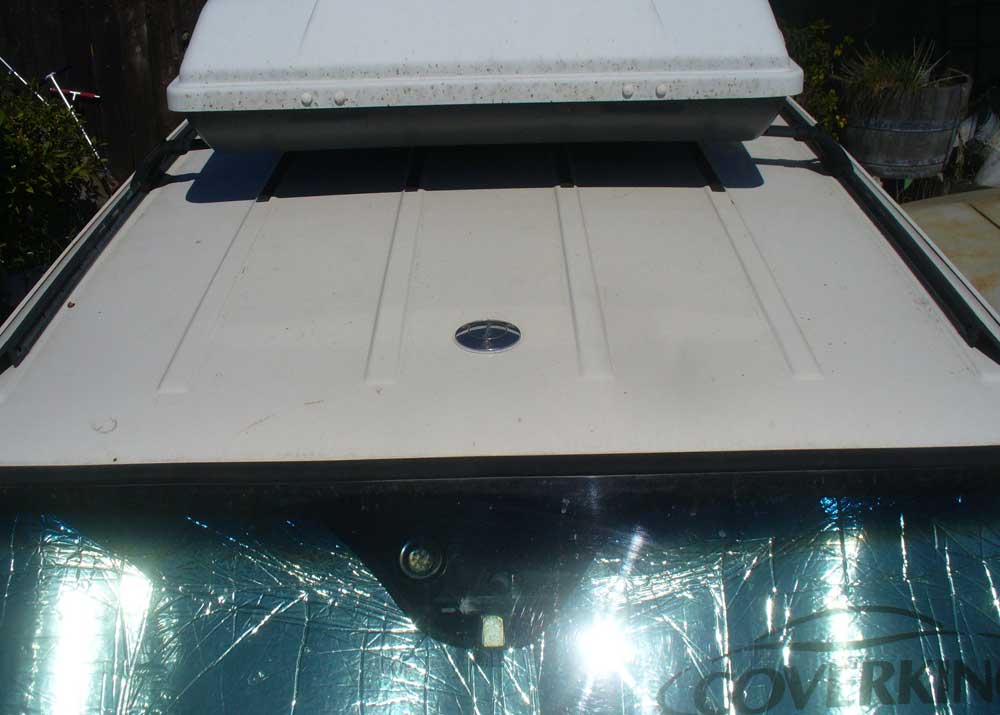
What you see is a stainless steel thru-hull fitting from the boat world. Mine is a fuel fill fitting. I think most T-hunters run a waste fitting for the larger diameter and thus better fitment for the spherical bearing (more on that to come). These fittings are weather-tight and use O-ring seals.
Here is the view from the inside:
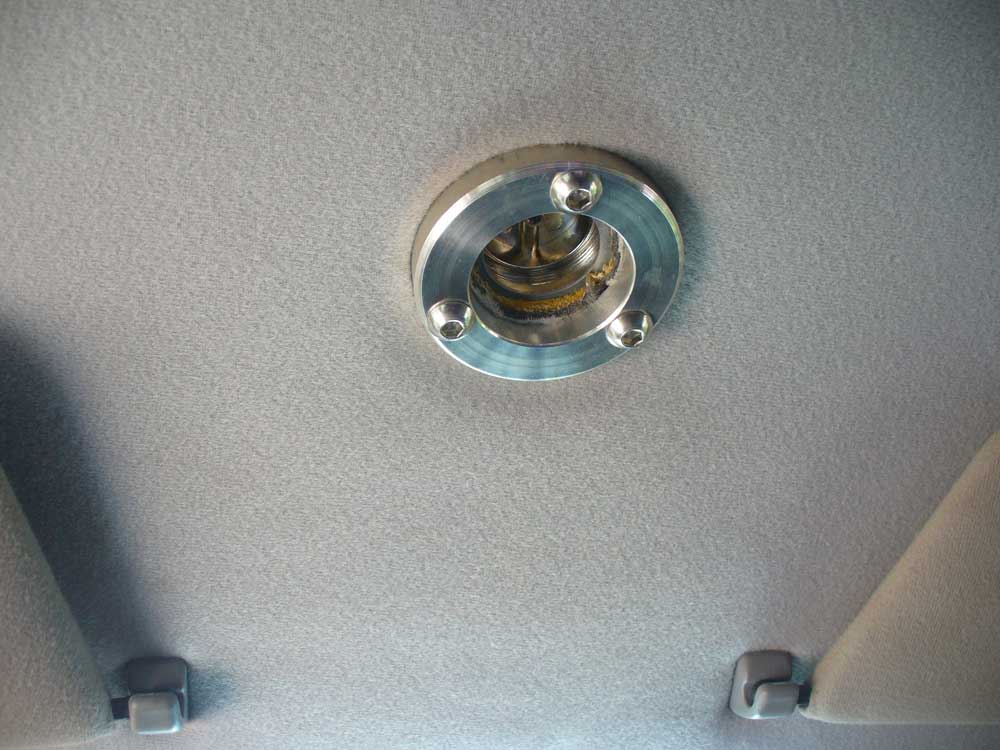
I made the aluminum ring to finish it off. There is actually another aluminum ring sandwiched between the headliner and the roof. The middle ring is what everything threads into. I also have a solid aluminum cap for the inside.
This is a tangent item:

Before I got my mobile rig I ran with just a handheld unit in the cabin. I made this adapter so that I could run a vertical omni in the hole I had already made in my roof. I now have an antenna mount on my quarter panel armor so there isn’t much call for this piece anymore, unless a Varmint (harmonic) wants to run his handheld at some point.
Here are the pieces which make up the support structure for my mast:
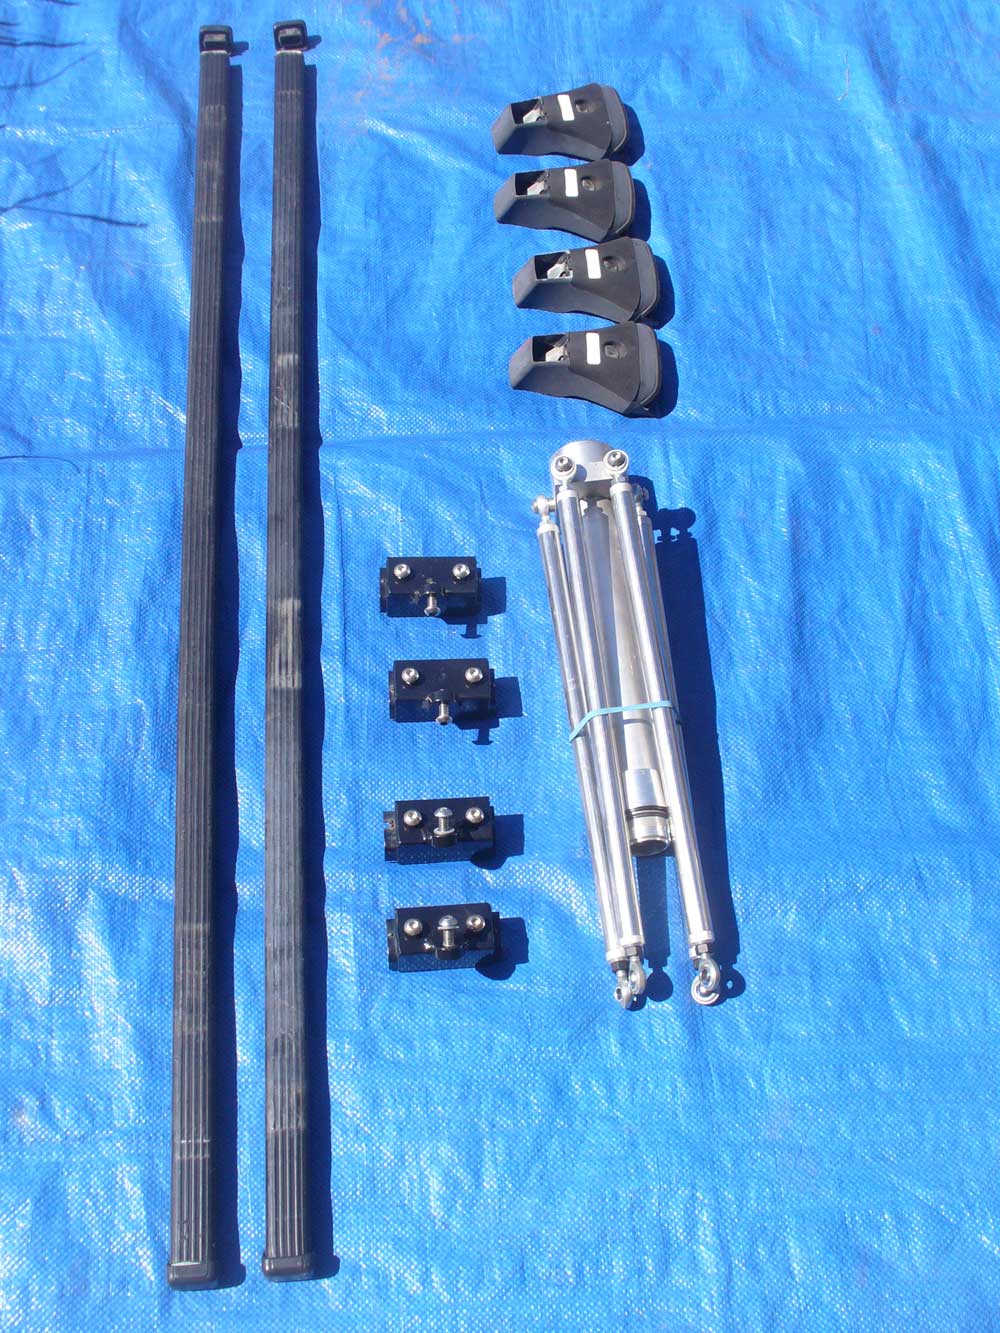
What you see there is a Thule load bar system with my own brackets to support my mast bearing mount. The Thule load bars are rectangular and thus much easier to make brackets for. Here is a close up of one of the adapter brackets:
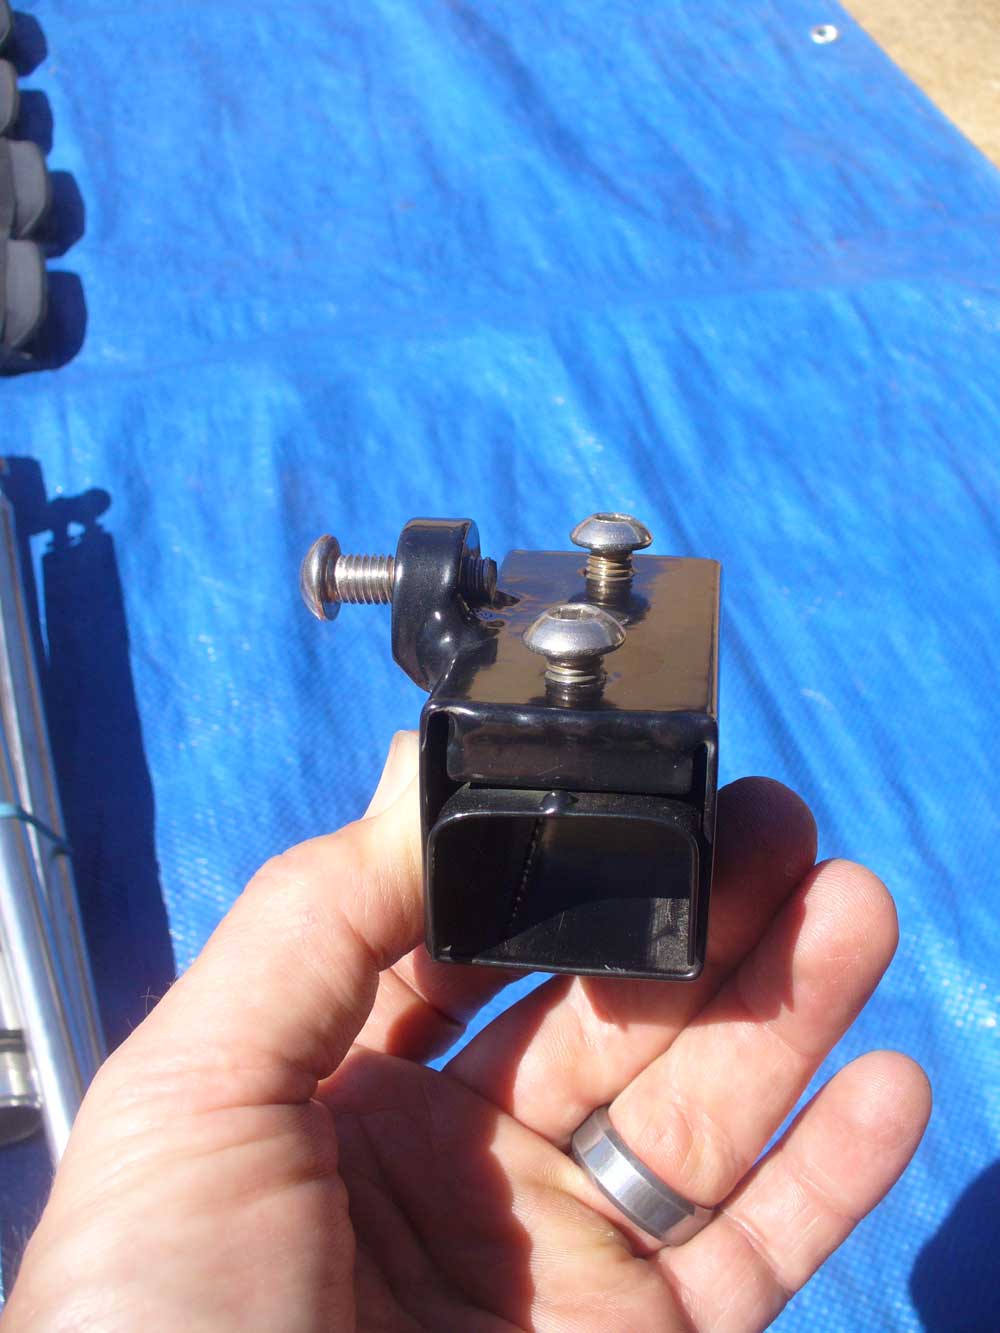
They are just a piece of thinwall square steel tubing with a piece of rectangular bar stock welded in and then threaded. The screws through the bar stock apply pressure to a piece of bent sheet metal that acts as a clamp. Screws are M8-1.25 because they use a 5mm Allen wrench which is the same size as is used in the Thule feet. That helps reduce the number of tools I am hunting for after I drop them in the grass.
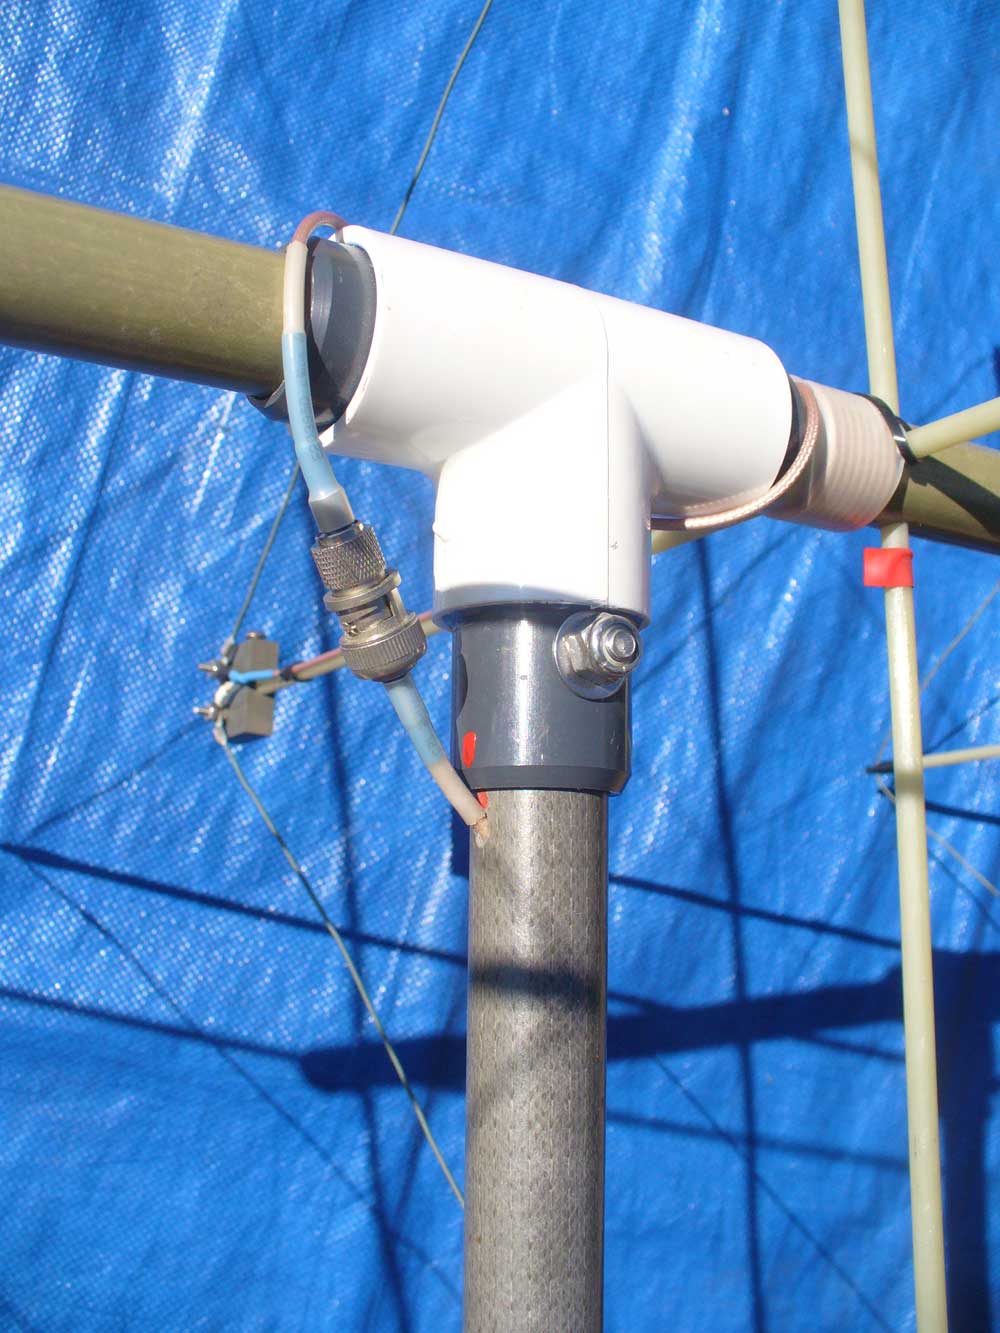
Because automotive rooflines are not exactly parallel to the ground a spherical bearing is used at the roofline in order to allow for a non-perpendicular angle for the mast. You can sort of see the spherical bearing here:
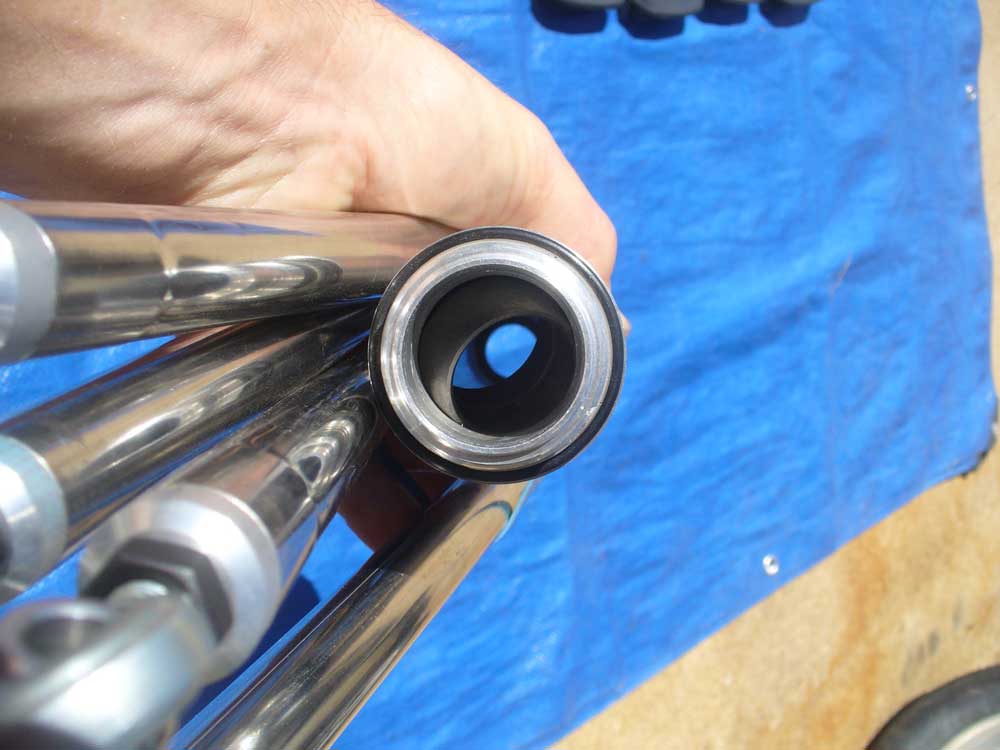
This is the Timken part:

That particular bearing happens to be a perfect fit for the 1” fiberglass poles used by most of the T-hunters.
Most of the setups involve machining out a bit of the threads in the thru-hull fitting so that the spherical bearing will drop in and then machining out most of the thru-hull cap in order to capture the bearing. A second thru-hull cap is then needed in order to close the opening when not using a mast. My setup did not lend itself to that arrangement. Instead I machined an aluminum collar that would thread into the thru-hull fitting, house the bearing and fit a piece of aluminum tubing above it. I also put in grooves for a pair of O-rings to keep out water in the event of a rainy day.
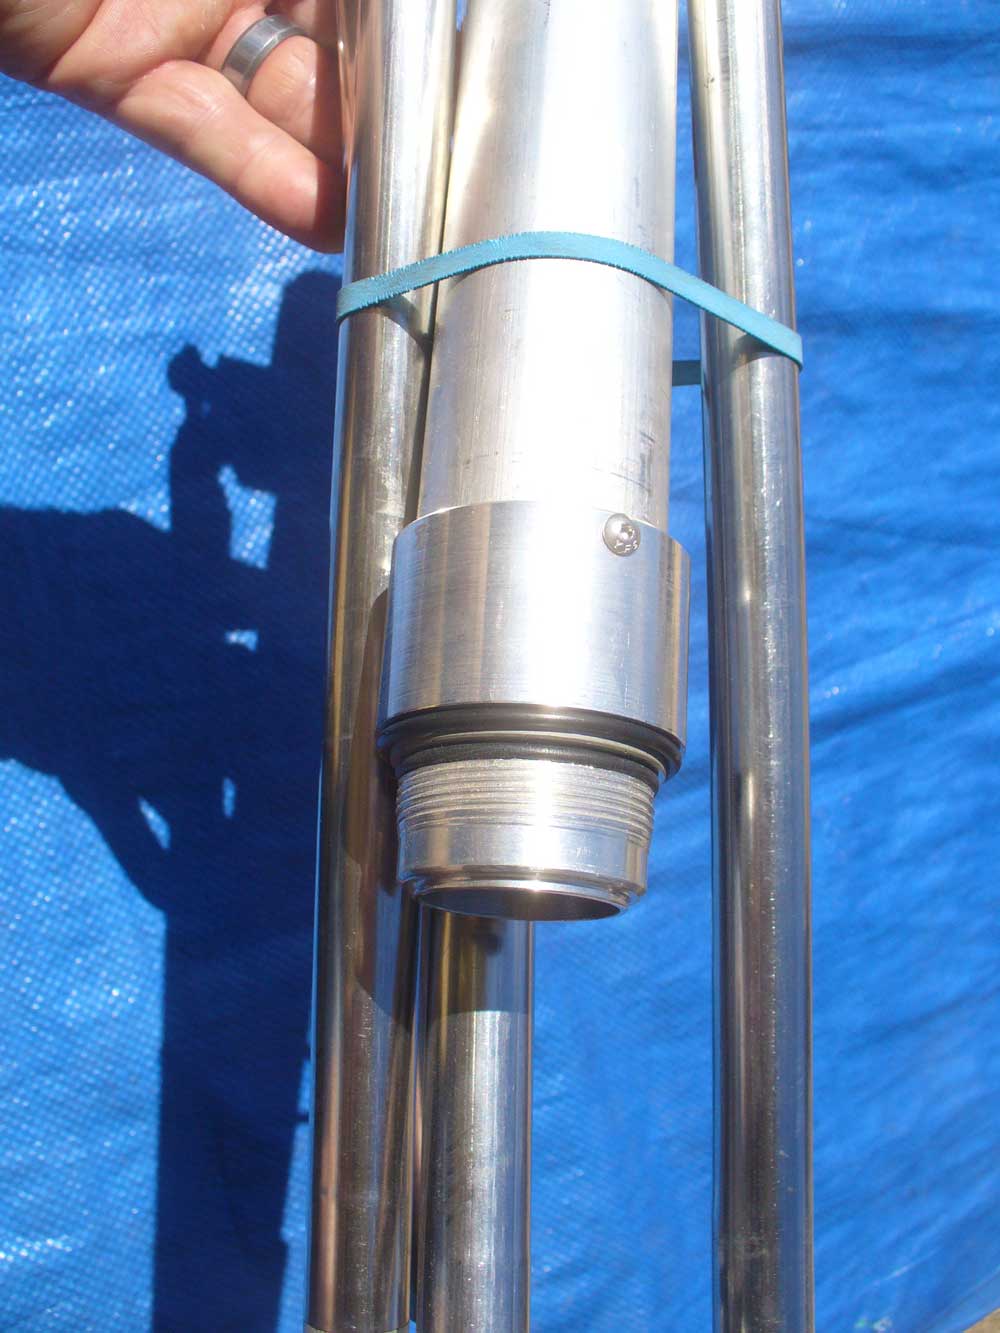
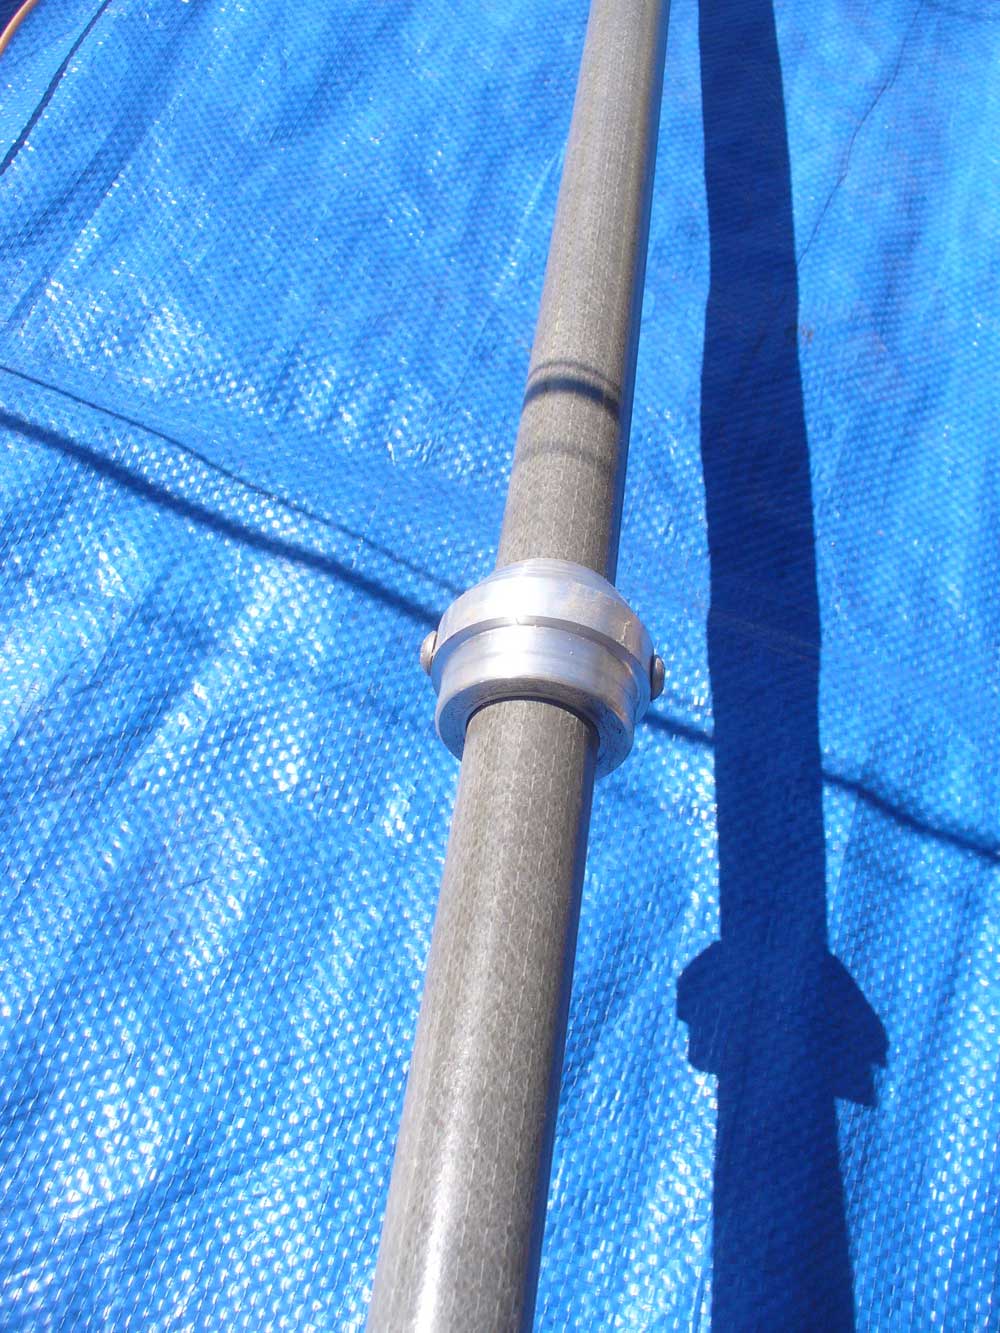
At the top of my support I have another bearing, this being a common trailer axle bearing. I am also running a pair of trailer axle seals, again to keep out water.

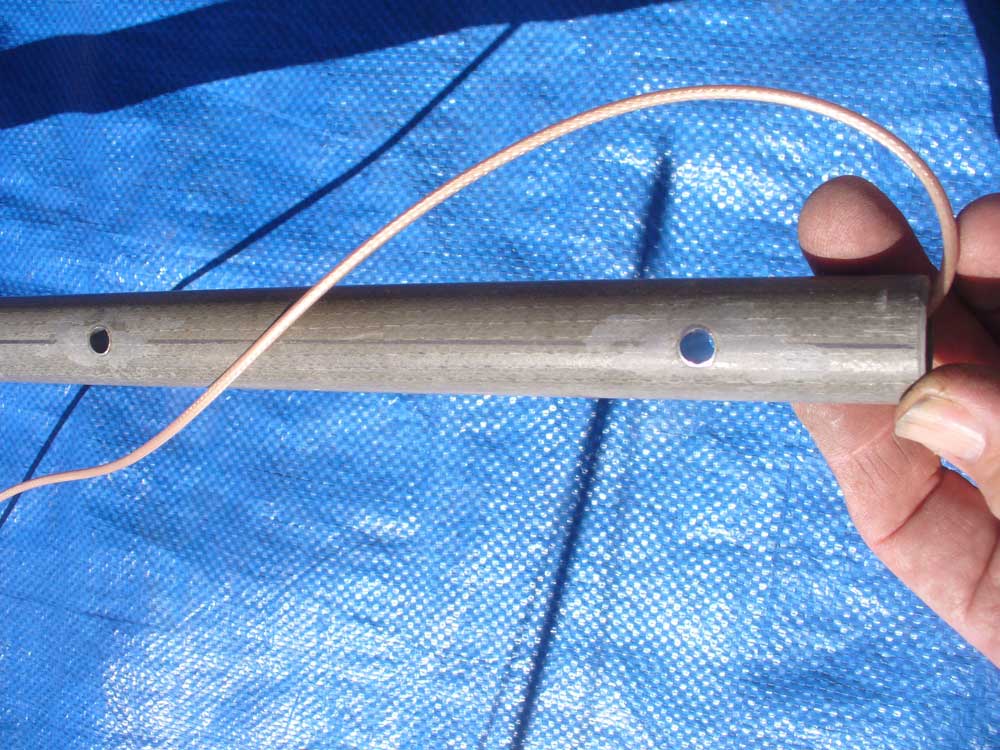
The four arms that provide lateral support to this assembly are thinwall stainless tubing with aluminum inserts pressed in. On each, one end is RH threaded and the other is LF threaded so that they act as turn-buckles and can be fine tuned as needed.
I should probably explain what transmitter hunting is. This is one of the niches of ham radio. The exercises in which I participate are essentially a game of hide and seek, but with radio signals. The purpose of this activity would have traditionally been for the sake of locating a downed airplane or an animal with a tracking collar. Technology has advanced in those arenas to the point that the devices which send out a signal will also send out GPS coordinates, so finding them no longer requires this skill, or at least not most of the time. Anymore it is most likely to be used to find a source of interference on the airwaves. This could be anything from the operator who doesn’t realize his microphone is stuck to someone who is maliciously jamming a repeater. For myself and The Varmints it is done for the fun of it, and it is a great way to learn about ham radio, particularly how to get a signal from one place to another.
In my area there are Saturday evening hunts which are expected to take two hours and then when a fifth Saturday of a month rolls around there are “countywide” hunts which are expected to take pretty much all day. Those are vehicle based hunts. In the spring there will also be an on-foot hunt which should probably take a couple of hours. The on-foot hunts follow an international model and involve five transmitters which sound almost identical, requiring a modicum of understanding of Morse Code in order to distinguish one from another.
In the Los Angeles area there are occasionally “Meathead” hunts which can be expected to take an entire weekend, starting Friday afternoon and hopefully getting folks back to work by Monday morning. Those can cover multiple counties and require participants to camp out in the mountains or wherever they happen to find themselves. A vehicle with good ground clearance and four wheel drive is a good T-hunt vehicle. An XJ is a good platform.
One of the reasons an XJ is a good platform is because they are still relatively abundant and cheap. I considered an International Scout, but I don’t think I would feel right putting a hole in the roof of a classic. And a hole in the roof is important because a mast with an easily rotated directional antenna is key to this game. It is a competition to see who can find it first, and thus you need to be able to drive and take bearings at the same time. Stopping and getting out to take bearings is not going to cut it. Some folks go to great lengths to work around putting a hole in their roof, but I think it makes more sense to just take the direct route, and to pick a vehicle on which won’t make a great difference.
Most of the time I simply operate as “Navigator” for Bruce (CoachBruce here on
. He has an ’01. He doesn’t post much though), but this past week he had a family event to attend, so I borrowed his radio and S-meter and set up Scope Creep to go hunting. I took some pictures to give any other interested geeks a sense of what is involved.It is probably worth mentioning that my setup is a bit different from most because I run a stick shift. Most folks support their mast between two bearings, one in a console cup holder and another at the roofline. That is fine if all you need to do is put it in drive and then go, but not so great if you need to row through the gears. Besides, ’96-down XJs don’t offer much to speak of in the cup holder department. So my mast is supported by a bearing at the roofline and a second bearing above that, supported by a rack mounted superstructure. A side benefit of this arrangement is that I don’t have to worry about wrapping my coax around my mast. I have plenty of slack to work with during the hunt.
That is probably more explanation than interests most folks, but it should help with understanding why I have done some of the things I have done. Besides those things I can’t even explain to The Bride.
On to the pictures…
First we have the hole in the roof:
What you see is a stainless steel thru-hull fitting from the boat world. Mine is a fuel fill fitting. I think most T-hunters run a waste fitting for the larger diameter and thus better fitment for the spherical bearing (more on that to come). These fittings are weather-tight and use O-ring seals.
Here is the view from the inside:
I made the aluminum ring to finish it off. There is actually another aluminum ring sandwiched between the headliner and the roof. The middle ring is what everything threads into. I also have a solid aluminum cap for the inside.
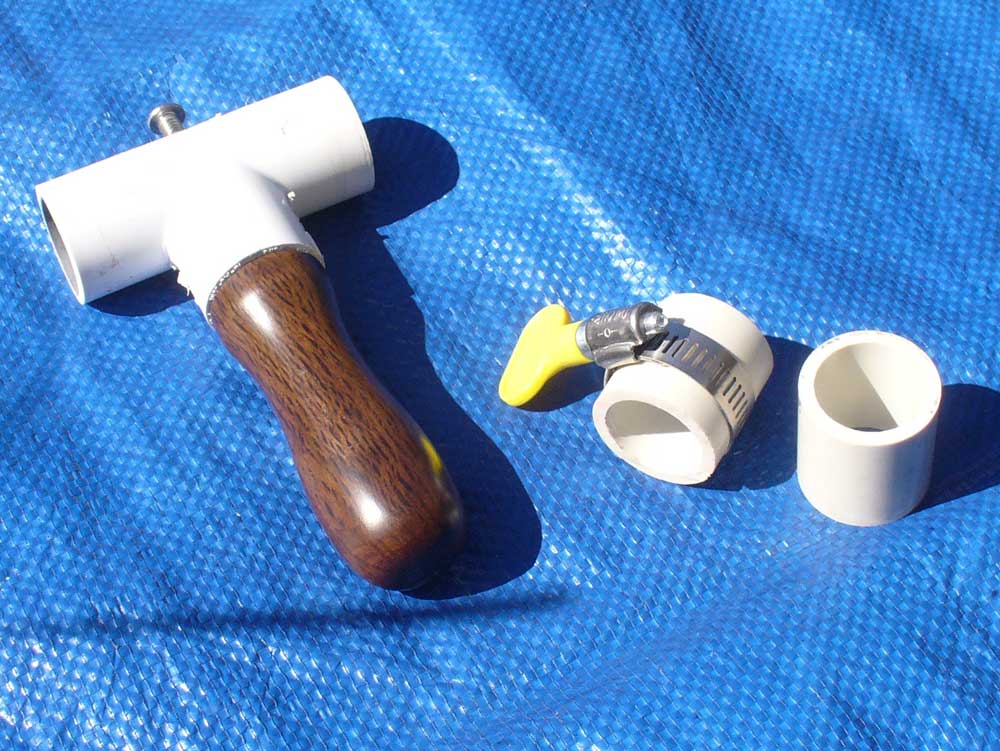
This is a tangent item:
Before I got my mobile rig I ran with just a handheld unit in the cabin. I made this adapter so that I could run a vertical omni in the hole I had already made in my roof. I now have an antenna mount on my quarter panel armor so there isn’t much call for this piece anymore, unless a Varmint (harmonic) wants to run his handheld at some point.
Here are the pieces which make up the support structure for my mast:
What you see there is a Thule load bar system with my own brackets to support my mast bearing mount. The Thule load bars are rectangular and thus much easier to make brackets for. Here is a close up of one of the adapter brackets:
They are just a piece of thinwall square steel tubing with a piece of rectangular bar stock welded in and then threaded. The screws through the bar stock apply pressure to a piece of bent sheet metal that acts as a clamp. Screws are M8-1.25 because they use a 5mm Allen wrench which is the same size as is used in the Thule feet. That helps reduce the number of tools I am hunting for after I drop them in the grass.
Because automotive rooflines are not exactly parallel to the ground a spherical bearing is used at the roofline in order to allow for a non-perpendicular angle for the mast. You can sort of see the spherical bearing here:
This is the Timken part:
That particular bearing happens to be a perfect fit for the 1” fiberglass poles used by most of the T-hunters.
Most of the setups involve machining out a bit of the threads in the thru-hull fitting so that the spherical bearing will drop in and then machining out most of the thru-hull cap in order to capture the bearing. A second thru-hull cap is then needed in order to close the opening when not using a mast. My setup did not lend itself to that arrangement. Instead I machined an aluminum collar that would thread into the thru-hull fitting, house the bearing and fit a piece of aluminum tubing above it. I also put in grooves for a pair of O-rings to keep out water in the event of a rainy day.
At the top of my support I have another bearing, this being a common trailer axle bearing. I am also running a pair of trailer axle seals, again to keep out water.
The four arms that provide lateral support to this assembly are thinwall stainless tubing with aluminum inserts pressed in. On each, one end is RH threaded and the other is LF threaded so that they act as turn-buckles and can be fine tuned as needed.