• Welcome to the new NAXJA Forum! If your password does not work, please use "Forgot your password?" link on the log-in page. Please feel free to reach out to [email protected] if we can provide any assistance.

The Smelly Old Man

Ok so work on the Jeep took a bit of a hiatus over the winter, I had to redirect my efforts into a place to work on and store the Jeep, I think I did pretty well too. Let me introduce you to the new work shop:
image_zpsc936444d.jpg

image.jpg1_zps9veno3px.jpg


It needs some work, a new roof, and it needs rewired for 220, but it is going to suit my needs just fine, 600sq/ft.... Big enough for 4 large cars. Roof, 220 wiring, and insulation is on the (very)short list. My father-in-law has a furnace out of a moble home and an old fridge he's donating to the garage, and my other father-in-law works for an LED lighting company, and is going to hook me up with LED light panels. Later this summer I will be picking up a welder and compressor, hopefully followed by a plasma cutter.
 
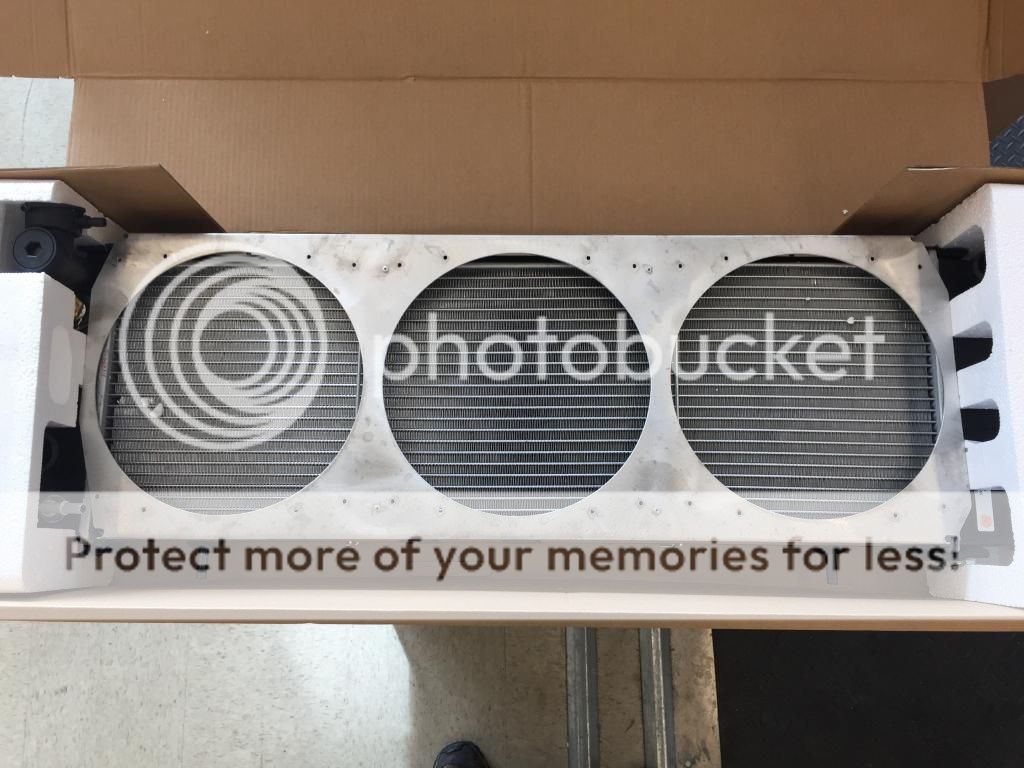
So I have decided to get rid of the Taurus fan in leu of the DirtBound OffRoad 3-10" fan shroud, there are a couple reasons for this, the major reason being the belt constantly squealing because its not getting enough contact on my upgraded aternator(a required mod if you have the stock 90A alternator). I even added an idler pulley to replace the one I had to cut out:

I added an second idler pulley at the top of the alternator. I copied what jeepster383 did and just ran a longer bolt thought the top of the alternator, and used a spacer and a couple of washers to shim the pulley out. Ended up using a Gates idler pulley(p/n 36330), fits 01-14 Subaru 3.0/3.6 in the Legacy/Outback/Tribeca. It is a nice bling pulley, but I think I would have just used another tensioner pulley for an XJ like jeepster383 did, just because of the cost difference(about $20). The belt has an OC of 82 1/8", or for 05-10 6.1L SRT8's (300/Charger/Challenger/Grand Cherokee).

Second, I was never really happy with how the Taurus fan mounted up, and had even thought long and hard about making an aluminum fan shroud for the Volvo fan, but that wouldn't fix the squeaky belt.

So here it is:
imagejpg1_zps42365cc8.jpg

image.jpg1_zpsrc8pdkar.jpg

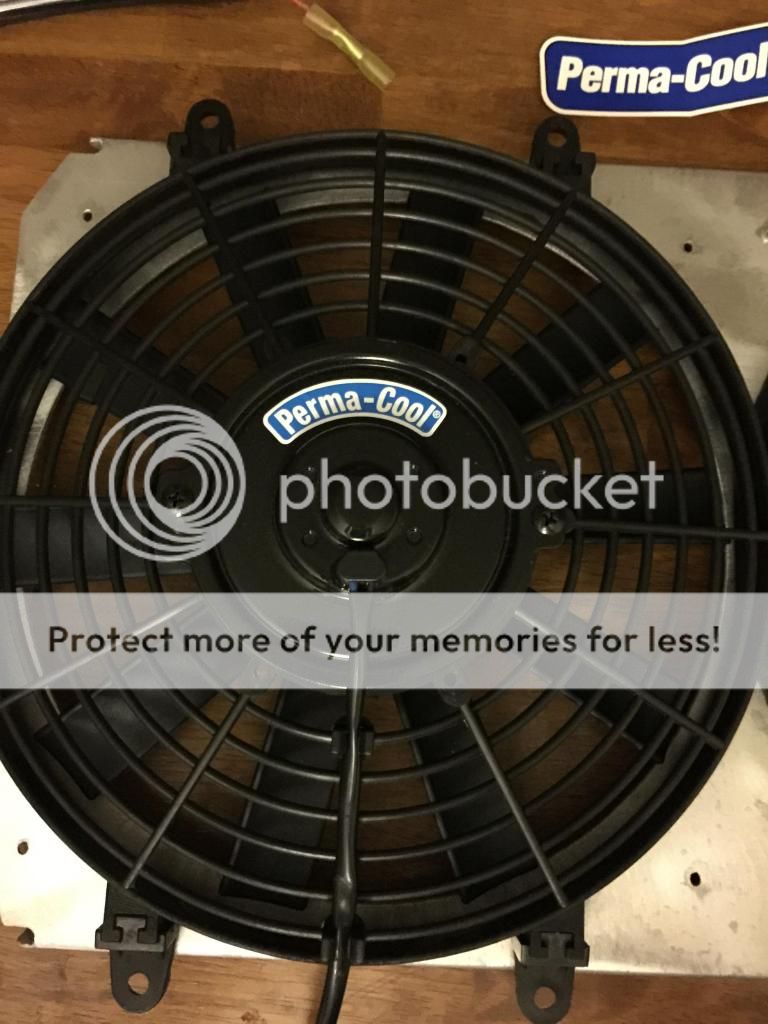
And because I decided to use a fan other than the ones Dirtbound sells, here is the inevitable "but"
imagejpg2_zps304f7721.jpg

The fans mounting tabs overshoot the shroud, by about 1/4" top and bottom. The tabs are about 12" apart, even though it advertises "Mounting area req'd: 11", and the shroud is 11 1/2" tall :thumbdown:
imagejpg3_zps18662d25.jpg

So after calling Perma-Cool, and finding out that a 9" fan will be too small and pretty much fall through the hole, I decided I was just going to have to make the 10" fan work.
imagejpg4_zps6131831c.jpg

So after a few hours with a Dremel, and a soldering iron(for "welding" plastic), I cut the mounting tabs down enough to make it mount up.

It's a first for me to be working with plastic like this, so it was kinda cool, but looking back, knowing what I know now, and finding out just how different the 9" and 10" fans mount up, I definitely would have gone with the fan shroud for the 9" fans, and gotten the Perma-Cool 9" fans. As an added bonus of running the 9" fans over the 10", you get 40 more CFM at a .2 lower amp draw
image.jpg4_zpsov2tj26v.jpg

Edit: I did have to trim the top radiator core support to clear the new shroud, I'll have to get a pic of it when I get home.

I'm going to continue to use the Volvo fan controller and BMW coolant temp switch for now, the center fan will come on at 195, and at 210 that fan fill shut off and the outer two will come on. If I can figure out a clean way to wire it up so all three fans can come on in stages automatically, I will change it, but for now this will work.
 
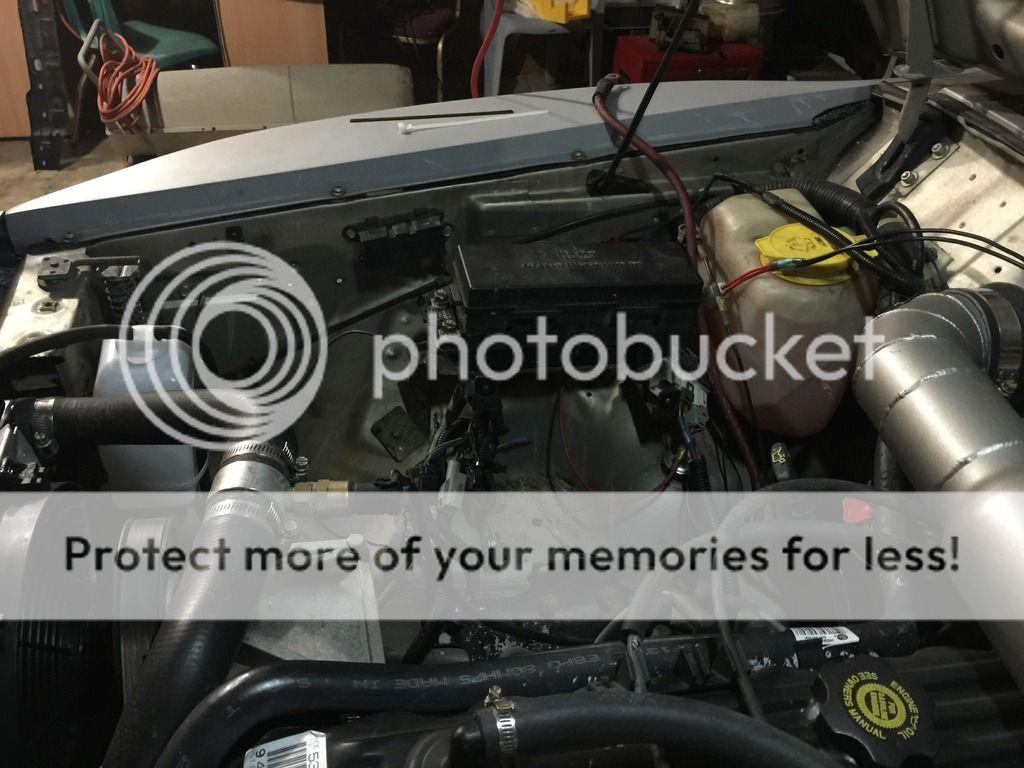
Here is another project I'm working on, making more room in the engine compartment.
image.jpg1_zpsupapeg7g.jpg

image.jpg3_zpszu8jmbxo.jpg

Relocating the battery to the rear of the Jeep, switching to a simpler coolant reservoir(relocated to where the battery used to be), and finally coming up with a permanent mounting location for the volvo fan relay(where the coolant reservoir used to be). The new reservoir is for an early 90s Celica, found it on eBay for something like $10, but it had $10 s/h from Taiwan, whatever it was new and suited my needs very well.

image.jpg3_zpsnsams3o2.jpg

Still have a few things left to work on, tying the cables together, tying them down so they don't move around, and then trim the center console to clear them.
image.jpg1_zpskphkzzsg.jpg

image.jpg2_zpsgoig7wbc.jpg

I had to pull the starter and oil filter to make enough room for the drill.
image.jpg4_zpsenwxze0q.jpg

And as you can see my floorboards look like hell, I've got new pans from Classic 2 Current Fabrication that just came in, but am going to have to wait till the garage gets 220 wired up before I can get them in, I will however start cutting the old ones out soon.
image_zps24l4khe5.jpg


I was working on clearing a path for the main cables thought the interior, and was going to run them on top of the transmission tunel, under the carpet/center console. Progress stopped when I pulled up the carpet, and got a good look at the condition of the floor pans. I knew there was an issue when we did the lift, but I was hoping it wasn't this bad. Well at least I have something to show the wife and say: "I need new floorboards... See?"
 
Finished a small modification to the lighting PDC, one problem with using the Crown Vic box is the bottom half, it really is kind of backward for what I want to use it for/where I want to put it. To use it for my lighting, it would mount best on the passenger side, but all the wiring for the front clip comes in from the drivers side.
image.jpg1_zps0tttbyrm.jpg

image.jpg2_zpspzsyl6pt.jpg

So I spun the bottom 180, it looked like it would work with a little modification.
image.jpg4_zpsod9necua.jpg

image.jpg5_zpstrpwdmis.jpg

I pulled out my Dremel and soldering iron, trimmed off a couple of the clips that hold the halfs together, and cut an opening for all my wiring to come through on the other side.
image.jpg3_zpska0w1qjp.jpg

I used a few of the pieces I cut off and the soldering iron to "weld" in a couple small filler pieces, it's not perfect but it should work for what I want it to do, at least until a better option comes along.
 
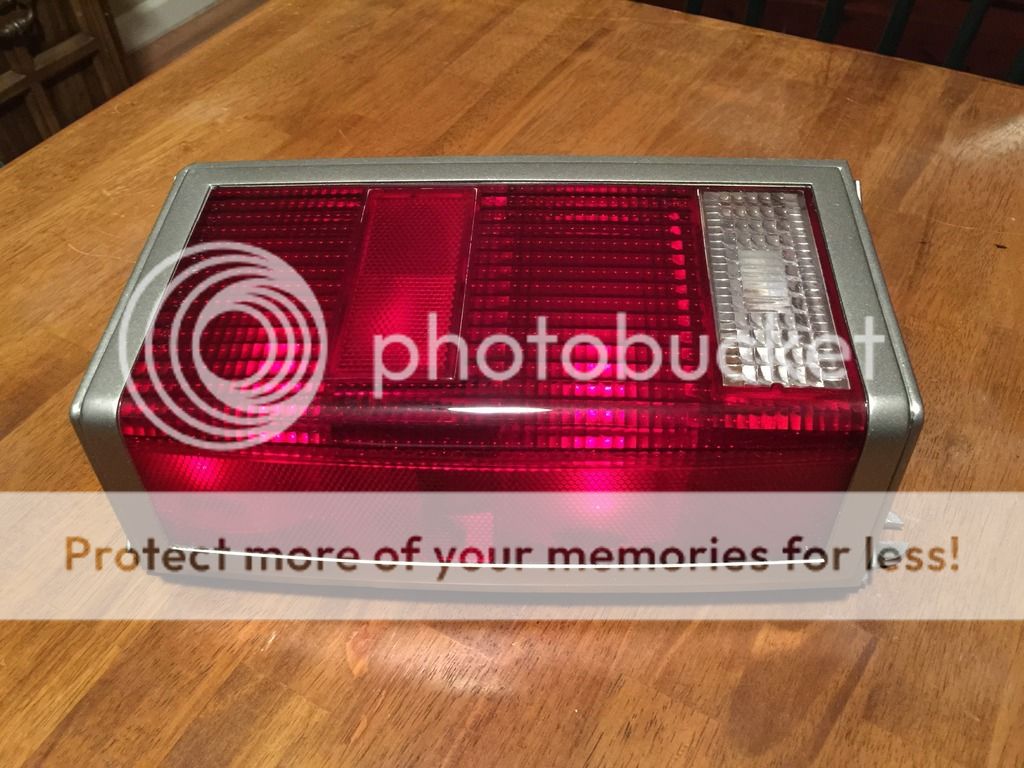
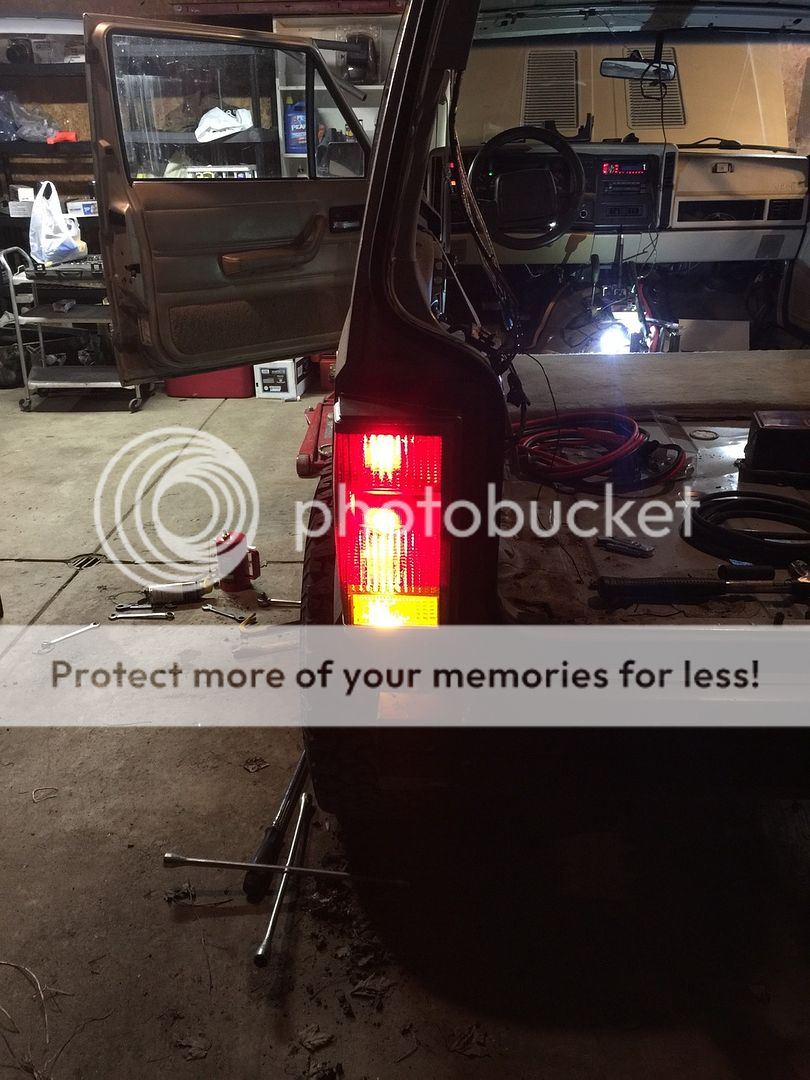
On a different note, I picked up a set of Wagoneer tail lights, for a look a little different than you normally see, and I think it turned out very nice. Since I have the Aurora reverse lights already, I really don't have a lot of use for the reverse lights in the tail light housings, so I filled the red lenses full of red LEDs for my brake lights, and the clear lenses I'm using amber LEDs for my turn signals.
image.jpg6_zpsdhkiur8j.jpg

image.jpg1_zpsewz4qqyt.jpg


While I was screwing around back there, I decided to take the reverse lights up a notch or 10 too
image.jpg2_zps5foow95x.jpg

I saw this on Facebook and thought it was pretty cool, but then when I stumbled across these on Amazon, I fig I would go ahead and do a version of the upgrade myself.
image.jpg1_zpseqophmbx.jpg

image.jpg1_zpsztytci1c.jpg

image.jpg2_zpslbbh0yvg.jpg

image.jpg3_zpsyxcakdlg.jpg

image.jpg4_zps3th6zq8h.jpg

image.jpg6_zpscljc2suz.jpg

image.jpg7_zpstdp9uefs.jpg

image.jpg8_zps9yztiotl.jpg

image.jpg9_zpsuzpnljeg.jpg
 
The Spal fans are only rated for 802cfm each, one of my fans can do what it takes three of the Spal fans to do, and they don't have a rating for the "blue dot" fans. Yeah I could have called, but I doubted they would be able to move much more than the Spal.
 
I actually did the same. Purchased the Dirtbound shroud, fans from Amazon, the Dakota Digital fan and thermostat (directly from Dakota), Autometer 5/8" heater hose adapter it ended up being MUCH more inexpensive than the kit from dirtbound.

Which fan controller are you using?? The Dakota digital is actually really nice!
 
You have a full write up for those reverse lights in the housing? I want to do that!
 
Ok, here is an update for anyone following this build. I've finally got my joints, jam nuts, and tube adapters for the Poly long arm brackets.

I also bit the bullet and ordered a couple other things I've been eyeing for a while now, since they have a 25% off sale going on right now. I've had my eye on T&M Metal Fabrication for a little while now, they seem to have some well thought out fixes for problem areas on XJs that nobody offers yet, I'm excited to see if the parts are as good as they look.
Door hinge brace(my passenger side seems to be fine, but I can see my drivers side is starting to become an issue)


The cracked B pillar vent on 2 doors(mines been an issue for a while, but doesn't look like it's gotten any worse since I noticed it)


http://www.t-mfab.com/store-3/


Not beautiful, but not bad since its been a few years since I've used a welder on a simi regular basis


Now, these are NOT plug and play pieces. Some bending, clamping, tacking, hammering, are needed to make these fit, as they are shipped flat. That being said, the installation was pretty straight forward, and if I had a fresh flap disk, or had taken the time to strip the paint out of the inside corners better, it would have went easier, as I wouldn't have been fighting getting decent contact and my welds would have looked better around the edges. Something to remember when I do the drivers side.
 
Poly long arm brackets are mounted up, and PureJeep cross member are mounted up. Unfortunately they don't fit together quite as well as I had hoped, but since they were two different manufacturers, it was a long shot that they would fit perfectly together, but with a little modification they will.


The best part about needing to replace your floor boards!!

 
Passenger floor pan is out and some much needed repairs are being made to the seat mount that runs under the floorboard.


Cut the old bracket out

Notch the frame


1x3x.120 box tube in its place


Rockers cut


2x4-.120 wall test fit

Seat mount welded in

Rockers welded in


The pinch weld will get cut out, and I'll bridge the gap between the rocker and floor pan once I can get back to get some more materials.
Fresh exhaust is in, Magnaflow cat and 18" muffler, with a Dynomax tailpipe for a RENIX era XJ(about half to price as a H.O. era). I redid the exhaust so I could make sure I had plenty of clearance around the new seat mount.

Floor pan is in for good, just need to finish welding it in top and bottom. Front seat mount test fitted, need to bolt the seat in place on the rear mount to locate the front mount before I start welding it in. I'll also bump up the hardware size while I'm at it, most likely to 1/2" grade 8 bolts, but I got to make a hardware store run.

Going to have to make anothe run for more 1x3, I decided to use what I had planed on using on the drivers side, to tie the Poly leaf spring brackets, and long arm brackets into the rockers.
 
Back
Top