GrimmJeeper
NAXJA Forum User
- Location
- Gardena, CA
The starter is a fairly simple part, with not much in the way of moving parts. Hopefully this write up will give you the confidence to at least tear your core apart and have a look in there before you turn it back in to the parts store.
First off, my problem. My jeep was cranking very slow, almost like the battery was dying. First thing I did was check the battery with a load tester from the auto parts store. it checked out fine, so next I checked the battery cables. I noticed some corrosion creeping under the insulation of the ground cable so I made up a 2g replacement with copper lugs on each end. Still having problems, i eventually ran into the problem where it wouldn't crank at all, just clicked when i turned the key. I had a buddy try to jump start me and even though the dash gauge read 14v, it still would not turn over. Remembering a trick my dad showed me, I tapped the starter body from underneath a few times and tried it, it fired right up. this means there is a dead spot somewhere inside the starter where the current is either shorting out or cannot pass because of some obstruction.
So, here we go. I bought a rebuilt starter to replace mine with, but I thought i would tear the old one down and rebuild it to show some of you at the very least something you havent seen before and may even want to attempt yourself. All the parts only fit together one way so there is literally no way to screw up putting this back together unless you forget to put something back in :gee:
Step 1) Remove the starter and get your tools ready.
For this job I used a 12mm socket, my trusty 3/8 ratchet, a blunted phillips screw driver (more on that later), an 8mm socket, a standard phillips screw driver, some medium grit sandpaper, brake cleaner (electrical cleaner would have been a better choice here but I am currently out of it), and a pair of gloves (latex shown but i switched to my mechanics gloves once the brake cleaner started eating away at the latex

Step 2) Clean the outside of the starter as well as you can
Dirt is the enemy of electronics and you don't want to do all this work just to accidentally smudge grease inside of it and ruin it while you're re-assembling it.

Step 3) Remove the energizing wire
This nut should take a 12mm socket. remove the nut, gently pull the wire off of the stud, and push it off to the side for now.

Step 4) Remove the solenoid
Remove the two large phillips head screws securing the solenoid to the main gear housing. this is where the blunted screwdriver comes into play. in the first pic you can see the sharply pointed tip of the phillips screwdriver. If you use this screwdriver you will strip the screw head out because not enough of the tip engages the slots in the screw head. the second pic shows (sorry for the blurry shot) another screwdriver i have ground the pointed tip off to make a flat end. this will let the driver tip sit all the way down into the screw head and you can torque down nice and hard on those screws to get them out. I had to put the starter in the vise and then use both hands to turn them out, the are seized in there pretty tight.
pic 1

pic2

With the screws out, you can now remove the solenoid from the gear housing. notice the spring inside the solenoid, DO NOT LOSE THIS. if it doesn't go back in your bendix gear will not retract away from the ring gear when you stop turning the key. that's bad

Now remove the plunger and set it aside.

Step 5) Remove the starter motor from the gear housing
These two long bolts hold the starter motor itself onto the gear housing. they take an 8mm socket and should spin out easily.

once they are out hold the starter so the nose is facing DOWN and gently slide the starter motor upwards and away from the housing. we do this so the planetary gears and the centering ball bearing don't fall out of the gear housing and get lost.
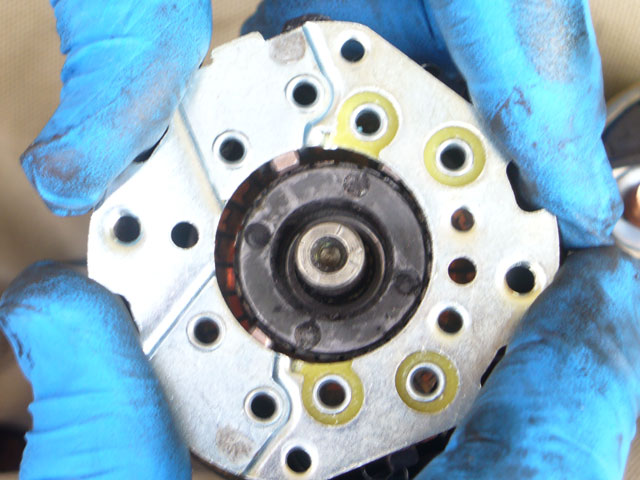
On the left side here you will see the planetary gears which provide gear reduction so the small starter motor can turn against the compression of the engine with ease. they simply slide on and off of the shafts they are on, should one fall off just pop it back on making sure the teeth line up with the outer gear ring. If you look closely into the hole in the center you can also see the ball bearing, if it falls out just drop it back in the hole.

Continued in next post...
First off, my problem. My jeep was cranking very slow, almost like the battery was dying. First thing I did was check the battery with a load tester from the auto parts store. it checked out fine, so next I checked the battery cables. I noticed some corrosion creeping under the insulation of the ground cable so I made up a 2g replacement with copper lugs on each end. Still having problems, i eventually ran into the problem where it wouldn't crank at all, just clicked when i turned the key. I had a buddy try to jump start me and even though the dash gauge read 14v, it still would not turn over. Remembering a trick my dad showed me, I tapped the starter body from underneath a few times and tried it, it fired right up. this means there is a dead spot somewhere inside the starter where the current is either shorting out or cannot pass because of some obstruction.
So, here we go. I bought a rebuilt starter to replace mine with, but I thought i would tear the old one down and rebuild it to show some of you at the very least something you havent seen before and may even want to attempt yourself. All the parts only fit together one way so there is literally no way to screw up putting this back together unless you forget to put something back in :gee:
Step 1) Remove the starter and get your tools ready.
For this job I used a 12mm socket, my trusty 3/8 ratchet, a blunted phillips screw driver (more on that later), an 8mm socket, a standard phillips screw driver, some medium grit sandpaper, brake cleaner (electrical cleaner would have been a better choice here but I am currently out of it), and a pair of gloves (latex shown but i switched to my mechanics gloves once the brake cleaner started eating away at the latex

Step 2) Clean the outside of the starter as well as you can
Dirt is the enemy of electronics and you don't want to do all this work just to accidentally smudge grease inside of it and ruin it while you're re-assembling it.

Step 3) Remove the energizing wire
This nut should take a 12mm socket. remove the nut, gently pull the wire off of the stud, and push it off to the side for now.

Step 4) Remove the solenoid
Remove the two large phillips head screws securing the solenoid to the main gear housing. this is where the blunted screwdriver comes into play. in the first pic you can see the sharply pointed tip of the phillips screwdriver. If you use this screwdriver you will strip the screw head out because not enough of the tip engages the slots in the screw head. the second pic shows (sorry for the blurry shot) another screwdriver i have ground the pointed tip off to make a flat end. this will let the driver tip sit all the way down into the screw head and you can torque down nice and hard on those screws to get them out. I had to put the starter in the vise and then use both hands to turn them out, the are seized in there pretty tight.
pic 1

pic2

With the screws out, you can now remove the solenoid from the gear housing. notice the spring inside the solenoid, DO NOT LOSE THIS. if it doesn't go back in your bendix gear will not retract away from the ring gear when you stop turning the key. that's bad

Now remove the plunger and set it aside.

Step 5) Remove the starter motor from the gear housing
These two long bolts hold the starter motor itself onto the gear housing. they take an 8mm socket and should spin out easily.

once they are out hold the starter so the nose is facing DOWN and gently slide the starter motor upwards and away from the housing. we do this so the planetary gears and the centering ball bearing don't fall out of the gear housing and get lost.
On the left side here you will see the planetary gears which provide gear reduction so the small starter motor can turn against the compression of the engine with ease. they simply slide on and off of the shafts they are on, should one fall off just pop it back on making sure the teeth line up with the outer gear ring. If you look closely into the hole in the center you can also see the ball bearing, if it falls out just drop it back in the hole.

Continued in next post...
Last edited:


