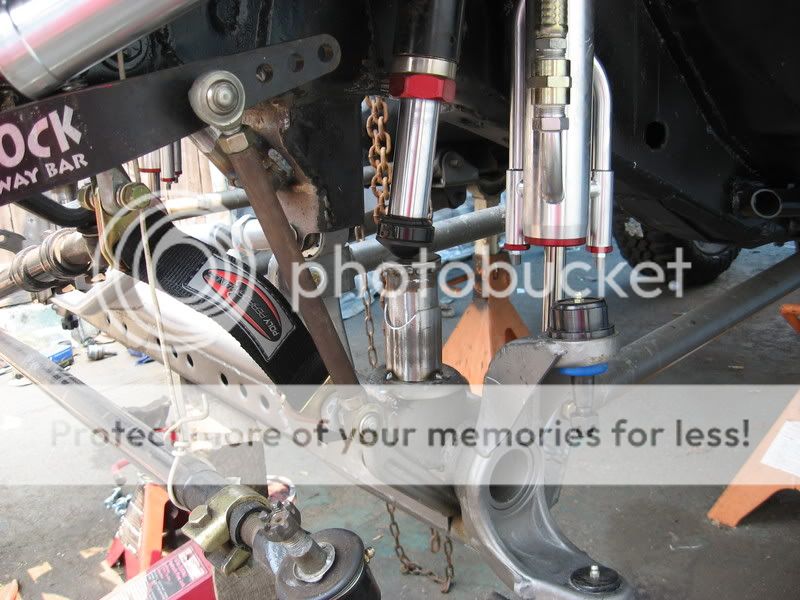
Suggestions for Barnett Air Bump Mount Kit installation...

loki_racer

NAXJA Forum User
Location
Pittsburgh, PA
I'm installing the Barnett air bump mount kit tomorrow. Any suggestions about issues I might run in to?

I guess the process is as follows:

  1. Put on stands, disconnect battery, remove tires, remove coils, remove springs, depressurize air bumps.
  2. Remove reservoir above passenger side coil mount.
  3. Hack off current bump stop.
  4. Drill out center hole in the mounted plates.
  5. Cycle axle up until it's about an inch below full travel.
  6. With air bump inside the mount kit tube, slide it in to the mount plates.
  7. Weld plates to frame and tube to the plates.
  8. Paint
  9. Reassemble
  10. Fill bumps with nitrogen.
Will I need to remove the air bump from inside the coil to have them filled? What pressure does everyone recommend I run? We don't have as much go fast as the Jeepspeed stuff.

When figuring out how high to mount the tube on the plates, should I have the lip of the air bump touching the mount tube?


Or should I leave some space between the mount tube and the lip on the air bump?
 
you want the lip pushed all the way in, that lip is there to help keep the bump from pushing inwards on a hard hit. I don't think how much jeepspeed type stuff you're hitting has anything to do with the pressure you run, the airbump is there to absorb a hard hit on the bumpstop instead of transferring the full force to the body. I would run whatever pressure the manufacturer recommends, it should be provided with the kit. If not call T&J's performance and ask them.

as far as filling them as long as you can get a line on the fitting in the back of the bumpstop you can fill them in vehicle, it would be much easier though to just take them somewhere to be charged with nitrogen. DO NOT FILL THEM WITH COMPRESSED AIR. Only nitrogen.
 
sounds good to me, you want it like the first pic, lip flush with can! Make sure when you cycle it you have the trackbar and steering installed as it does move side to side a bit, cycle it all all extremes(one side fully stuffed for each side, both full stuffed, and both fully drooped) and compromise the front/back tilt so it works best in your travel range), and you will probably get a little coil rubbing when you droop it out, you will need to address the lower striker pads for the bumps as well, I used tubing and plate and welded it straight to the stock coil pad and added some gussets(I'll try and find a pic). As for pressure, start at the max(whoever made your bumps should have supplied that info) and mess with it, you can go lower but I wouldn't recomend higher. Make sure you have the ground for the welder such that the current will not flow anywhere near the bump. I had to use a cylinder hone to ream out my cans after I welded them all up due to welding distortion, time consuming but it eventually worked. If your bumps have the schrader valve on top then you can fill them installed if you can access the fitting.

IMG_1079.jpg

IMG_1080.jpg
 
Thanks for the info everyone.

im getting ready to do this too, is that one set screw really the only thing holding the bumps up?
Ya, that screw is it. I read some complaints about the design not using the clamp style mounts. Most say it isn't an issue, but I have no experience with either, so the screw will work for me, for now.

I have to have something on the strike plate? What if the distance from the strike plate to fully compressed air bump is more than enough to limit the axle travel?
 
Last edited:
the screw is just there to keep some resistance on the can to keep it from sliding out. if you use clamp style mounts there is a slit up one side of the can which compromises the integrity of it. They aren't going anywhere, I wouldn't worry about it.
 
You need to go through the forum and look at some of the bump mounts. Simply welding in the plate and welding the tube to the plate isn't going to make it last very long. Listen to Skullver as he offered up some great advice.
 
You need to go through the forum and look at some of the bump mounts. Simply welding in the plate and welding the tube to the plate isn't going to make it last very long. Listen to Skullver as he offered up some great advice.

I'm not sure I follow. The kit came with two plates and a tube. Those are for the air bump mount. Skullver talked about the strike plate and what I should do with that, but didn't say a single thing about the mount kit. You say if I mount that kit, it won't last long. Barnett sells a kit that doesn't last long?

Then I asked if I had to have an elevated strike pad, or if I could just let the air bump pad strike the stock coil mount.
 
He's saying that simply welding the can to that mount is not enough. No company makes a kit that is suited for all applications. the barnett kit is a start, its up to you to properly reenforce the area after installation.
 
I'm not sure I follow. The kit came with two plates and a tube. Those are for the air bump mount. Skullver talked about the strike plate and what I should do with that, but didn't say a single thing about the mount kit. You say if I mount that kit, it won't last long. Barnett sells a kit that doesn't last long?

Then I asked if I had to have an elevated strike pad, or if I could just let the air bump pad strike the stock coil mount.

you're a feisty little dude huh? haha, you will find out, depending a bit on your shocks as well, the oil pan could potentially act as a bumpstop with your axle, not the happiest of scenarios, so you will have to have an elevated striker, that height will depend on what your shocks and oil pan/axle clearance dictate. The mount kit mounts the bumps where they need to be for jeepspeed, look at it, see how it is ALL sheetmetal, thin at that? How long do you think that will last if it is not tied to an engine cage, or at the very least plated in and reinforced? Not long, pretty sure there is a thread showing vetteboy(sorry if I bungled that, don't remember who but a few key word searches should find it) and how he plated in that area for his bumps, so if you don't have an engine cage, or a cage at all, there are other ways to make it last. Don't be so critical, have fun, and search around and see what others did, don't rush into it. That is my advice, it is free, do with it what you will:).
cheers and good luck!
 
the oil pan could potentially act as a bumpstop with your axle, not the happiest of scenarios, so you will have to have an elevated striker, that height will depend on what your shocks and oil pan/axle clearance dictate.
Funny you mention this. I have a nice dent in the oil pan already from the first race and lack of knowledge about needing better bump stops.

I guess I didn't do enough research on the mount kit. Didn't realize more was needed for the install. Does anyone have any photos (maybe I missed them in xcm's thread) of the engine bay, specifically of an air bump mount kit, installed?
 
Funny you mention this. I have a nice dent in the oil pan already from the first race and lack of knowledge about needing better bump stops.
Bump stops in the stock location will do nothing to keep the axle out of your oilpan, no matter how good they are, the key is stopping the axle before it gets there - which is why Chris (Skullver) raised the lower bump pads on his axle. that allows the bump stop to contact the axle and bottom out before it ever gets anywhere near the pan.

Chris - vetteboy plated his upper coil buckets and they still bent again. Loki, the key is transferring the force applied to the bump stops to other places, which is why you need to tie them into an engine cage. The only purpose of hydraulic bumpstops (or any bump stop for that matter) is to cushion the blow.
 
Funny you mention this. I have a nice dent in the oil pan already from the first race and lack of knowledge about needing better bump stops.

I guess I didn't do enough research on the mount kit. Didn't realize more was needed for the install. Does anyone have any photos (maybe I missed them in xcm's thread) of the engine bay, specifically of an air bump mount kit, installed?

any bumpstop has an ending point, and thats what matters when keeping the pan out of the axle, or the tires out of the wheelwell, or bottoming out the shocks. setting this 'end point' is where it gets interesting. you have to determine this end point, THEN tack weld your bump cans in. THEN flex it out to doublecheck it. i recommend a small, easily ground down tack weld.

to set my end point, i setup the new shocks, then jacked the axle up till i had 1/2" left of compression on the shock, then put in an empty bumpstop full compressed. it should be tacked so it's at full bump, end point.

make sense?

hydraulics are differant because they have a stroke, so you gotta think of it once it's compressed as the full end. the only other differance is they cusion the bump thru the valving, but that only cusions, the end point is still the same thing! it just helps that you dont see 100%, full bump as often, due to the help of the bumps valving.
 
We did the install today and I have a couple questions.

I'm running a 91 XJ, so the radiator reservoir is above the passenger side mount. With the tubes installed, that reservoir no longer fits. Suggestions?

There is a rubber pad, I think it's called a coil isolator, that was located on the stock bump stop. The inside diameter of it is too small to fit over the Barnett kit. Do I need that rubber pad?

Here's a write-up of the install. I'm not quiet sure we got the angles right, but nothing to do about it now.
 
Last edited:
We did the install today and I have a couple questions.

I'm running a 91 XJ, so the radiator reservoir is above the passenger side mount. With the tubes installed, that reservoir no longer fits. Suggestions?

There is a rubber pad, I think it's called a coil isolator, that was located on the stock bump stop. The inside diameter of it is too small to fit over the Barnett kit. Do I need that rubber pad?


You do not NEED the rubber isolater. And, you need a newer style radiator. The one with a cap(no resiviour needed)
 
Back
Top