5spd_xj
<<the good ol days
- Location
- Dracut, MA
How does that look to you?
it looks perfect. now wheel it, damn you!!

")
How does that look to you?
Since whatever I choose here will directly effect how that goes, I'm ain't rushing this.it looks perfect. now wheel it, damn you!!
:gee: Thanks Rob. That 4"x6" oak is really getting used, but hey as long as it isn't part of the XJ I'm all set, right?i really like your use of wood on this build
Since whatever I choose here will directly effect how that goes, I'm ain't rushing this.

:gee: Thanks Rob. That 4"x6" oak is really getting used, but hey as long as it isn't part of the XJ I'm all set, right?
I got the mounting cans and the old shock body from Offroad Engineering.
I went with the 2" cans so that I could use all the popular brands (like SAW, Fox, King, Bilstein, etc) if I ever came across a deal on them. I called SAW and got dimensions for their 2" stroke bump, so I based mine off of those collapsed.


Jeff sorry I missed this, I don't know how it slipped past me! :dunno:I now have a set of these exact same bump cans in my grubby little hands and began by setting one of them where I wanted it to mount and noticed that I really didn't have that much room there. I took a look at the sway away site and noted that I can really only fit a 2" stroke stop (8.36" collapsed length.) They list the collapsed and extended lengths, but don't show if that measurement includes the schraeder valve or not. Also, they don't list the dimension from the bottom edge of the mounting can to the bottom of the fully collapsed bump. Do you have these measurements?
Jeff


Thanks!Those rockers look like they were a lot of pain to do. Looks good though!
I still want to be able to throw doors back on it and I didn't want to get into something like what Starboard M did with his. I think with the UHMW on there I'll be plenty slick to slide over stuff.ooo nice, why not go a little higher with the box tube? kinda like boat sides
I still want to be able to throw doors back on it and I didn't want to get into something like what Starboard M did with his. I think with the UHMW on there I'll be plenty slick to slide over stuff.
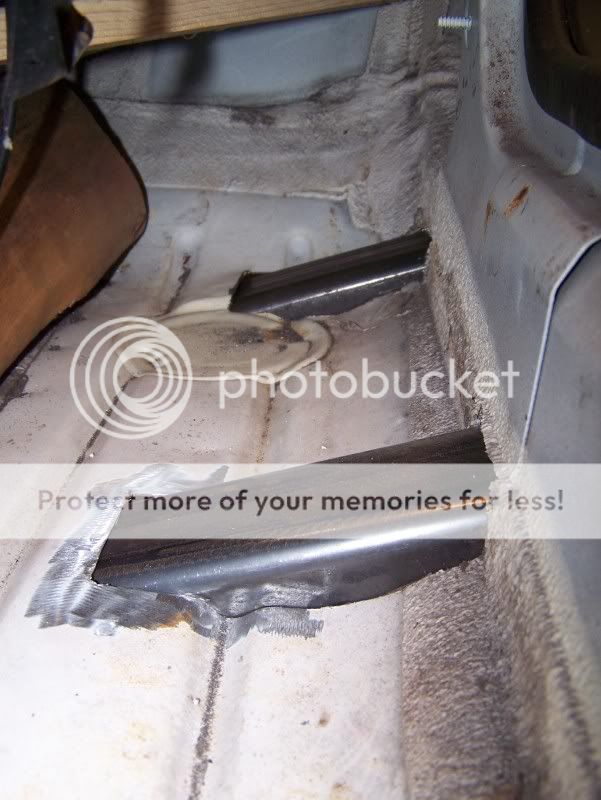
Shots form underneath, you can see I bent the pinch seam back a bit so it'll clear the skin:
also when you order the UHMW let me know, maybee we can get it cheaper if we buy more
 1/4", 1/2", 3/4" thicknesses. its being sold as an alternative to wood for making kitchens outta plastic or something. looking at the spec sheets for the product, its very similar to UHMW/HDPE with equal strength ratings and characteristics. i was thinking of buying a sheet and using it when i do my boatsides and bellypan, maybe even the gas skid too.
Power everything for the doors, the heated mirrors did come off and they are going on Angel's. I don't think I'll run mirrors.im only plannin on takin 2" off the bottom of my doors wich should still allow windows to work(btw did yours have power windows?), also when you order the UHMW let me know, maybee we can get it cheaper if we buy more
Haha, the pinch seam isn't doing anything other than holding a small peice of sheetmetal to the bottom of the rocker. If it wasn't going to help keep water out I'd have cut if off.DUDE. Didn't you know that if you mess with the pinch seam it could take away from the structural integrity of your vehicle?!? :scared:
otherwise, looks great
Find out exactly what it is, if it is virgin or recycled, and a price you could be onto something. Be Careful, UHMW is not the same as HDPE. They are both polyethylene, but UHMW is better with impacts and wear than HDPE, the tradeoff is it is much more expensive. Either would probably work fine though.One of the places my dad buys his plywood from has a bunch of 4'x8' sheets of these i found hanging out back
Bill, what do you have for a line on UHMW? my other thought was ordering some thru the Grainger store a town over from me.
Find out exactly what it is, if it is virgin or recycled, and a price you could be onto something. Be Careful, UHMW is not the same as HDPE. They are both polyethylene, but UHMW is better with impacts and wear than HDPE, the tradeoff is it is much more expensive. Either would probably work fine though.
I'll PM you (and Rob) with information I have on the hookup.
same with the rockersits virgin stuff, has the same tensile psi rating as UHMW, impact and wear resistant. im 95% sure its UHMW, it just has a fancy name on it from the company that sells it, but the specs all match UHMW. im pretty sure he told me $200-250 for a 4'x8' sheet of 3/4".


