Project Downward Spiral

It'll be a long cold day in .... before I ever drive a ricer like that.

I know you'll be ridiculously thick-headed about this (honestly no offense heh) but, at one time I would have totally agreed with you. But now, I see the thing as just a good little transportation car thats decently fun to drive and gets great mileage...
 
Maybe for you it isn't...

Ha I'm kidding Bill, I would never purposely try to make anyone roll. I swear I will be a good spotter, should the occasion arise.
I'm holding you too that. :D
Also, I know I've been slacking, and I need to come pick up that header panel and take a look. I have tests and finals coming up, so I probably won't be able to do it until after.
Eh, no worries. It's now camped out nice and safe wrapped in an old blanket on top of my tires in the shed.
I know you'll be ridiculously thick-headed about this (honestly no offense heh) but, at one time I would have totally agreed with you. But now, I see the thing as just a good little transportation car thats decently fun to drive and gets great mileage...
I have no problem with good gas mileage cars, they are great provided they have enough power to get out of their own way. I only have a problem with rice burners. ;)
 
Heh. :D

DSC02710Medium.JPG


DSC02729Medium.JPG
 
Are you guys worried at all about the strength of the A pillar being bent like that?
Which bend? I don't see how it is much different than your A-Pillar bar (the lower part anyway, you do tie into a halo)? There are a couple extra little bends, but I don't see how it would effect the overall strength to much.
Your XJ is looking good!
 
Last edited:
I have no problem with good gas mileage cars, they are great provided they have enough power to get out of their own way. I only have a problem with rice burners. ;)

well then i'm confused. lol. why is it a "rice burner"??
 
Which bend? I don't see how it is much different than your A-Pillar bar (the lower part anyway, you do tie into a halo)? There are a couple extra little bends, but I don't see how it would effect the overall strength to much.
Your XJ is looking good!
I was thinking about the two that suck it into the body. Now that I actually think about it, I cant imagine two ~10* bends would do anything to really cause any problems with the cage.

Friend and I talked about doing something like this when we did mine, and we figured it might cause problems, and we didnt have the skill to pull it off anyway. :doh:
 
Not that it's doing all that much, but I have the tube stitch welded to the unibody all down that area that Bill and I cut out of the inner fender.

I don't see it as being any worse than any of the other bends in that piece of tube...
 
well then i'm confused. lol. why is it a "rice burner"??
Isn't that the definition of an Asian made car or motorcycle?
I was thinking about the two that suck it into the body. Now that I actually think about it, I cant imagine two ~10* bends would do anything to really cause any problems with the cage.
They are 13 and 9 degree bends in my case. :) I couldn't imagine it either, that's why I was wondering.
Friend and I talked about doing something like this when we did mine, and we figured it might cause problems, and we didnt have the skill to pull it off anyway. :doh:
Give yourself some more credit, yours is coming out great. It just takes a little more time and paper to get the bends were I wanted them.
Not that it's doing all that much, but I have the tube stitch welded to the unibody all down that area that Bill and I cut out of the inner fender.
This is my plan too, not sure it it'll do anything as there is not much there. Yet another area that I was amazed at how little material was actually there.
 
Isn't that the definition of an Asian made car or motorcycle?

not as I understood it, but thats ok :) I always assumed it was more along the lines of "wow-this-kid-thinks-that-gas-sipper-is-fast-look-at-that-body-kit" crap. lol. I guess by your definition though, your mom's subaru is just as "riced out" as my little DD honda :dunno: heh

I digress ;)
 
Ok, I know I’m sorry for the super lack of updates. I took a week long vacation and that doesn’t help progress. Also, I know it’s a lame excuse but the camera battery has been dead and updates without pictures are useless as the saying goes.

We last left off with the A-Pillars. I spent a day mocking up the fuel cell where I thought it was going to go in the back behind the hatch. However with the travel that I have in my rear suspension there was no good way of mounting the cell that didn’t leave it vulnerable or that looked halfway decent. So the cell is back to being inside the Jeep. It fits nicely between the B-Pillar and the hatch right where the rear seat bottom used to belong. It’ll be more of a pain to fill, but oh well.

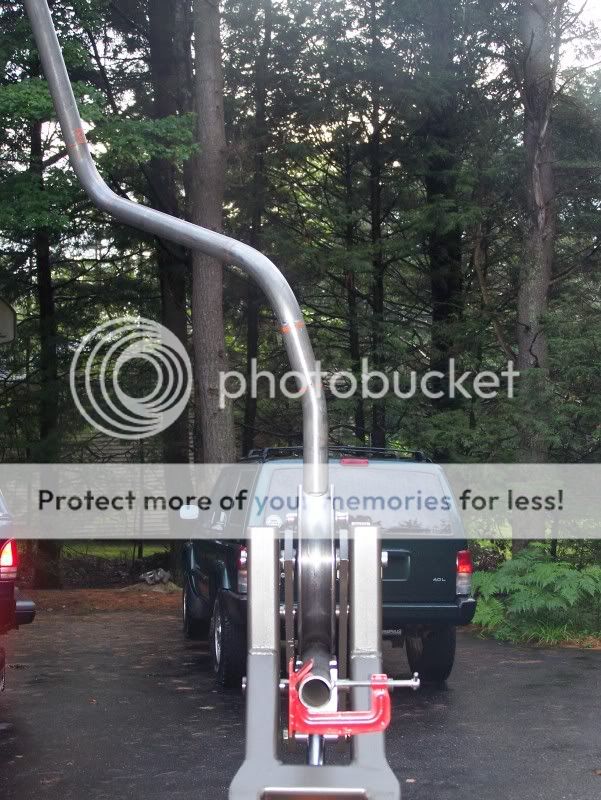
I then began bending the rest of the tube that would finish off the rain gutter/rub rail and form the outer back edge of the Jeep.
CPillarBending.jpg


I think it hugs the hatch and forms the top edge quite nicely. I won’t go as far as to say it is “dovetailed” but it goes kick in about 6” from stock body edge on each side. This allows me to have the entire corner protected by the tire. I'll bend in the remaining rear quarter sheet metal to match the tube profile.
HatchTubeHug.jpg


A view from the back:
BackShot1.jpg


Then with some help with my buddy,
Jasper1.jpg


I bent up and got an X formed to cover the hatch.
BackX.jpg


Then work began on protecting the roof. I bent up a bar to go along the top of the hatch and drilled some holes so I’d be able to connect to the inside B-Pillar.
RoofHoles.jpg


Nice tight fit:
MiddleRoofCross1.jpg


A 2/3rd’s shot as I left it tonight:
BackX_2.jpg


Hopefully I can get a bunch done this long weekend. I do have to replace my father’s Dodge Dakota brakes and shocks at some point, but that shouldn’t take long. Tomorrow I hope to finish the last piece of the rearmost part of the roof X and then remove everything you see above as a unit. This will allow me to weld it all put and continue with the hatch and body work. I want to complete the hatch and get that welded in place, finish off the rear wheel wells and bend the tube that will form them. Then I can grab some paint and finish up the rear of the Jeep before putting the cage back on.

Some fancy new things to help me with the above; a new Lista workbench (Thanks Travis!) and a Woodward Fab bead roller. I’ve got a pretty neat idea for finishing off the rear floor area similar to a pickup truck bed with beads.

NewListaWorkbench.jpg


WoodwardFabBeadRoller.jpg


That’s all for now.
 
That work bench sucks.
 
As always great work Bill
x2.

Can't wait to get it on the trails not so pretty anymore.

:D
Thanks guys! Me neither!
That work bench sucks.
I much so beg to differ.
I agree... give it to me so you won't have to look at it :roll:
Hmmmm.... No. :)
I can't even fathom what it took to bend your outter rails...
Damn....sweet work.
Not much really. Just some thought, a protractor, my homemade plane of bend tool, and three angle finders. That piece has six bends in it, all different planes.
Your's is coming along good too!
 
I got asked where and how I learned to weld. Simple answer to that is; myself. I just bought the welder and taught myself everything and had a buddy that’s a welder critique me along the way. I went though several 11lb spools of wire and tanks of gas before I even attempted anything on the XJ. Time consuming, but I think it paid off.
It's no TIG weld that some of ya’ll can do, but not bad for self taught I don’t think.
JointWelds.jpg


Anyway, more progress… I didn’t get as far as I would have liked today but I still did decent. I spent an hour and a half chasing primer. :(
I pulled down the rear portion of the cage, finished up the rear half of the roof X, and welded everything home. Still pretty good for no tube notcher I think, although I am going through a bunch of flap wheels!
RoofXMockJoints.jpg


I wanted super good adhesion with the paint so my gal and I sanded the entire thing and them wiped it all down. Ready for primer:
RearCageReadyforPrimer.jpg


In self etching primer:
RearCageReadyforPaint.jpg


After a few coats of color:
RearCagePainted.jpg


The red is much more red than I wanted. I was originally looking for a more medium or blood red color and this turned out much more of an almost Coke can color red. On the plus side it does match the seats, harnesses, and drive flanges.

Progress continues tomorrow.
 
...and your driveway is now red too!
 
Back
Top