Project Downward Spiral

Is that a 1310 to 1330 u-joint on the lower left Bill?
Yes it is, it is so I can cut down my stock front shaft and use that for now.
One year later.....

And still no completed cage.

Farkin' union builders.
Yah, well to many other things going on! Almost done with lady's new ride so all my attention will be back on it soon.
No way I'd be in the union!
i think he works for caltrans!!!! LOL
:huh:
Must be a west coast thing...
 
That's what I thought you needed that for. I have a brand new one sitting around if you want it, I have no use for it.
 
Yes it is, it is so I can cut down my stock front shaft and use that for now.

Yah, well to many other things going on! Almost done with lady's new ride so all my attention will be back on it soon.
No way I'd be in the union!

:huh:
Must be a west coast thing...

Just Imagine 1 guy working and 6 guys watching...
 
He ought to have an update soon, I know there's been alot of time in the garage lately for him :)
 
Any Updates? You have given me a plethora of ideas thus far..
On my XJ? Maybe after tonight...
He ought to have an update soon, I know there's been alot of time in the garage lately for him :)
There has, but its hasn't been on mine, it's been on the wife's. :rolleyes:
Her's is almost there. She's now driving it at least!

Completed/Replaced:

- Head Gasket (and all other gaskets to get there)
- Water pump
- All the engine hoses
- T-stat
- Radiator cap
- Champion Truck spark plugs
- ZJ Rear Disc Swap (stops excellent, very pleased)
- Rear wheel studs (needed because of ZJ swap)
- Front Brakes
- New Spicer 760x's in the front shafts
- Turn Signal/Hazard switch (on the 2nd one, the first new one was defective)

To go:
- IAC (minor idle issue once it is warm, the IAC on it was super gunked. I cleaned it out and that helped a bunch, but the issue is still somehwat there. I'm blaming the K&N FIPK with oiled filter that was on it. I kept the FIPK, but it now has an oil less replacement. It will get an AMSOIL one when I place my next order)
- Coolant temp sensor (gauge jumps around a little, going to keep my eye on it)

She's working tonight, so I get some more garage time with just mine! :D
 
Well I got a couple questions on our ‘new’ XJ and about the head gasket replacement so rather than start a whole new thread I'll hijack mine for a post. :D

Arriving home (yes my poor truck has since got a wash, clay and wax):
99XJ_FirstHome.jpg


Before the teardown:
BeforeStartTeardown.jpg


Rockers look pretty clean and in good shape for 130k miles.
Rockers.jpg


Old Gasket, you can see where the coolant was entering the #3 and #4 cylinders.
OldGasket.jpg


Corrosion and stains from coolant on the head. This was only on the #3 and #4 cylinders. A half can of carb cleaner and some slight elbow grease and they cleaned right up.
HeadCyclinder_34.jpg


New OEM Mopar gasket laid into place (sorry for the poor picture). We got the head gasket kit direct from a local Dodge dealer as it was significantly cheaper than the local auto parts store (go figure).
NewGasketMock.jpg


Problem is the new design of the Mopar gasket is three layers of steel with a formed gasket on the outer two layers (the blue part). The gasket assembly is held together with rivets (gold colored, you can just make them out). As I’m sure you can imagine the rivets cause the gasket to not sit flat on the block. After a quick phone call to the service department to see if we had got the wrong gasket (as I had never seen one like this before) revealed that most of the 99+ blocks have small reliefs cut into them for the rivets. The new design gasket is supposed to be superior to the one piece version and so out came the duck tape and 1/4” drill bit. After carefully center punching where the rivets are located three small 1/8” deep divots were drilled on the top of the block to allow for a place for the rivets to sit (don’t mind the black sharpie circles that was to help me find the punches). I did stone the drilled areas on the block to ensure there was no high spots or burs. The other 3 rivets on the passenger side clear just fine in the pushrod valley. No modifications were needed for the head.
RequiredDrilling.jpg


Inspection of the exhaust manifold quickly revealed the exhaust leak location. I cleaned/welded it up and we were back in business.
ExhaustCrack.jpg


This was most defiantly the cause of the overheat which caused the head gasket issues. New vs old water pumps. Notice the complete lack of impellors?
WaterPump_OldvsNew.jpg


I also bought a complete set of FSMs off the previous owner of the XJ. By far some of the best money I ever spent. The step by step directions and the torques were key to getting the whole thing done correctly.
FactoryServiceManuals.jpg


/Hijack
:D
 
Believe it or not I actually had a chance to work on mine for the first time since NACFest tonight!
It took a little figuring and I think I got the seat mounts all sorted and ready to be made. However before I could make them I needed to finalize the rocker to unibody rail tie-ins as the seat mounts would incorporate them.

As I mentioned a few pages back they just barely poke up through the floor. This should be plenty of area to drop the cage tubing down onto.
RockerTieIn_AboveFloor.jpg


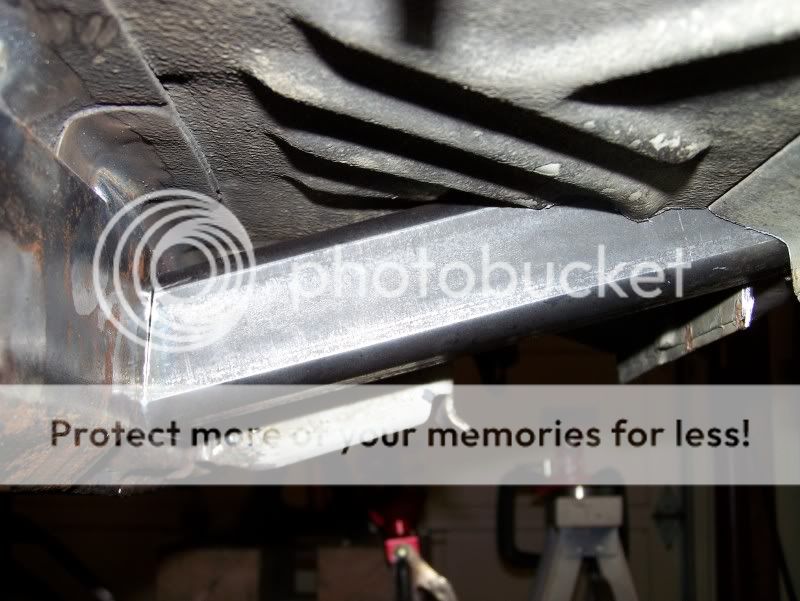
A shot from the underside. There will be four tie-ins on each side and will get skinned between them.
RockerTieIn_UnderFloor.jpg
 
Nice work on Angel's Jeep Bill.

I also bought a complete set of FSMs off the previous owner of the XJ. By far some of the best money I ever spent. The step by step directions and the torques were key to getting the whole thing done correctly.
FactoryServiceManuals.jpg


:D

And I know where I'm going next time I have problems with my Jeeps...
 
Stop buying and working on stock XJ's!!!! We want progress!!!!
I know! I want to wheel it!
its not stock, it has clear corners
Among a few other things like a K&N FIPK, 62mm throttle body, Magnaflow cat with Dynomax cat-back and helper "coilovers" in the rear (which actually net about a 1" lift in it). I'm not sure I like those helper coilover things, but they work for now and it's not getting any suspension work done until the woman who drives it 95% of the time lets me. :)
and BF Goodfornothing Most Terrains.
:D
Eh, they'll be perfect for her street driving and winter stuff.
 
Well I’ve managed to get some more work done on mine but as usual I didn’t snap any pictures before I tore it all down again, sorry guys/gals, I’ve now got a reminder written on my wall. I won’t forget tomorrow night.
Anyway, even with lack of pictures the seat and harness mounts are 100% done. I think I’m just going to use the wrap around shoulder belts rather than the bolted mounts. It’s a cleaner look and if I want to later on its all of a few minutes to weld on some tabs.
I also got to work on the ‘X’ for the B-Pillar hoop and man some of those notches aren’t all that fun!

I've worked out the fuel system (thanks to those who helped me out back channel!) going to be ordering at least the fuel cell in the near future. I need it to finish up the rear section before I really get to many tubes in there. I can’t afford the entire fuel system at this point, but just the cell itself will allow me to keep moving with the cage. I’m thinking I’m going to use a Summit Racing SUM-290100 16 gallon cell.

That’s where progress halted on mine yet again a couple nights ago when the woman came home and there was a nice set of drips coming from the radiator.
icon9.gif

I guess now that the cooling system was actually pumping fluid caused the radiator to distaste its current life. Oh well.
A quick call to Dirk @ DPGOffroad and I had a CSF 3-row radiator in three business days. Seems to cool a whole lot better than the cheap 2-row with plastic tanks that was in it, built well too.

CSFRadiator.jpg


Aside from the other XJ's radiator I got some shiny new 35-spline 4340 axle shafts for my D60 rear. Despite my wishes I just could not swing the cost of the domestic shafts. The cheapest domestic shaft I was able to find after calling all over the place was $495 for the pair and they were double splined so I’d have to add another $200-$250 to get drive flanges. I was able to pick up these ‘Made in India’ Yukon’s for about half the domestic shaft cost.
We’ll see what I can swing when it comes time to purchase the front shafts, hopefully I can swing some domestics up there.

Yukon4340RearShafts.jpg


Progress continues tomorrow night.
 
Back
Top