- Location
- Encinitas, Ca
So this is a project that I've always wanted to do and I've finally got around to it. Yeah, I could've just bought a ReadyWelder and be done with it, but there's not much fun in that, plus you need at least two batteries to get a decent weld.
If you're not familiar with a "weldernator", you modify an alternator by bypassing the voltage regulator to give full field voltage, and in this case I used an external bridge rectifier to convert the 3 phase AC to DC. My original intent was to use the internal rectifier that came with the alternator, but turns out the diodes in the particular CS144 alternator I bought were "avalanche" diodes. Can't use avalanche diodes since they're designed to breakdown beyond a max voltage to protect overcharging the vehicle.
Major expenses for this project were the CS144 140 Amp alternator ($107), external 3-ph bridge rectifier ($40), and 4AWG welding cable ($35).
Seems like most people that have these weldernators run a dual alternator set-up, leaving the existing alternator as-is and running the second alternator dedicated for welding. Since I couldn't see a way to run dual alternators in my XJ with air conditioning, I rigged up a mounting system above the engine that allows you to easily and quickly mount (temporarily) the weldernator assy for welding. The weldernator assy consists of the alternator and control box mounted to an alum plate. The idea is that when you need to weld on the trail you just pop open the hood, mount the weldernator assy, adjust engine RPM, and you're ready to weld. Welding V-output is adjusted by engine RPM.

Completed weldernator assy mounted and ready to weld.
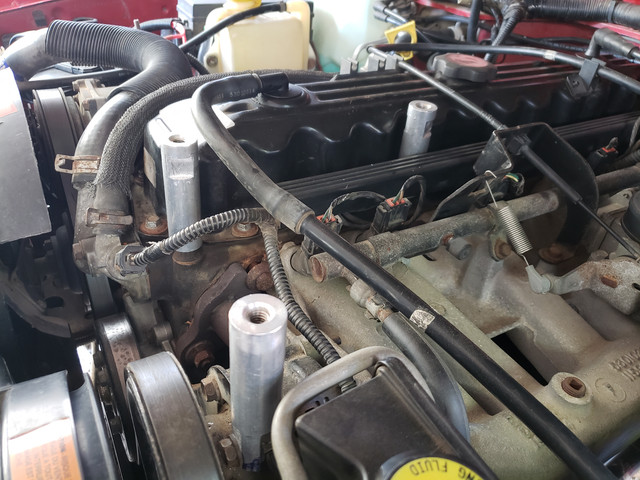
The weldernator assy mounts to these three studs.
Goals for this project were:
- No permanent modifications within the XJ engine bay
- Quick and easy set up, no tools required
- $300 budget
- Decent welds on 1/8 and 1/4" thick material
Although I'll probably never use it, I also connected a receptacle to the control box since most tools with universal (brushed) motors can also run on DC voltage.
The most challenging part was figuring where to attach the fan belt that drives the weldernator. I ended up machining a custom pulley to piggyback against the pwr steering pulley. The issue is that there's not much clearance between the pwr steering pulley and aux fan. I could only squeeze in a 1/4" wide V-belt in that space. This skinny 1/4" belt is barely cutting it since there's signs of slippage when the alternator kicks on under load. If anyone knows of a thinner aux fan vs stock for a '96 that would give more clearance let me know. I also made pulleys for a 1/2" wide belt but it interferes with the aux fan. The pics shown here are with the 1/2" wide belt with aux fan removed.

Piggyback pulley
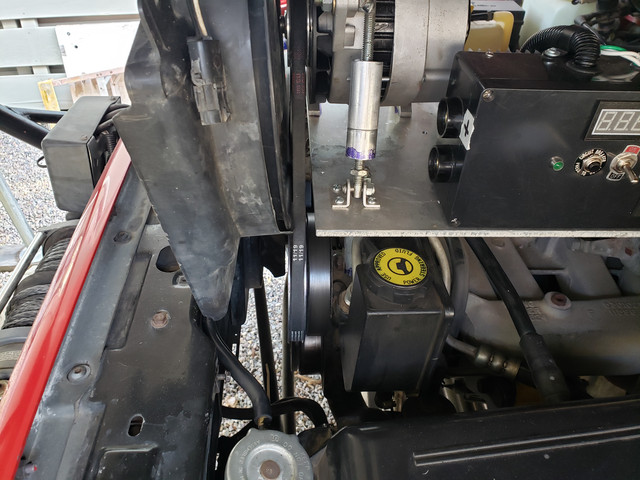
Aux fan doesn't fit with 1/2" wide belt (it does fit with 1/4" wide belt).
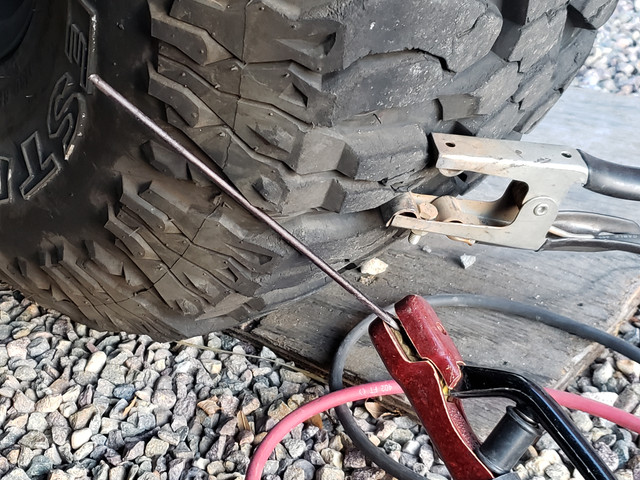
Here's some pics of the very first welds with different rod types. Don't scrutinize too much since these are literally the first welds I did on this set up without paying too much attention to V-output and Amperage. Thickness of the plates were 1/8 and 1/4".

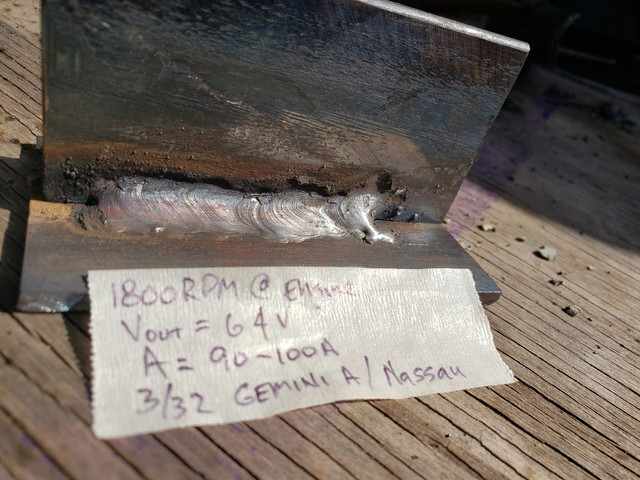

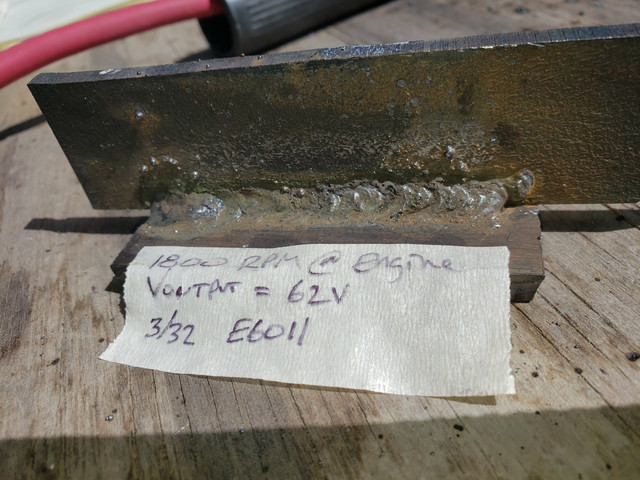
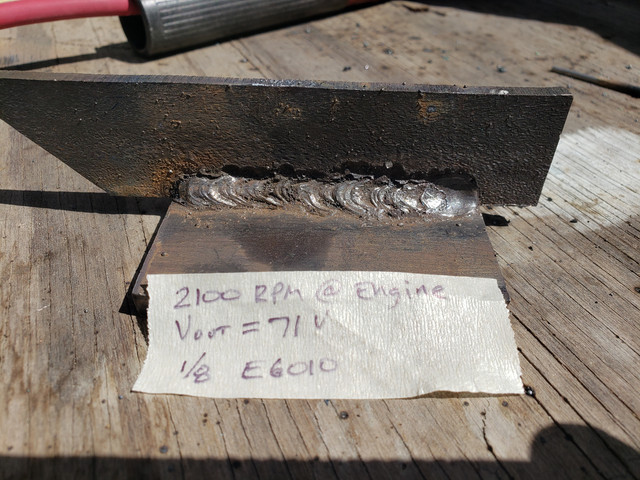
I was pleasantly surprised with how the welds turned out and I'm sure they could improve with dialing in and fiddling with it more. But for now they're good enough and hopefully should work for any quick trail fixes. If there's any interest I can post up more details on the required modifications with more photos.
If you're not familiar with a "weldernator", you modify an alternator by bypassing the voltage regulator to give full field voltage, and in this case I used an external bridge rectifier to convert the 3 phase AC to DC. My original intent was to use the internal rectifier that came with the alternator, but turns out the diodes in the particular CS144 alternator I bought were "avalanche" diodes. Can't use avalanche diodes since they're designed to breakdown beyond a max voltage to protect overcharging the vehicle.
Major expenses for this project were the CS144 140 Amp alternator ($107), external 3-ph bridge rectifier ($40), and 4AWG welding cable ($35).
Seems like most people that have these weldernators run a dual alternator set-up, leaving the existing alternator as-is and running the second alternator dedicated for welding. Since I couldn't see a way to run dual alternators in my XJ with air conditioning, I rigged up a mounting system above the engine that allows you to easily and quickly mount (temporarily) the weldernator assy for welding. The weldernator assy consists of the alternator and control box mounted to an alum plate. The idea is that when you need to weld on the trail you just pop open the hood, mount the weldernator assy, adjust engine RPM, and you're ready to weld. Welding V-output is adjusted by engine RPM.
Completed weldernator assy mounted and ready to weld.
The weldernator assy mounts to these three studs.
Goals for this project were:
- No permanent modifications within the XJ engine bay
- Quick and easy set up, no tools required
- $300 budget
- Decent welds on 1/8 and 1/4" thick material
Although I'll probably never use it, I also connected a receptacle to the control box since most tools with universal (brushed) motors can also run on DC voltage.
The most challenging part was figuring where to attach the fan belt that drives the weldernator. I ended up machining a custom pulley to piggyback against the pwr steering pulley. The issue is that there's not much clearance between the pwr steering pulley and aux fan. I could only squeeze in a 1/4" wide V-belt in that space. This skinny 1/4" belt is barely cutting it since there's signs of slippage when the alternator kicks on under load. If anyone knows of a thinner aux fan vs stock for a '96 that would give more clearance let me know. I also made pulleys for a 1/2" wide belt but it interferes with the aux fan. The pics shown here are with the 1/2" wide belt with aux fan removed.
Piggyback pulley
Aux fan doesn't fit with 1/2" wide belt (it does fit with 1/4" wide belt).
Here's some pics of the very first welds with different rod types. Don't scrutinize too much since these are literally the first welds I did on this set up without paying too much attention to V-output and Amperage. Thickness of the plates were 1/8 and 1/4".
I was pleasantly surprised with how the welds turned out and I'm sure they could improve with dialing in and fiddling with it more. But for now they're good enough and hopefully should work for any quick trail fixes. If there's any interest I can post up more details on the required modifications with more photos.
")