My box build

anthrax323

NAXJA Forum User
Location
San Antonio, TX
So I finally got the itch to stop being a lazy ass and build something...

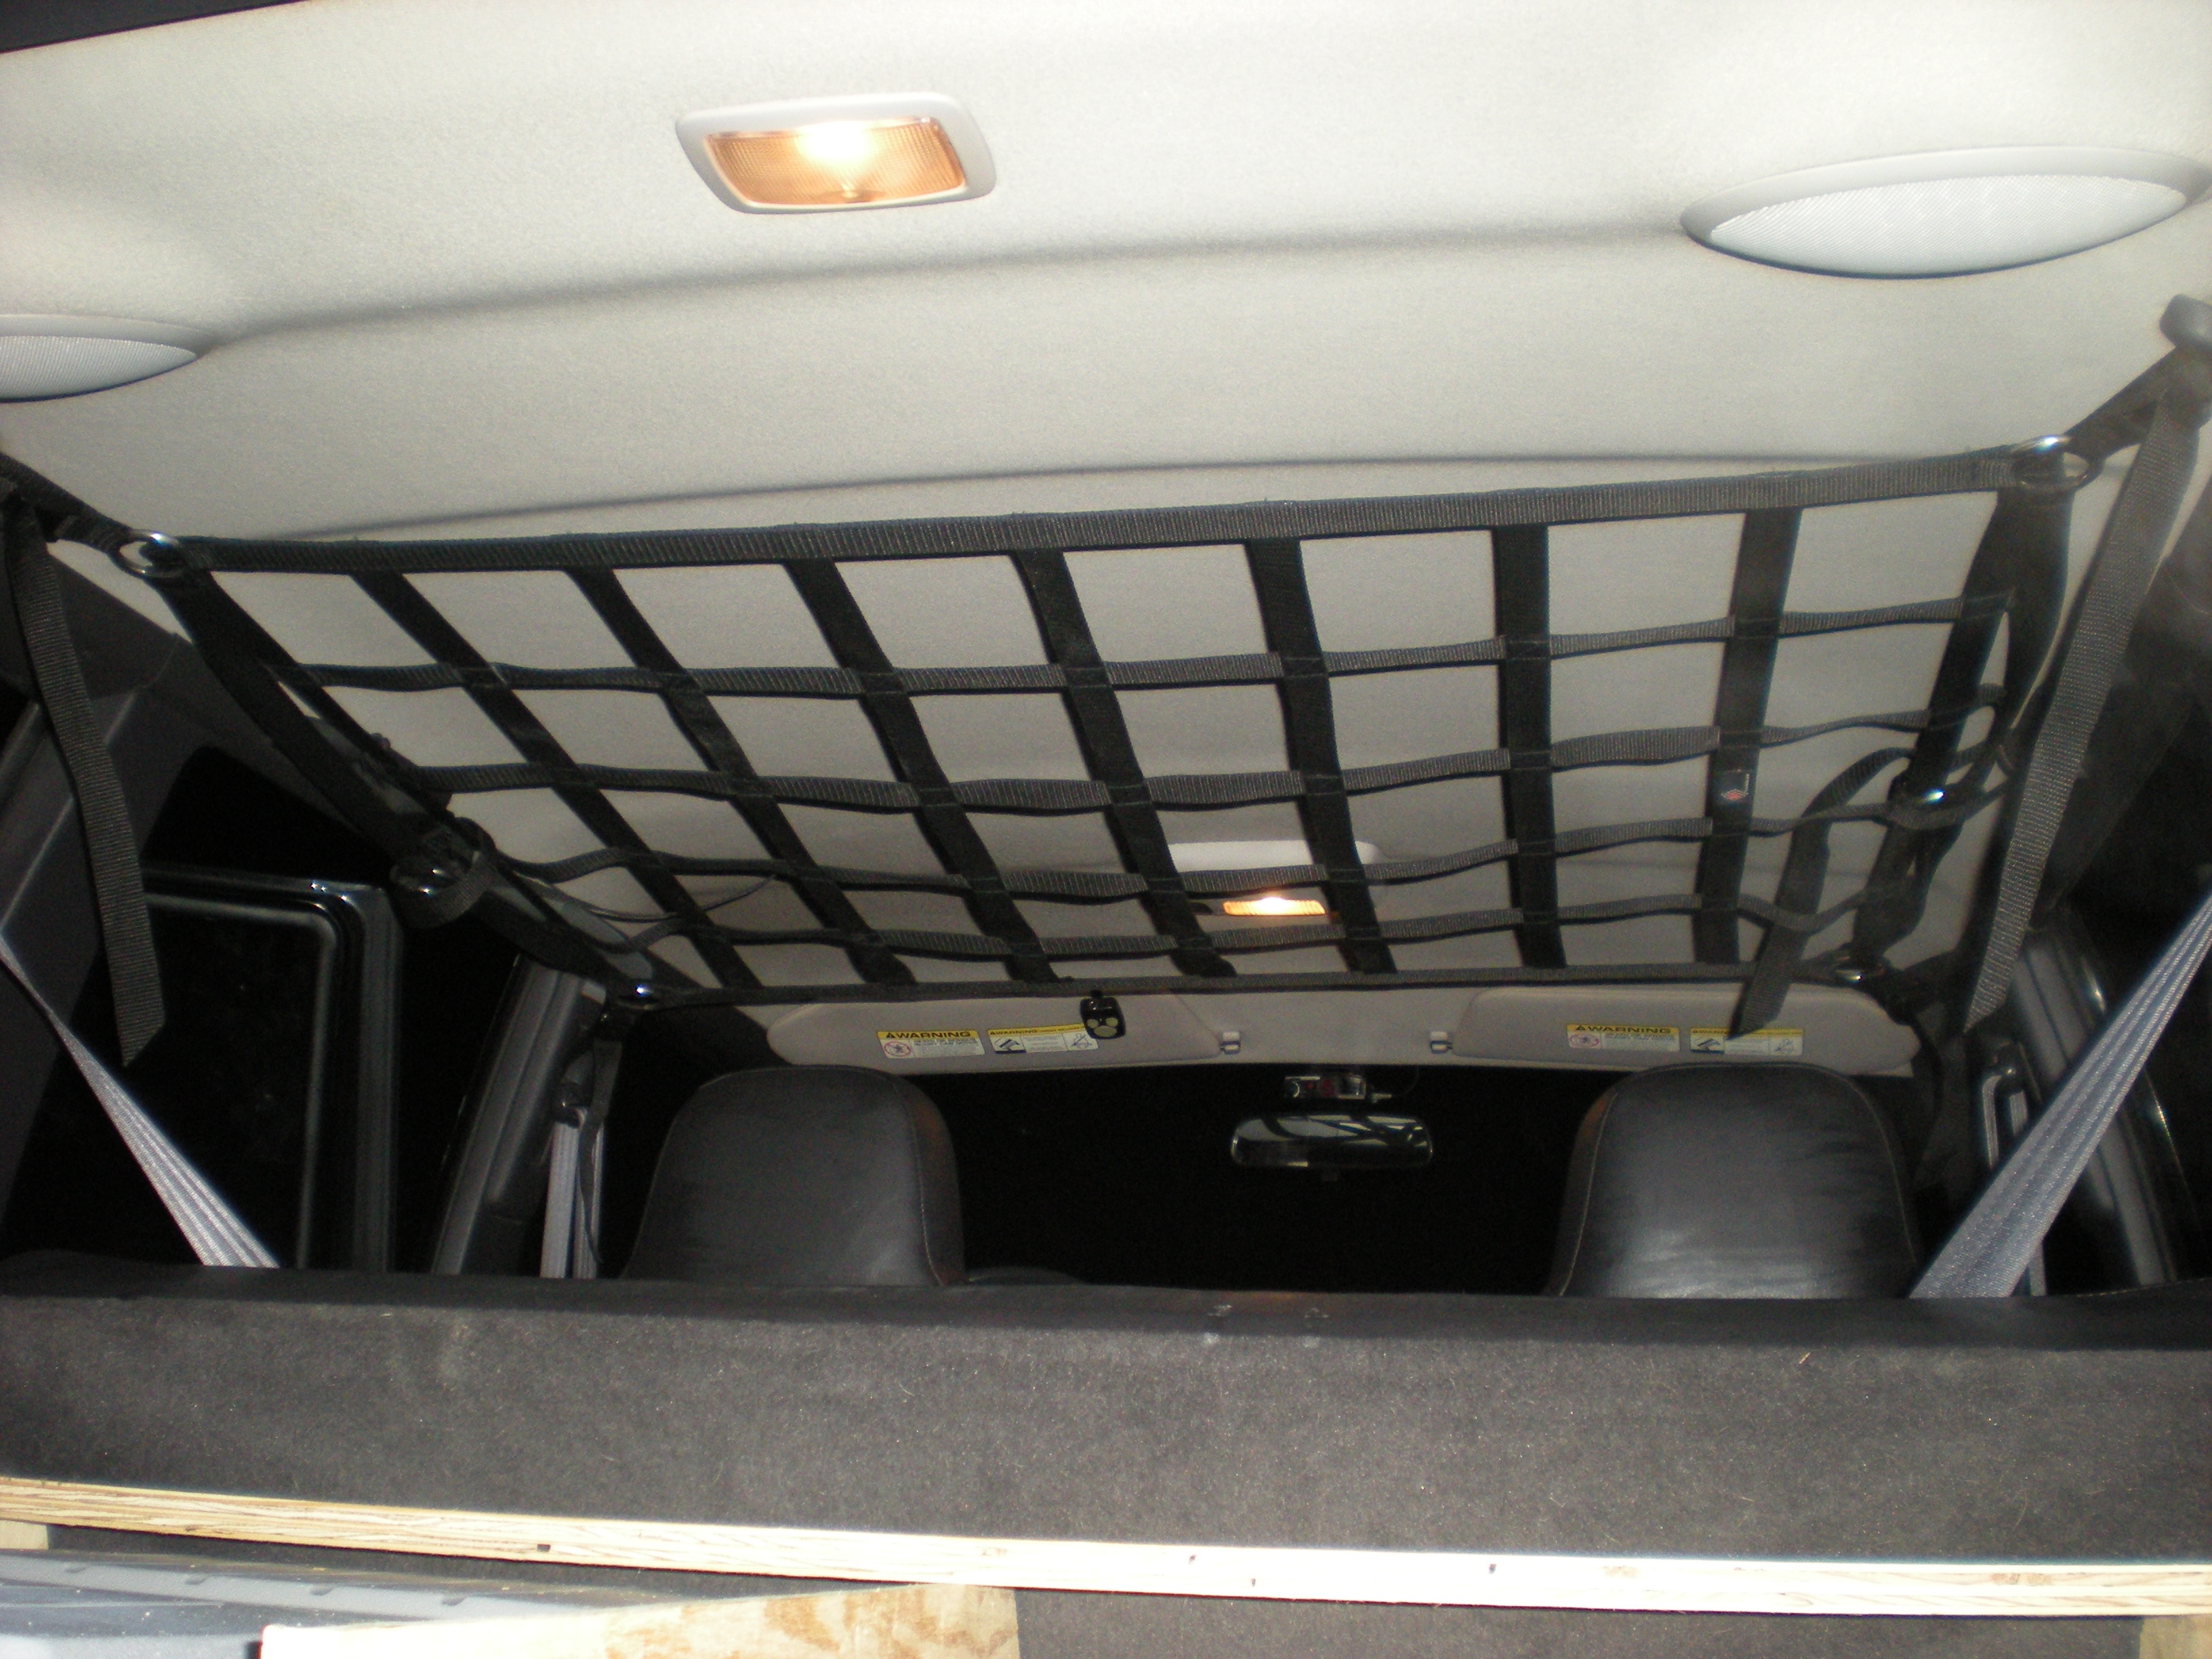
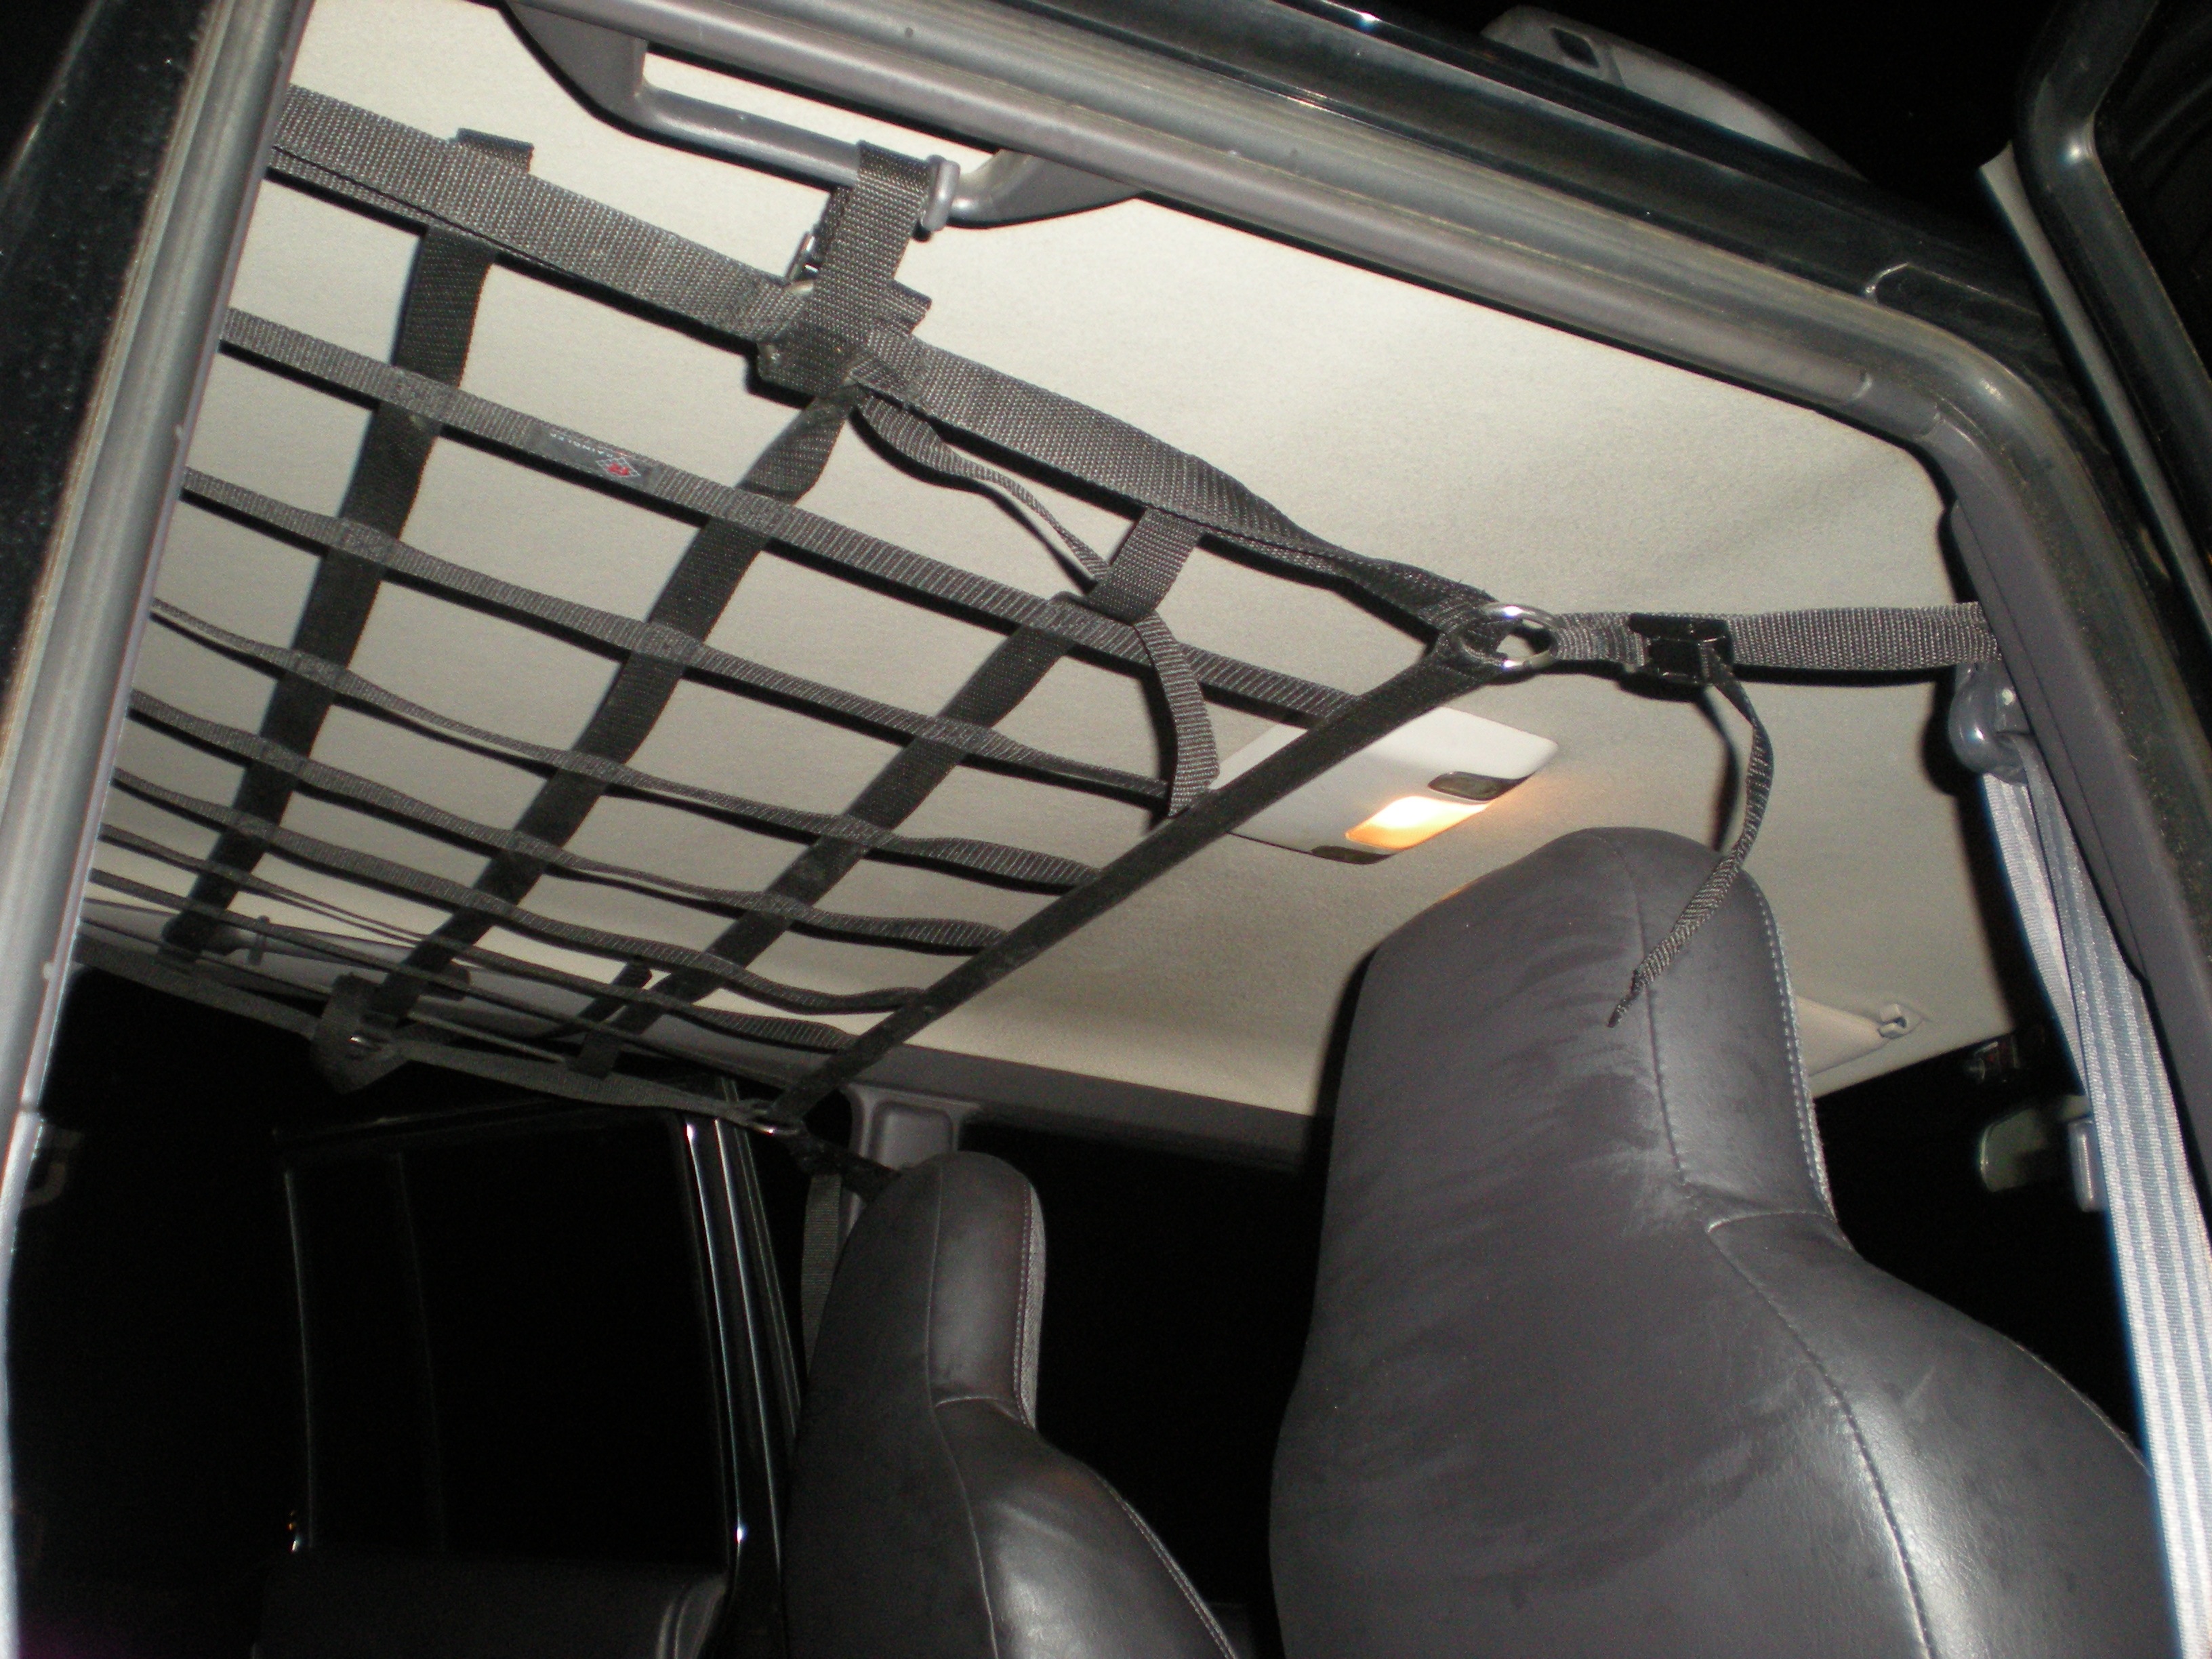
I've been keen on building a box for a long time, and the "Show me your cargo area!" thread has been chock full of inspiring ideas. Ultimately, I wanted to be able to accommodate the following luxuries with said box:
  1. Small subwoofer and amplifier (below 300 watts, so amp footprint will be minimal).
  2. On-board air, primarily for convenience but eventually for ARB air lockers.
  3. A high-output inverter for powering accessories when camping and whatnot (hey, some people like to have a coffee maker).
I also wanted it to be able to store two 8 gallon Action Packer bins, the contents of which vary depending on where I'm going (and the absence of whom would free a large chunk of storage space). A few bins for loose/small items are also in order.

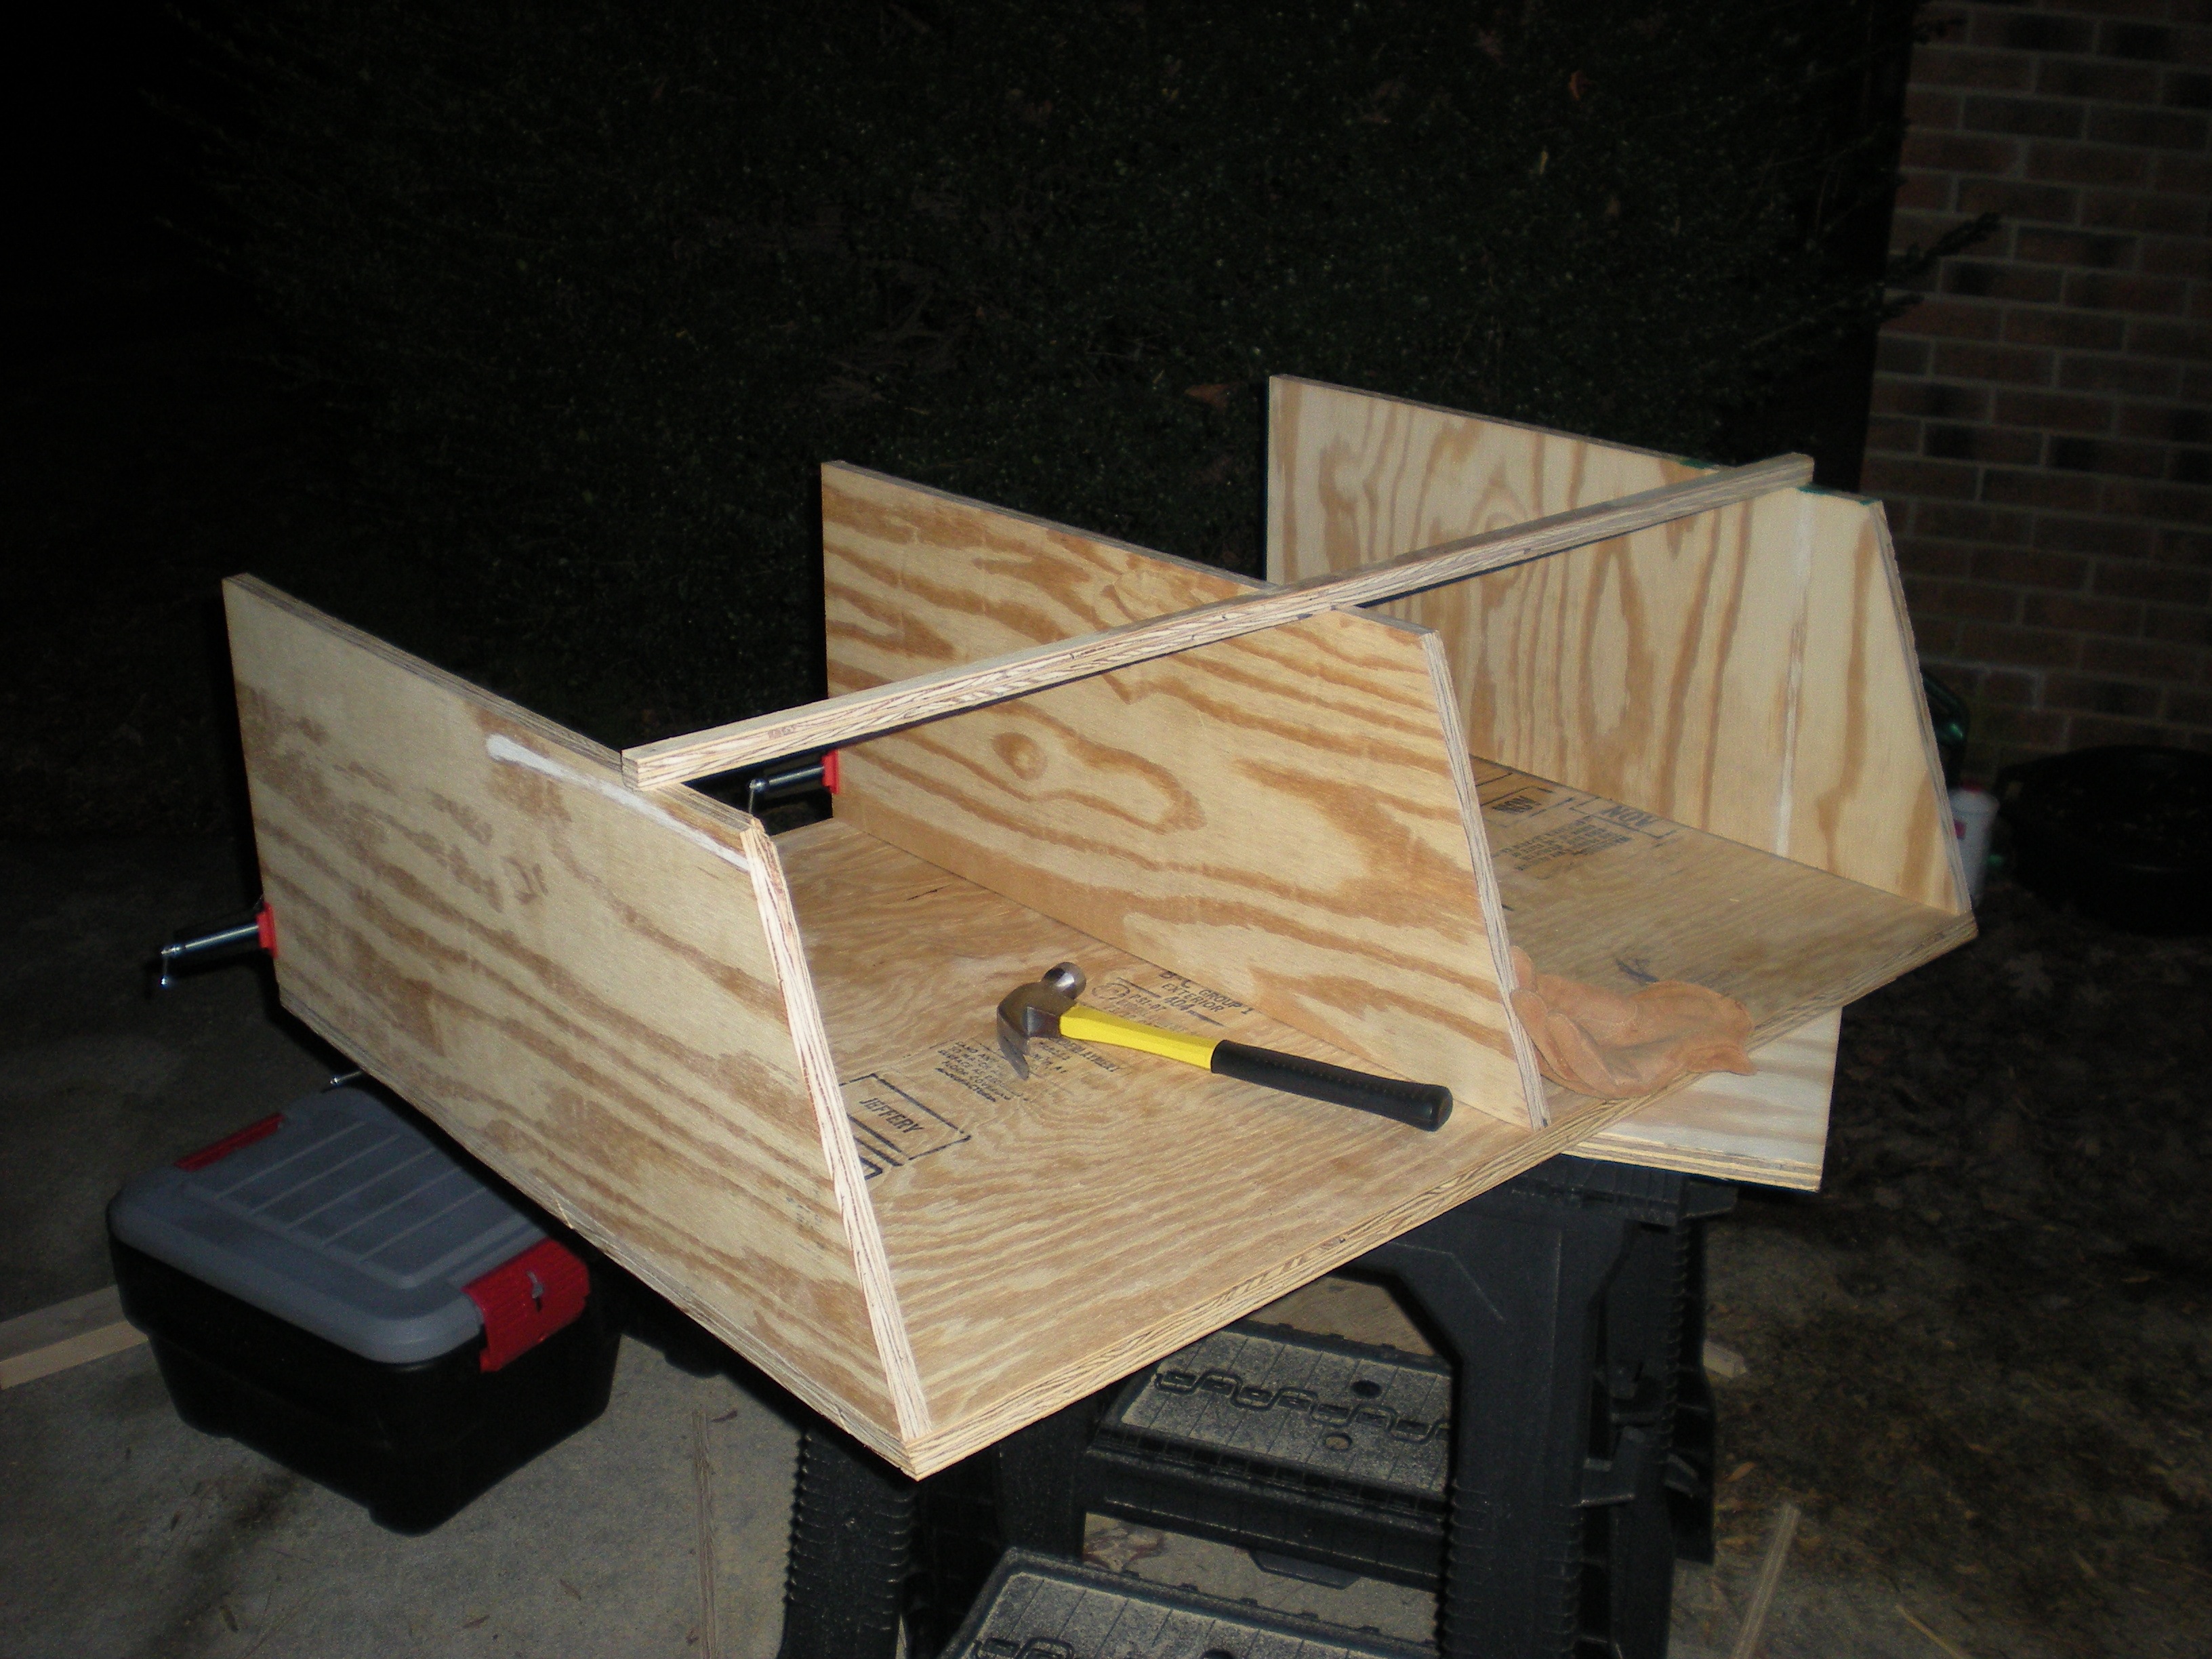
So, all things considered, I got to work... Eventually I realized that the dimensions I'm working with are too restrictive to be symmetrical (especially with 3/4" plywood and the Action Packers taken into account), so I mitigated my OCD as much as possible and started cutting.


This is as far as I made it yesterday (beer and too much thinking will kill progress sometimes), but here are a few more pics...


So, the game plan...

Slightly raised "wing" doors will be on each side of the main assembly, with small vertical pieces on each side to fully seal the box to the interior trim (thereby making side storage compartments).

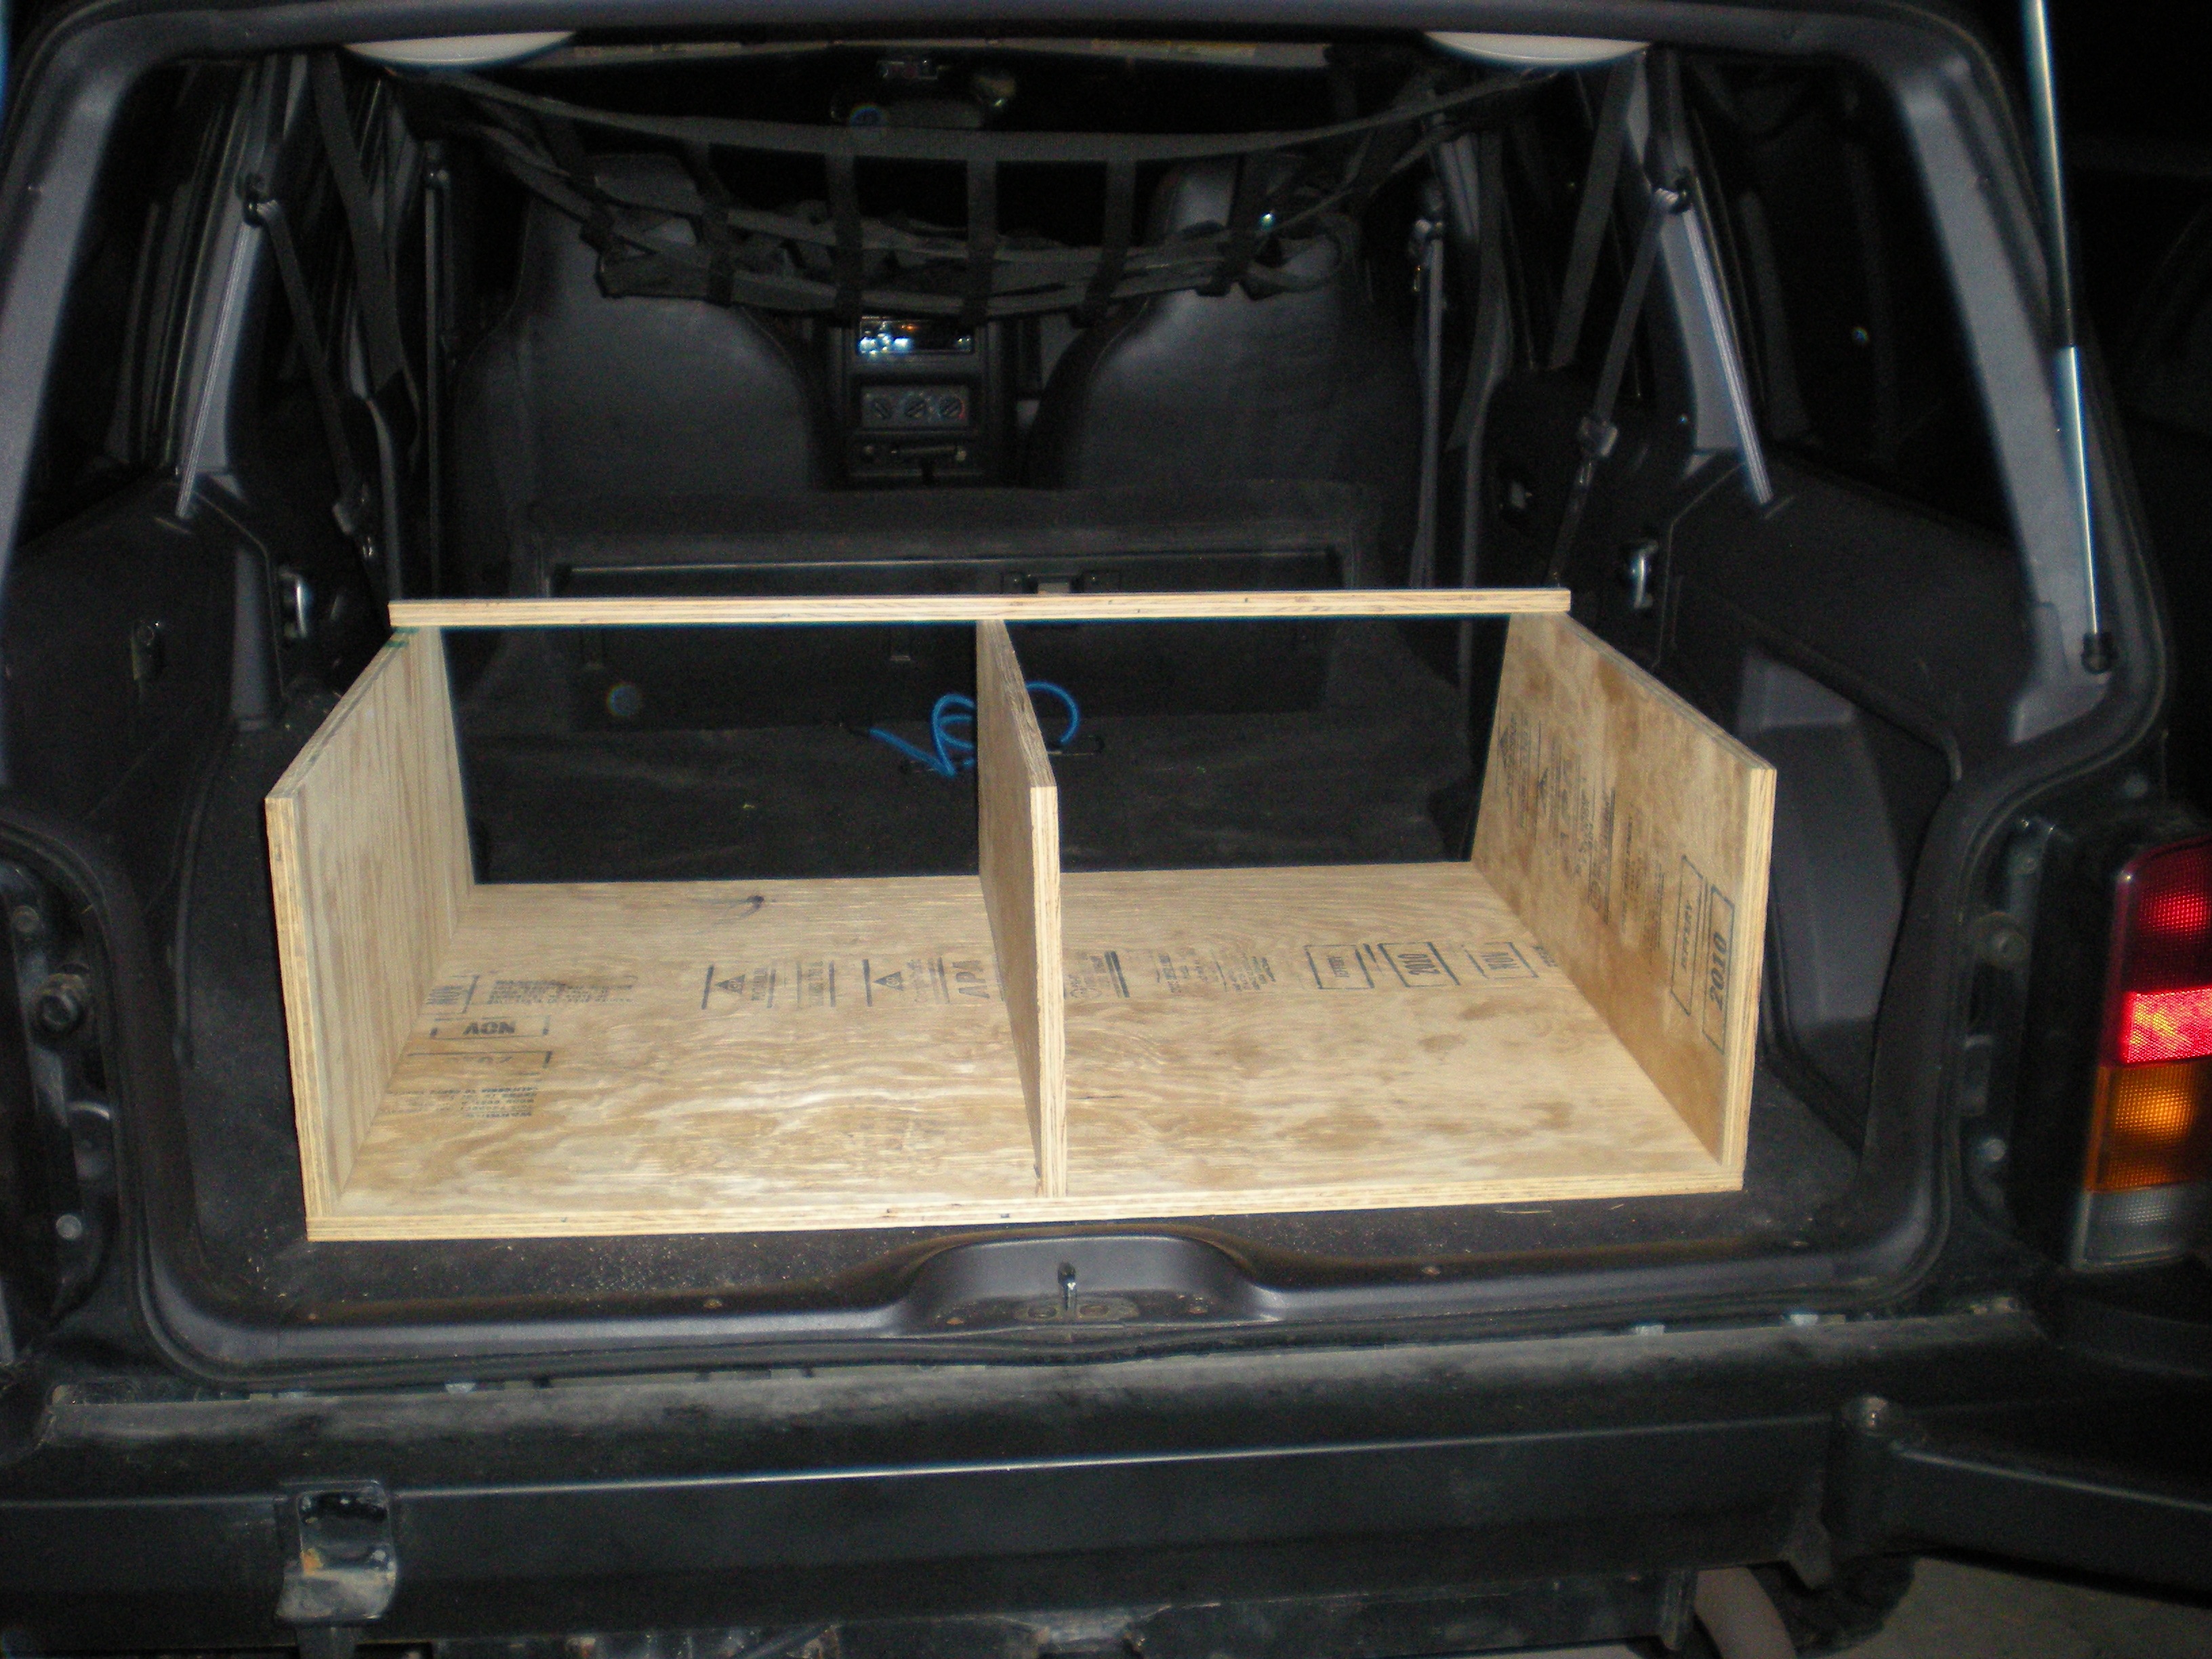
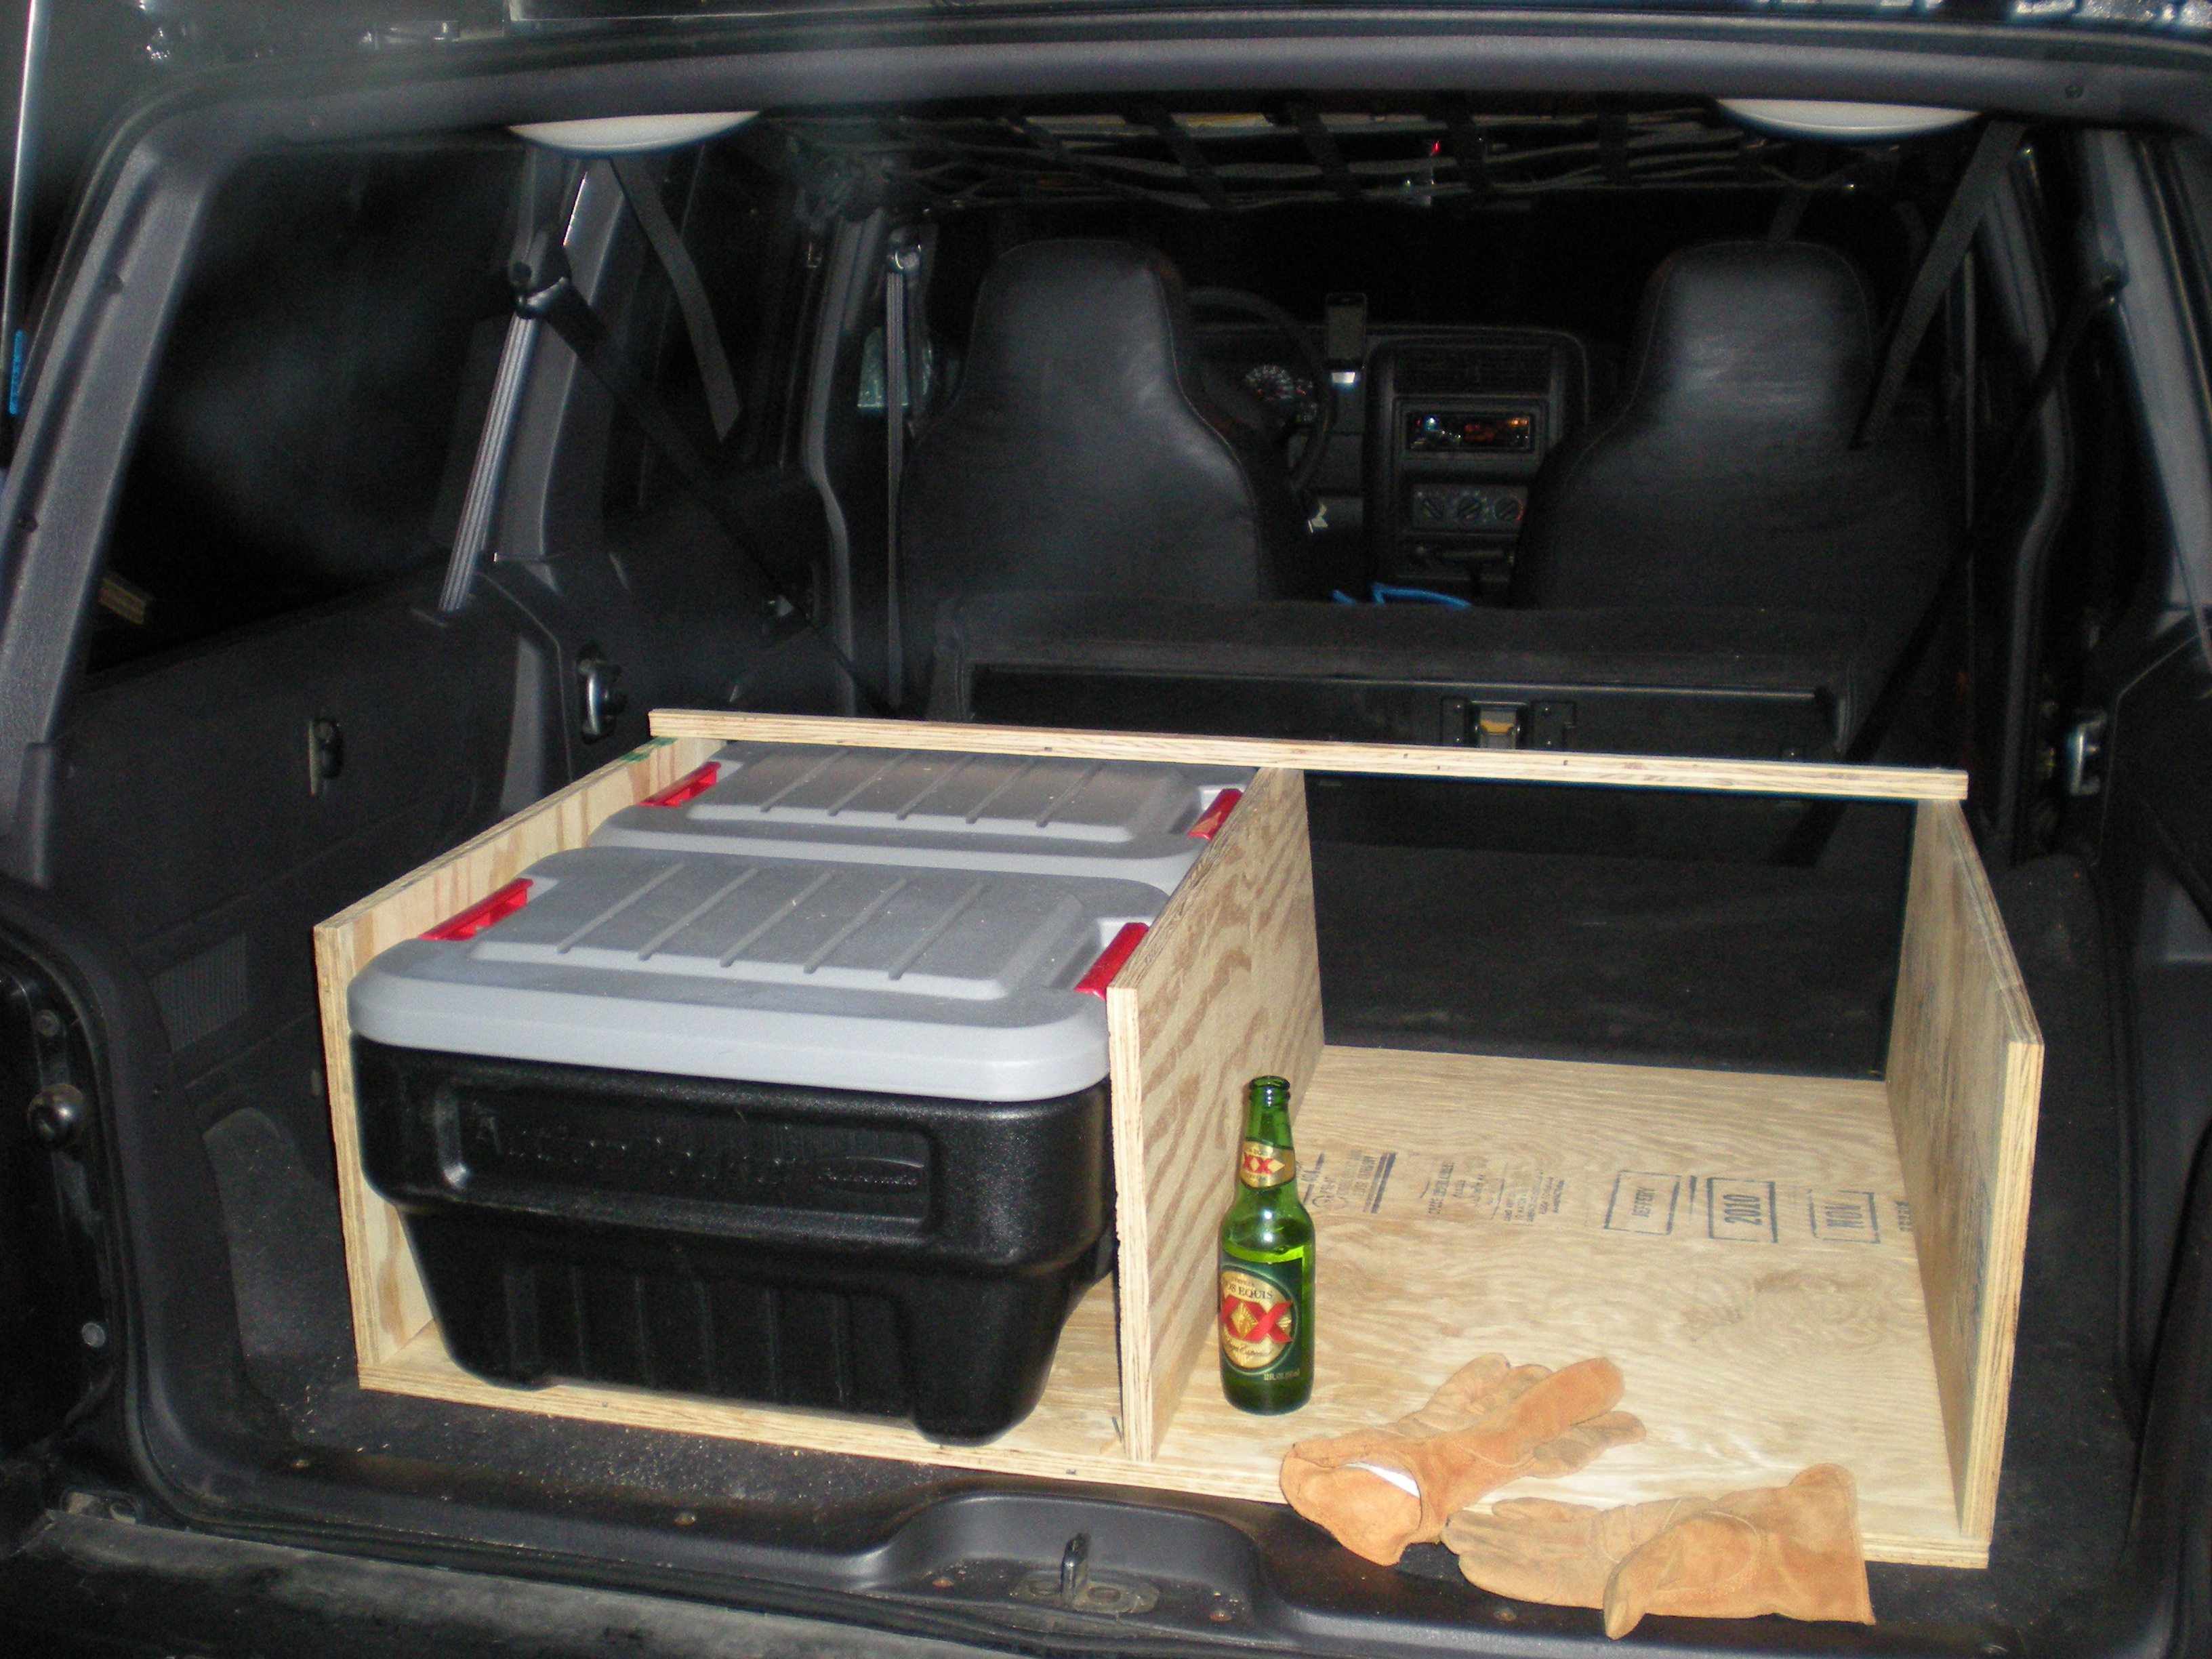
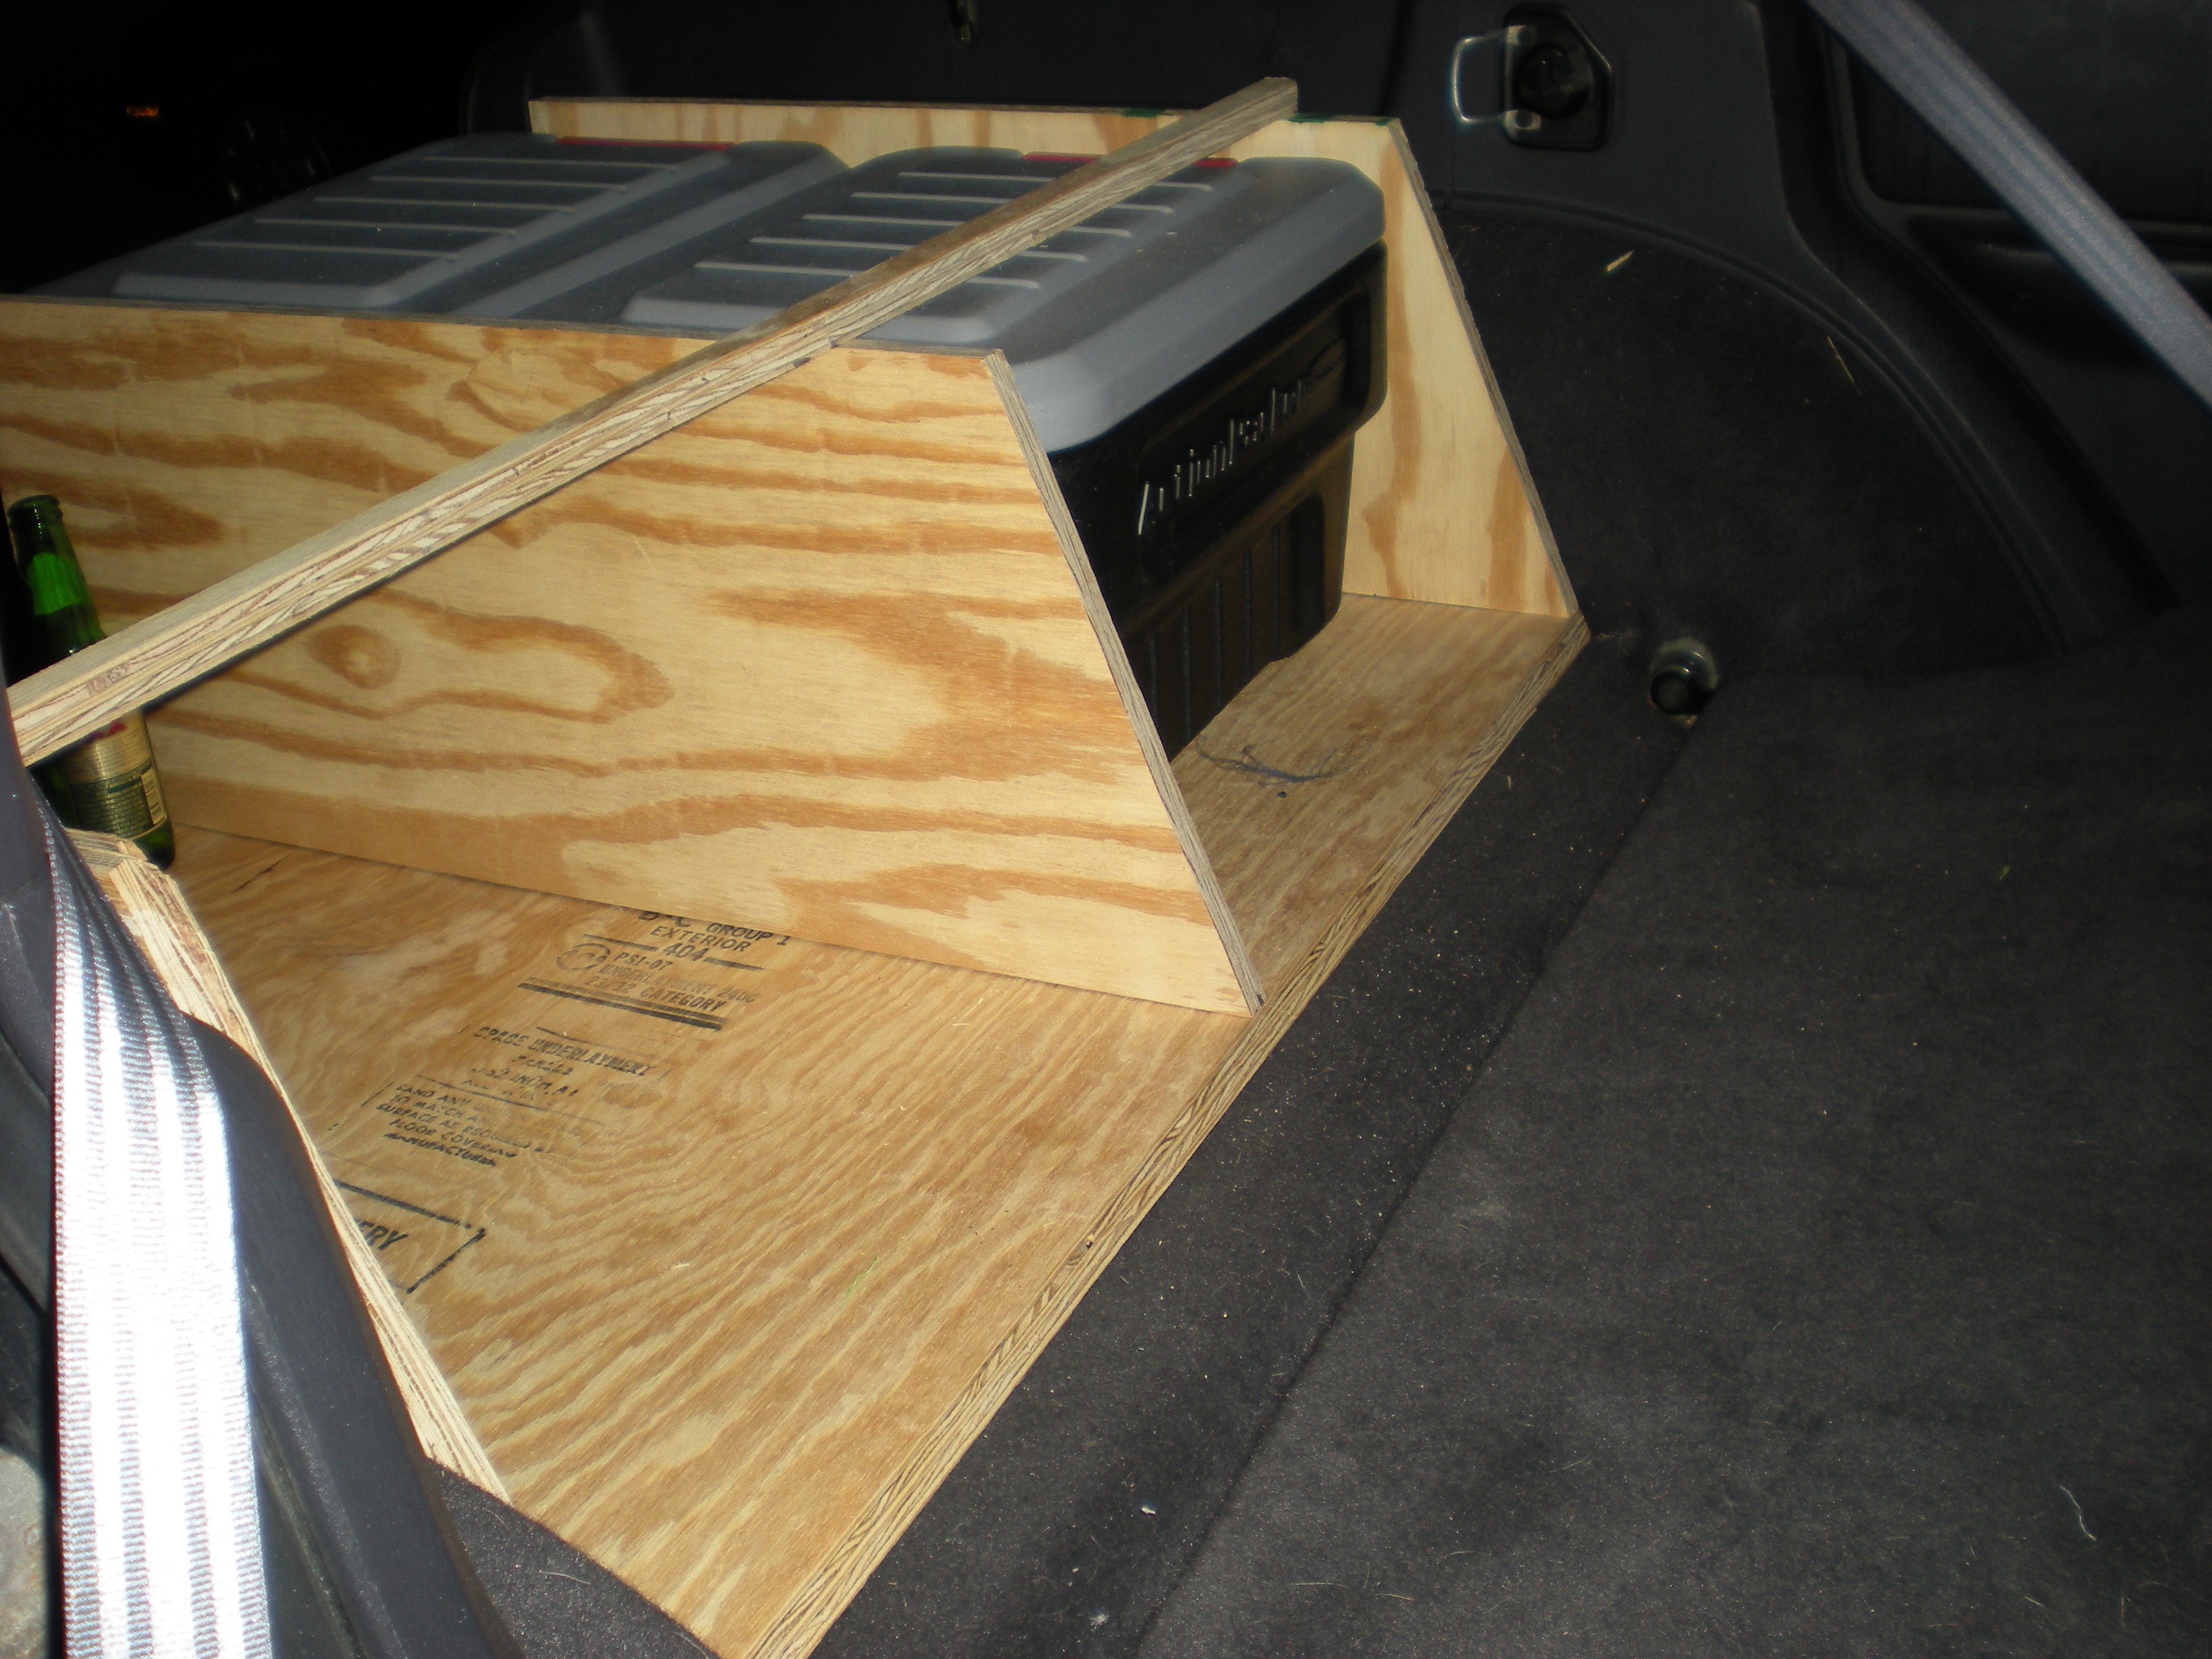
As for the main compartment... I realized that it would simply NOT be feasible for me to have all 3 mentioned luxuries from above at the same time, so I've decided on a modular approach. About half the open space on the right will either be a storage bin or drawers, and the remaining half or so will be space to which the "modules" will be mounted. Once the 2nd battery is installed and wired up, 0 or 1 gauge cable will be run back to a quick-disconnect style plug (as well as a single channel of audio, and possibly a run of Cat5 for the possibility of wiring up a relay box) that will then be available to each module when it is installed. After really over-thinking it, I believe these modules will be installed in the frontmost part of the box (requiring that the back seat be folded down to change them out).

In any case, I'll continue to post pics... This is my first real woodworking project of any substance, so it'll definitely be a learning process.
 
very NICE! I have to do this too. I want to incorporate a loose tool drawer, an old 54 Quart Coleman cooler, and a 2 gallon air tank.

Before you drop all that cash on the carpet, why not just pull some at the junkyard? Half the XJ's I saw even their seats taken out already! personally Im thinking spray on bed liner, then cover the top with this stuff: http://www.sears.com/shc/s/p_10153_12605_00912163000P?prdNo=3&blockNo=3&blockType=G3
 
Good points man... I had contemplated various other means of protecting the box, including bed liner, but am going with the OE carpet just out of personal preference. I'm a big fan of sticking with OE styling as much as possible, and seeing as this thing has ultimately been 99.986% a DD (hopefully not much longer), I'm aiming to preserve as much of the original interior fit and feel as possible... That being said, I tend to make things more complicated than they should be :) . I need to get some measurements done to see if the junkyard is a possible option, but the local yards don't see too many late model XJs or ZJs that I've seen.

At this point I'm trying to figure out how big the accessory modules can be... Once I get the typical size of a decent 12V compressor and a typical high-output inverter, I can move forward (as the subwoofer aspect has a little more flexibility, oddly enough).

Hopefully my asinine trials and tribulations in this project might help spare other NAXJA'ers some agony in the future.
 
Well, I wasn't happy with where things were going, and I have an insatiable need to make things complicated...

Time for a new direction.

steelbox1.jpg


A few more pictures:

http://flargen.com/images/jeep/steelbox2.jpg
http://flargen.com/images/jeep/steelbox3.jpg
http://flargen.com/images/jeep/steelbox4.jpg

Still in the cutting/fitting stages right now, as this is definitely a learning experience... I'll post more pictures as they're available. I should have access to sheetmetal equipment by tomorrow afternoon, which could add another layer of unnecessary complexity to this project (but who cares, I'm having fun).
 
Finally got around to finishing the welds a couple days ago (all except those joining the top piece to the vertical supports, which are just tacked right now), and trimmed down the old box top to fit this piece.

cargoshelf1.jpg


I also learned what these things are called - "tee nuts", apparently.

cargoshelf2.jpg


The top is secured by allen head 1/4"-20 screws from underneath, as I want the final version to be wrapped in carpet and as seamless as possible (OCD, anyone?). I also realized that this method of attachment will give me the option of installing much longer screws in order to bolt on eyelets or a fence of sorts surrounding the top area.

Of course, being the idiot (or novice) that I am with this kind of stuff, I've come to realize I need to do things differently than I have thus far. A few things I failed to fully consider, which I'm hoping to act upon sooner than later:
  • I'd like to use holes that have already been drilled in the body to secure the platform/box/whateverthehellitis to the vehicle. This has given me 8 total options (including the factory tie-down holes and spare tire perch holes), which I'm going to use as the foundation for the next revision. When it comes to the method of attachment itself, I'll likely weld nuts to medium-sized washers or small steel plates to secure bolts to the underside of the sheetmetal and feed the bolts in through the top (these plates will be sealed and attached with RTV, or temporarily held in place by magnets to get the threads started). Again, I'm being a little obsessive over this...
  • The angle of the forward supports is 70 degrees, which is a bit steeper than I needed. The next go 'round will be parallel to the back of the seat (my dumb ass didn't measure the angle before).
  • Inlaying the wood into the steel frame made attachment with tee nuts a pain on 1" steel. As the pic above shows, placing them on the very edge of the material is less than ideal (conversely, trying to move them away from the edge creates issues with the hole placement on the underlying steel). Next time, it'll be inverted so the wood will fully overlap (and extend beyond) the underlying frame to ensure healthy tee nut placement.
  • The overall structure could have been considerably deeper, and will be next time... It'll also need to be about 1/2" taller, as the Action Packers snag on the shelf when trying to pull them out (thanks to the rear trim). If it was fully bolted down in this condition, I'd have to compress the lid of the rearmost one to get it out (the 2nd could then be rotated and removed without issue). Nit picky, but I'd rather do it right than do it quickly.
  • Welding light-gauge steel tube to heavier-gauge angle steel has proven to be a pain in my ass. I know it's possible, I've just had a hell of a time getting the voltage and wire feed speeds right (burned through a couple spots). The structure of the next one will just be 1/8" thick angle steel all the way around (with some exceptions).
This has been an interesting project thus far, but more importantly it's the first real exercise in design I've had in a very long time.

If someone in the Raleigh area wants the frame/shelf above, feel free to PM me and I'll toss it your way once the new one is started (probably tomorrow). My roommate would be none too pleased to have yet more crap in the garage.
 
Finally figured out how to beat my way out of a wet paper bag in SketchUp...

steelbox_sketchup.png


This is proving to be invaluable, as it's allowing me to identify snags early on and change the design as I go... Plus, it'll allow me to hash out a list of all the pieces I'll need so I can just cut, adjust, and assemble. The seemingly stray vertical supports are the initial components of the subframe I'm building (for the different modules)... Probably should've left them out, but oh well.
 
So, when attempting to design the rack-like setup on the right hand side of the unit, I decided to go ahead and just mock up the mounting holes in traditional server-rack style...

http://www.server-racks.com/eia-310.html

Well, it turns out I inadvertently designed a perfect 8U rack.

steelbox_sketchup2.png


At 14" high (internally), and 1.75" per 1U, I'm sitting at an even 8U.

Even the hole spacing (center to center, width) is 18 5/16"... That equates to 18.3125", and the spec calls for 18.312".

Now, let's see if any of this holds true once I start cutting and welding...
 
lol, no sweat.

In the realm of rack-mounted server equipment, a "U" is a rack unit equivalent to 1.75" of vertical space on the rack. Rack mount servers are built to various specs based on this (most commonly 1U, 2U, or 4U). In this case, 8U means there are 8 "units" (U) of vertical space.

The only reason I want to adhere to these specs are for the sake of buying mounting tabs and other crap (such as shelves, pre-made drawers, and so on). The mounting tabs are the main reason - if I can avoid making my own custom little f'n tabs for each component that will be going in this thing, I'll be quite happy.
 
Hehehe, glad to help :)

Got more pieces mocked up...

steelbox_sketchup3.png


steelbox_sketchup4.png


Gonna sleep on it tonight while I sort out a couple concerns (namely being able to easily remove the slanted panel in order to change out modules)... Sometimes being a nerd is eerily satisfying.
 
use the dead space behind the slanted panel to mount your amp, inverter and whatever else will fit and if you want you can vent it with a small 12v fan ( thinking of something like a computer case fan) or maybe a small sealed sub box.
 
use the dead space behind the slanted panel to mount your amp, inverter and whatever else will fit and if you want you can vent it with a small 12v fan ( thinking of something like a computer case fan) or maybe a small sealed sub box.
Thanks for the tip - I'd been looking at that, but ran into a bit of a snag... First, the only true dead space is the area behind the "rack" (the right side of the box in the above pictures). The left compartment/cubby needs the full depth to fit two Action Packers in there.

That being said, I've kept this design (with the dead space behind the rack) so that I have the option of making the boxes deeper than the rack itself. This will give me enough space to make a 2U (or smaller) power inverter component, as well as a 2U or 3U subwoofer enclosure (shallow-mount driver, small footprint amp - I really just want something to round out my stereo). The leftover space could be used for a drawer, or for more aggressive (i.e. larger) versions of the aforementioned components.
 
I think I've gotten the hang of SketchUp... I hit a dead end when attempting to make dynamic components, but at least it's just because I'm using the free version (which doesn't allow the creation of dynamic components).

steelbox_sketchup5.png


99% of the measurements are final, just need to do some sanity checking and decide which parts will be the final cuts (looks like pretty much just the top surface and the floating trim pieces that create the side bins).

Should be a fun weekend.
 
This afternoon, I had the sudden realization that without using server rails, I would be unable to secure all 4 corners of any module without removing two brackets, then re-attaching them once the module was seated. This would require access to the sides, which would be easy to work around design-wise if it weren't for the wheel well (too many things would have to change to accommodate it).

So, I came to the conclusion that a top-loading design would work best.

steelbox_sketchup6.png


This has the added complication of a double-hinged lid, but I'll be securing the large lid to tabs welded to the top rail of the metal frame on the right-hand side (likely some large Philips-head countersunk 1/4"-20 screws).

The top-loading design also makes it easy to give the components wooden faces, which can then be wrapped/trimmed however desired (and will look better than rackmount tabs/ears).

This thread is quickly becoming long and rambling, documenting my first real foray into the realm of engineering/design... Hopefully this crap might inspire someone looking for ideas. Now, I think it might almost be time to make it happen...

...And it just occurred to me that I might not have enough vertical space in the cargo area for the lid to flip like that. Crapola. I'll need a minimum of 19.75" clearance above the top surface (which will be roughly 14.75" high)... Time to measure.
 
Last edited:
That's a nice design....really functional.I like
Seems like you are doing an awful alot of "virtual" work......no?I get why you are but man,I could have already thrown something like that together in real life.Don't take that the wrong way like you said you're having fun and that's what its all about.

I see alot of ppl building boxes out of wood and imo its a bad idea.Ive been down that road a few yrs ago I built one out of wood and for one it was HEAVY!!The other thing alot of ppl don't think about is moisture.Mine got a little damp and next thing I knew it warped all over the place to the point that the screws busted out.I'll post up pix of my redesigned cargo bay in teh "show me your cargo area" or whatever its called thread
I hear ya man - I haven't had time this week to go in and start cutting, but will actually start on that part today. My issue is that I tend to discover design flaws once I've already cut and welded crap together - I'm getting sick of wasting money on what eventually turns into scrap, so I took the virtual/CAD route to allow me to get my ducks in a row before I start building (plus, it's been a lot more interesting than actually doing my job :) ).

At least now, I have a list of exactly what pieces I need to cut, and have a clear idea of exactly how much steel I need to buy. This is really more of an exercise in seeing if I can build something correctly in the "first" go (although this will really be the 3rd).

I'll check out your pics once you post them, as I'm interested to see them. I also had major reservations about building a box entirely of wood for exactly the same reasons - 3/4" plywood structures get VERY heavy, very quickly, and warping is a significant concern if you're not using marine-grade plywood (which is far from cheap). That's why I opted for a steel frame... In the last pic (and current revision of the model), I've eliminated about another ~8 lbs of redundant/useless steel, so this should be decently lightweight before the wood panels go on.
 
Back
Top